
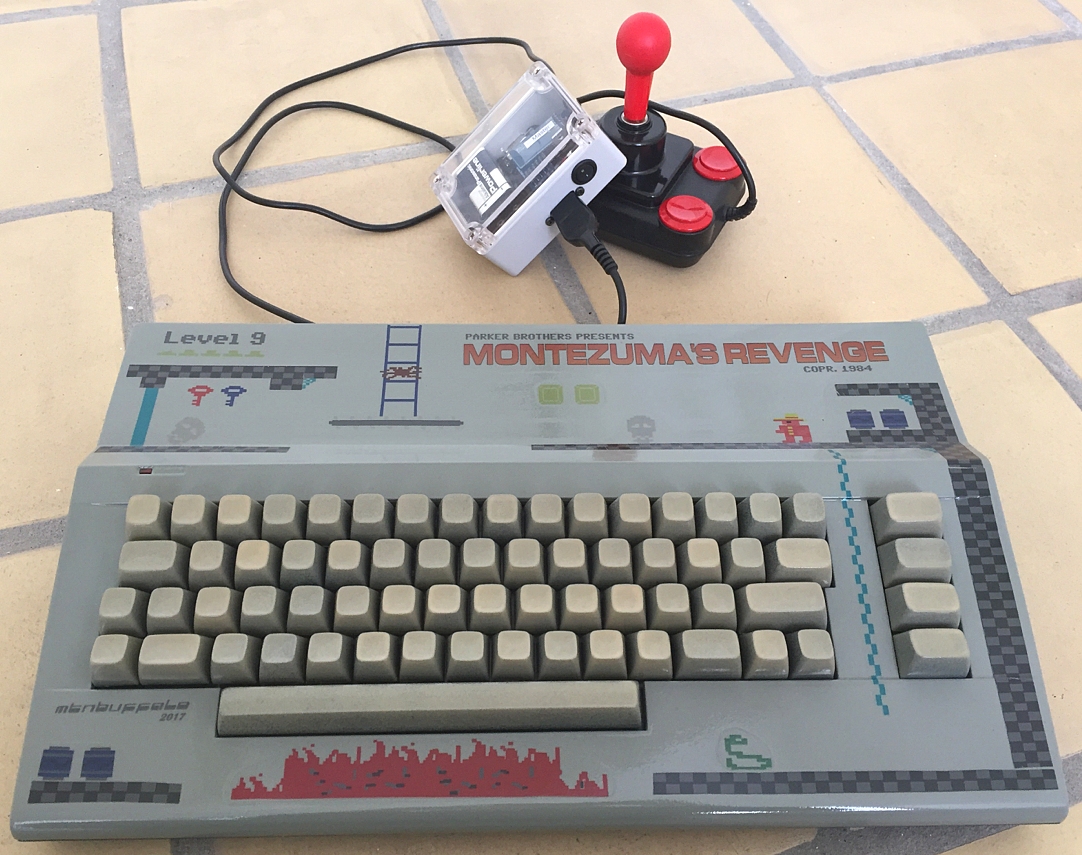
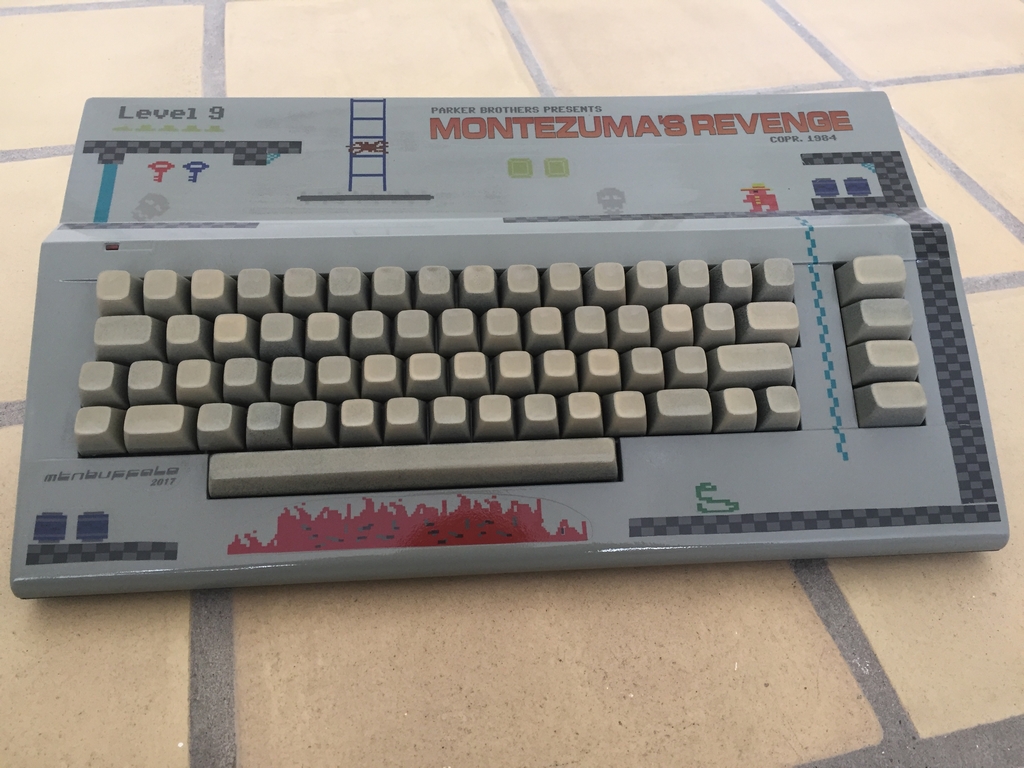
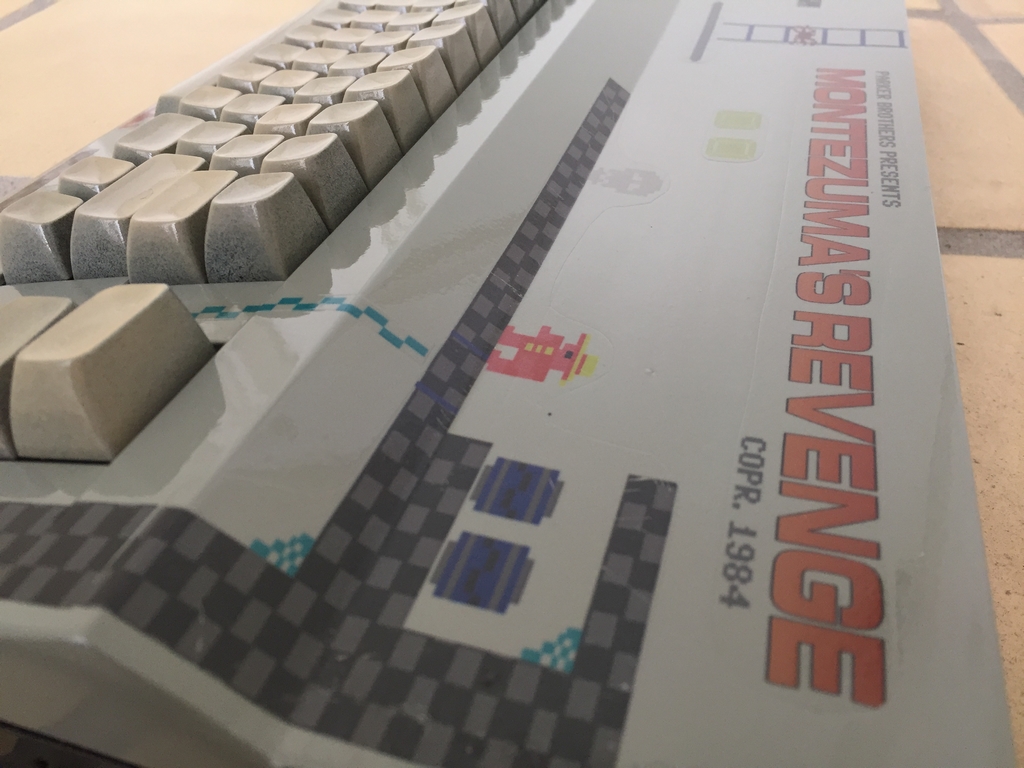
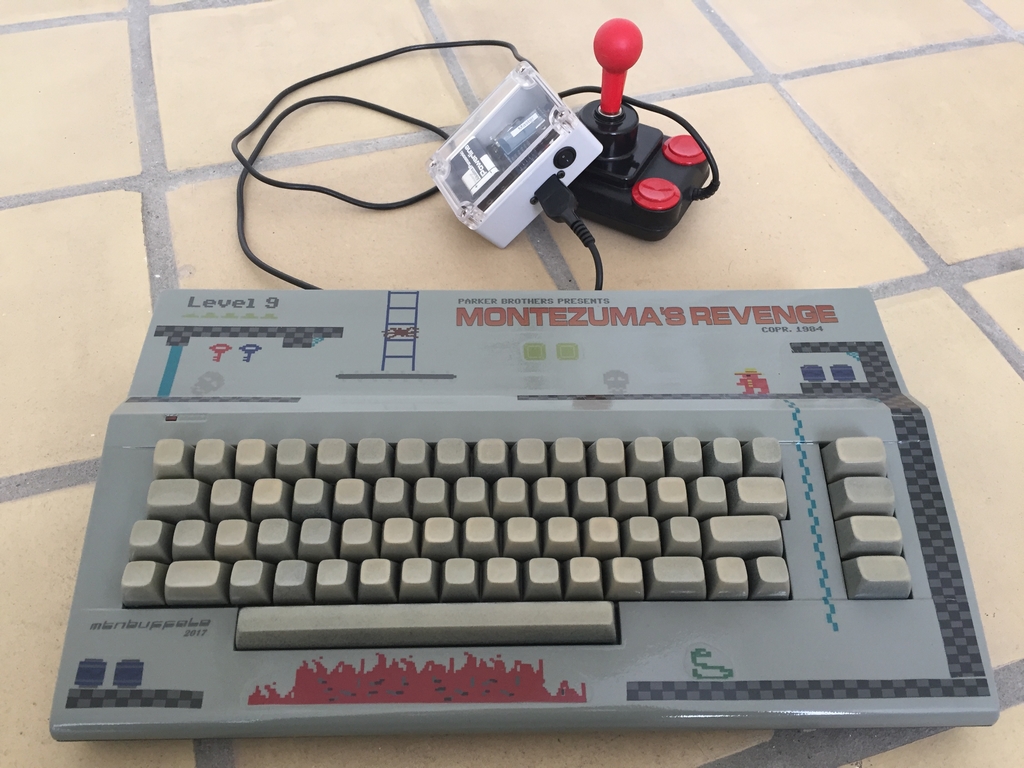
Another year has passed and once again it is time to present this year’s Commodore 64 mod of the year! In 2015 it was a painted breadbox that was modified with potentiometers and a hardware solution for playing SID tunes in stereo (link). In 2016 a transparent Kickstarter case with flashing LED’s was used along with an LCD display and the entire motherboard was modified with ZIF sockets (link). The Mod of the Year 2017 is a tribute to the C64 game Montezuma’s Revenge (link). The case is decorated with graphics from the game while the keys are painted in greyish colors to match the overall theme. When turning on the machine the colors of the Basic screen has been modified along with the text to let the user know that this is a dedicated Montezuma’s Revenge machine! The game is of course installed on an internal SD2IEC and pressing SHIFT + RUN/STOP will load the game automatically. Gaming can be done wirelessly on the couch 15 feet away as the joystick connection is wireless. The Mod of the year 2017 is a compilation of several previously described mods as well as a few new ones. I’ve worked on the machine for quite some time and this is the complete list of what has been done to it.
Case Mod
Internal SD2IEC Mod
Custom Switchless Kernal Mod
Internal Wireless Joystick Mod – The JoyFi
Capacitor Mod
3D Printed Keyboard Mounts
Power LED Mod
Power Switch Mod
The Machine in Action
Case Mod
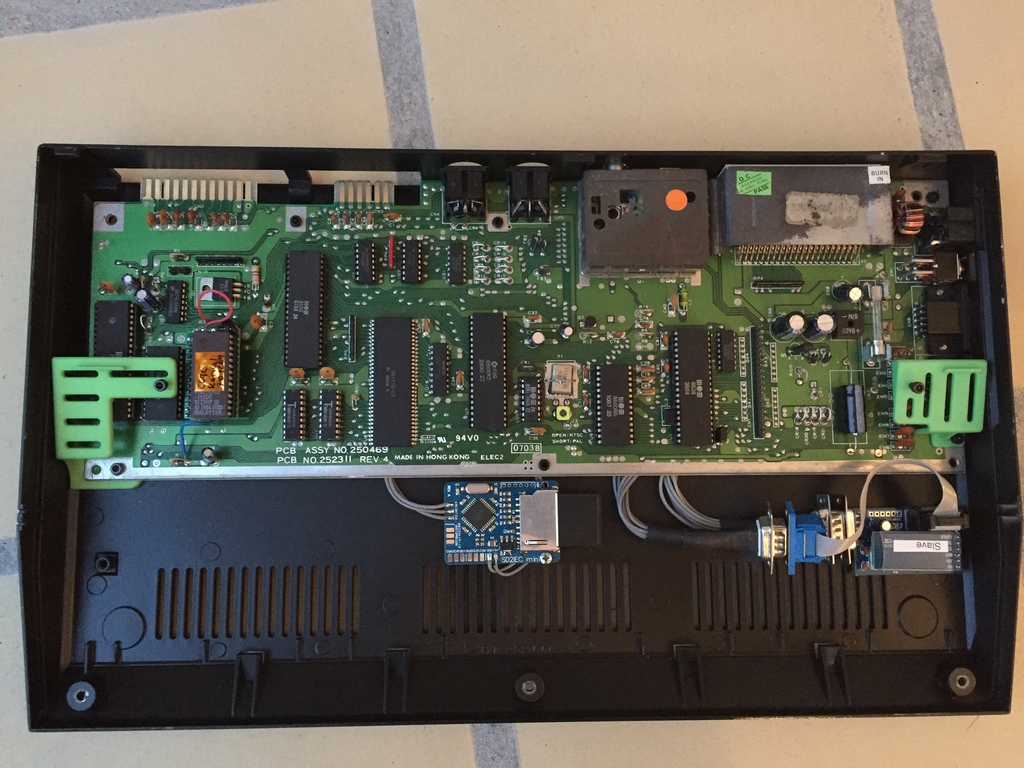
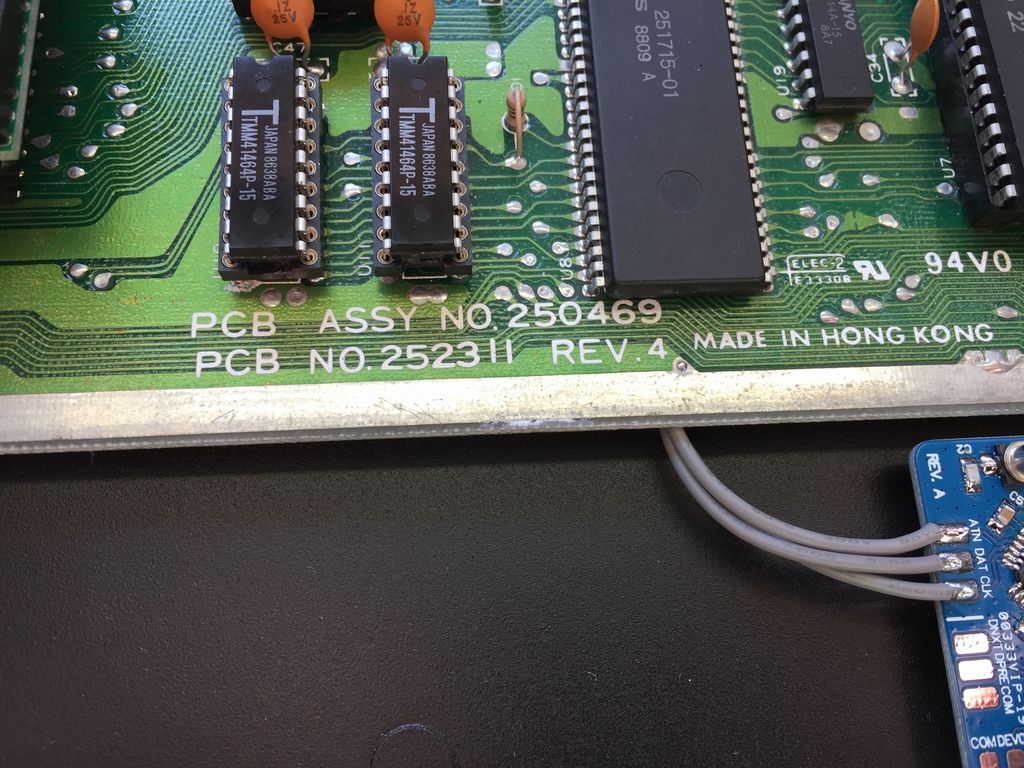
All the electronics have been placed in a miscolored Commodore 64 C case with a green short board (Assy 250469 Rev A.). This mod was all about making an Montezuma’s Revenge themed case that would be dedicated to playing just that game. More info on the case mod can be found here (link).
Internal SD2IEC Mod
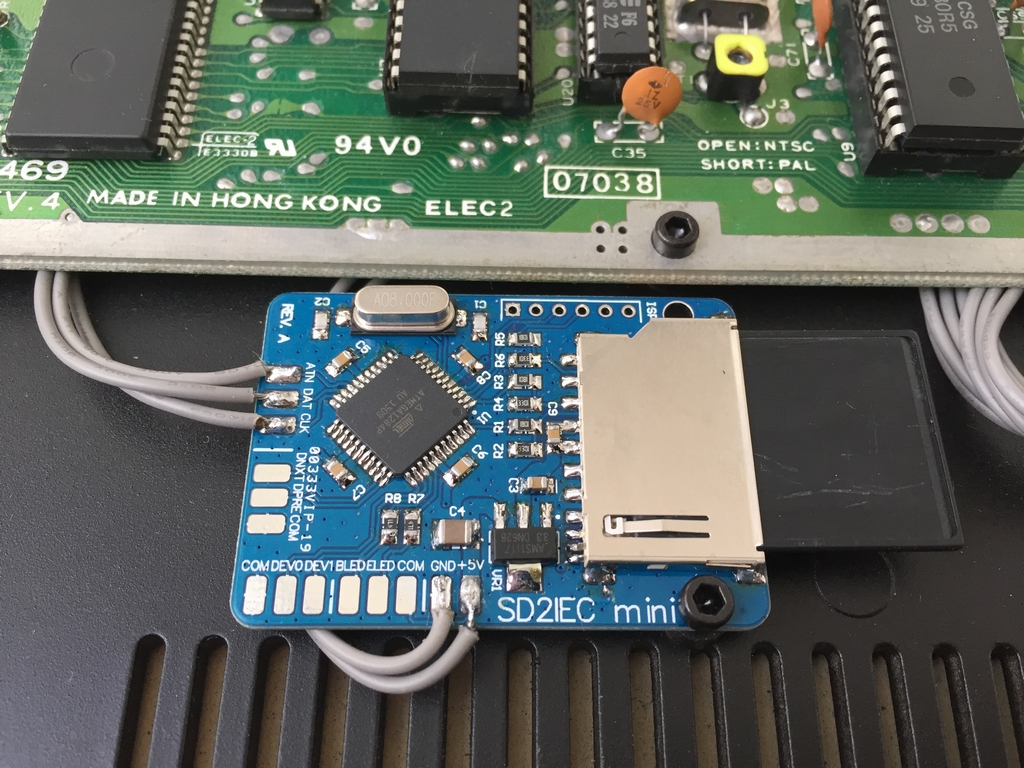
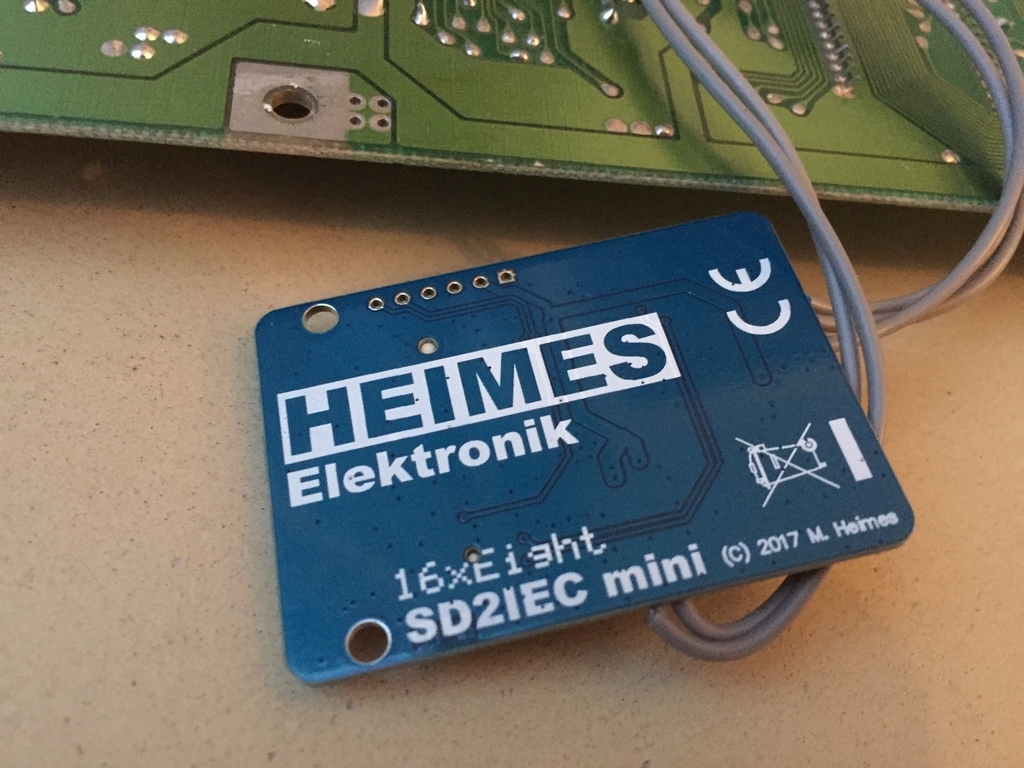
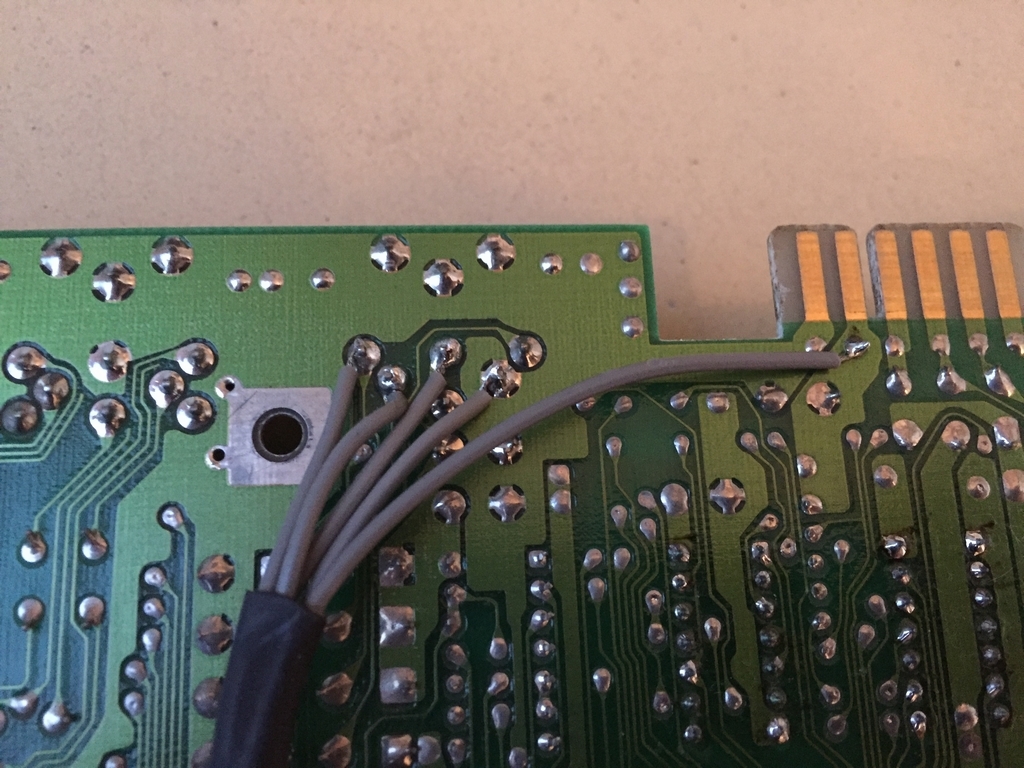
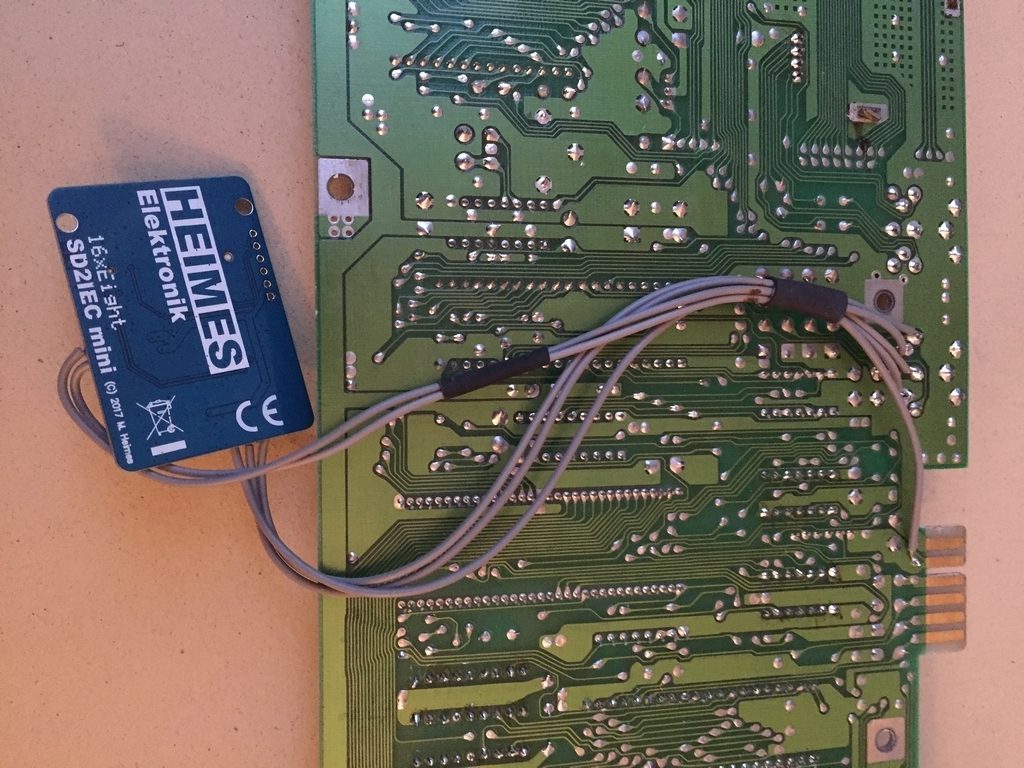
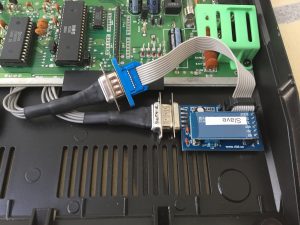
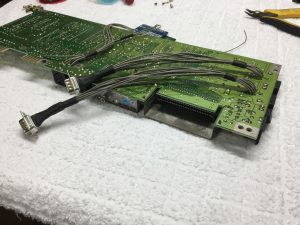
There are so many ways to load Commodore 64 games other than having to fiddle around with old 5.25″ floppies. One of these devices is the SD2IEC which is a mass storage solution that uses a SD card for data storage (e.g. games and programs) and interfaces with the IEC bus of the Commodore 64. It does not emulate the 1541 diskette drive completely like the expensive 1541 Ultimate II does (link), but it reads quite a few .d64 and .prg files and it supports JiffyDOS natively (link)! For this mod I used the smallest device I could find – the SD2IEC Mini from 16×8 Digital Retrovation (link). All wires have been placed internally to make the mod as clean as possible. Don’t want to cut holes in that nice case, right? A review of the device can be found here (link).
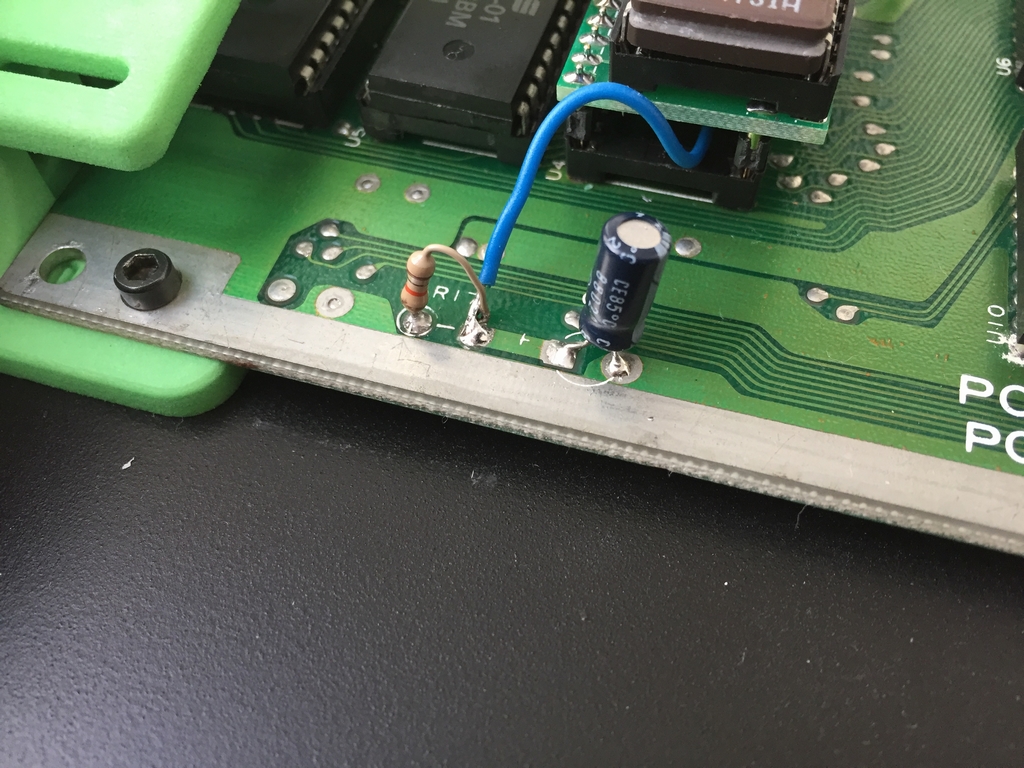
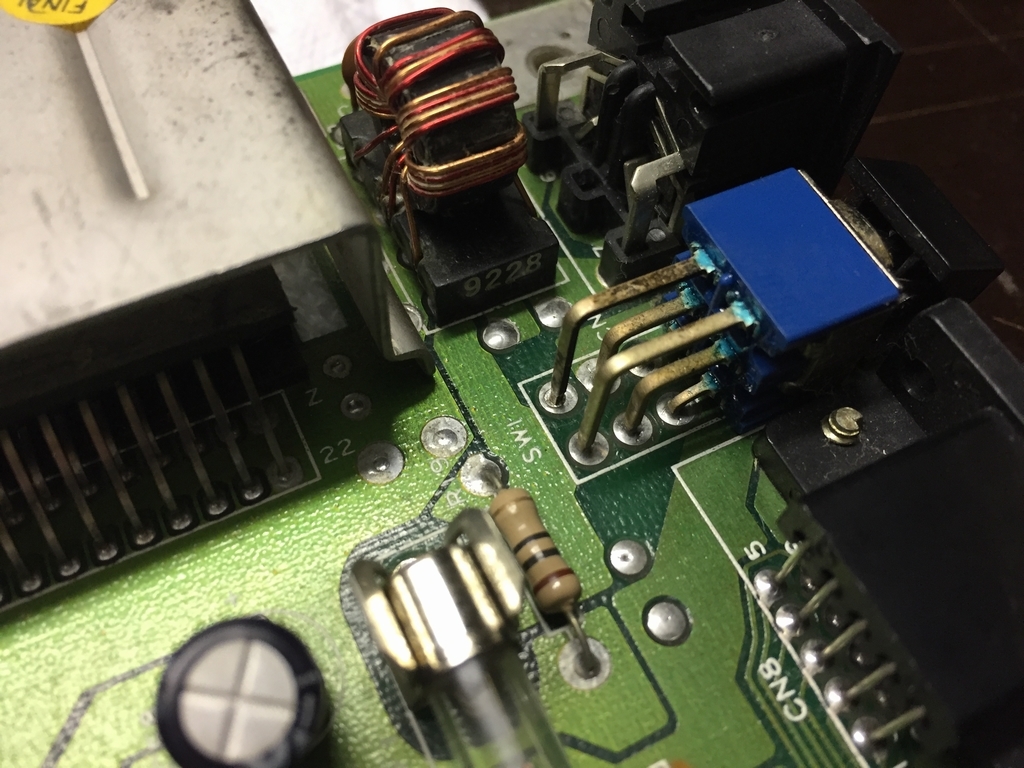
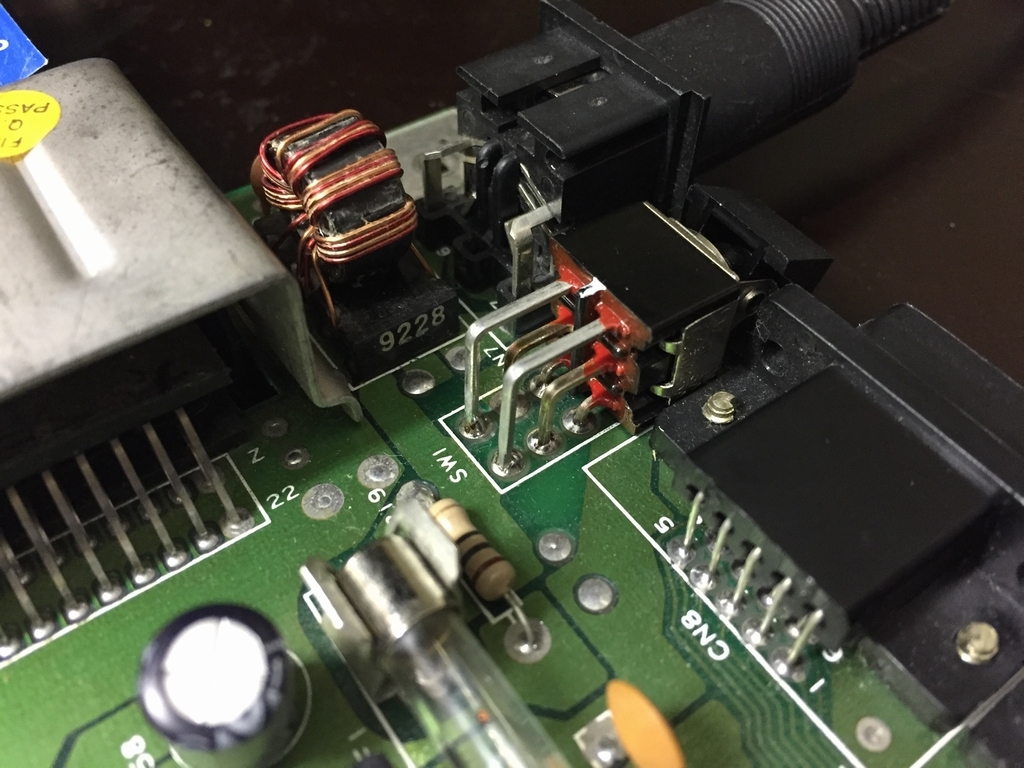
Custom Switchless Kernal Mod
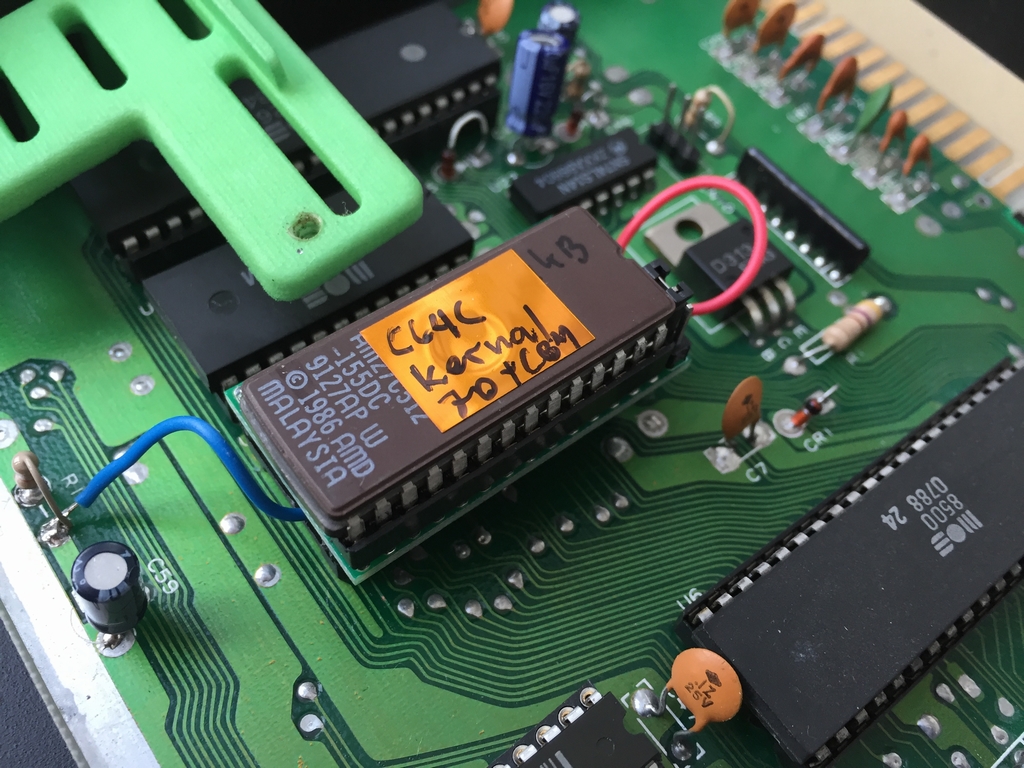
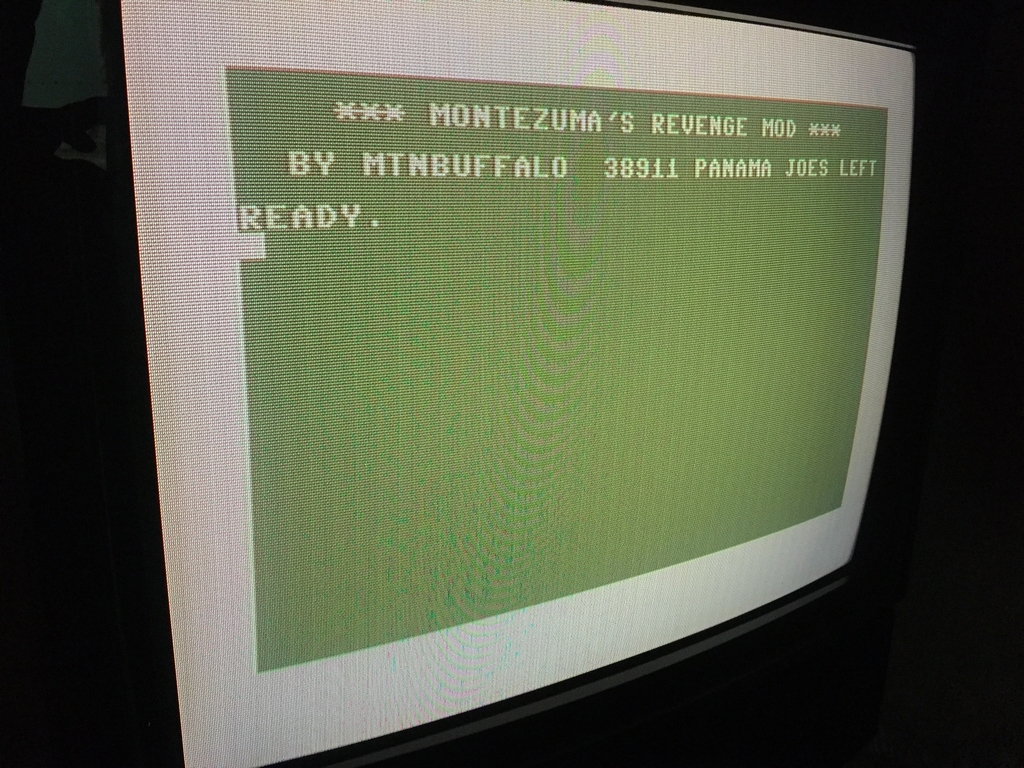
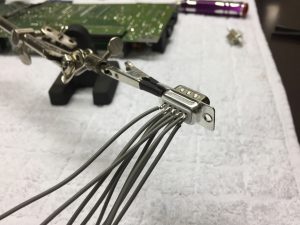
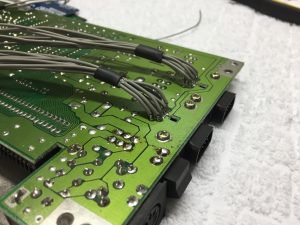
To swap between kernals (CBM Kernal & JiffyDOS), the original CBM Kernal IC has been replaced by a small PCB with both the original CBM Kernal and JiffyDOS. Pressing the RESTORE button during power up, the machine will boot into the standard CBM Kernal. If nothing is pressed during power up, the machine boots into JiffyDOS. I modified the Kernal to customize the colors and text of the JiffyDOS screen. The changes were burned onto a 27C512 EPROM. The entire mod and how to modify the C64 Kernals can be found here (link). Below are the solder spots for the switchless Kernal unit.
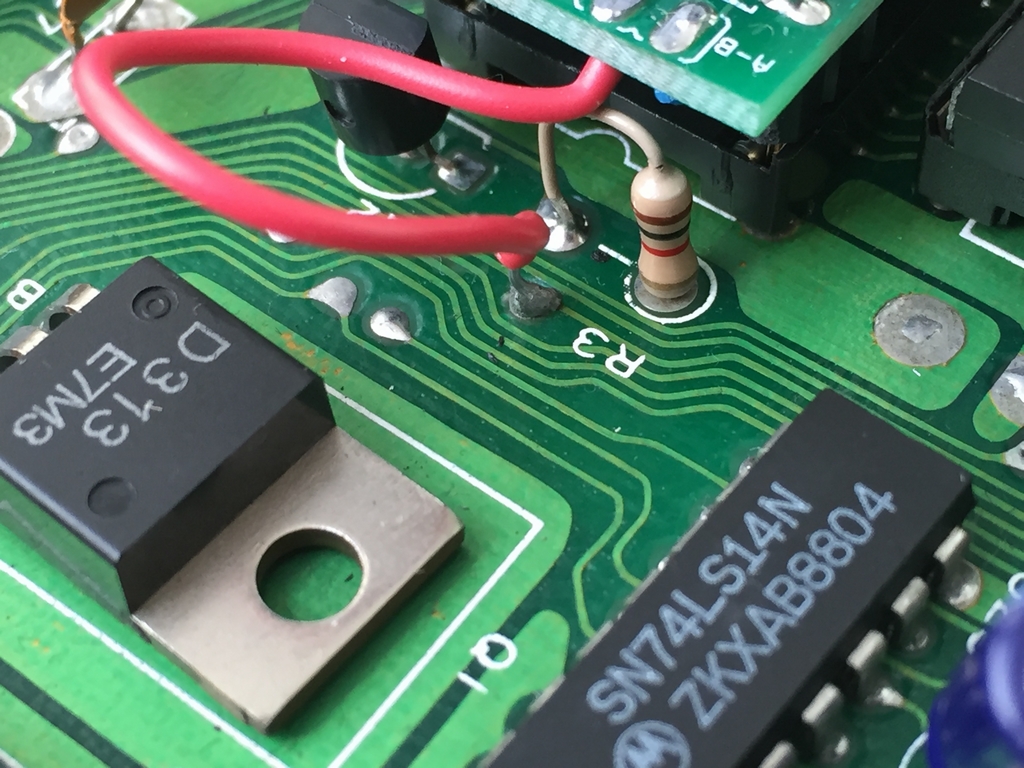
The Kernal has custom colors and text to match the Montezuma’s Revenge theme. Turning the machine on will make it boot directly into JiffyDOS. Pressing SHIFT + RUN/STOP will load the first program on the SD card which is… Yes, Montezuma’s Revenge!
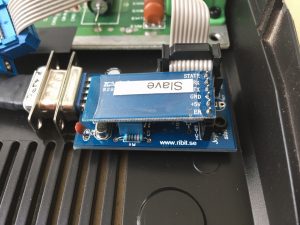
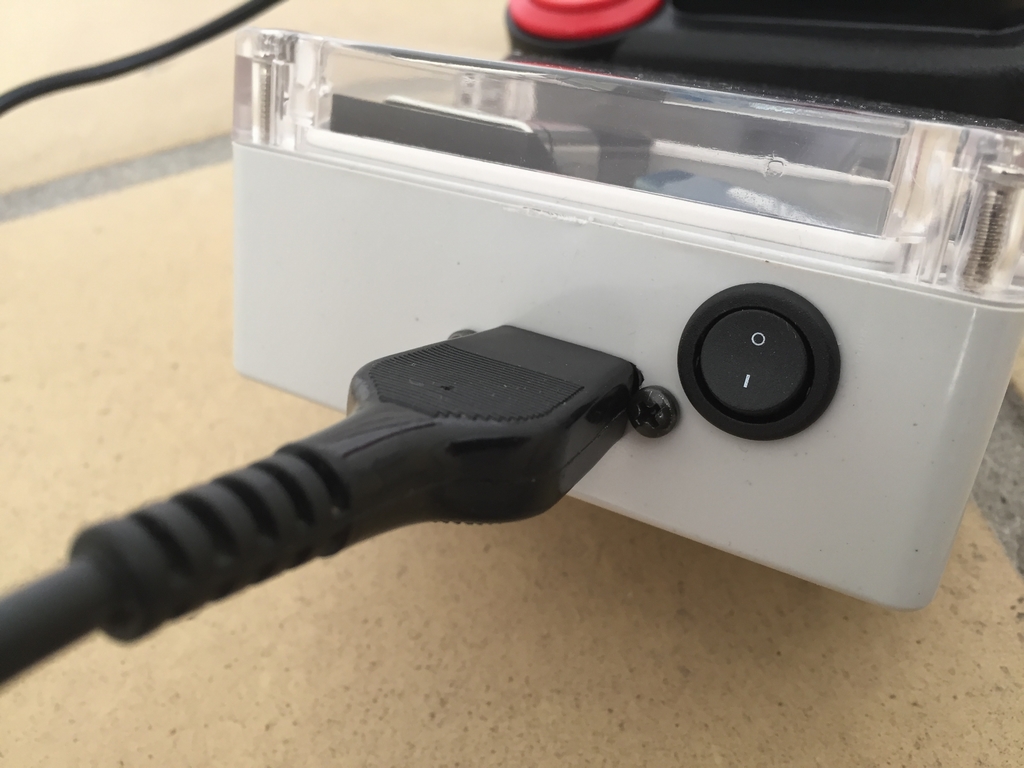
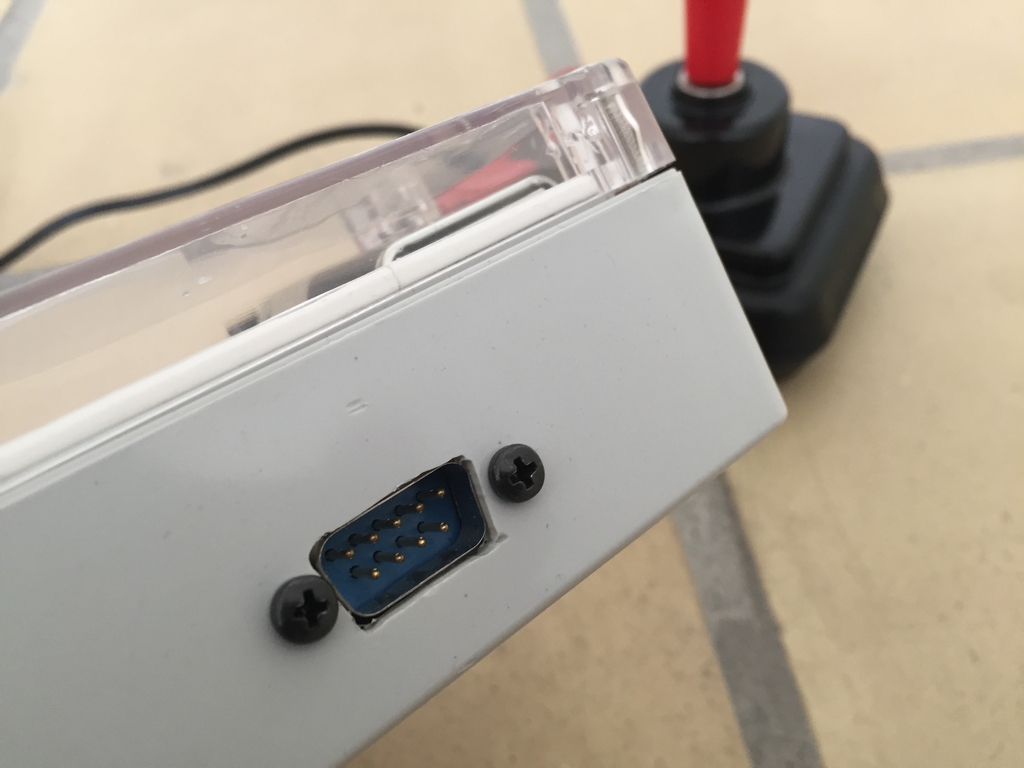
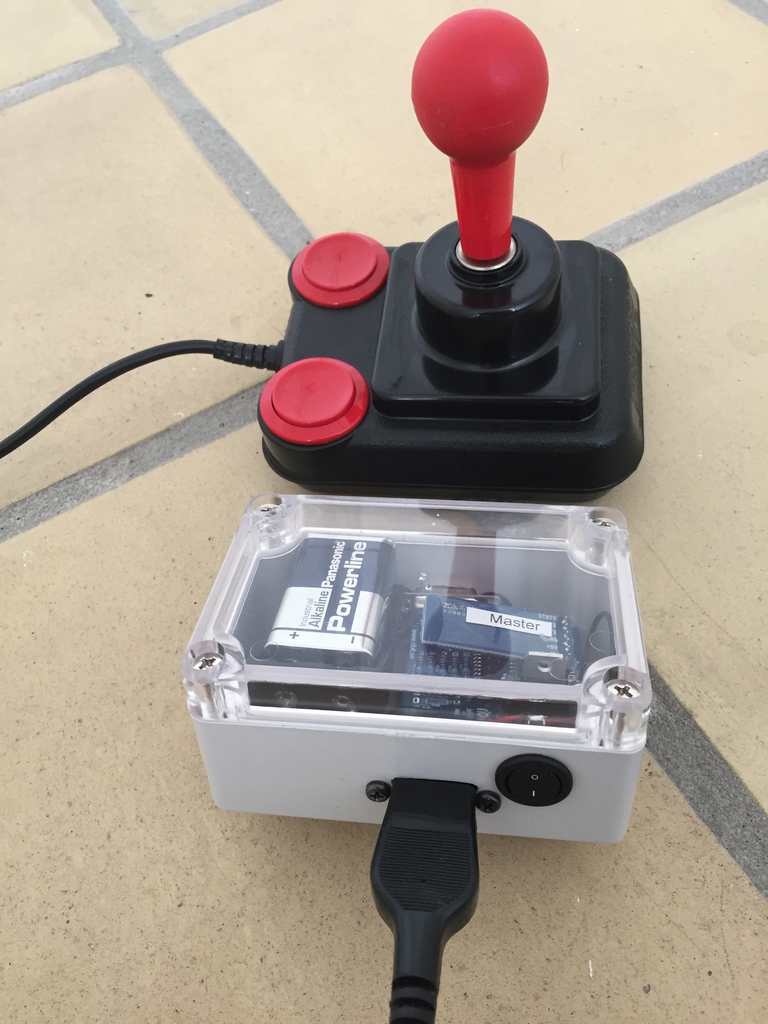
Internal Wireless Joystick Mod – The JoyFi
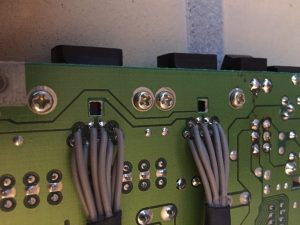
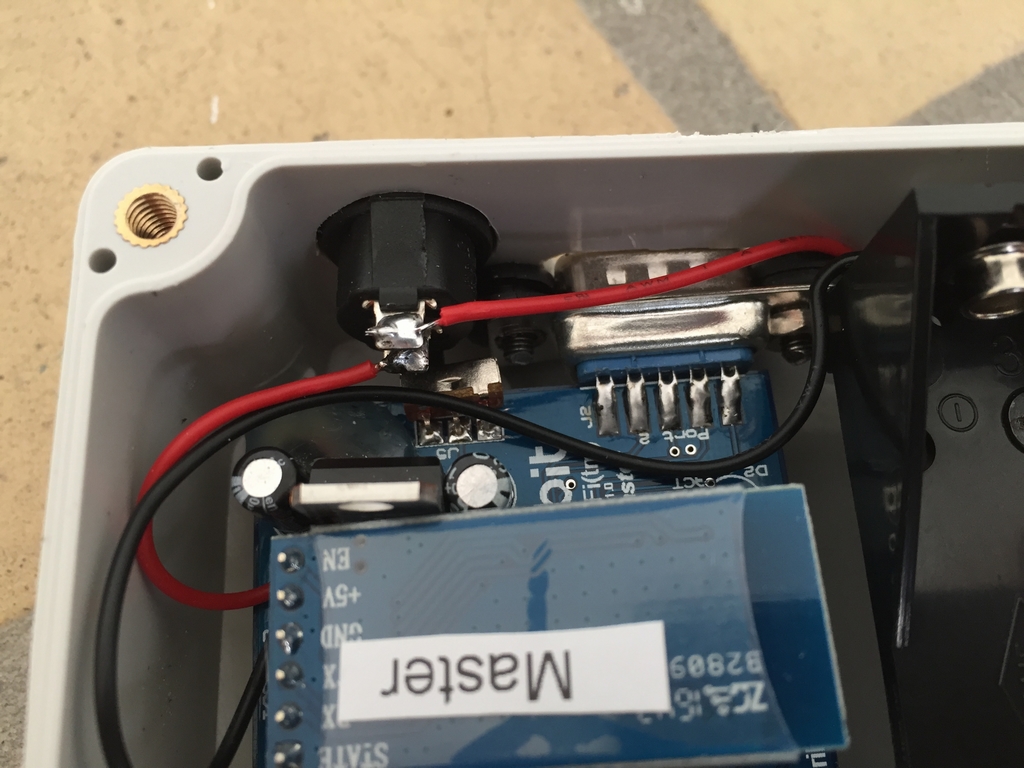
The JoyFi is a neat solution for making your joysticks go wireless using original 9-pin joysticks on the Atari, Amiga and Commodore 64 as descirbed here (link). The JoyFi is made by RiBIT (link) and consists of two PCB’s that are connected to the joysticks (Master PCB) and the Commodore 64 (Slave PCB). The master part is powered using a 9V battery while the slave part is powered by the 5V line of the joysticks ports. The wireless connection is based on a Bluetooth connection and after booting up the machine, the connection is made within seconds. The parts comes unprotected so I decided to put the slave parts inside the c64 case and make a box for the master parts.
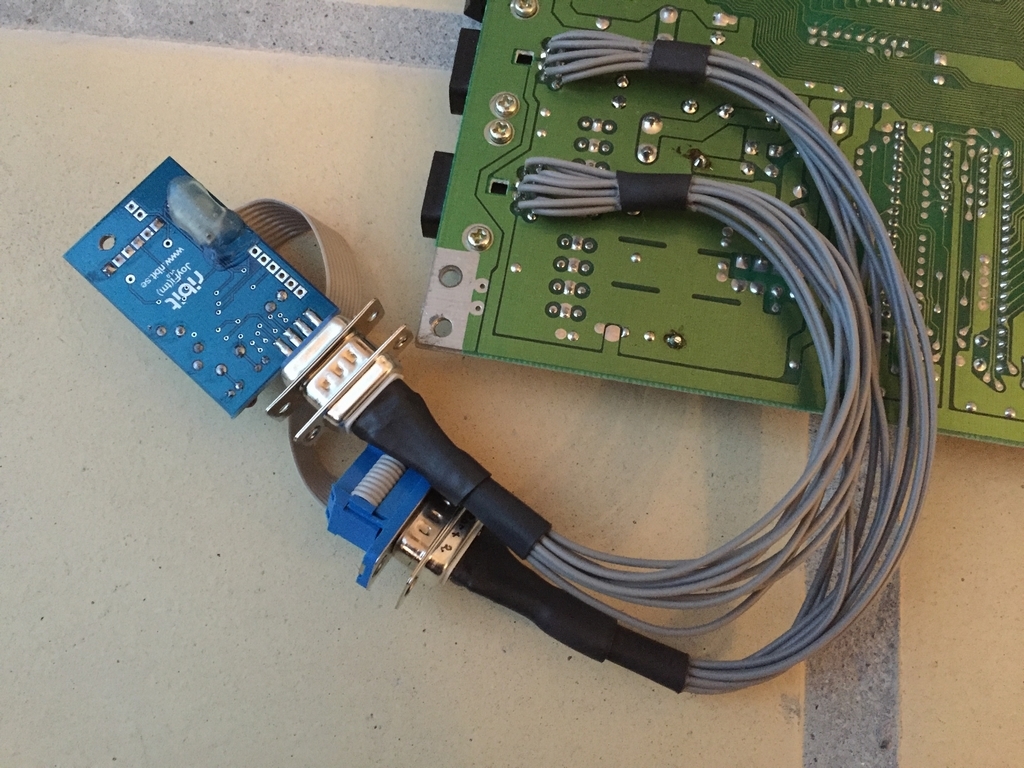
The slave parts placed inside the C64 case. I had to drill a hole to the larger PCB to put a screw through it. That particular area is just ‘ground’, so nothing should break (except for the warranty!). To connect the joystick ports to the motherboard of the C64 I used two male 9-pin plugs and a heap of wire…
The cables were then connected to the Slave part of the JoyFi. The normal external joystick ports still work if a mouse or paddles should be connected to the machine (the JoyFi does not support these devices yet!).
The master part of the JoyFi is for the joysticks. I used a small case for installing the hardware. I installed a little rocker switch in order to save on battery power when not in use.


A red LED lights up when the device is turned on.
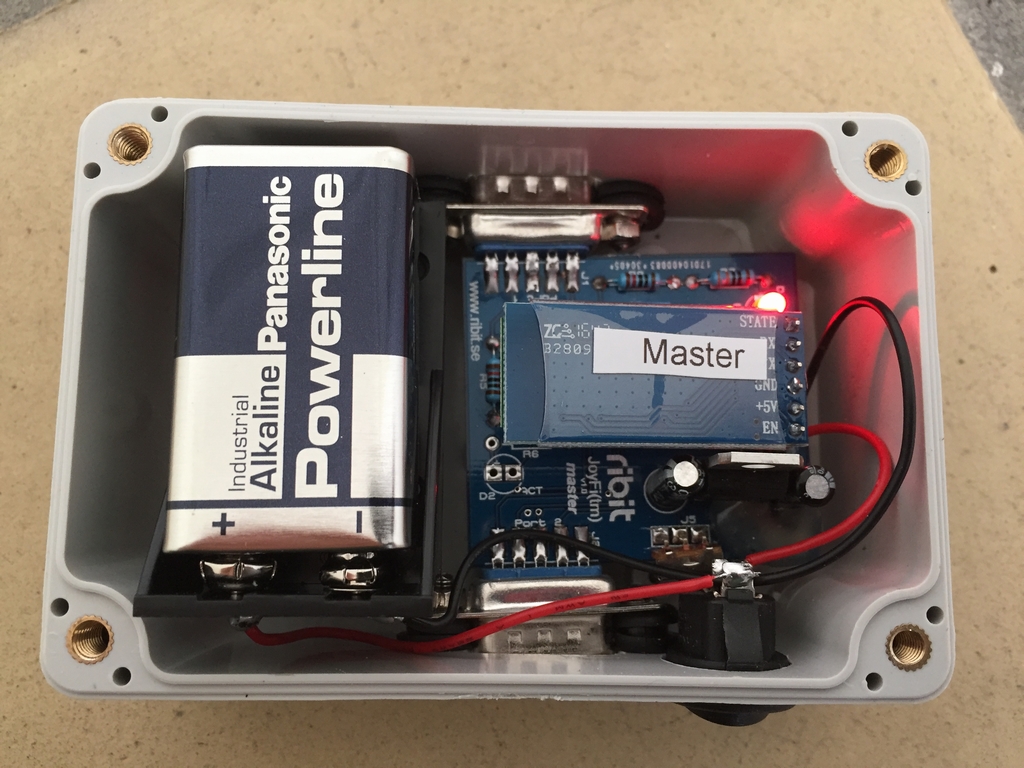
The finished case.
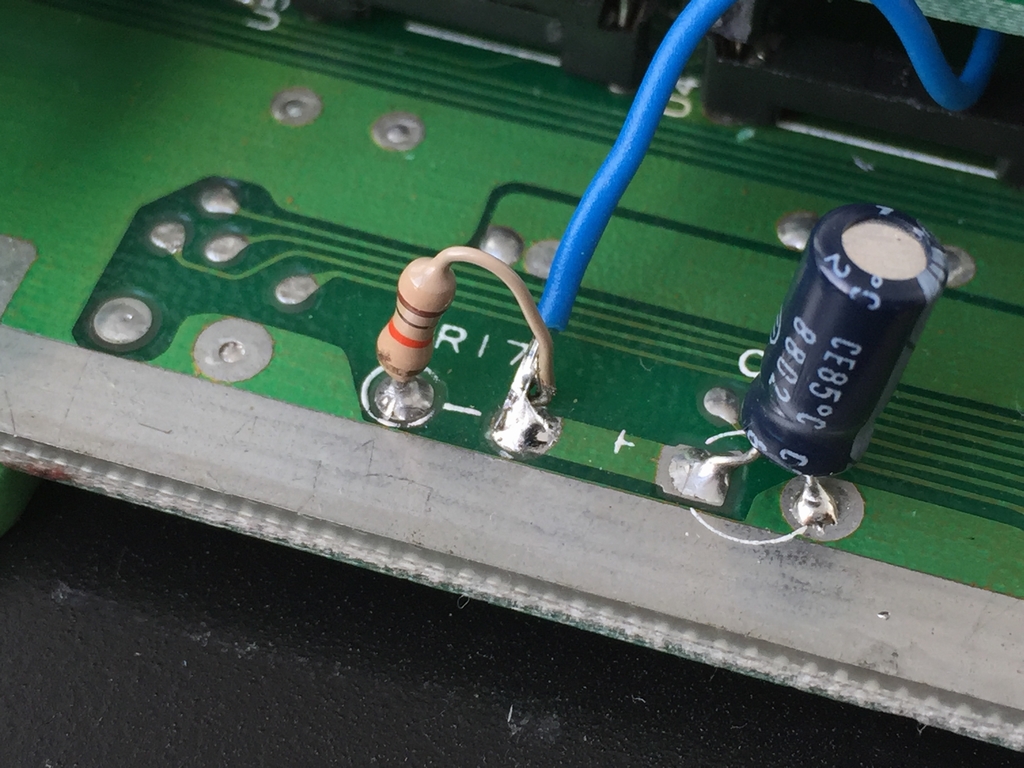
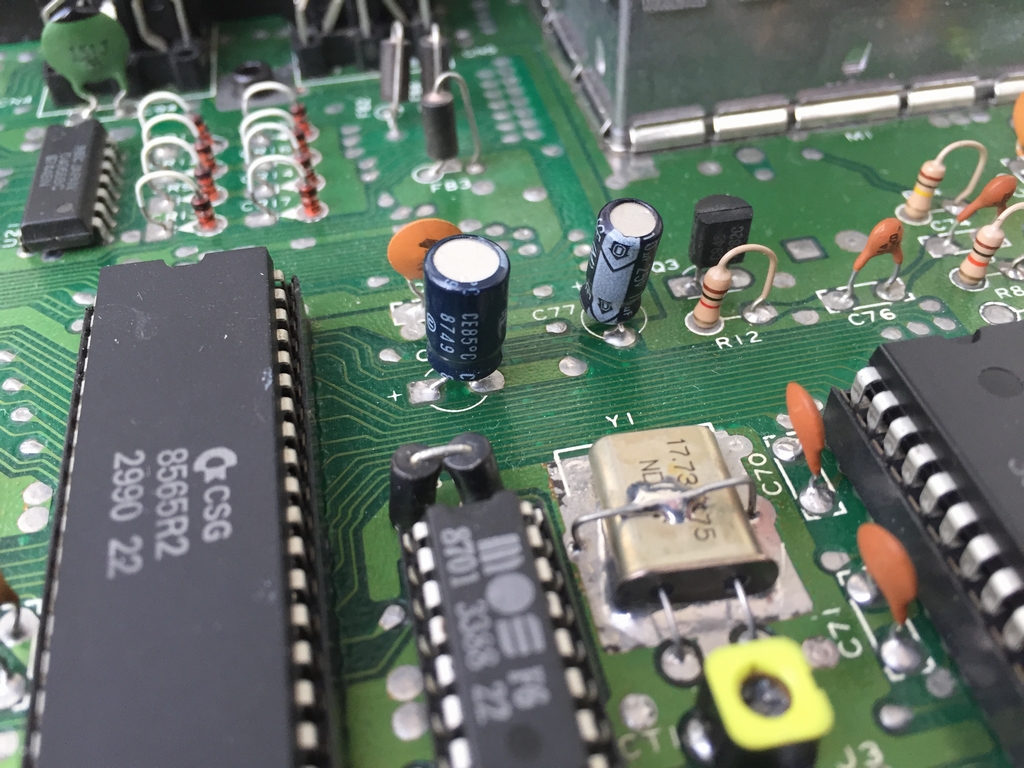
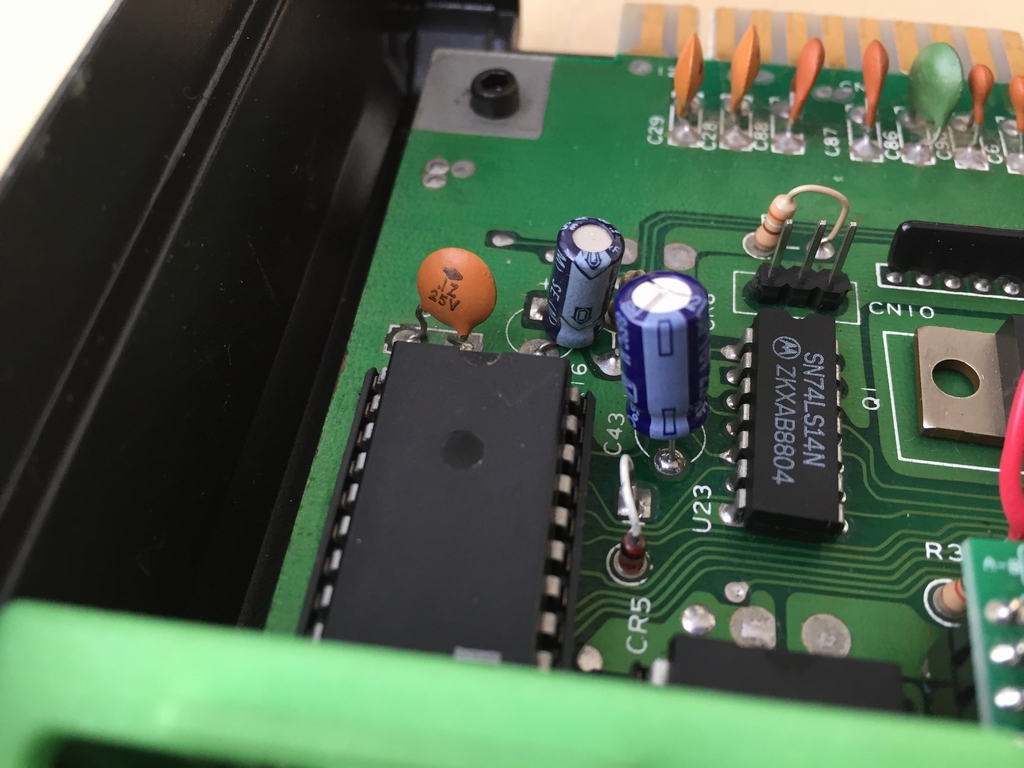
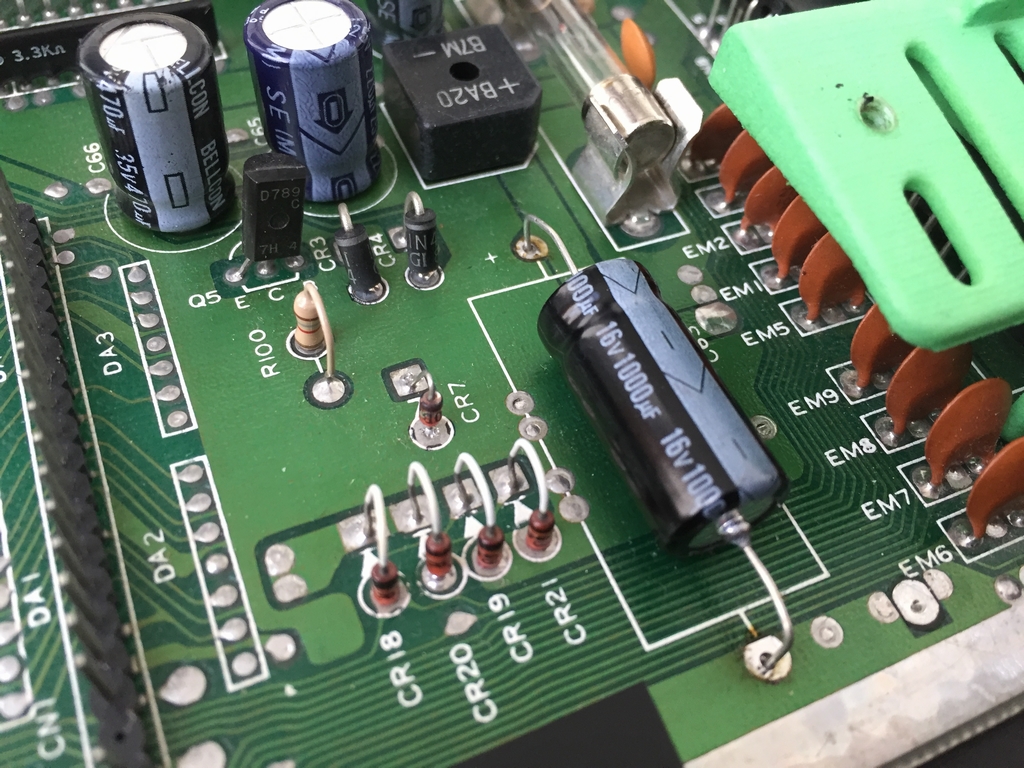
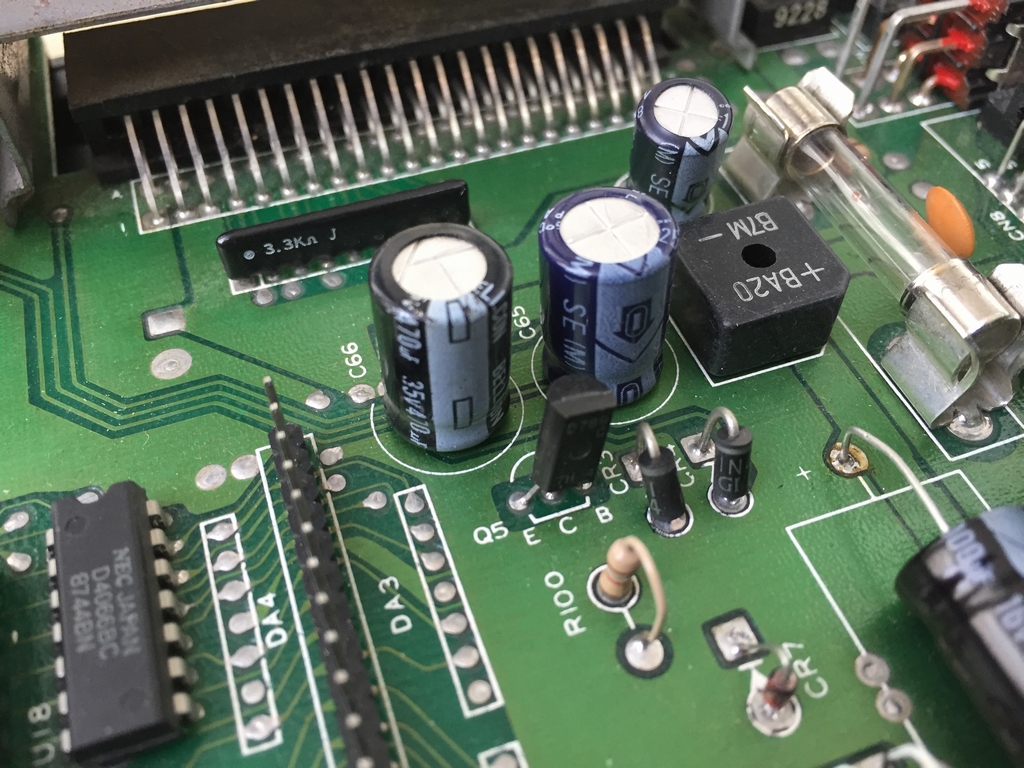
Capacitor Mod
All capacitors were replaced with new ones as described here (link). This should make them work for another 30 years without drying out…
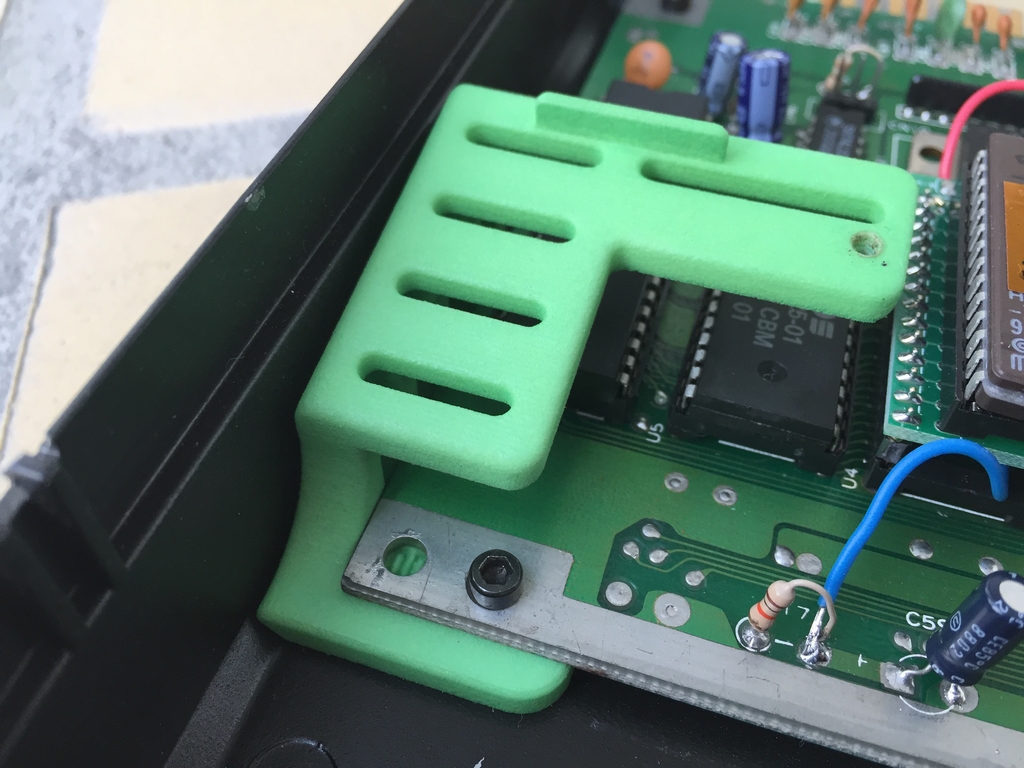
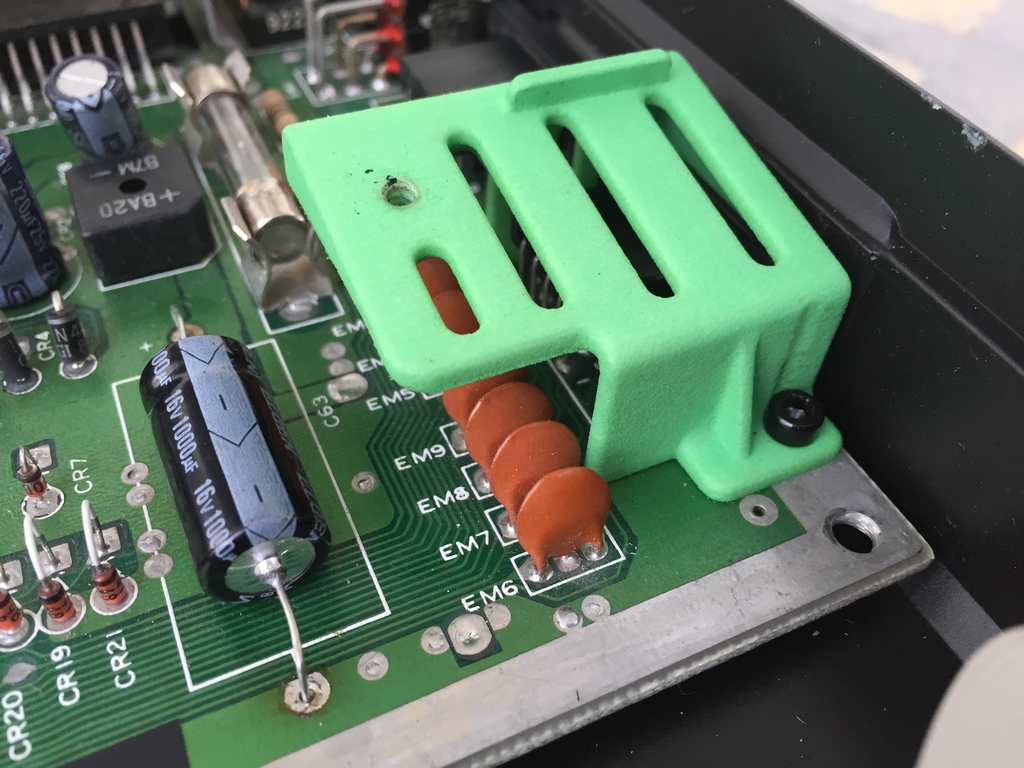
3D Printed Keyboard Mounts
The 3D printed keyboard mounts look a little nicer than the stock metal ones… More images of the mounts can be found here (link).
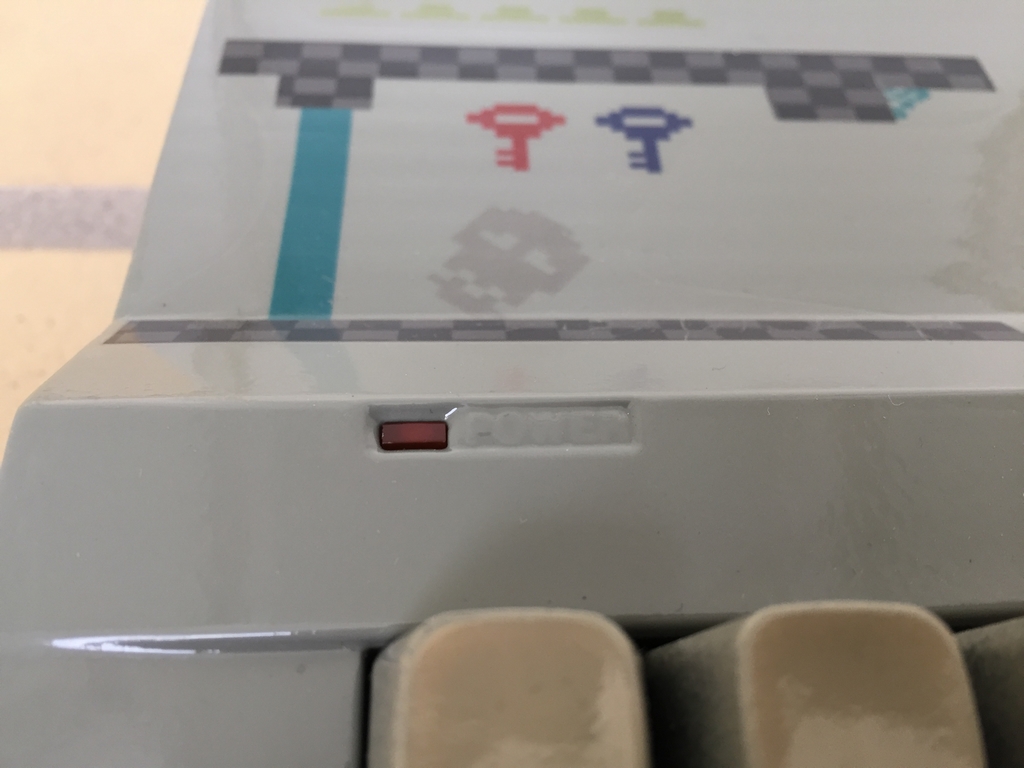
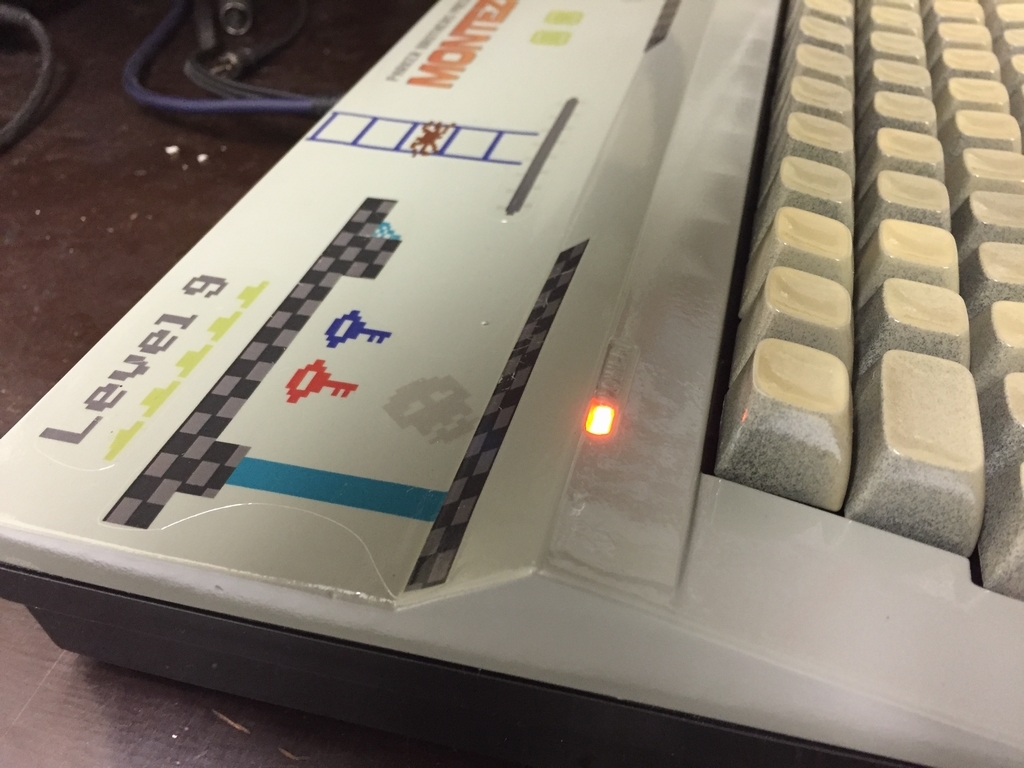
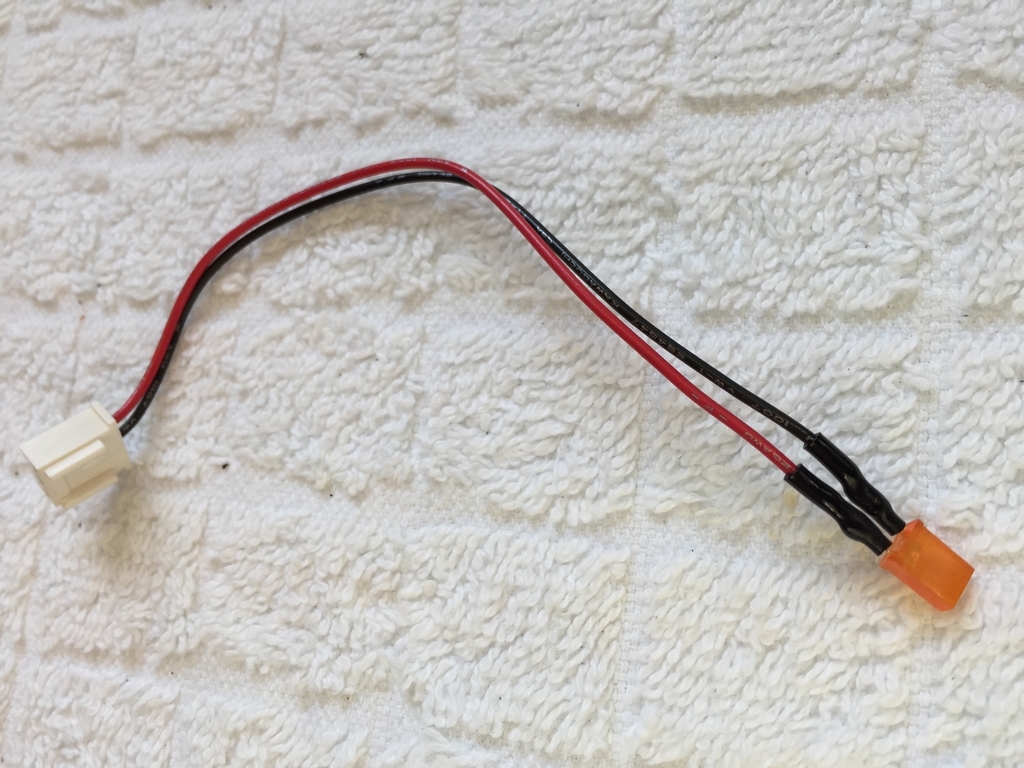
Power LED Mod
An orange LED was made to go with the overall theme of the machine as described here (link).
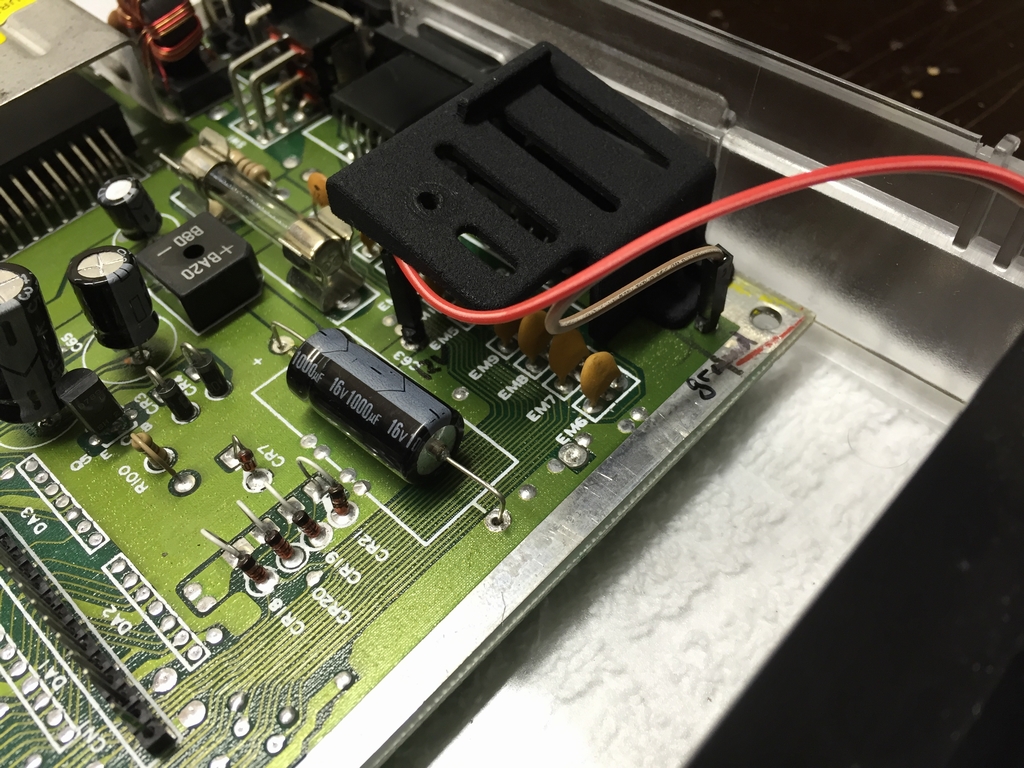
Power Switch Mod
The motherboard also had a fresh new power switch installed to keep it going for years to come. The old switches may go bad after a certain number of operations.
The Machine in Action
A little video showing the Mod of the Year in action.
© breadbox64.com 2017
Awesome work – so jealous! Also, it’s really neat to read your build log. The links are highly appreciated! Thanks for sharing – can’t wait to see what your next blog post will be about!
Merry Christmas!
Hi Pete, thanks a lot for your comment 🙂 And a very Merry Christmas to you too!
It really is the whole package. Like the glossy finish to the paintwork. What monitor are you using? Is it a crt or lcd ?
Thanks! The tv is a 21″ B&O (Bang and Olufsen) MX4000 CRT from the 1990’s. It’s a Danish design classic and the sound and vision is perfect for the commie – beats the sound of every standard flat screen! When they where manufactured in the 90’s they were quite expensive – around 1000£ which with inflation would be almost 2000£ (2700$) in 2017. They are usually sold on Danish second hand sites for around 30£… So I kinda brag about having a B&O TV for my basement 🙂
Well it looks like you are getting a production quality crt picture from a TV that takes up half the space of a production monitor. Nice for retro gaming. Great for a C64. Would be nice with a Megadrive or a Snes also.
Yes, it does not take up much space and the little mount it sits makes it easy to optimize the viewing angle.
Love it!
Do you know if you can still get the SD2IEC Minis? Thanks.
The 16×8 Digital Retrovation store is still down. So it looks like you may have to find another sd2iec solution 🙁