
The C64 Reloaded ROMs IC holds 2 Kernals and 2 Character sets located at specific memory locations on the EPROM. Each of the ROMs can quite easily be replaced in order to have two unique character sets (i.e. English & Danish) and two different Kernals (i.e. Standard CBM Kernal & JiffyDOS Kernal) on the same machine. At start-up, the 1st Kernal and 1st Character sets are chosen as default. By pressing and holding the RESTORE key for a few seconds, release it and then activate the RESET switch, the 2nd Kernal will be loaded into memory. If the RESTORE key is pressed during reset, the 2nd character set is chosen and will remain active until the next reset. Thus, there is no need for drilling any holes for a switch in our precious machines any more! I have previously covered the topic of installing a commercial version of the JiffyDOS IC. However, this time I wanted to do all the work myself! As I have no use for a second character set, I just wanted to exchange the 2nd Kernal with JiffyDOS using my own 27C256 EPROM, an EPROM burner and a licensed binary copy of JiffyDOS from Retro Innovations. Thus, this is how to exchange the 2nd Kernal on the C64 Reloaded board with JiffyDOS.
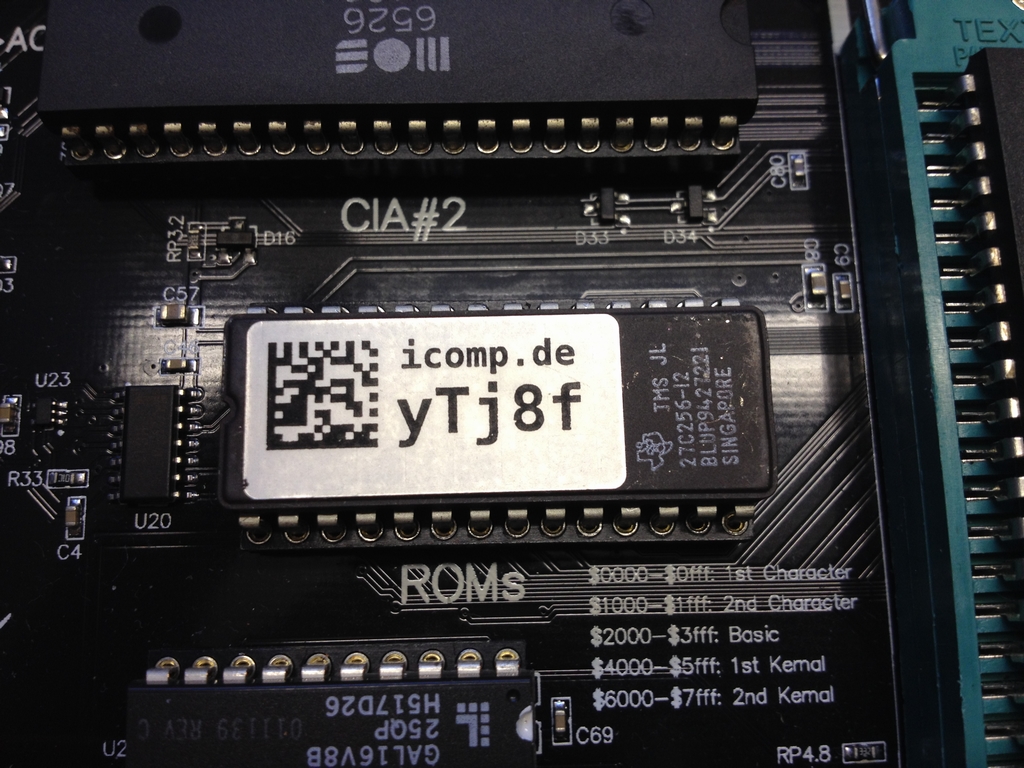
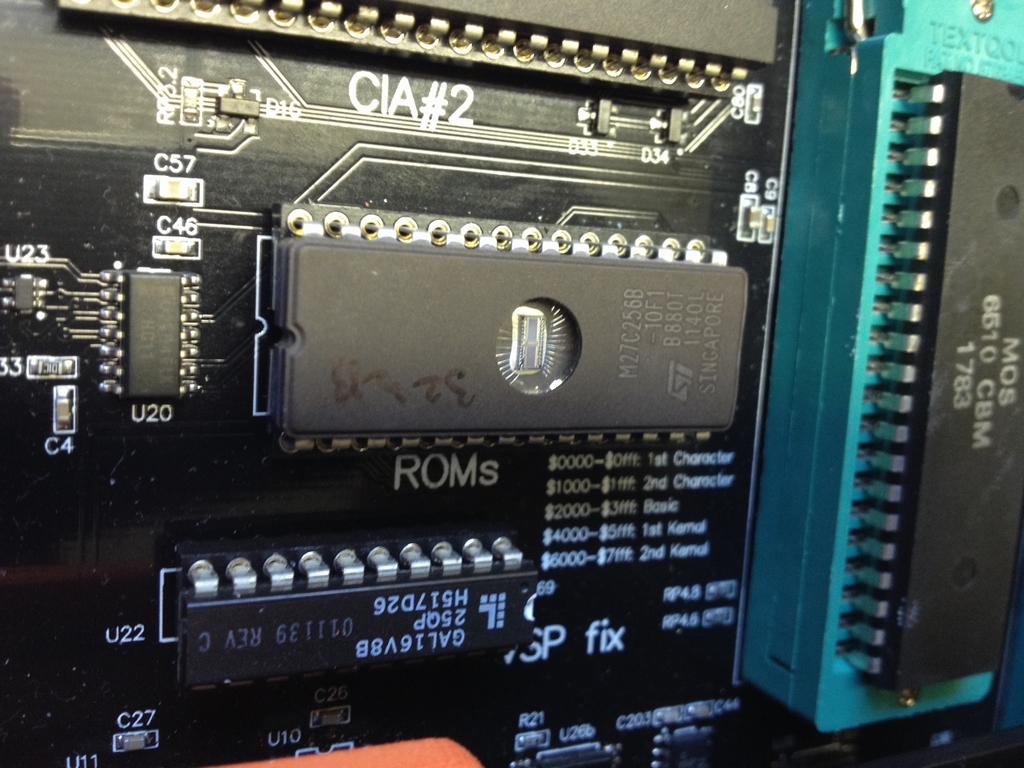
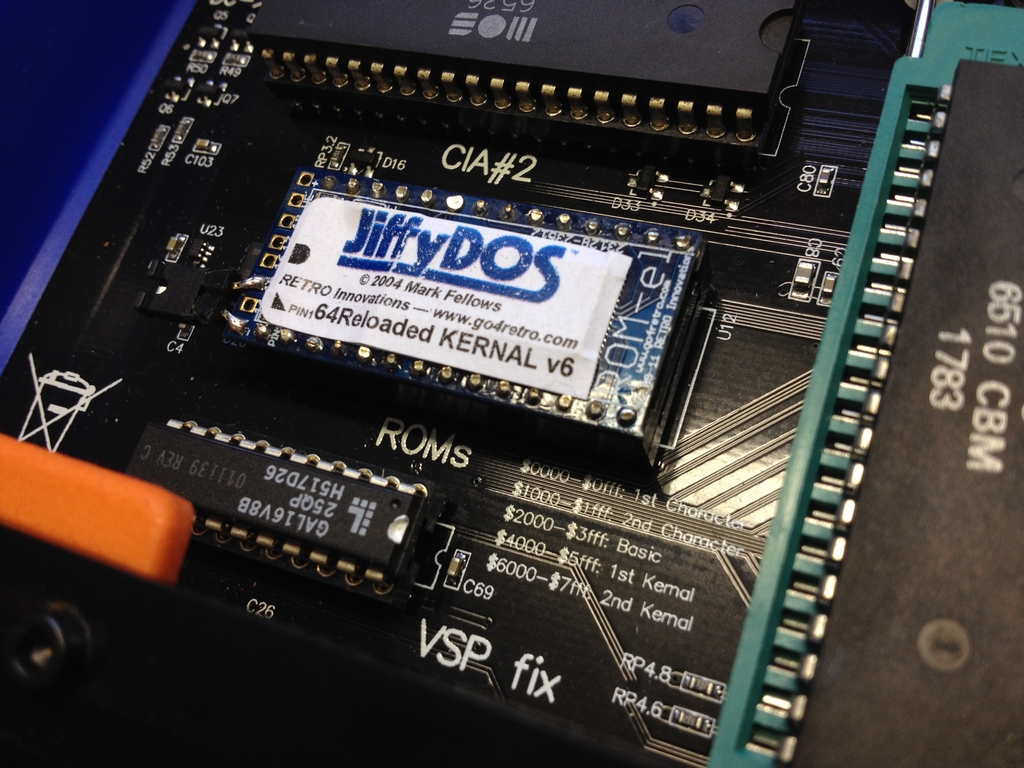
The ROMs IC on the C64 Reloaded board is located on the far left side of the motherboard.
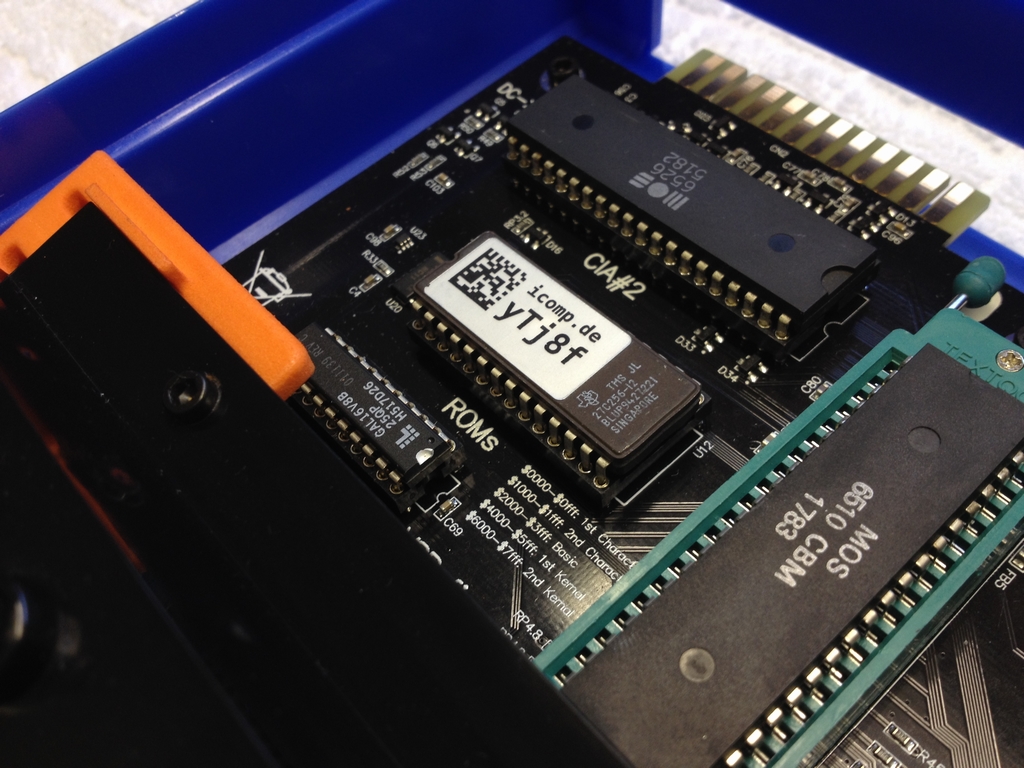
The memory locations (in hexadecimal) of the Character sets, the Basic ROM and the Kernal ROMs are printed below the chip.
$0000-$0fff – 1st Character set
$1000-$1fff – 2nd Character set
$2000-$3fff – Basic ROM
$4000-$5fff – 1st Kernal ROM
$6000-$7fff – 2nd Kernal ROM
I’ll be replacing the data at memory location $6000-$7fff with JiffyDOS.
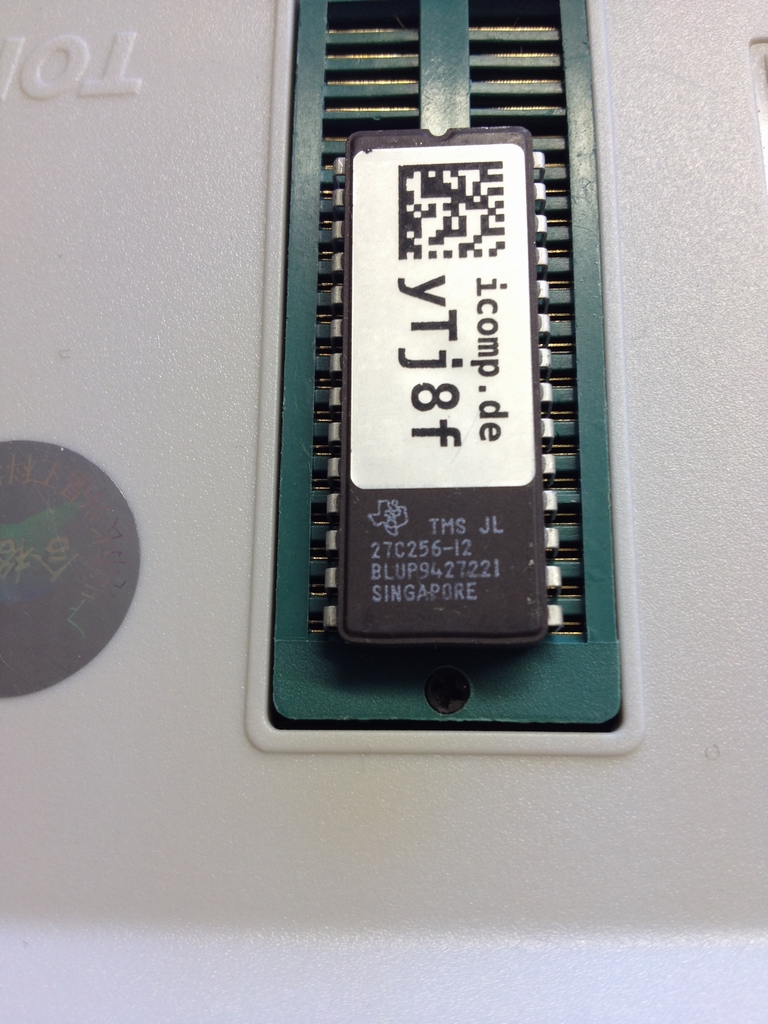
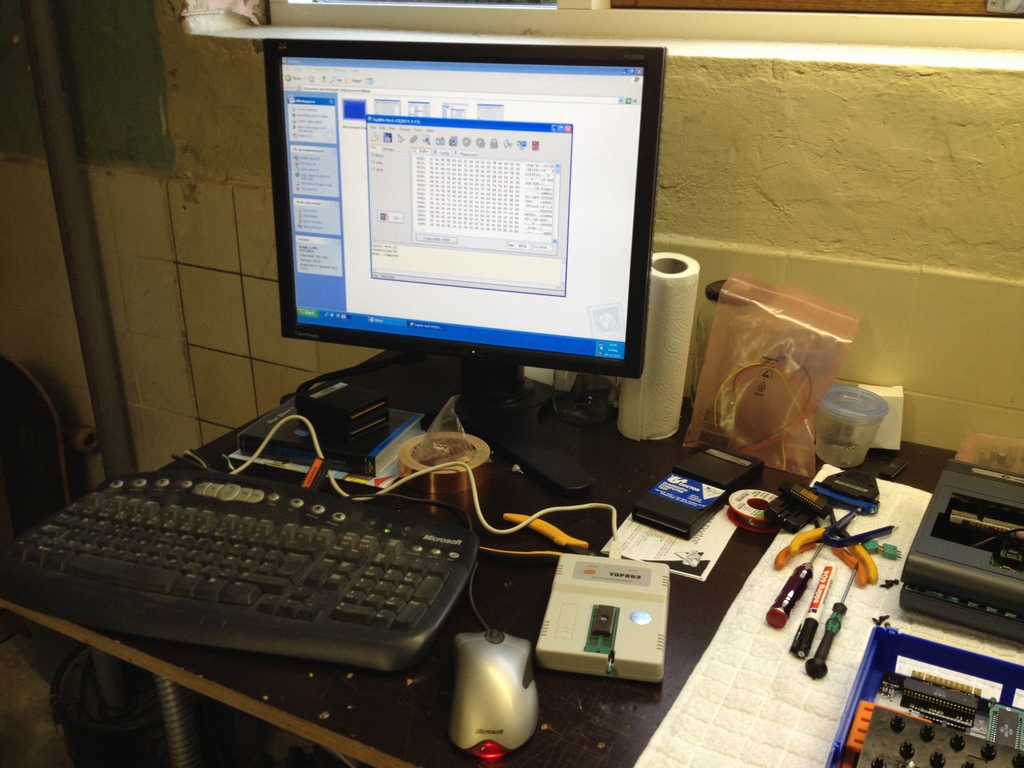
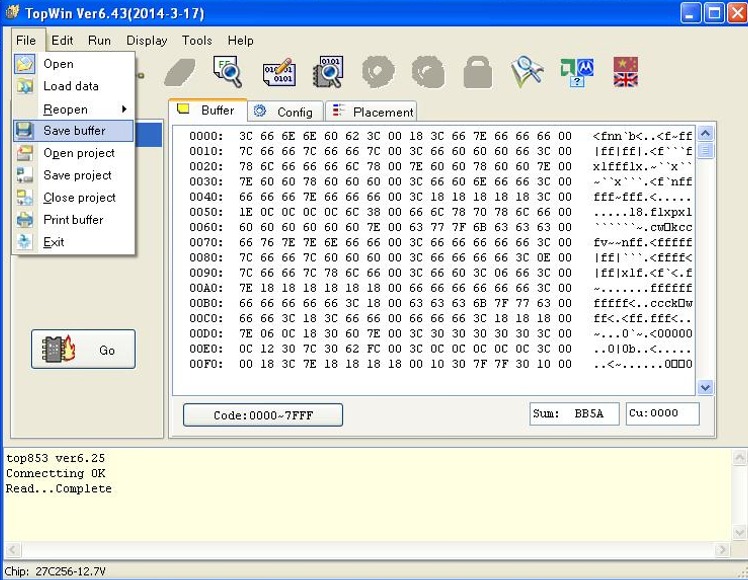
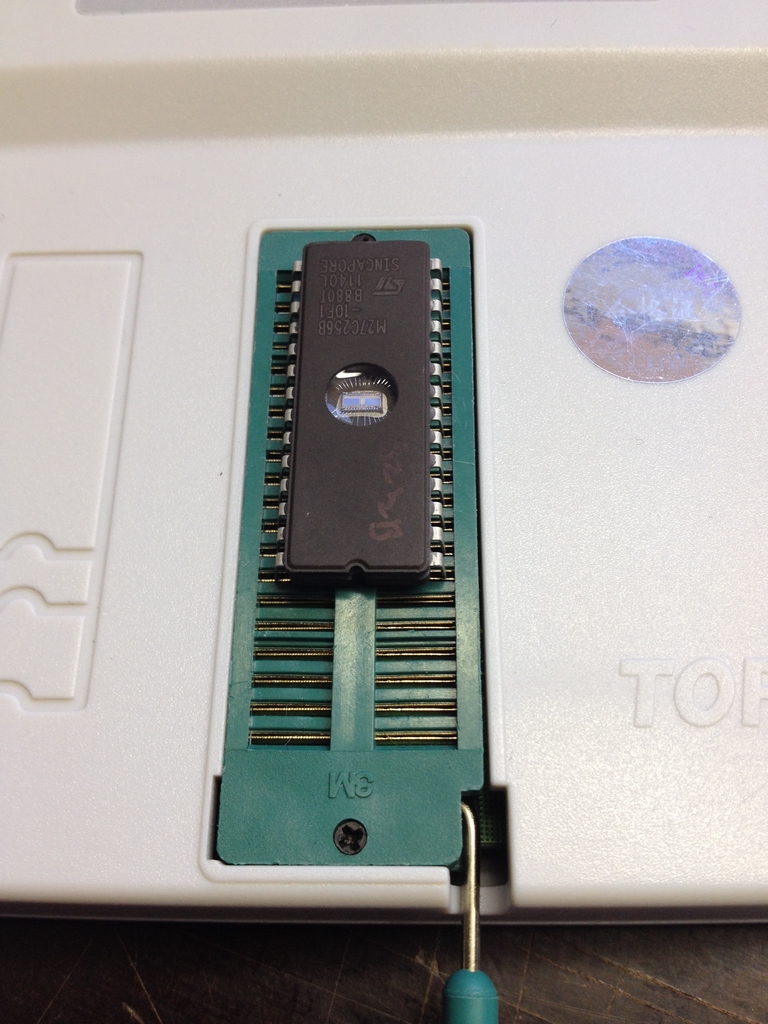
The EPROM burning was carried out on my TOP853 Universal Programmer that I got cheap on Ebay from China. First I gently removed the original ROM IC from the board and placed the chip in the programmer.
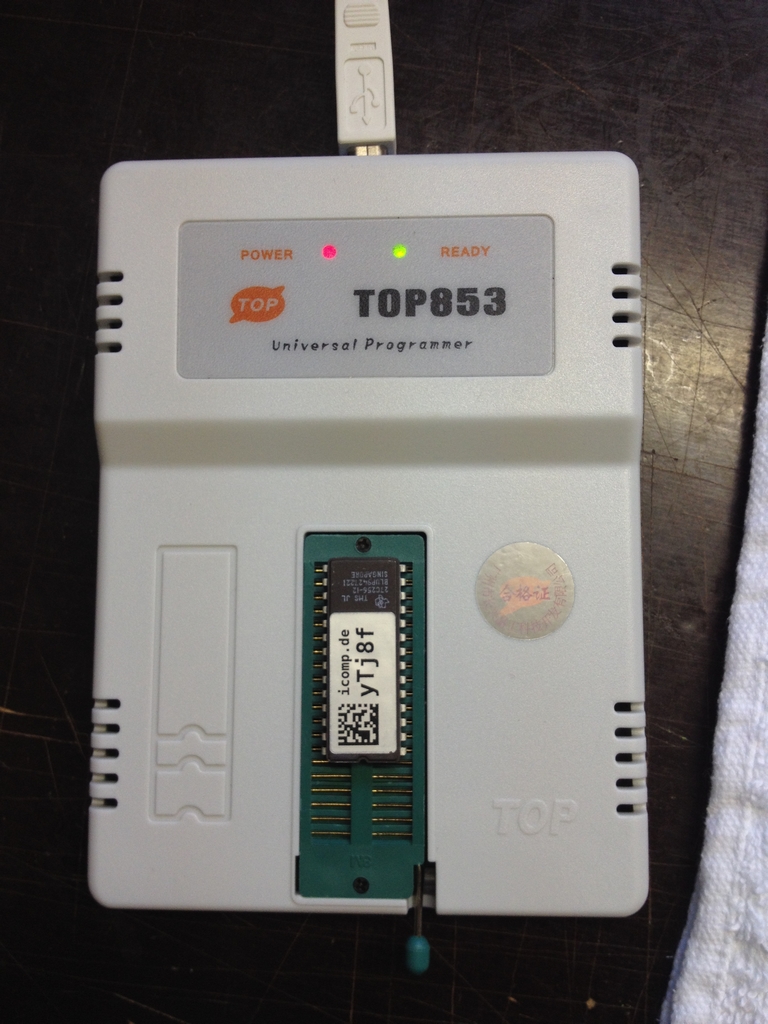
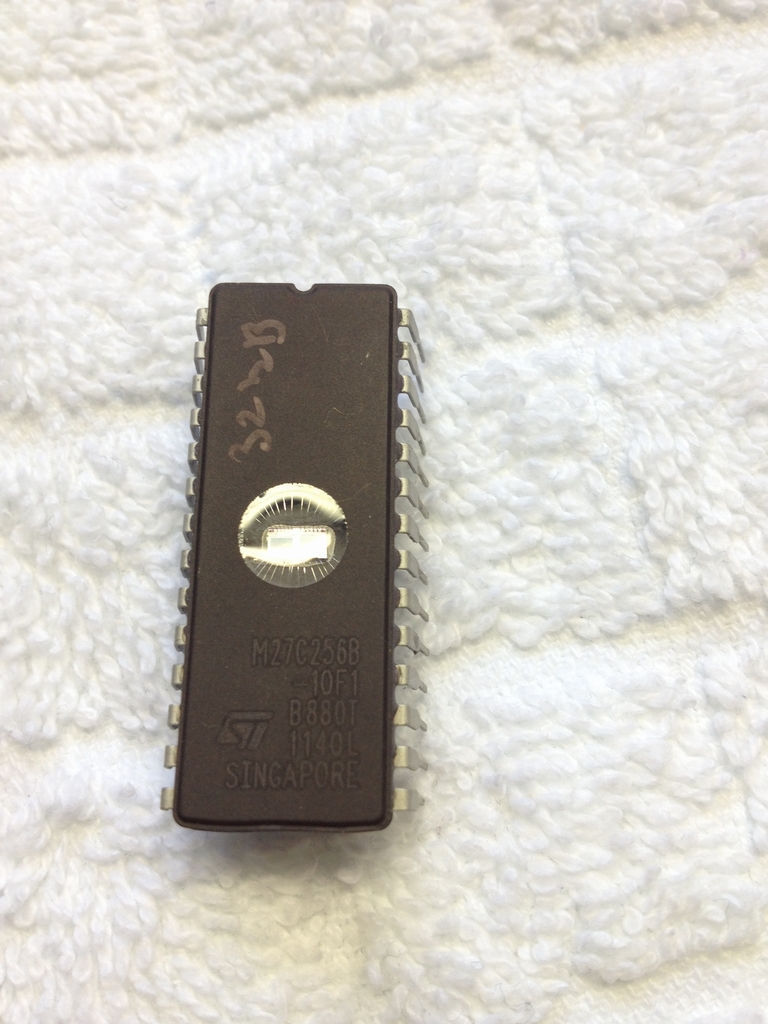
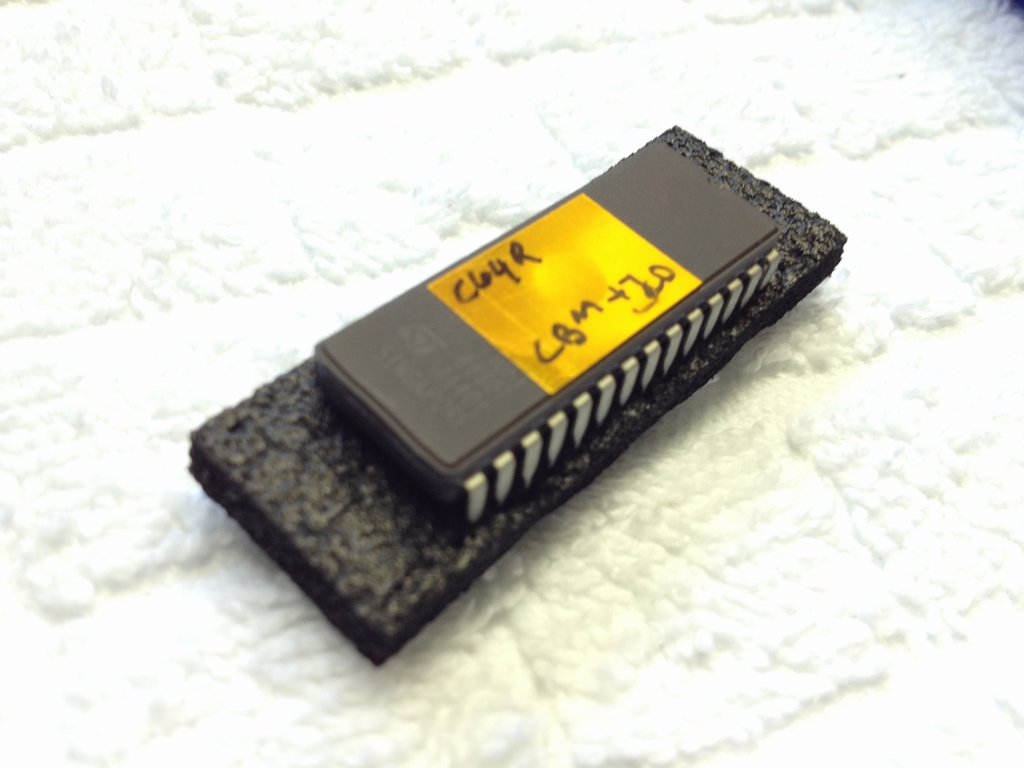
The chip is a TMS27C256 EPROM. This information will be used shortly.
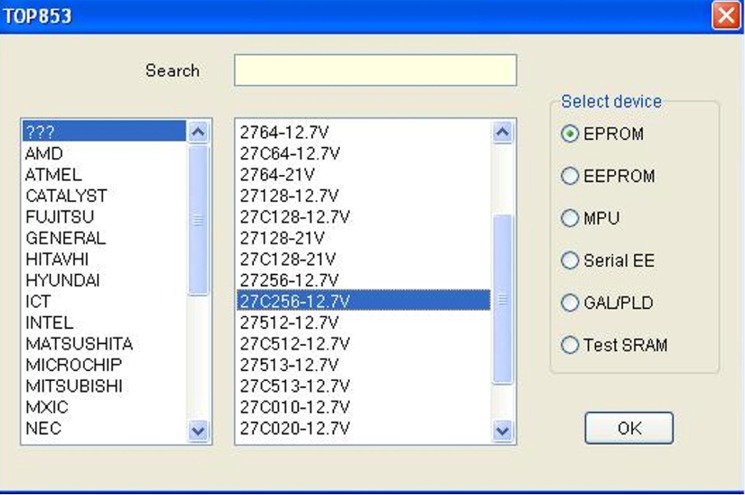
I then started the utility software that came with the programmer. Unfortunately, it only works in Windows XP so I had to dig out an old Windows machine in order to get on with the project.
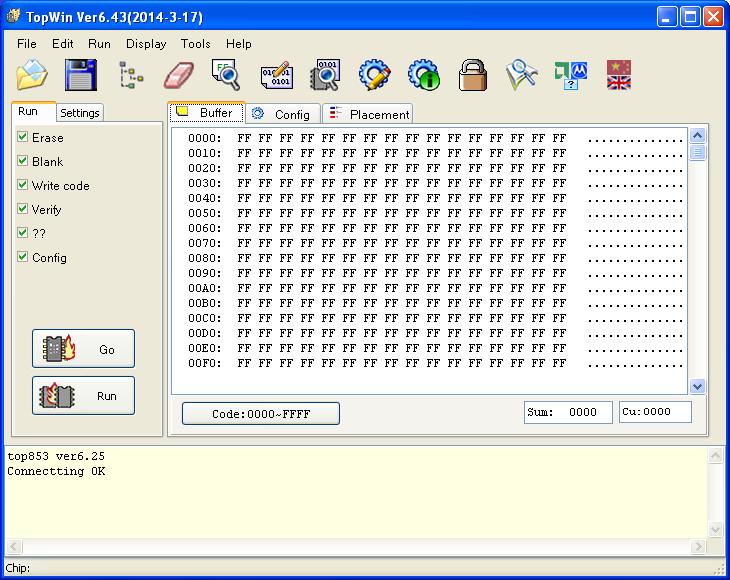
First I chose the IC that I had placed in the burner (TMS27C256 EPROM) from the list. This information is needed in order to dump whatever data is on the EPROM.

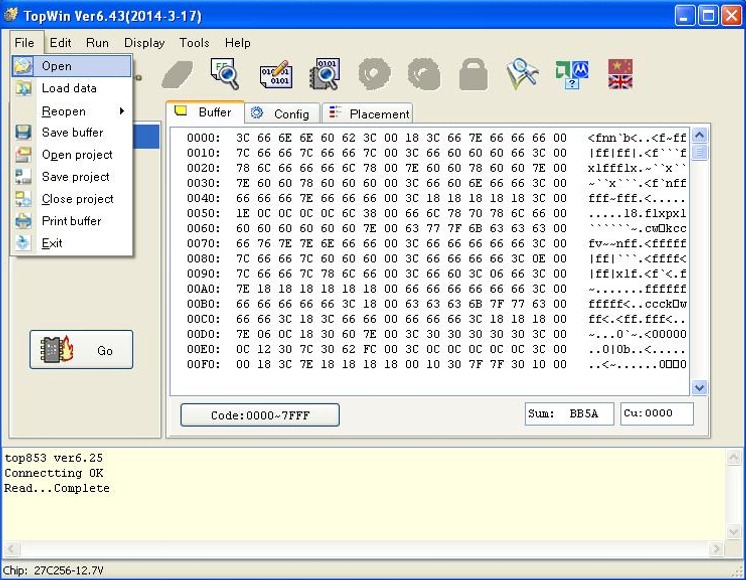
Pressing ‘Read’ dumped (or copied) all the binary data that was on the original C64 Reloaded ROM IC. This way I had a known working copy if something should go wrong along the way – better safe than sorry, eeh!
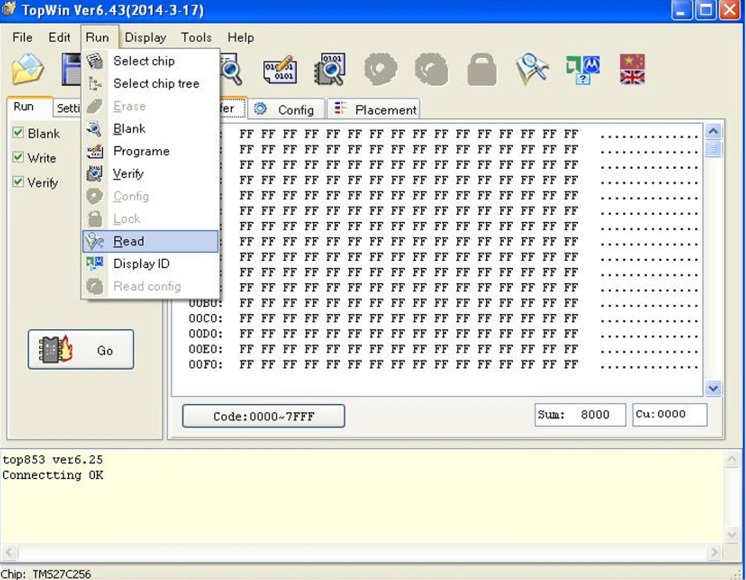
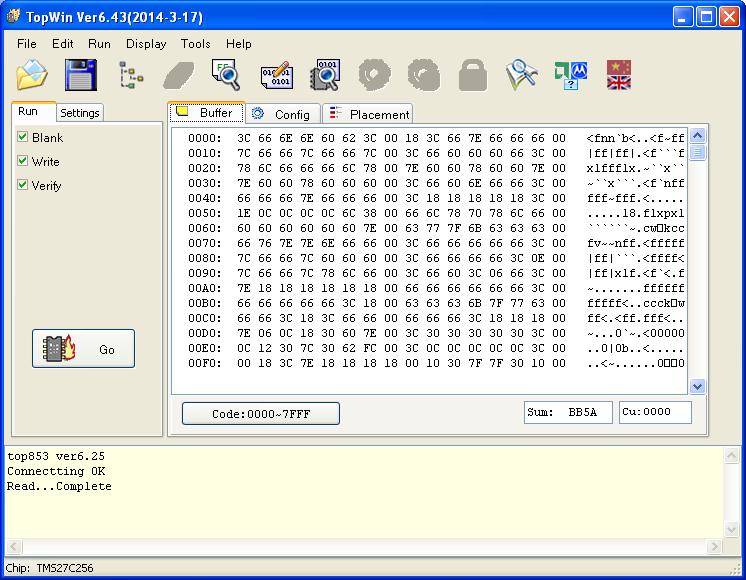
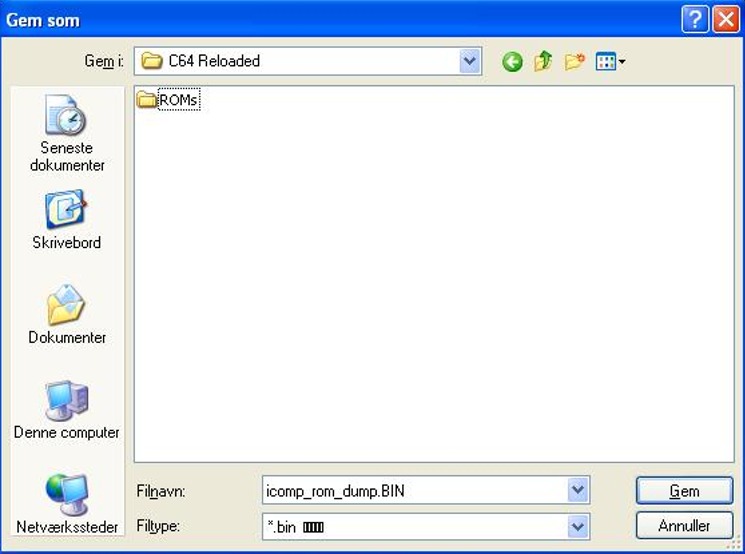
The dumped data was then saved to the harddisk (filename = ‘icomp_rom_dump.bin’) as I had to use another program to exchange the binary data of the 2nd Kernal with the JiffyDOS data.
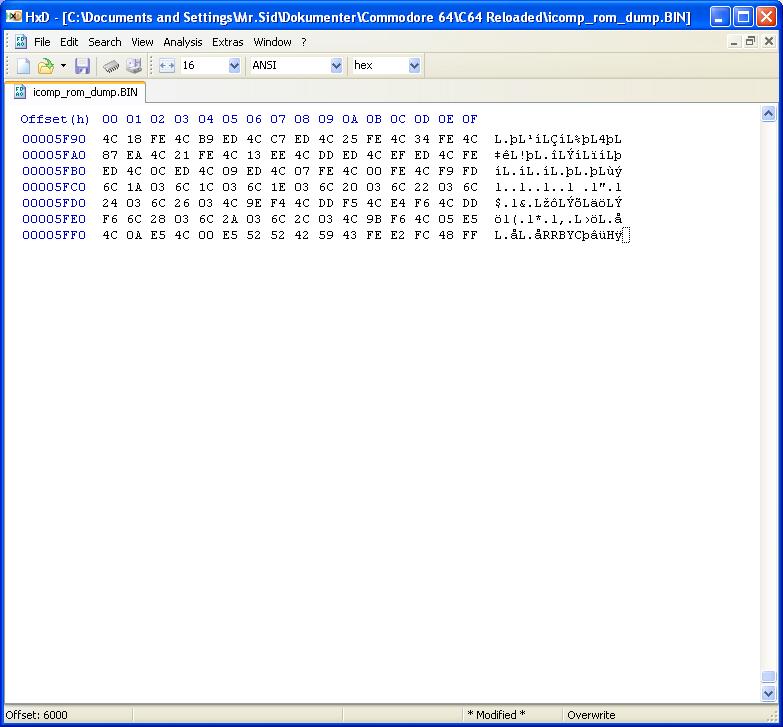
The hexadecimal dump file (filename = ‘icomp_rom_dump.bin’) from the original C64 Reloaded ROM IC was then opened in a free hex editor. The one I use is called HxD.
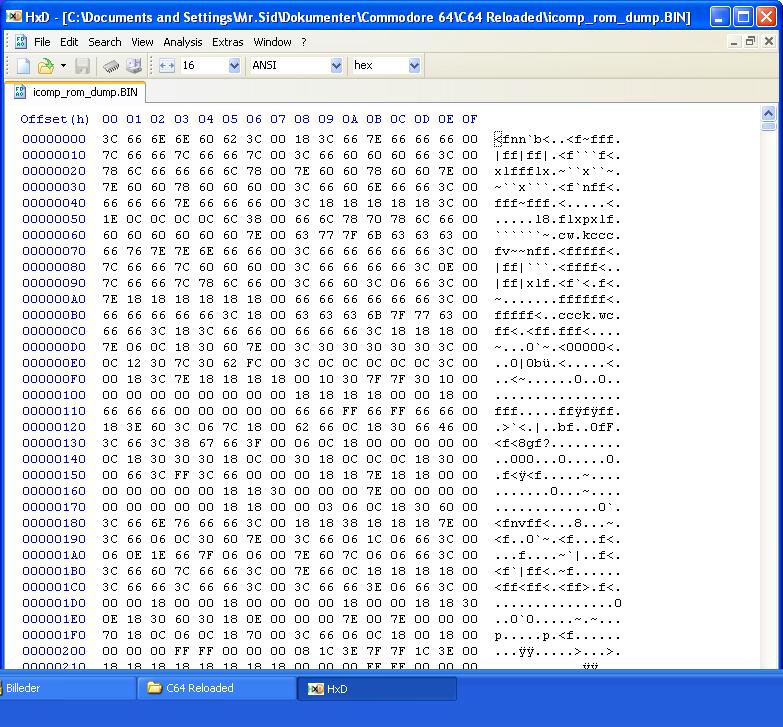
I scrolled down to memory location $6000 (the memory start location of the 2nd Kernal), marked everything between memory location $6000 and $7fff and deleted it!
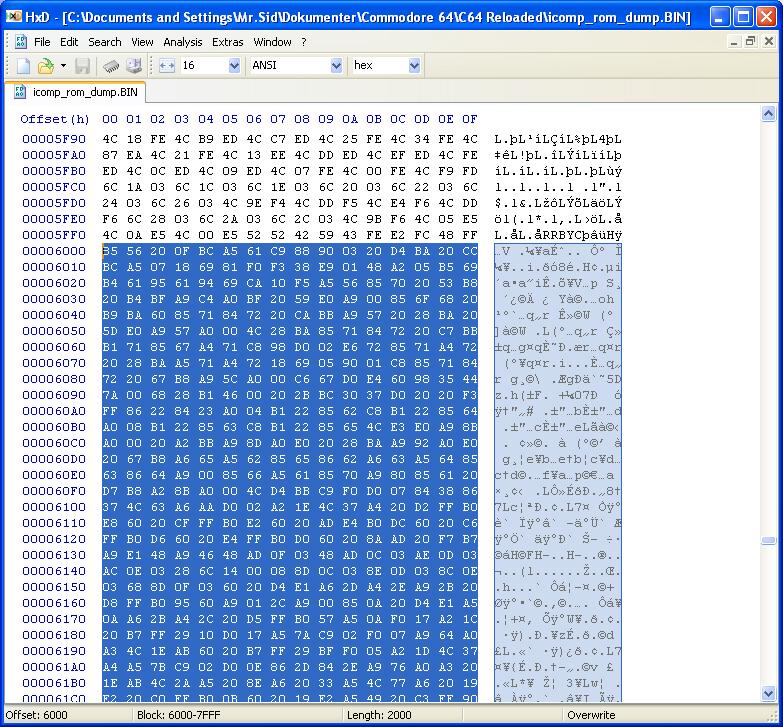
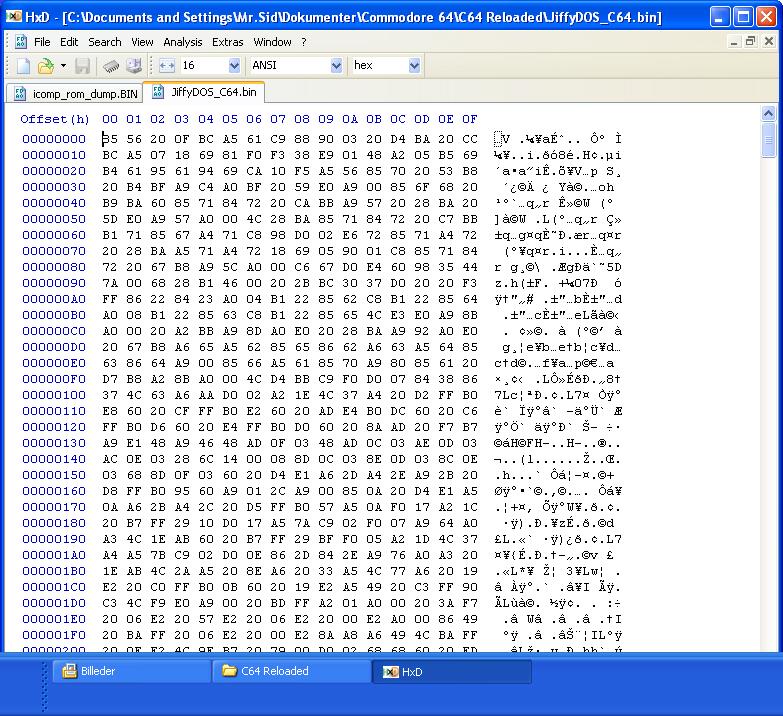
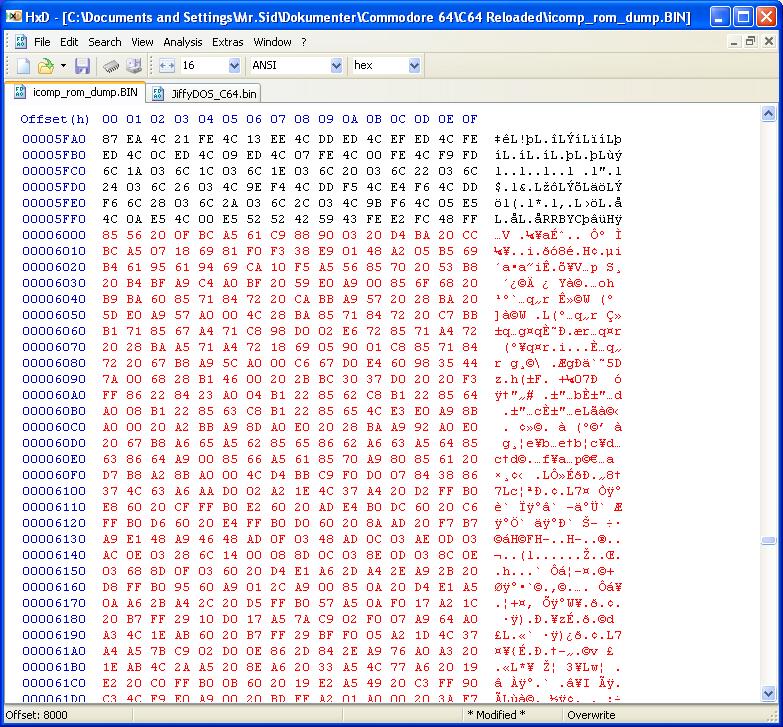
I then loaded my original copy of JiffyDOS (filename = ‘JiffyDOS_C64.bin’) into the hex editor, marked all the JiffyDOS data (CTRL+A), copied it (CTRL+C) and pasted it (CTRL+V) into the original C64 Reloaded dump file where the original data of the 2nd Kernal used to be. The inserted JiffyDOS binary data is marked in red.
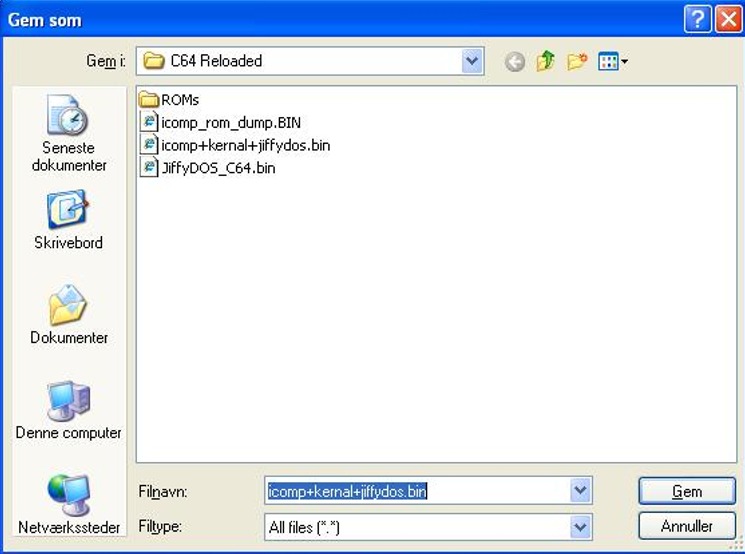
Finally, the updated binary file was saved as ‘icomp+kernal+jiffydos.bin’. This file will go into my own EPROM shortly…
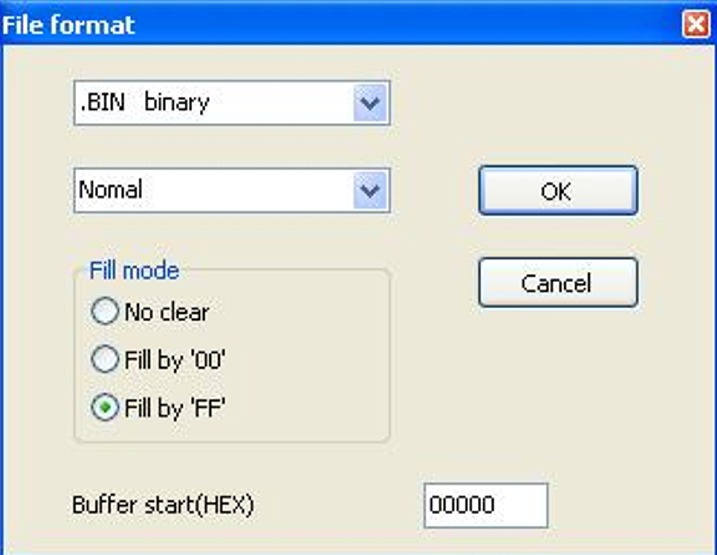
I bought a suitable 27C256 EPROM on Ebay and placed it in the Universal Programmer.
I then returned to the TOP853 Universal Programmer software. Unfortunately the programmer did not have the specific EPROM in its software so I just chose a generic EPROM (27C256 at 12.7V).
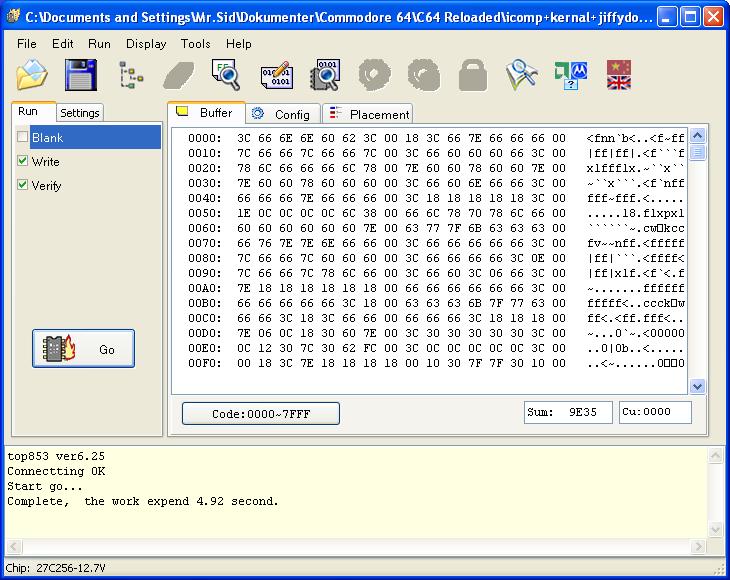
The ‘icomp+kernal+jiffydos.bin’ binary file was then loaded into the TOP853 Universal Programmer software and burned onto the EPROM by pressing ‘Go’. In less than 5 seconds later the IC was ready to go back into the socket on the motherboard.
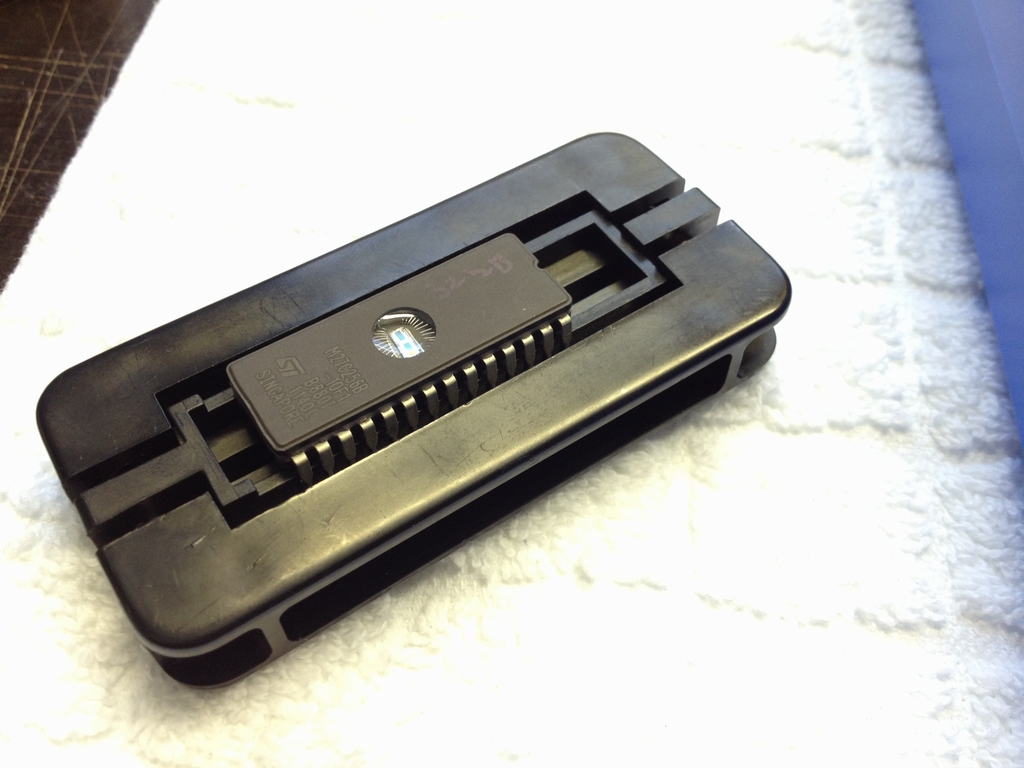
The EPROM has never been used before, so the legs had to be bent inward a little bit to fit the precision socket of the C64 Reloaded board. I have a little tool which makes that task quite easy.
And that’s it – the EPROM safely installed in the precision socket of the C64 Reloaded board and ready to go.
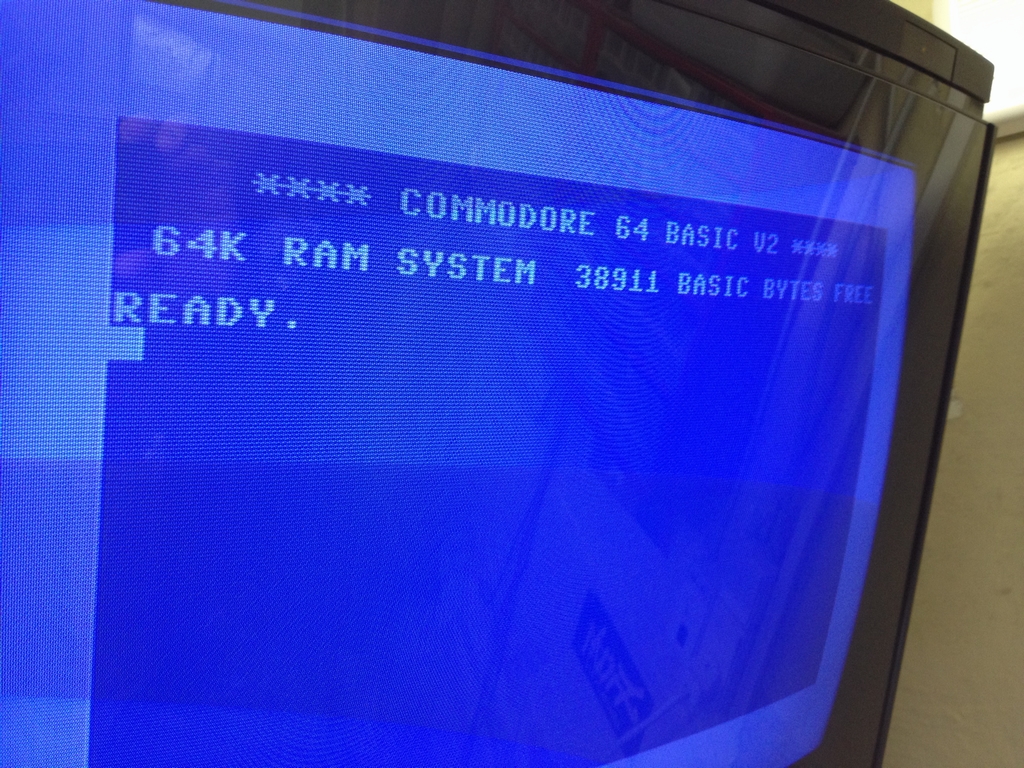
Testing went well as I was greeted by the sweet blue screen of Commodore BASIC V2.
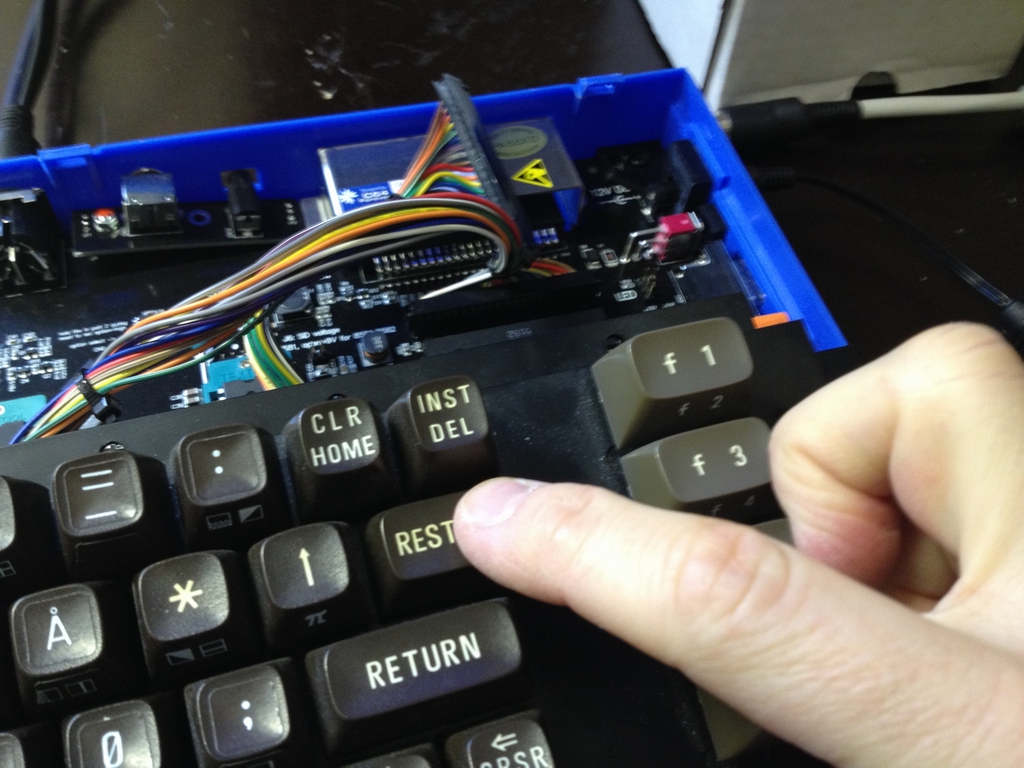
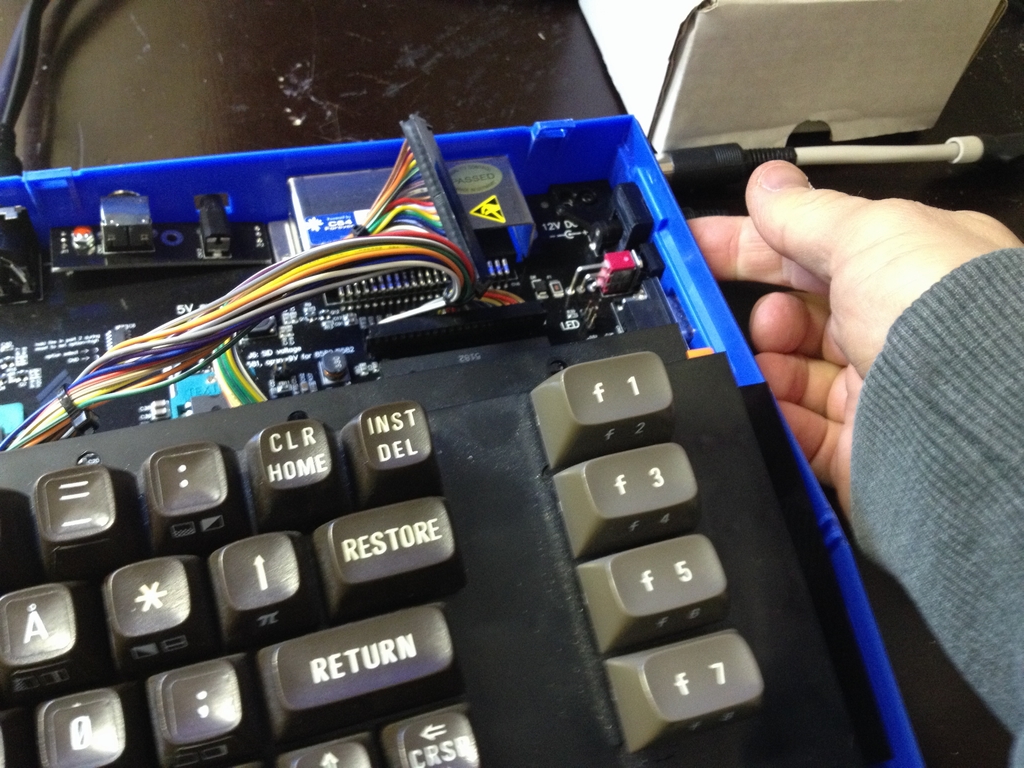
Swapping between kernals is done by pressing the RESTORE button for a few seconds and then flip the power button up (reset function of the switch).
..and here we come JiffyDOS!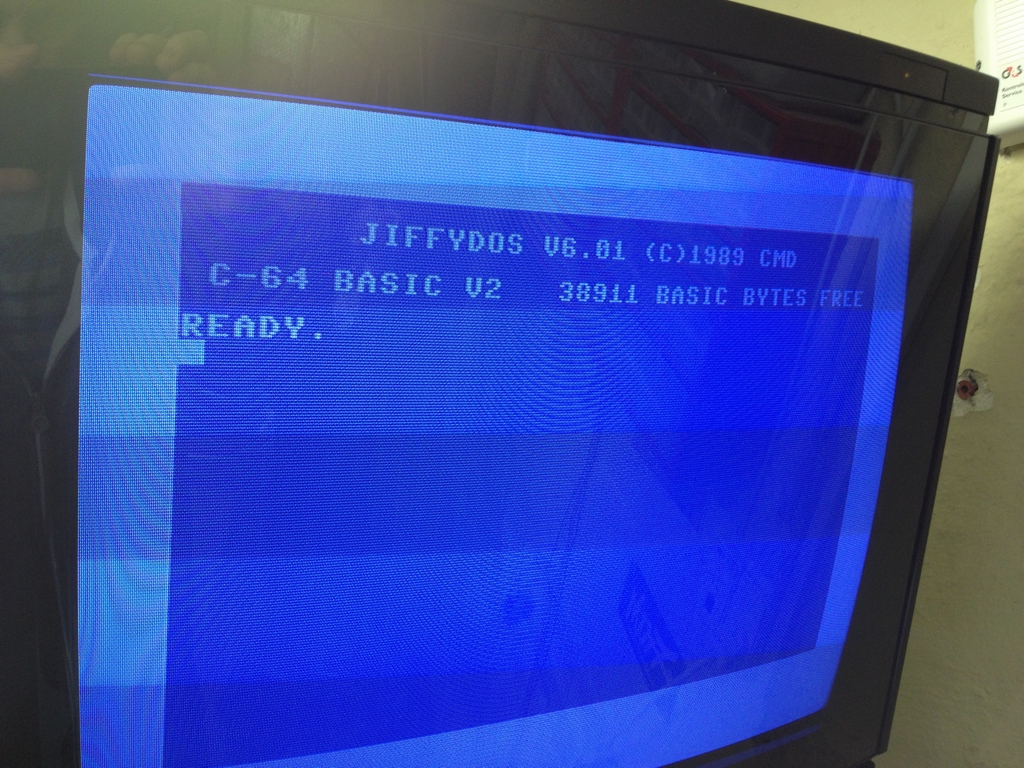
EPROMs can be erased by UV-light. I closed the window on top of the chip with a little piece of metal tape, to avoid that UV light from the sun will erase the data over time.
The easy solution is of course to buy the commercial version of the JiffyDOS IC for the C64 Reloaded as I did here. But where is the fun in that?
© breadbox64.com 2015
Hi,
I tried to write my 27C256 EPROM with a Willem programmer. When I read the C64 Reloaded EPROM I have the same hex data type you show in yours pictures : with a majority of ffff and a dot (.) in the middle…If we take a regular Rom, there are more various chars…Is there an action we can do to convert the data? I don’t understand how you do this translation… If you could help me.
Best regards
I did not do anything particular to show the data as displayed in the post. This is what a Hex-editor/viewer should show you after a dump of the C64R ROMs without any modifications. The data on the original EPROM should look like the image if you follow this link. I think you may have turned on Text mode rather than Hex mode when viewing your file…The data should be correct, it is just displayed unexpectedly.
Hope you get it figured out.
Thanks for your answer
My C64R dump look like yours (same as your link) in my Willem programmer software and any Hex editor software (HxD or Free Hex edit). But if I take a genuine c64 rom bin or a JiffyDos rom bin, many chars are different and you can read little comprehensive words like ´COMMODORE 64 BASIC V2′ near the first part of it. I used the same hex editor , HxD not in text mode and the difference stays…
The difference is the same as seen between yours 2 screens where you say ´I scrolled down to memory location $6000′. The upper image contains a dot in the middle of each line and a majority of ‘f’ VS the lower image that contains different types of chars. I also tried some charset conversion but it doesn’t do any difference.
I think I understand your question now 🙂 I think you may be comparing data at two different memory locations in the C64R dump file. The images you are referring to are images of the Character section (memory location starting at $0000) which has a lot of f’s and dots down the middle in the text section of the Hex editor. The Kernal section (memory location starting at $6000) of the C64R .bin file has a lot more characters.
I just did a quick comparison of the original Commodore 64 CHAR, BASIC and KERNAL .bin files and they look exactly like the data found on the C64R EPROM. I’m therefore pretty shure that all your data is correct and all you need to do is scroll down to where you want to substitute the original CBM Kernal with JiffyDOS.
Thank you very much MtnBuffalo. I had real reading problem and when I saw your snapshots I goes wrong because I believed they corresponded. To resolve my problem I downloaded a newer and adapted version of my Willlem PCB5.0 (the seller of my PCB gave me a link to an old PCB3). Now I have exactly the same as shown in your .bin file! :o) Weeelllllll
But now I have a problem when writing data! My 2 pristeen EPROMs seem to have a problem. The software says ‘Writing error at 0x0’ for one and ‘0x4’ for the other… I tried 12V and 15V power supplies instead of USB 5V. Nothing helps. I should look for an eraser… Hmmmm not cool GRRRRrrrr
Great that you have made some progress. Sounds like you need an UV light eraser to finish up the project 🙂 In my experience, if the EPROM is not completely erased, when trying to write data to it, it will fail. I got an EPROM eraser cheap on Ebay. I think I payed like 8-10$ including shipping from China.
Yes, I will buy an eraser. Thank you for your valuable advice
No problem. Hope you’ll get it all working!
What’s the directions to flash rom with for the switch if needed, which I will need to do if some stuff don’t load with JiffyDOS.
You can find instructions on how to swap between ROMs on your C64 Reloaded MK1 board here (link).