
It has been almost two years since I boldly announced that I would make new keyboards (link) for my C64 Reloaded boards (link). I have now realized that making new keyboards is by far the biggest Commodore 64 project that I have ever gotten myself into… I completely underestimated the amount of time that I had to put into the project before the first working prototype was made.
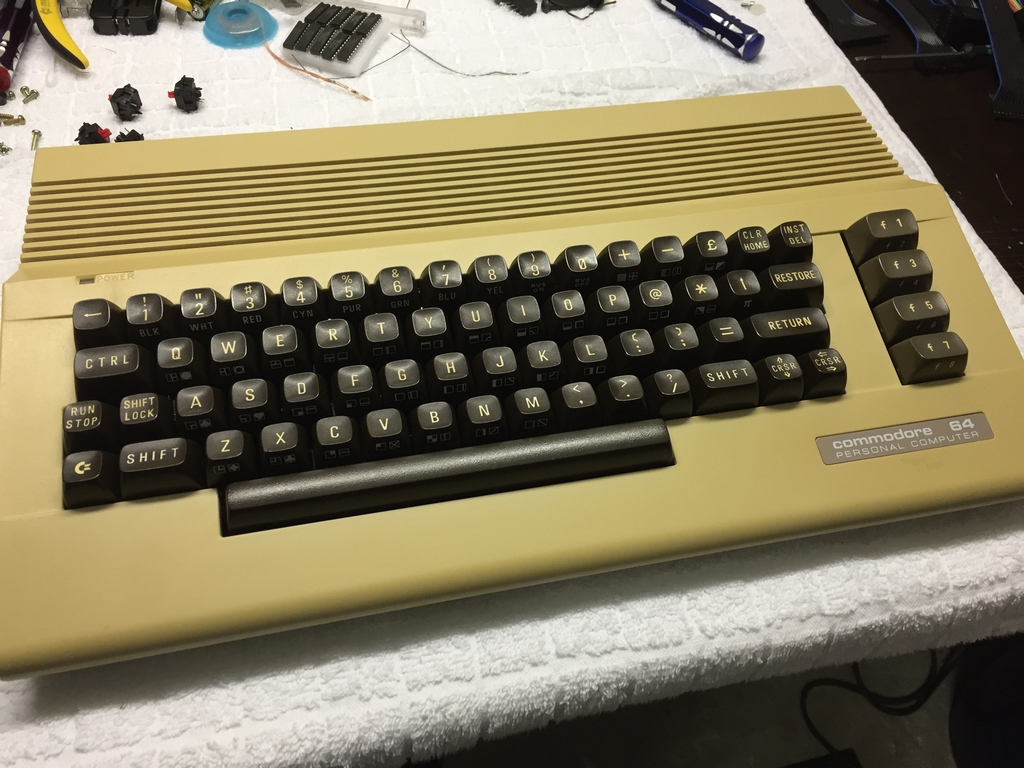
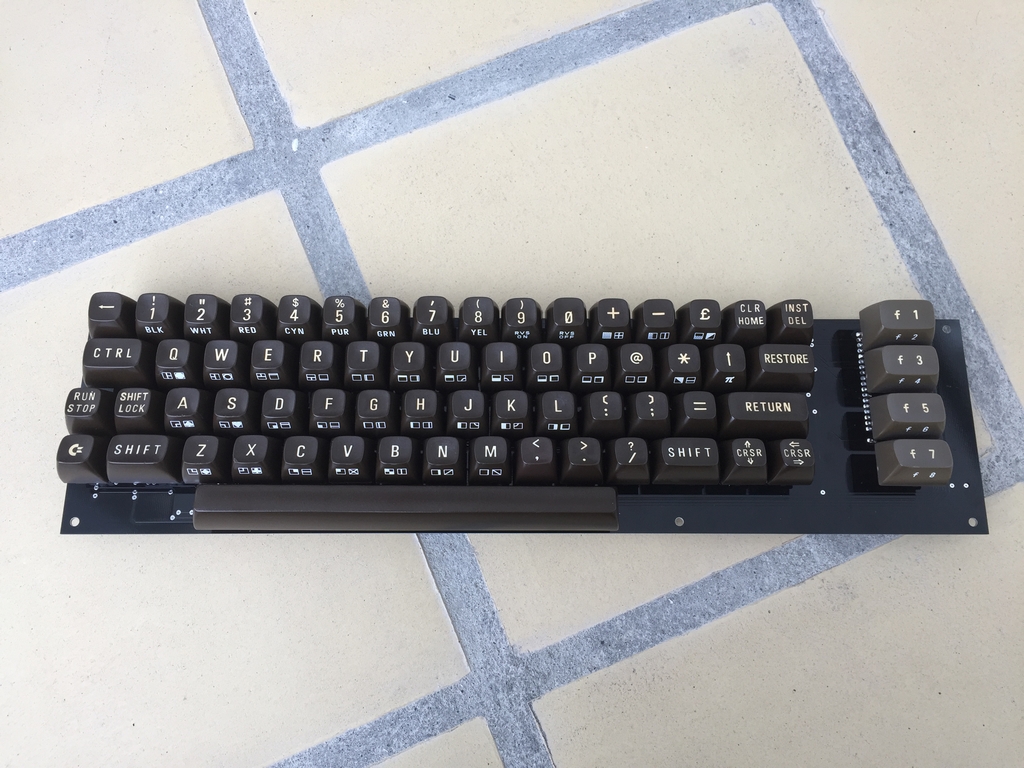
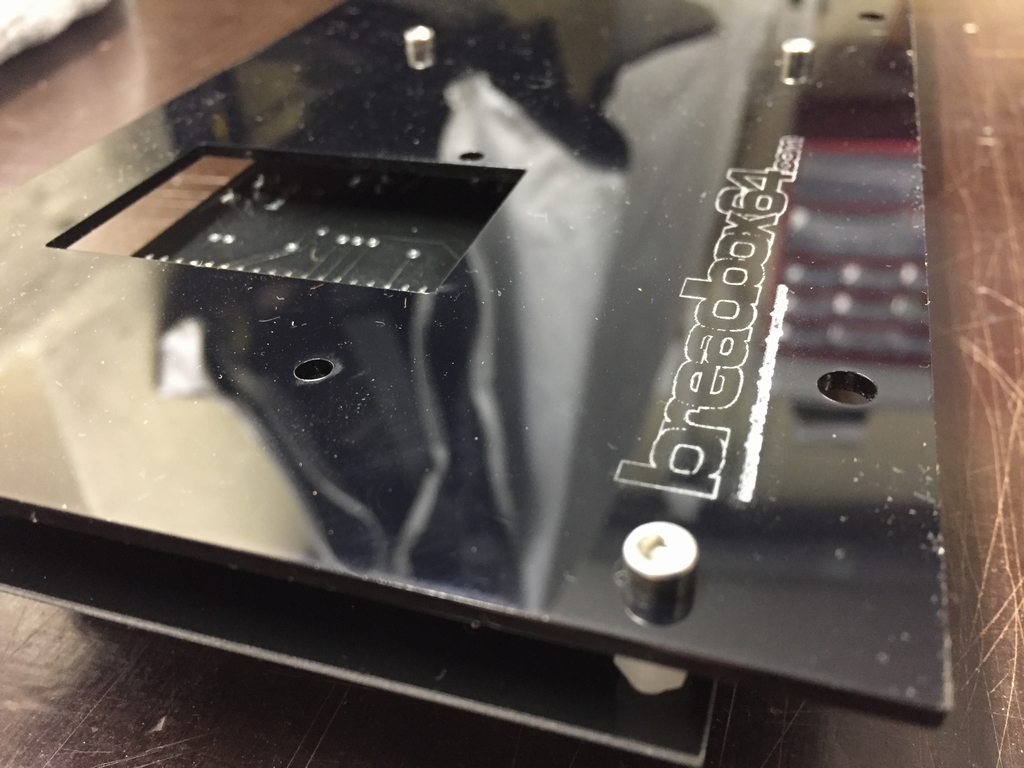
The keyboard is a drop-in replacement for the original keyboard and it should therefore work on all Commodore 64’s, including the C64 Reloaded (link) and the upcoming Ultimate 64 (link). The keyboard consists of a PCB, plastic spacers, a 20 pin ribbon cable, custom made keyboard stabilizers, Costar stabs, 3D printed keycap adapters, some resistors, a few capacitors, two IC’s, a heap of microswitches and a black acrylic board for mounting everything. So quite a few components went into the project along with a looong list of parts and ideas that were eventually discarded before final decisions were made. This is how the first protoype was created!
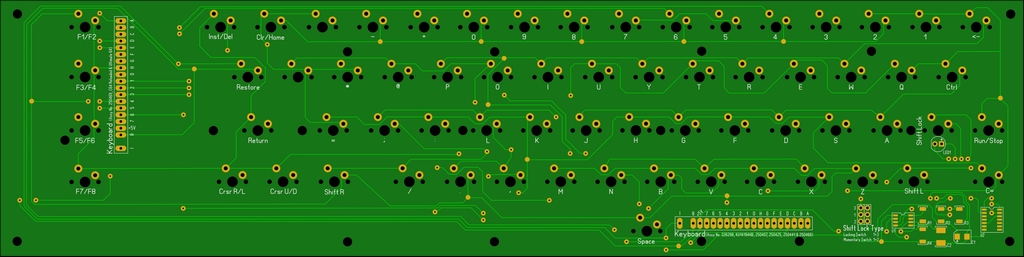
Drawing the Keyboard Prototype PCB
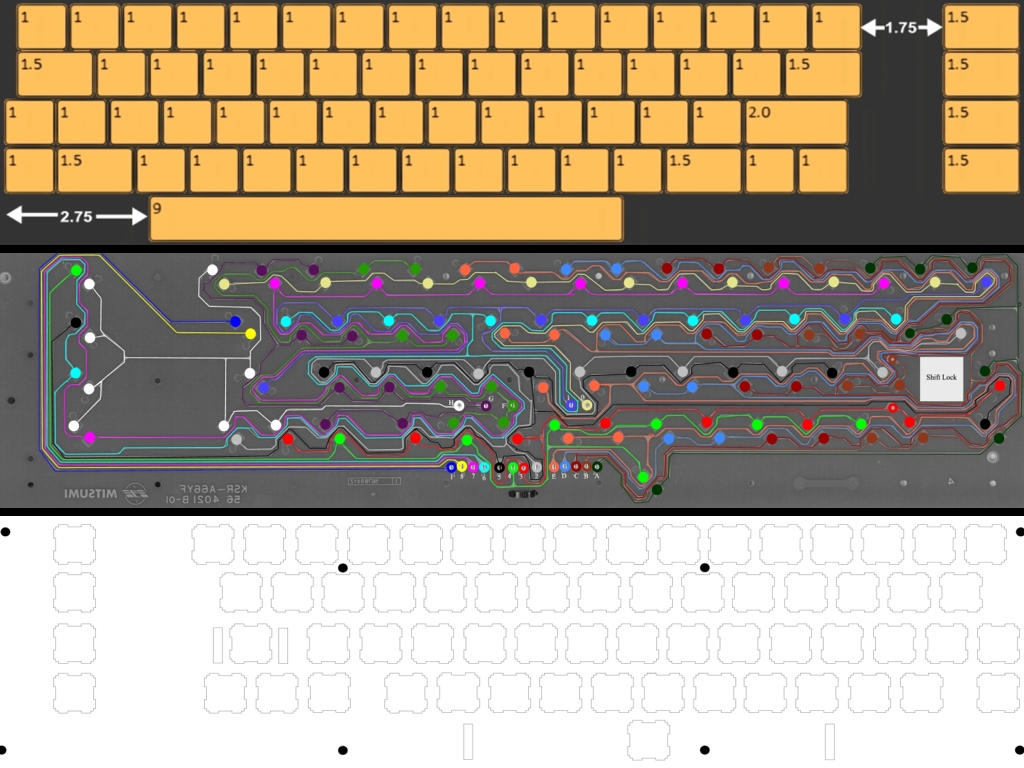
I started out by measuring the physical locations of the keys to ensure that everything would line up nicely and fit in both types of Commodore 64 cases (breadboxes and the newer C64C cases). Then I scanned the original C64 keyboard PCB and colorized each of the copper traces to see what was connected to what.
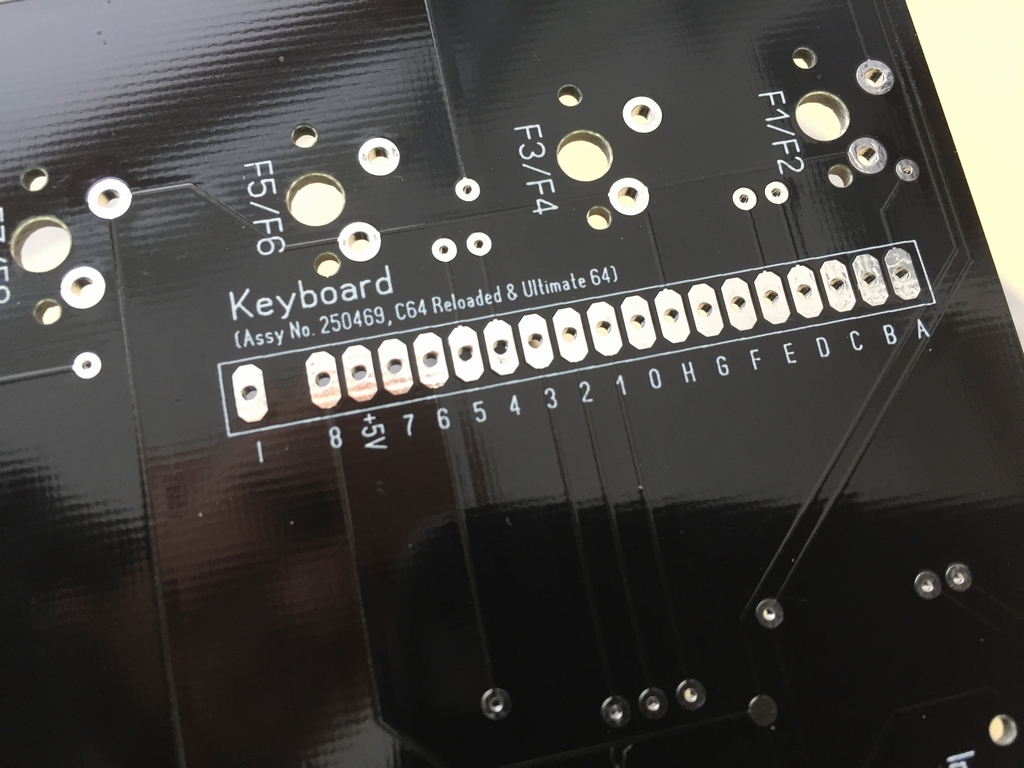
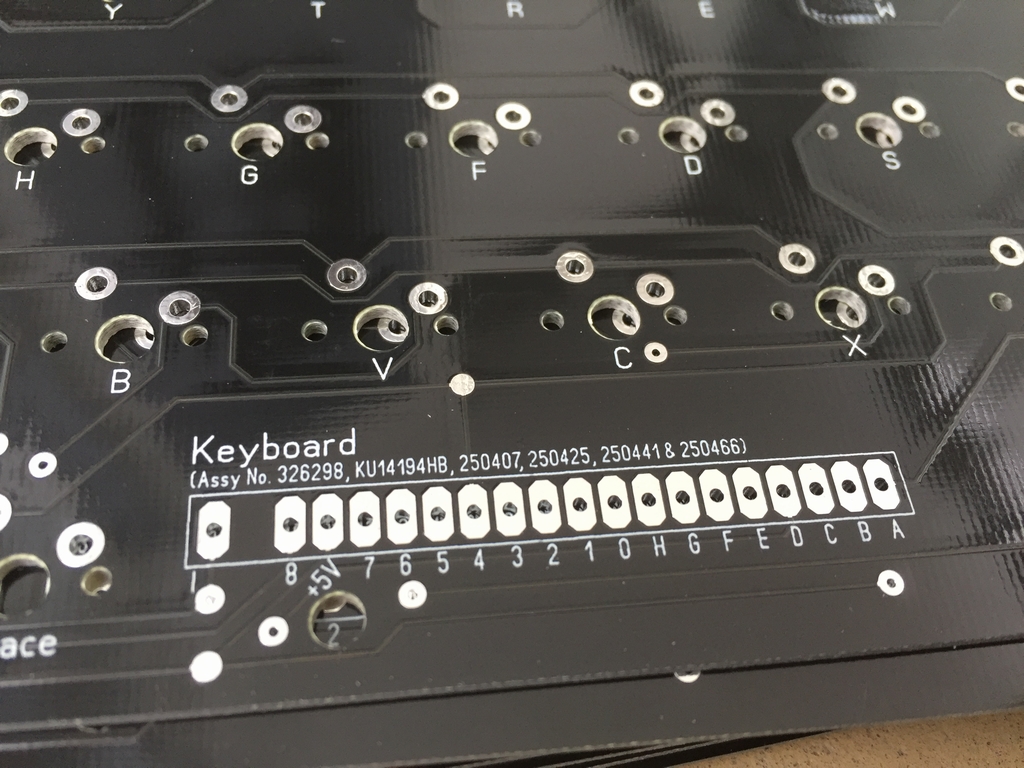
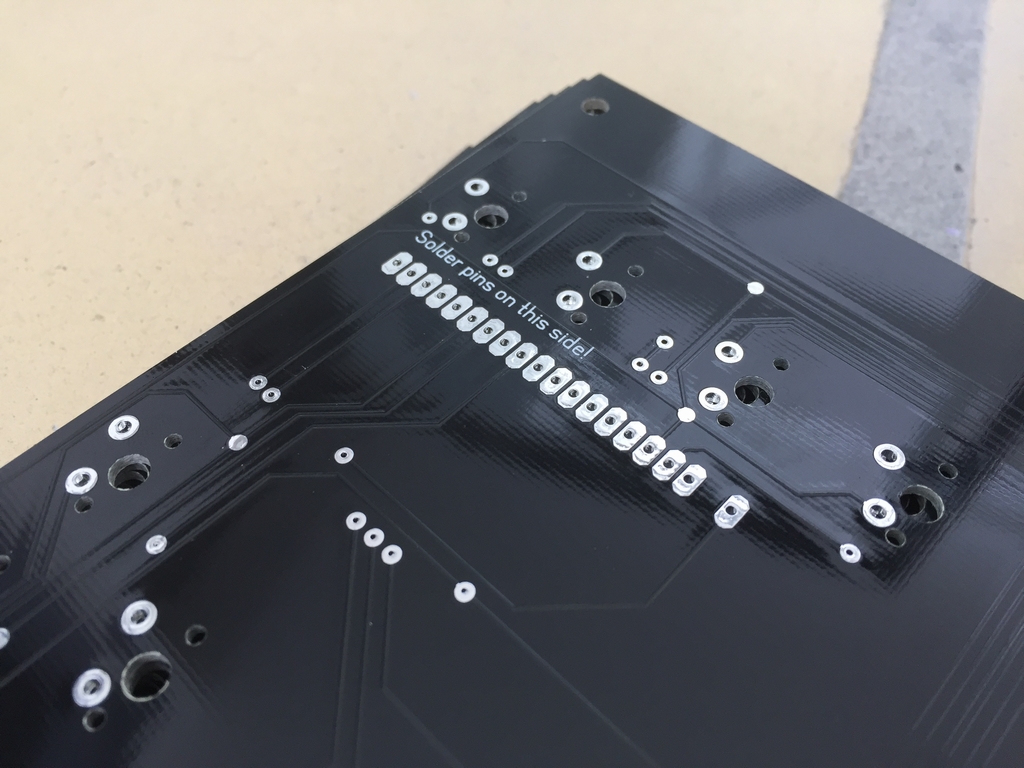
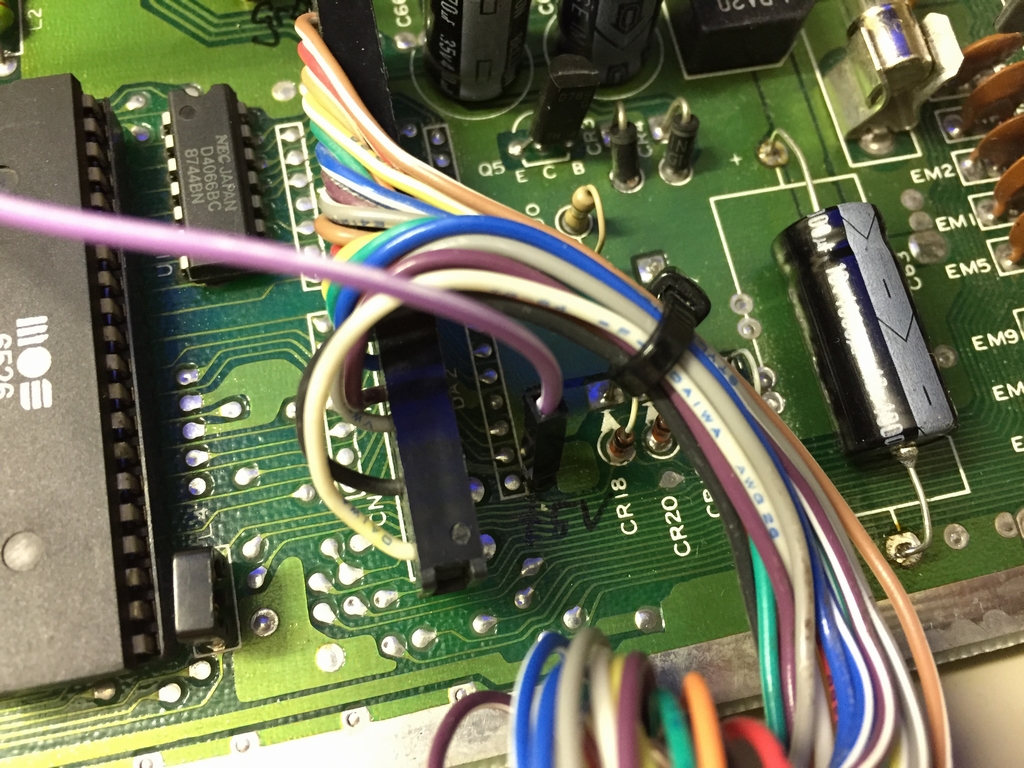
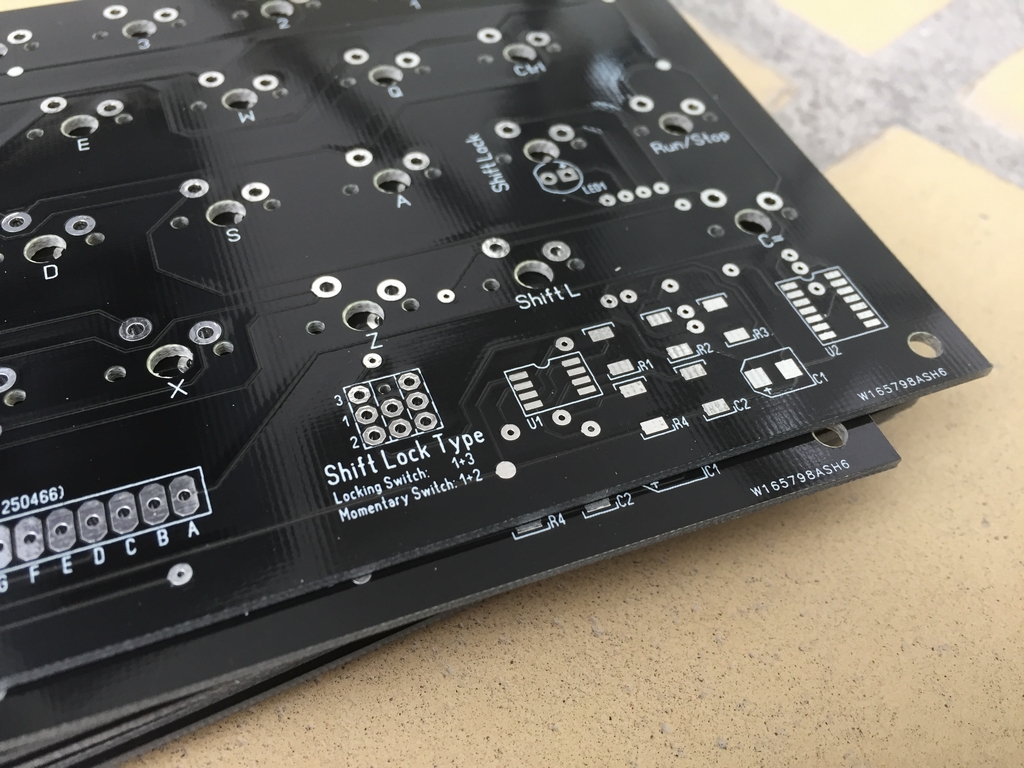
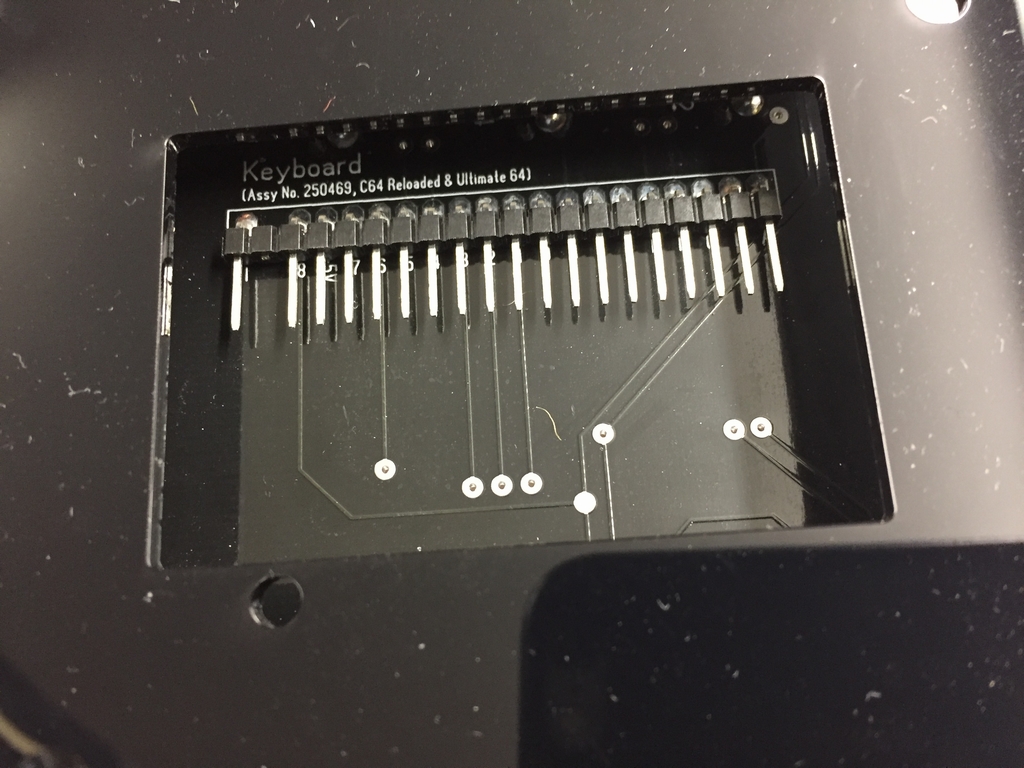
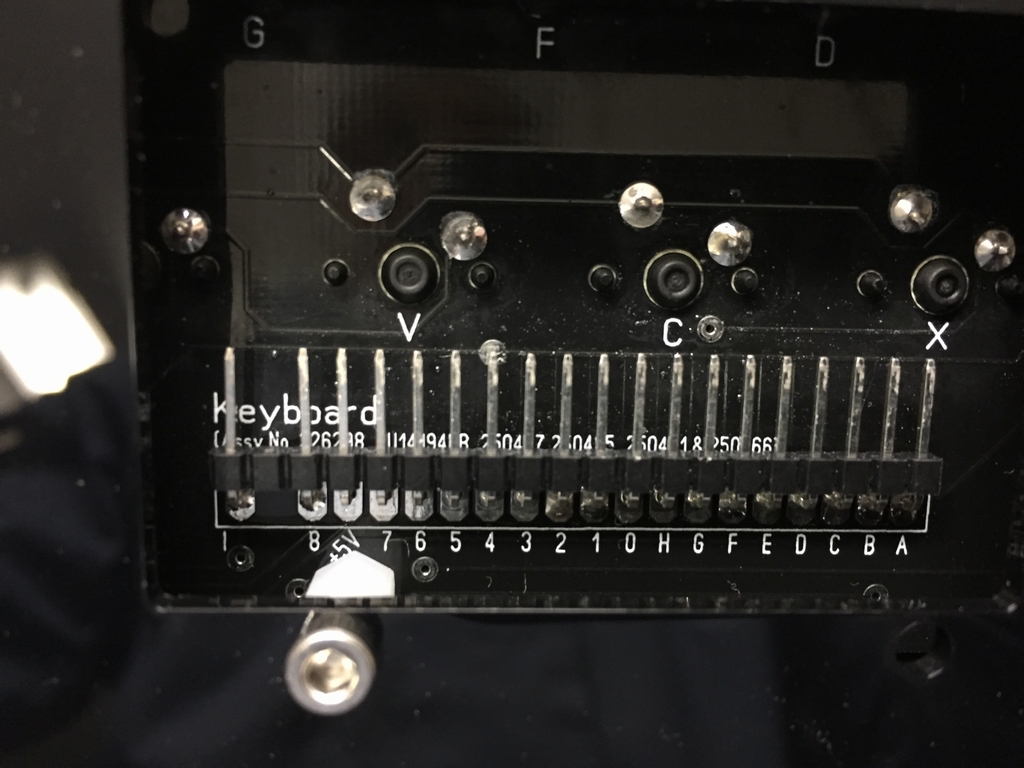
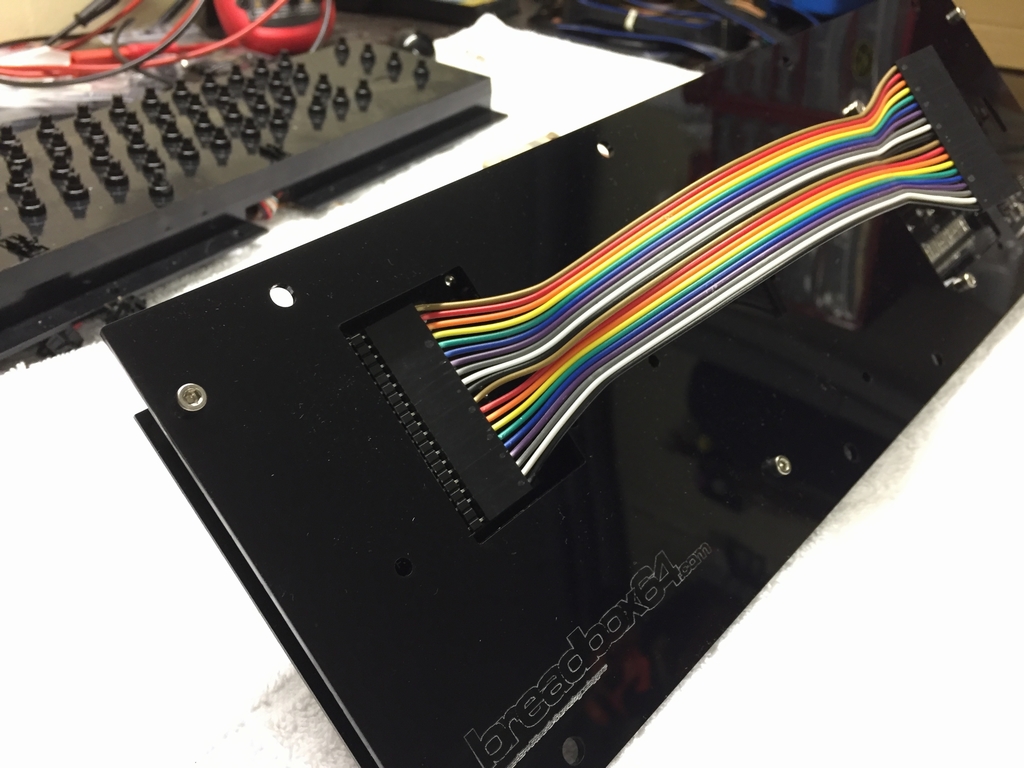
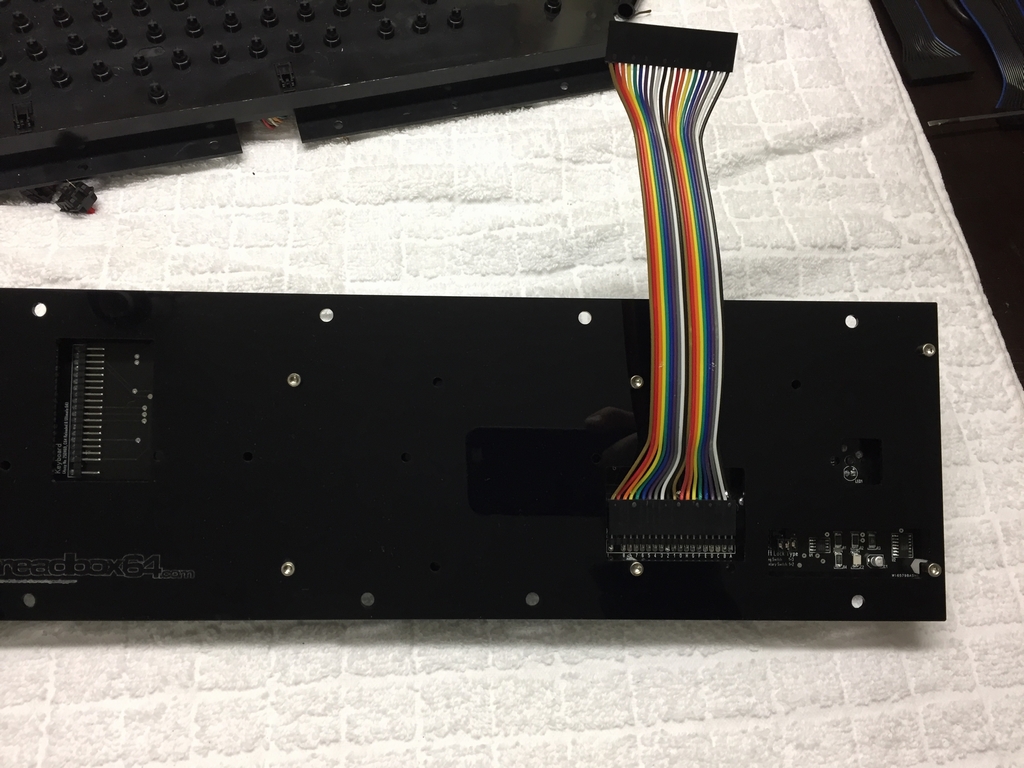
Next up was making the PCB and align all the components perfectly. For this task I used Sprint Layout (link) as it allows a JPEG image to be placed underneath the circuit, hereby making it easier to align everything correctly. Two 20 pin headers were placed at two different locations on the board. The older long boards have the connection on the left side while all short boards and the C64 Reloaded/Ultimate 64 have the connection further to the right. This way a short 15-20 cm ribbon cable can be used for connecting the keyboard to the C64 motherboard.
This is how the keyboard layout looks like as well as the copper traces and the first PCB prototype drawing.
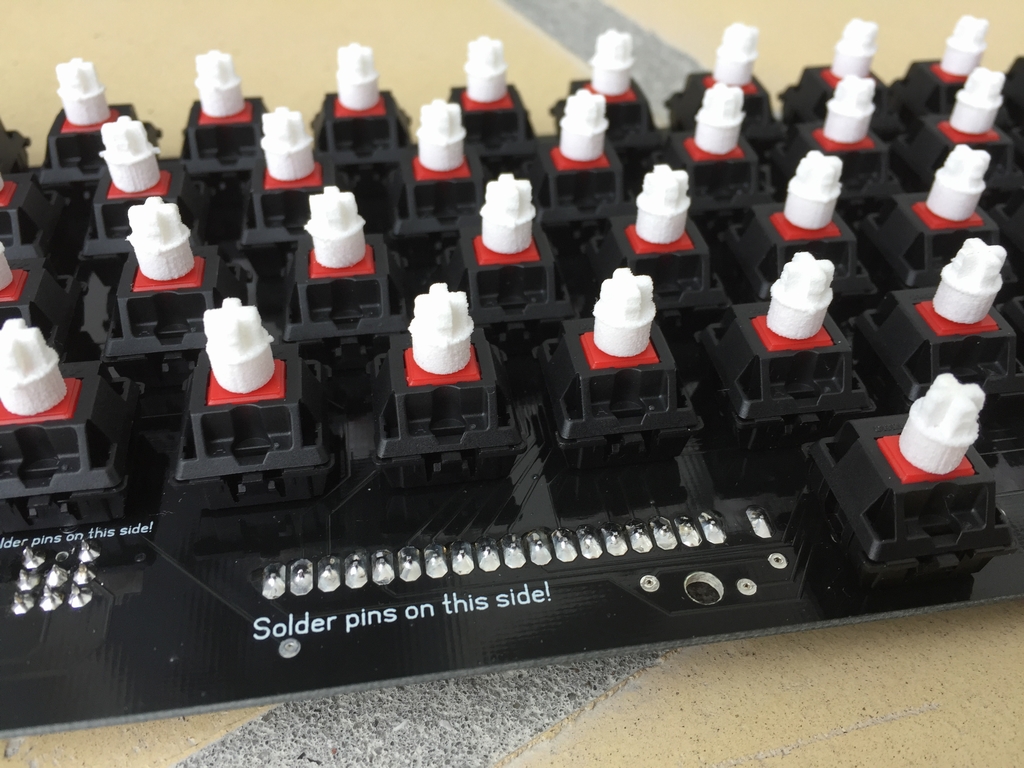
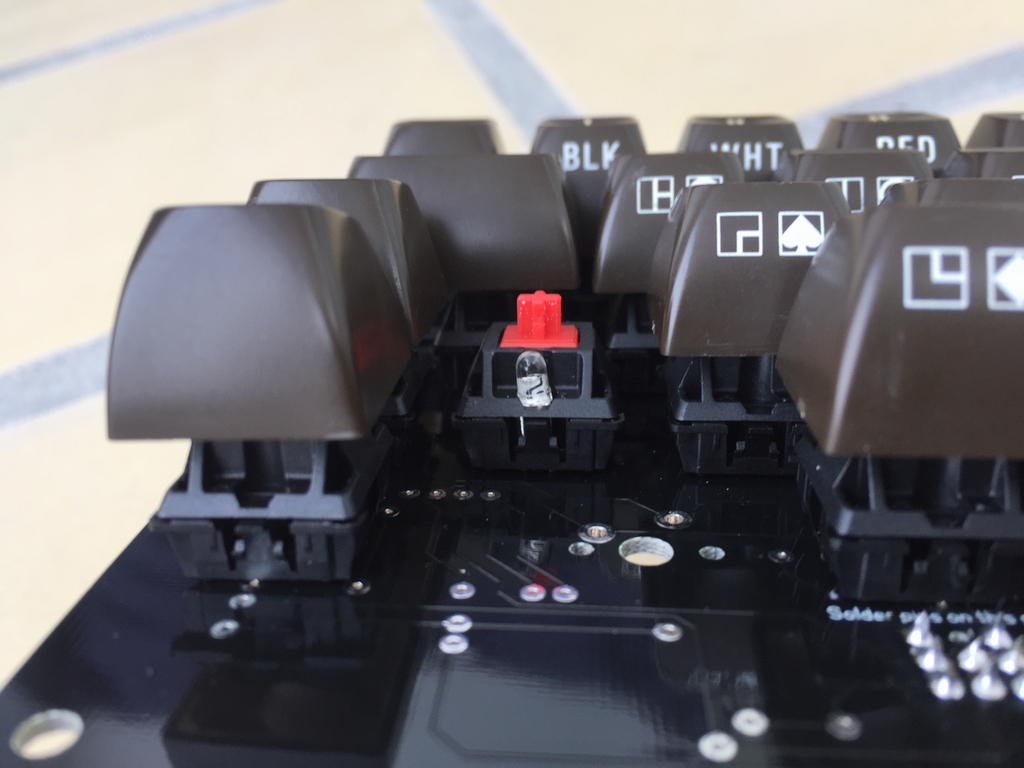
I wanted to use Cherry mx red microswitches as these resemble the feel of the original c64 keyboard. In this context, Cherry mx switches come in two variations; plate mounted and PCB mounted. The former calls for a frame that the keys snap into and the PCB is then attached underneath the frame. This is what a guy on Deskthority has done previously when he made a replacement USB keyboard to fit inside a C64 breadbox, the MeC64 (link). However, maintenance, modifications and/or repairs of this approach is quite difficult because all switches have to be un-soldered in order to fix whatever needs fixing. My goal is to make everything as accessible and repairable as possible. Thus, I opted for the PCB mounted solution even though it may be a little less sturdy than the plate mounted version.
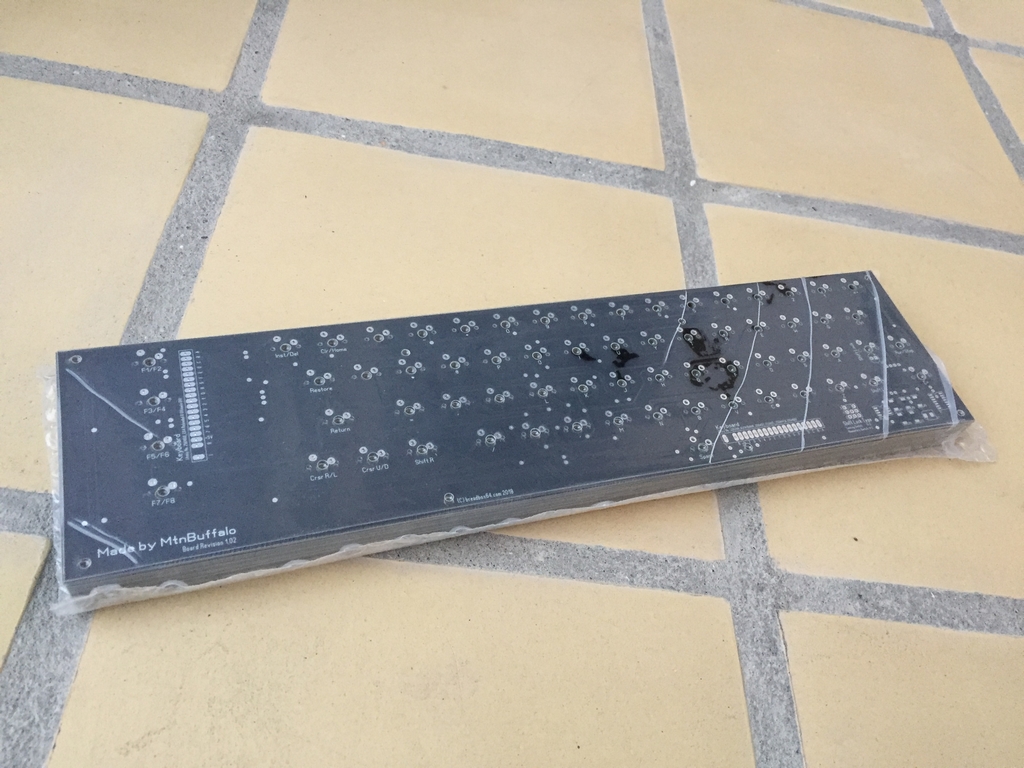
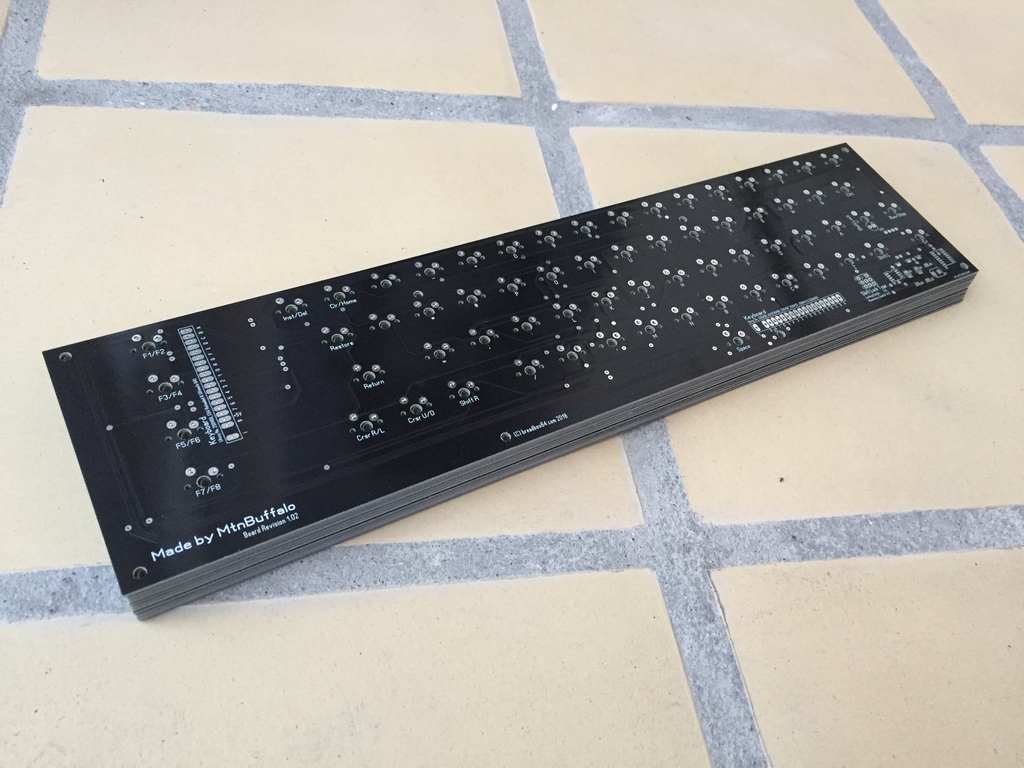
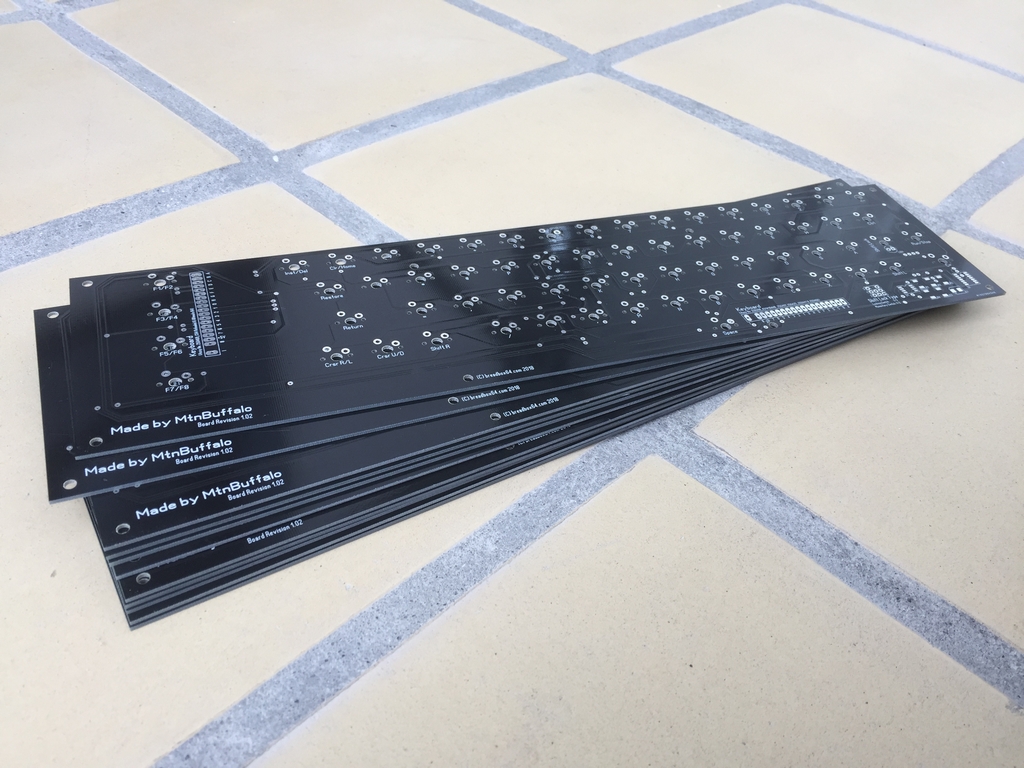
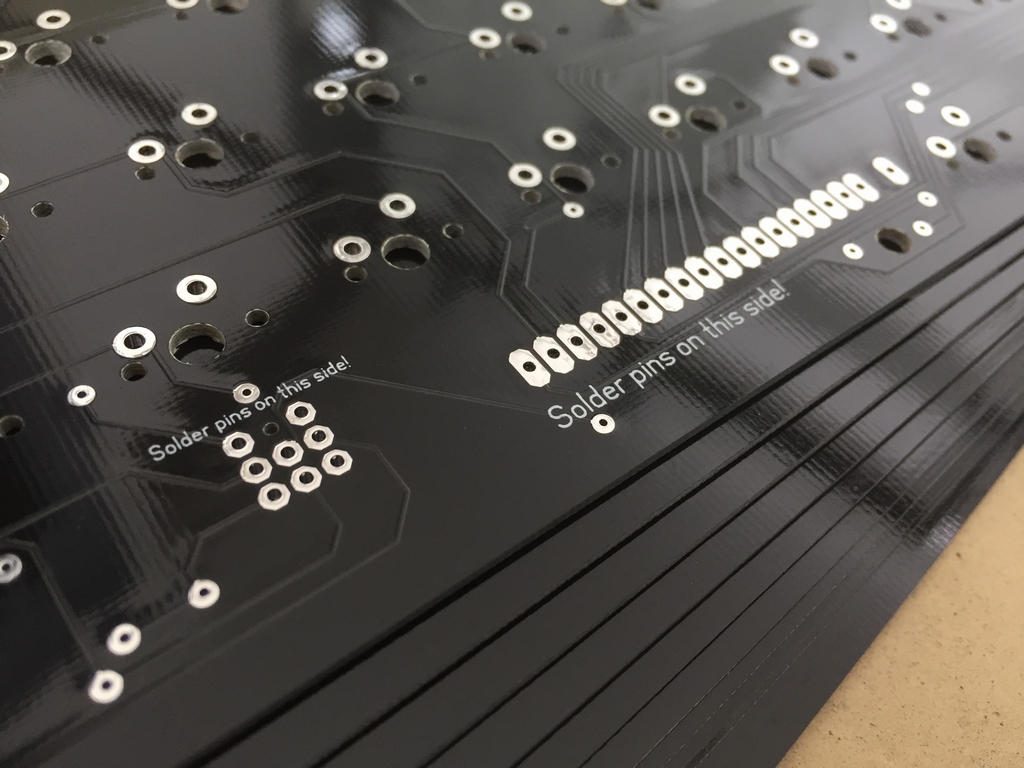
The Keyboard Prototype PCB
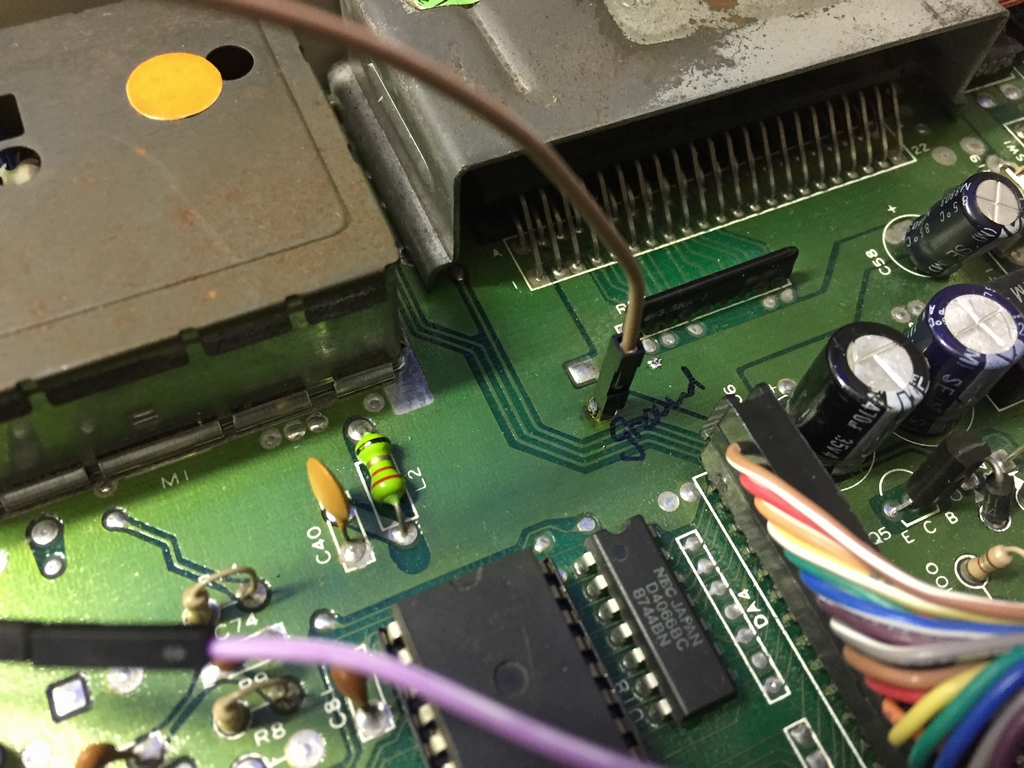
The PCB prototype was ordered from a company in China that makes prototypes in small quantities. Six days after placing the order, I recieved the printed circuit boards. They looked really good and a lot better than what I expected! As evident from the images, the two 20 pin headers have been marked with the motherboard revisions that they will fit the best – we want to keep things nice and tidy, right?
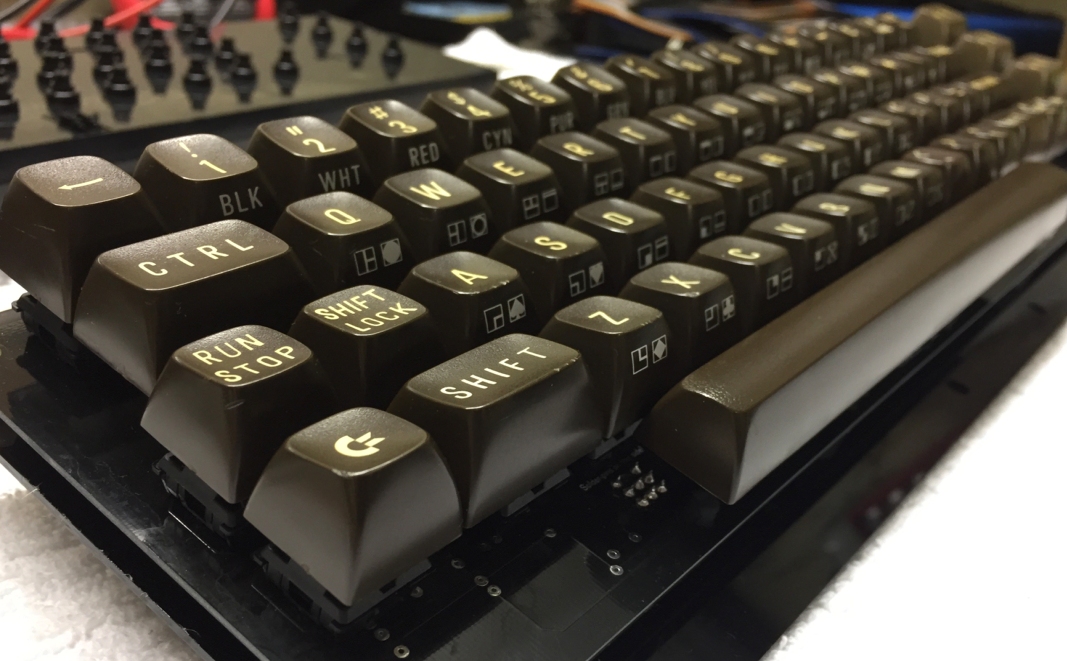
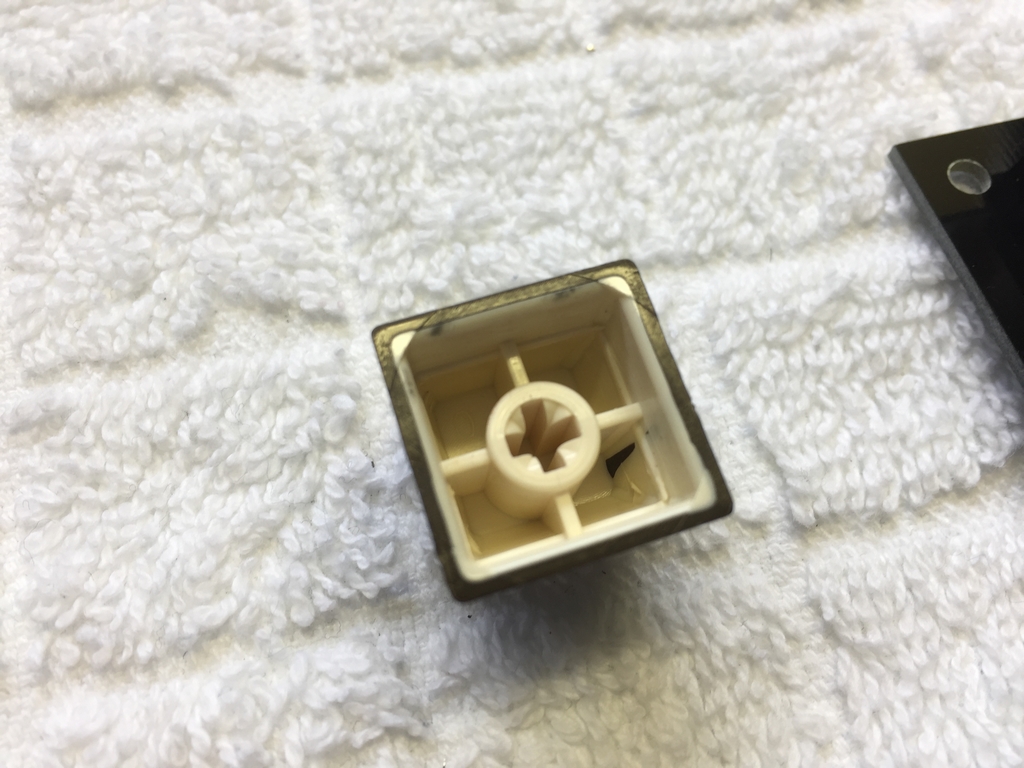
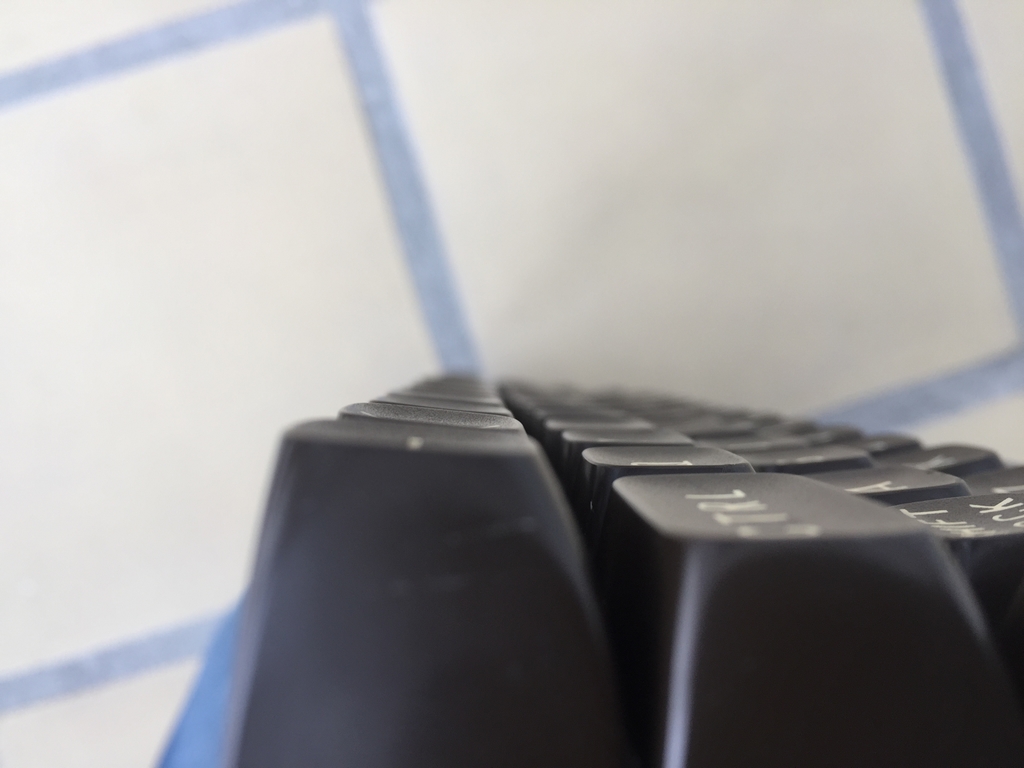
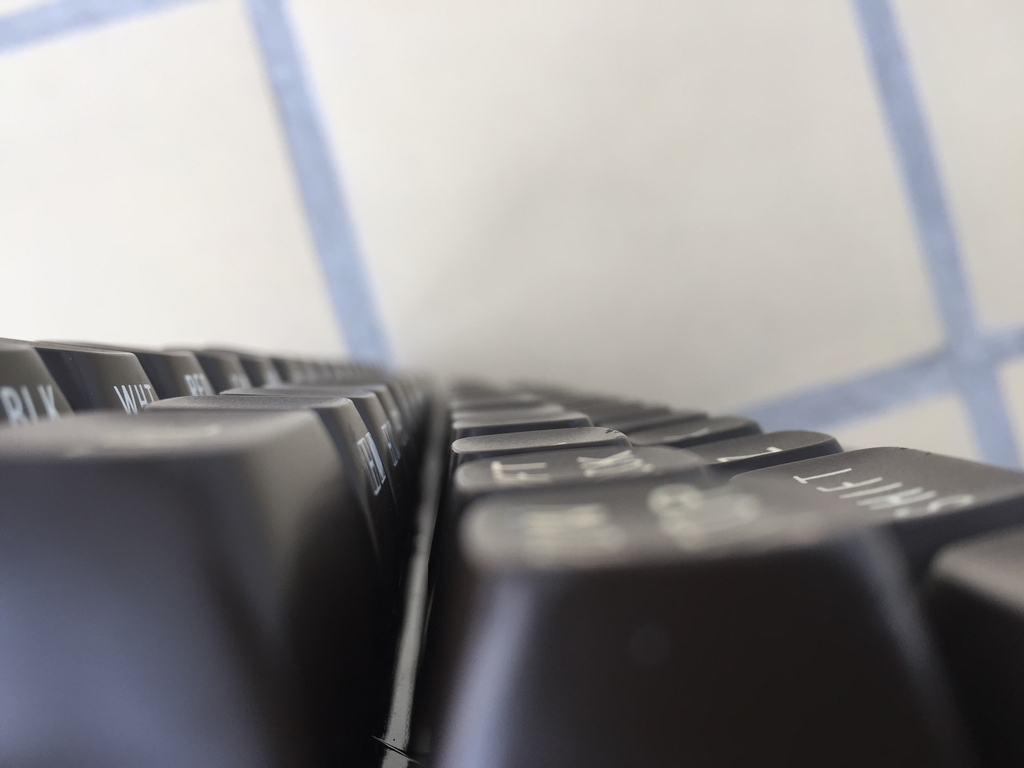
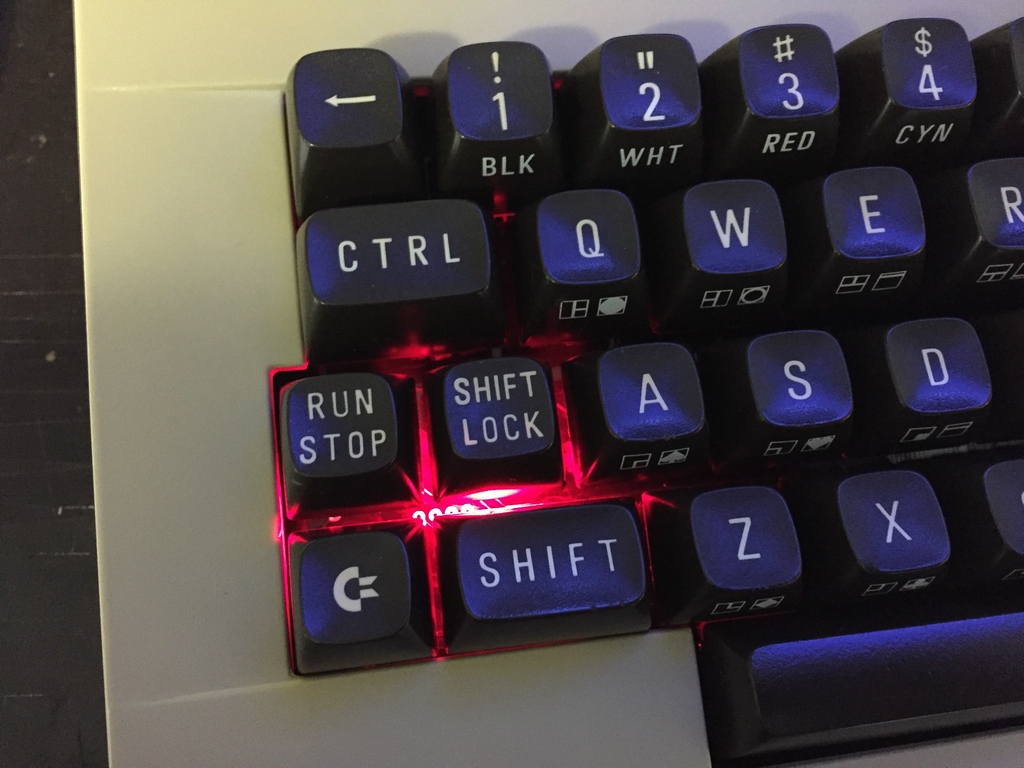
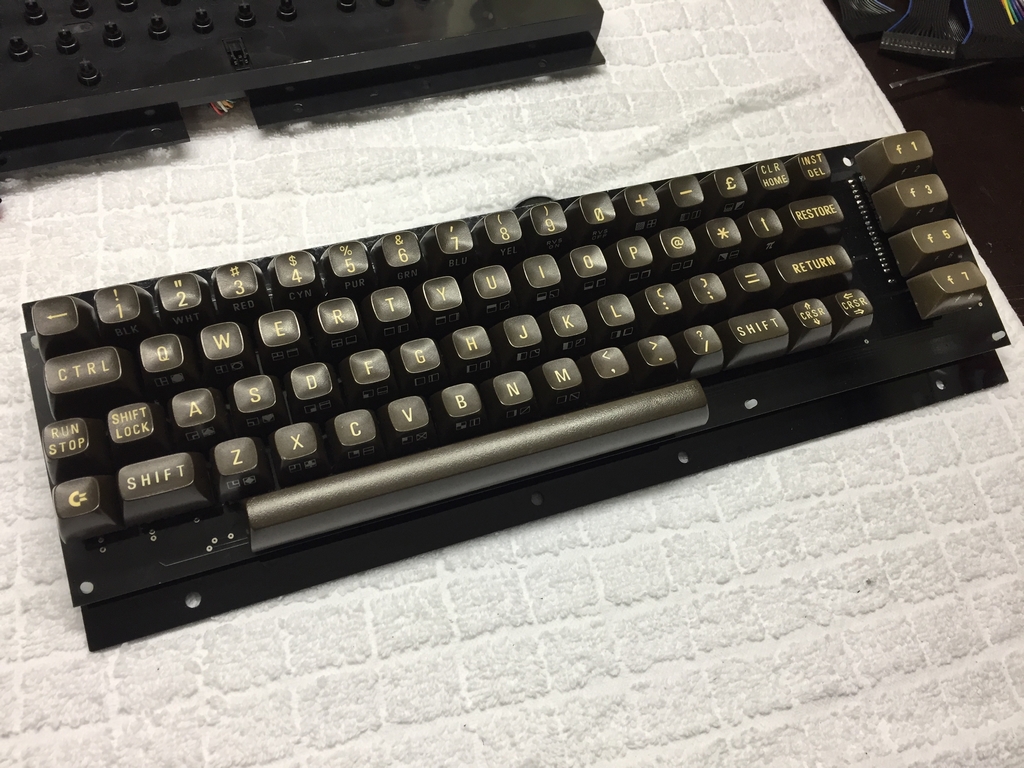
In order for the original keycaps to fit the Cherry mx switches, 3D printed key adapters have to be used. I got mine from Shapeways a long time ago but they have since removed them from their shop due to issues with the prints. It is still possible to get the drawing from here (link) and print them somewhere else if I should need some more in the future. It should be noted that I have only tested the key adapters with the type of C64 keycap imaged below and the Cherry mx swithces!
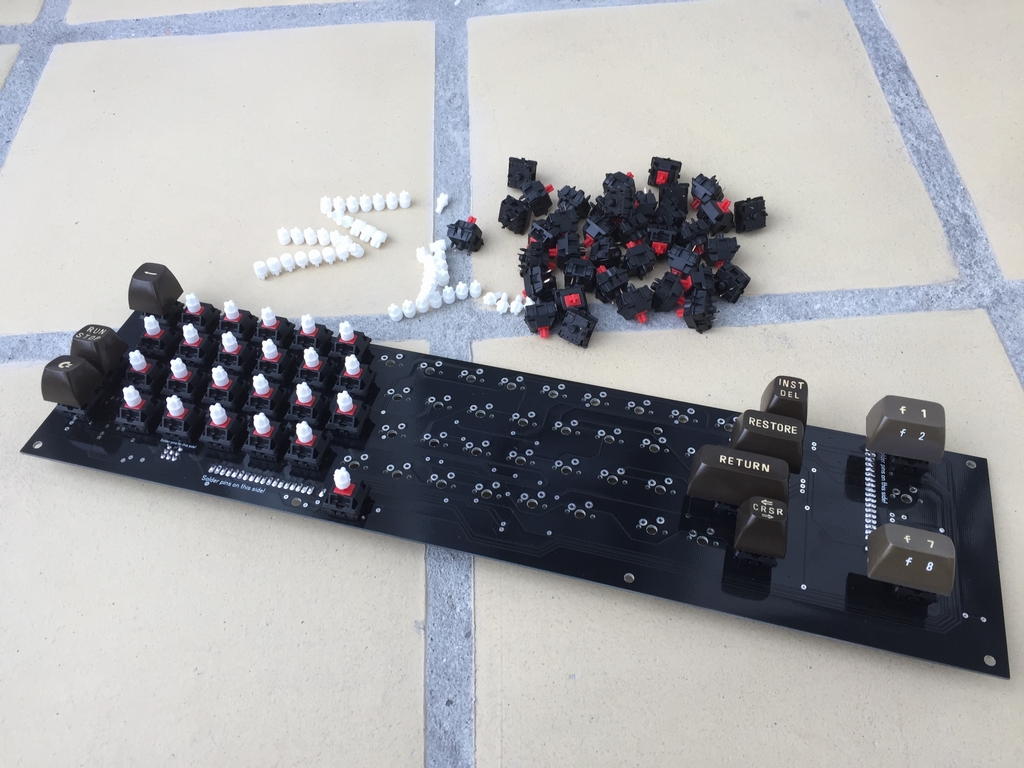
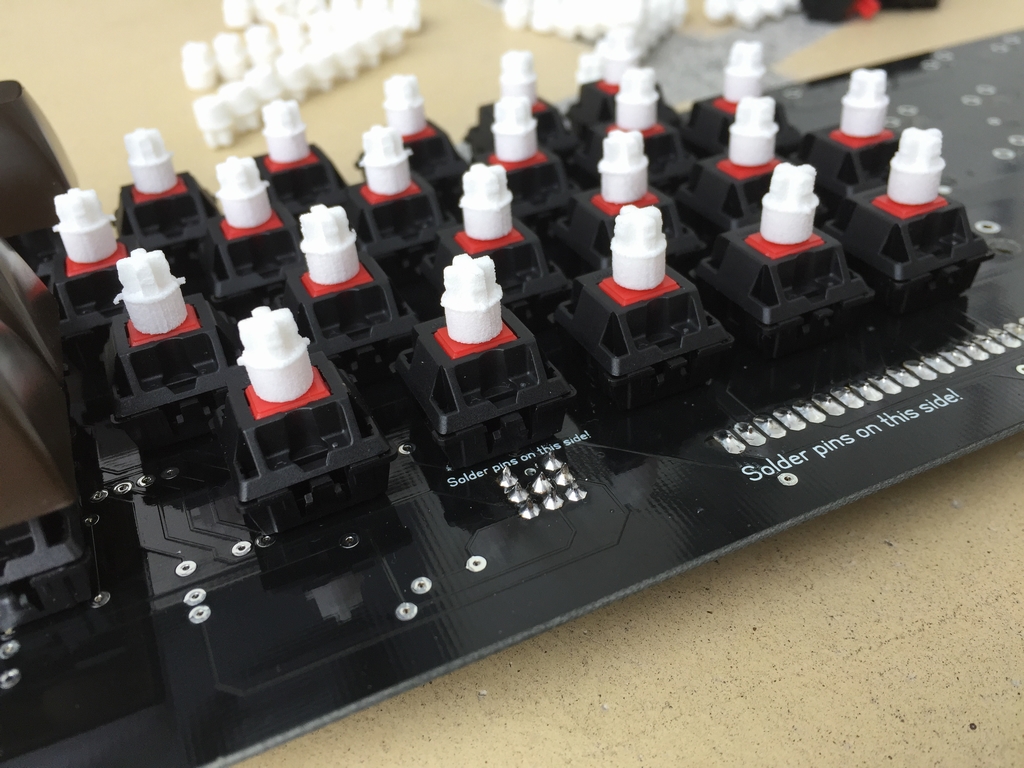
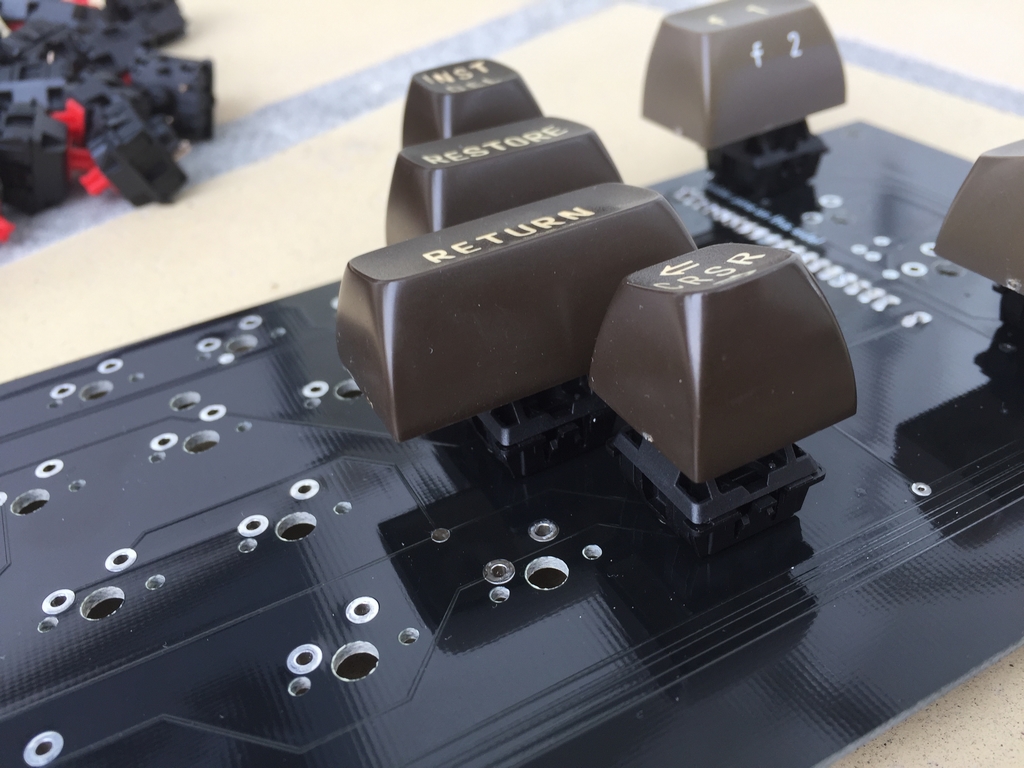
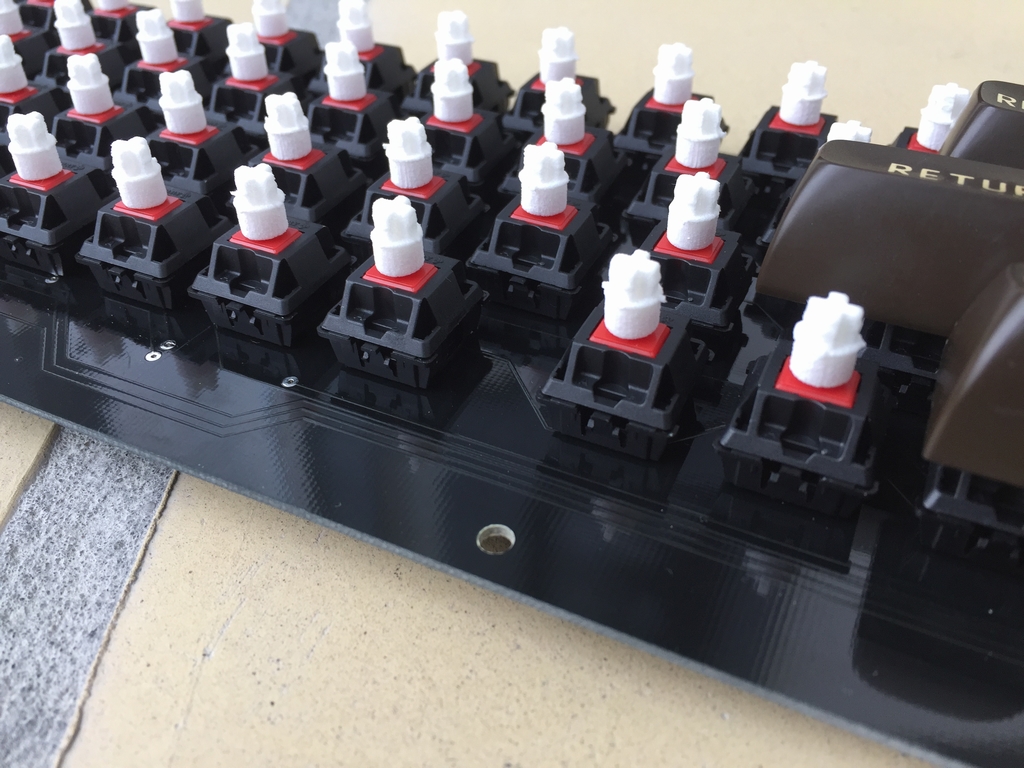
The 3D adapters have to fit perfectly in order to get the same height of the keys. I think it turned out pretty good!
The Shift Lock Solution
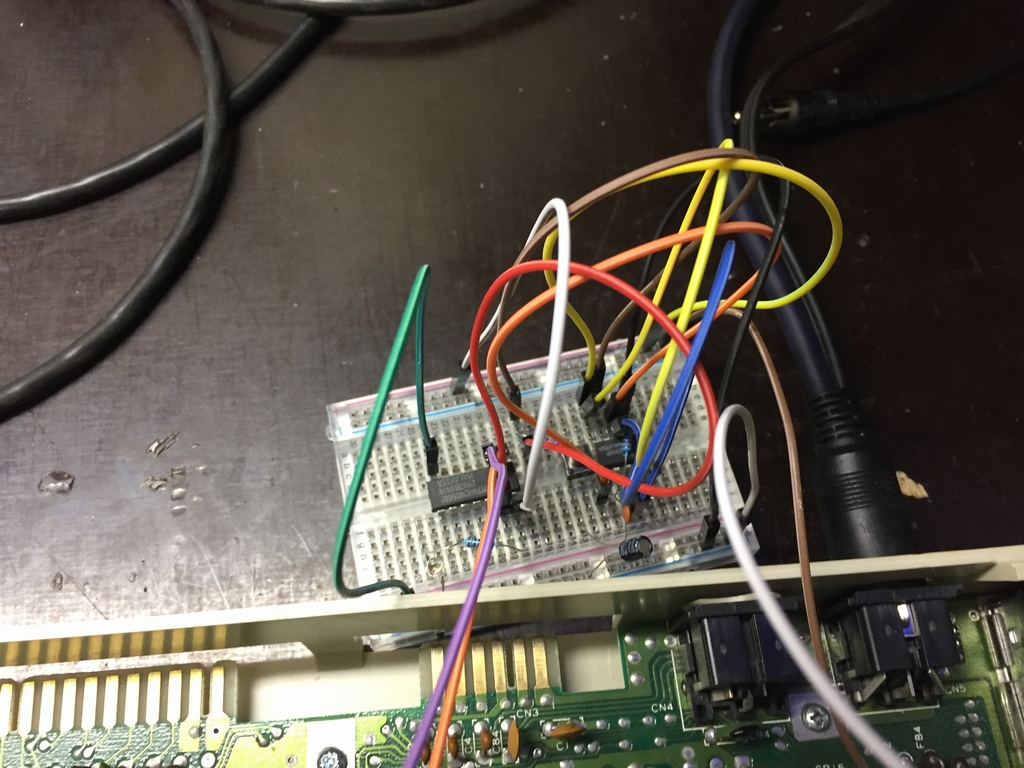
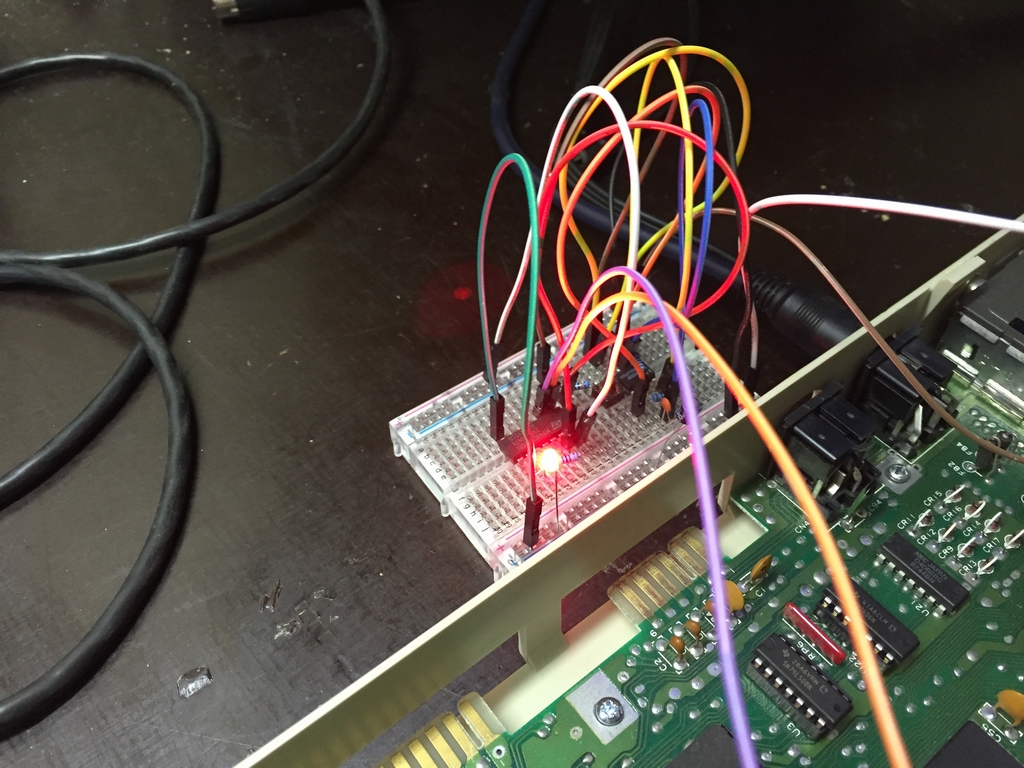
The original Shift Lock key uses a latching/locking type switch. Unfortunately, Cherry discontinued making a locking switch so I had to come up with another solution. I therefore made a small circuit which adds a push on push off functionality. This way a standard non-latching Cherry mx switch can be used to turn on the Shift Lock and when pressed again, turn it off. In order to get a visual indication of the state of the switch (on or off) a 3 mm LED is placed underneath the keycap and lights up whenever the switch is activated. The circuit is made from a few components including a NE555 timer, a 4066 analog switch, some resistors and two capacitors. The circuit draws about 90 mW when the Shift Lock is activated so this should not put too much strain on the old C64 power supplies.
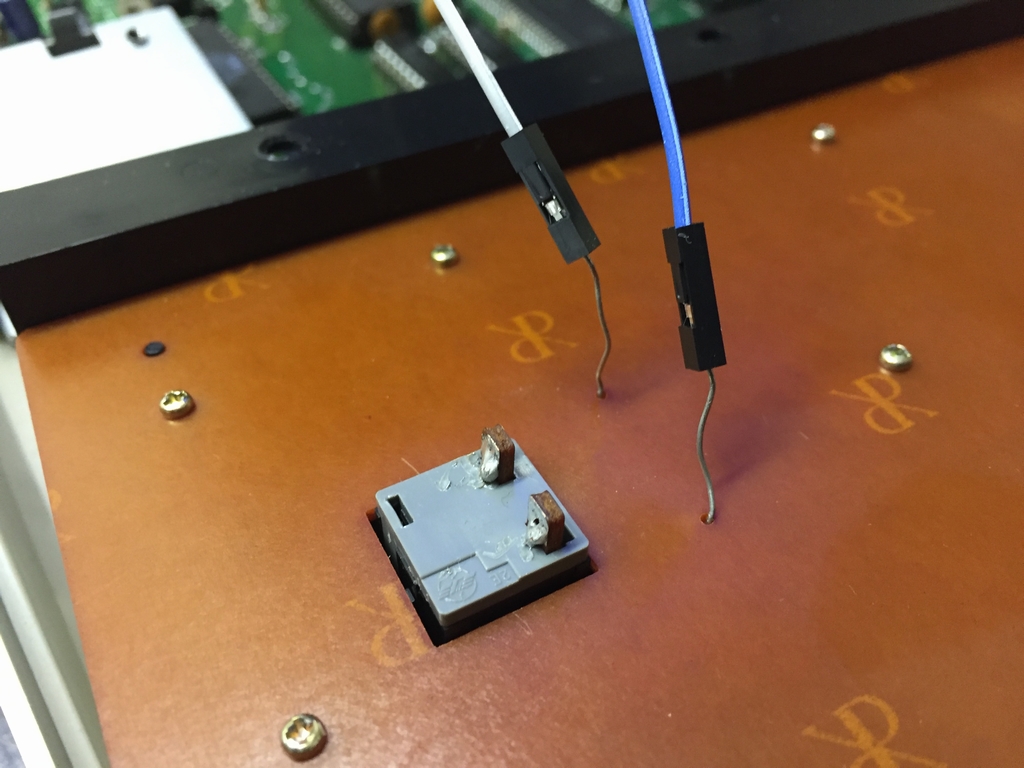
Before transferring the circuit onto the keyboard PCB, the push on push off circuit was tested with a simple breadboard connected to a C64. On the final keyboard PCB, the circuit is powered using the 5V line going to the keyboard. This 5V line is not used on the original Commodore 64 keyboards, so it came in handy for powering the Shift Lock circuit on my keyboard.
The push on push off circuit is placed in the lower right corner of the PCB. A 3mm LED can easily be fitted into the Cherry switches and even in daylight, the LED has plenty of light to be seen clearly. And if it is too bright or dim, its simply a matter of exchanging one resitor on the PCB.
If I manage to get a Cherry mx locking type switch, I can simply replace the microswitch without a big hassle. All I have to do is replace the momentary switch with the locking type and move the pin headers next to the circuit to accommodate the locking switch.
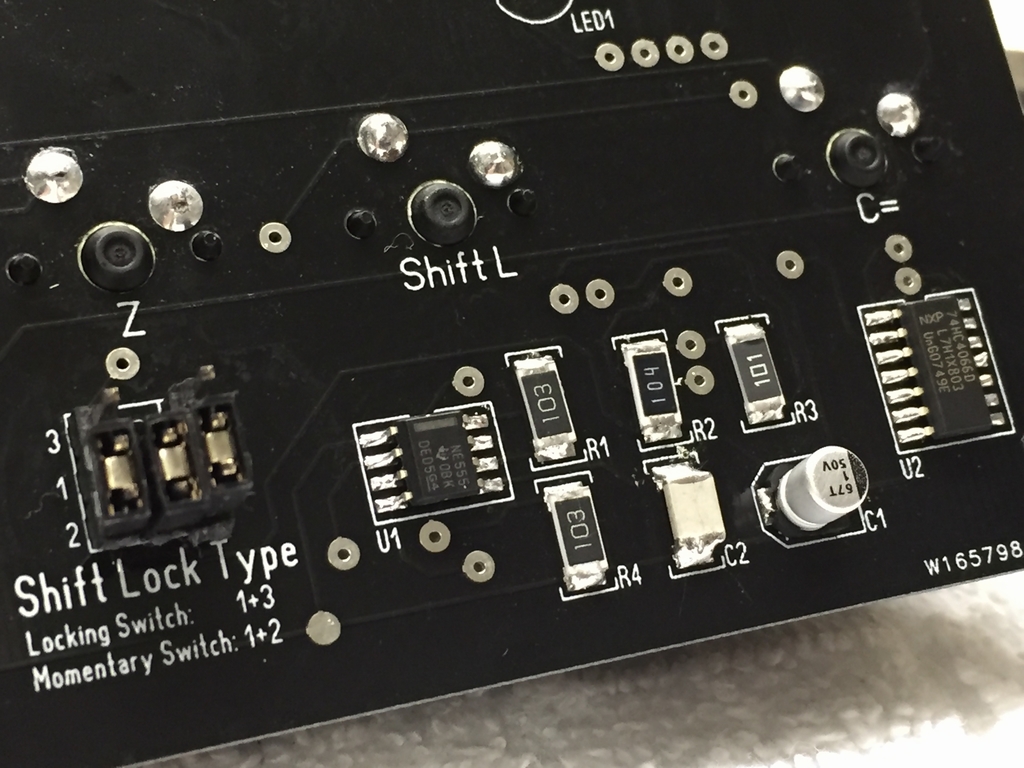

I used SMD components only, so that the assembly could be done retrospectively if needed. To keep it oldschool, I may want to use the keyboard with a Cherry locking switch on my older machines and therefore do not need the circuit with the LED…
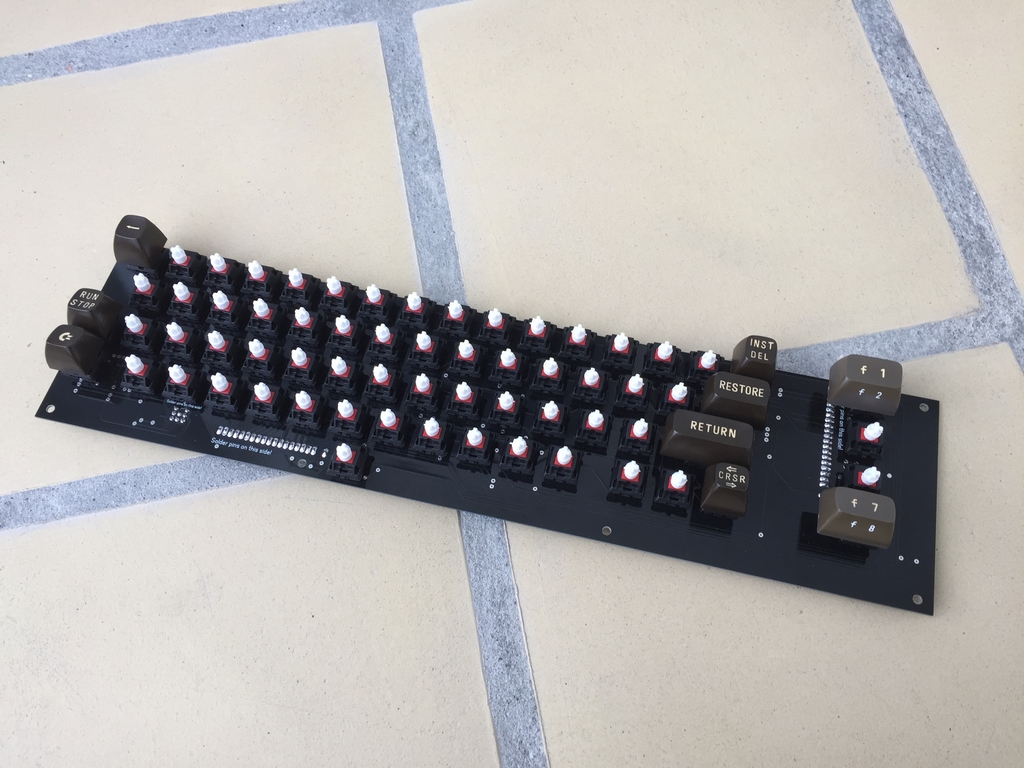
The Keyboard Frame
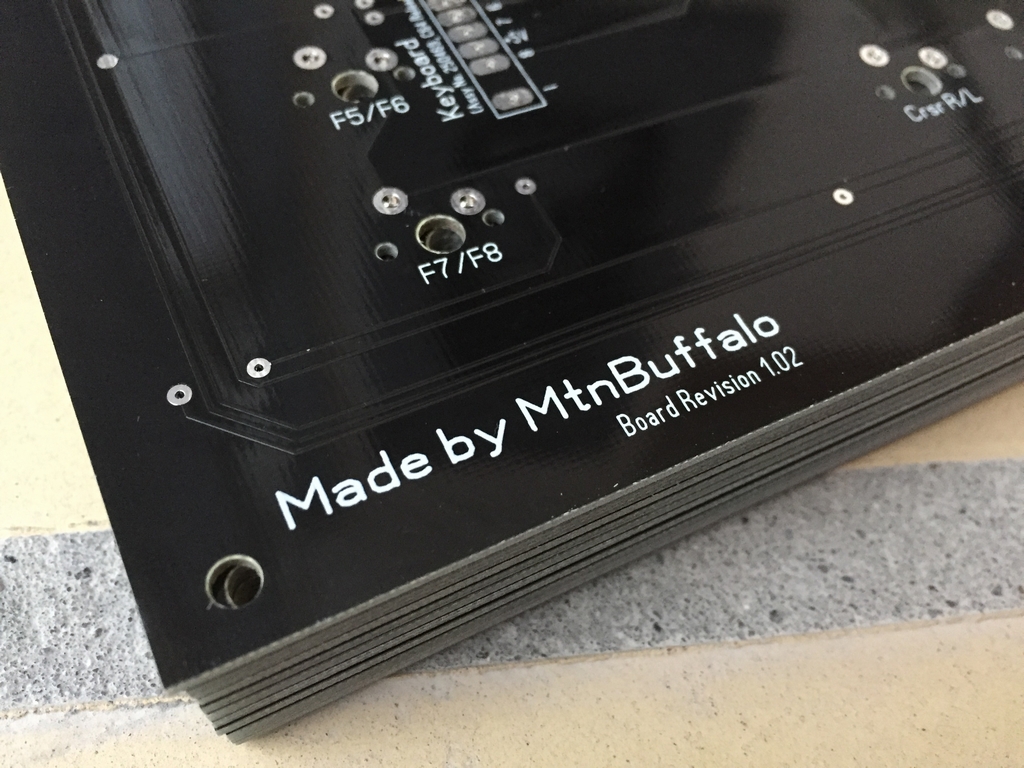
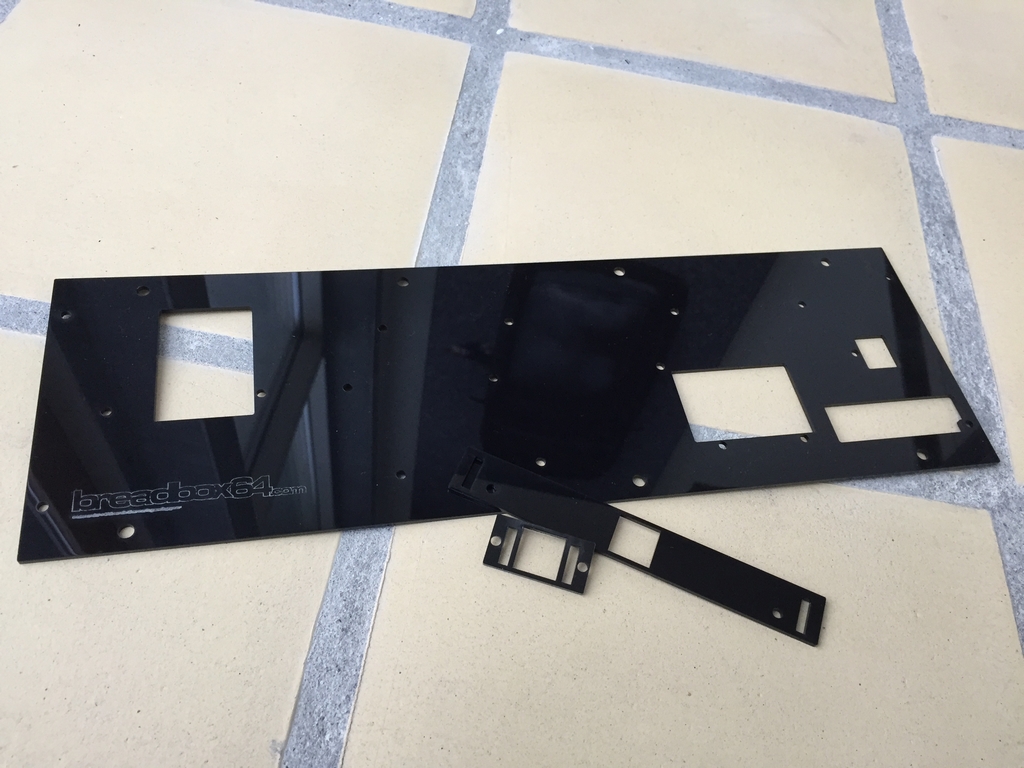
I have racked my brains to come up with the best solution for attaching the keyboard PCB to a frame that would be stiff enough for the final installation. A bend metal plate will be very stiff, but would call for special tools that I do not have direct access to. Furthermore, laser cutting in metal gives rise to issues with the size of the holes (according to the local laser cutter guy). The laser cutter simply cannot cut 3-5 mm holes for the spacers and the rectangular holes for the Costar stabs would also be problematic. I therefore decided to use 2mm black acrylic as this does not have the same issues as metal has when laser cutting it. This material also allows engraving stuff on top of it to make a nice professional finish – it’s all about the looks, right?
I also had to come up with a solution for stabilizing the spacebar and the return bar. The spacebar is 9 units long so the stabilizers (the piano wire thingy underneath it that makes it more stable) have to be custom made. I am currently waiting for a special tool, a Du-Bro E/Z bender dub480, that will make the job pretty straightforward.
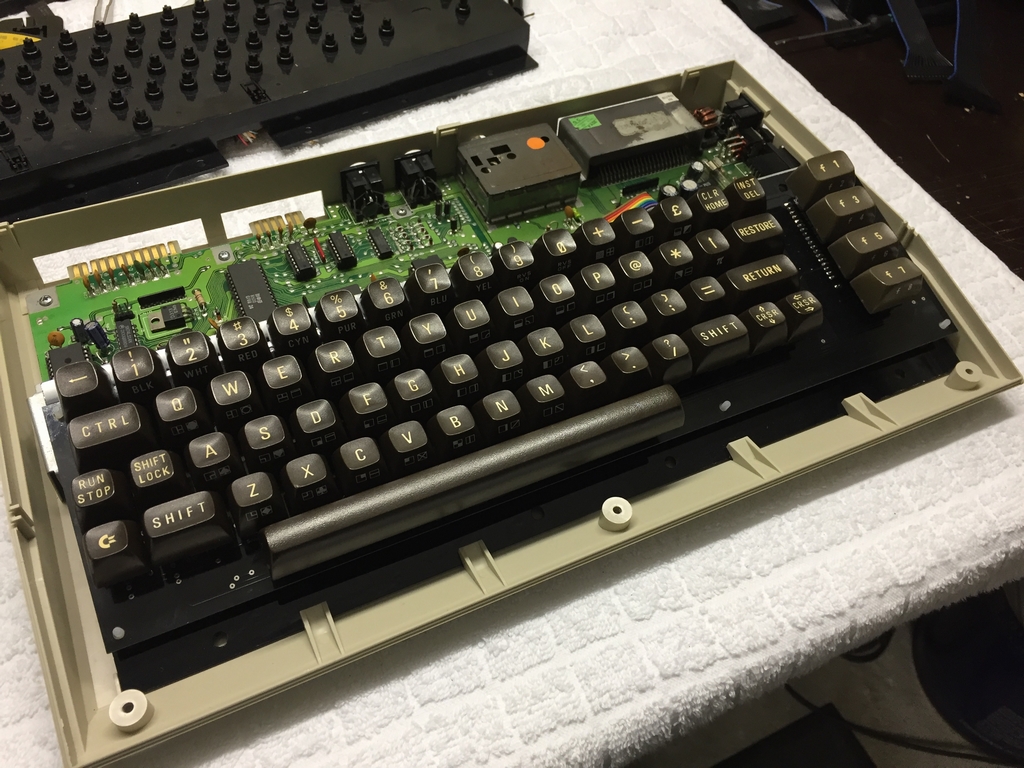
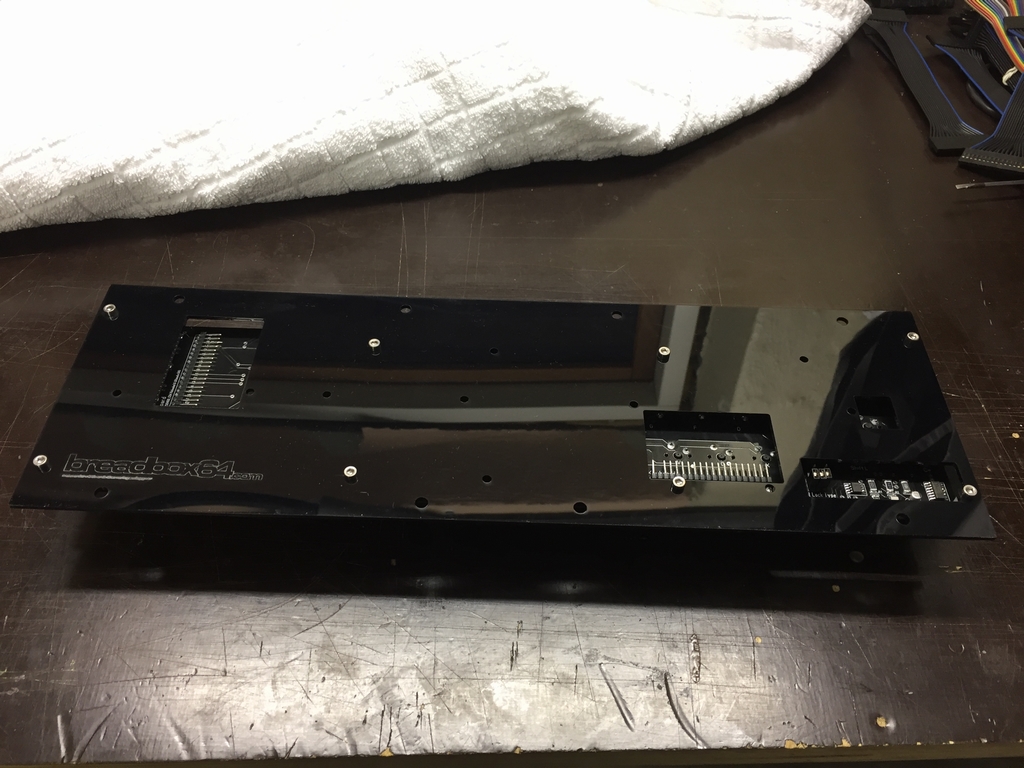
Furthermore, the stabilizers are going to be attached to Costar stabs. I therefore made some small rectangular mounts that will be placed on the upper side of the keyboard frame and attached with some plastic spacers. To this end, almost 20 holes have been made to the PCB and the acrylic keyboard frame to securely attach the PCB and the acryllic frame to each other. This makes the entire keyboard very stiff.
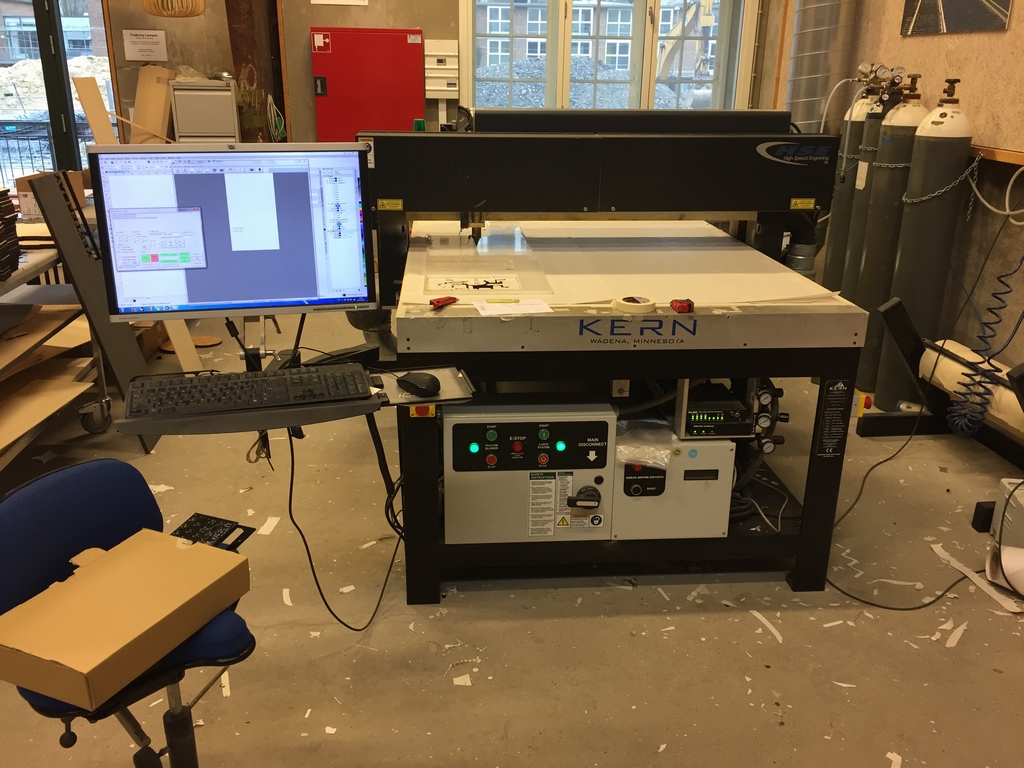
Below are some images of the laser cutter that was used to make the keyboard frame as well as the plates for the Spacebar and the Return keys. And some images of the assembled Commodore 64 prototype keyboard. I think the black acryllic material looks pretty sweet and will visually look nice underneath the black keyboard PCB .

Testing it
There is not much to report other than the C64 keyboard prototype works. It really works! All the copper traces have been connected correctly, the Shift Lock circuit works with the LED and swapping it with a locking type switch also works.
So what is left to do before the new Commodore 64 Cherry keyboard is finally done? Well, I have updated the PCB with some minor improvements and is currently waiting for the next batch being produced in China. The rectangular Spacebar and Return mounts have to be re-made using an acrylic plate of 1.5mm in thickness in order to make the Costar stabs snap into the material correctly. I also have to find some black plastic spacers in the right size before I can assemble everything. However, these last parts are not really technically difficult, so I do not expect any major issues before I can round up the project.
Here are some more pictures of the keyboard. I used some spare spacers in white nylon to adjust the height of the keyboard. These will be swapped with some nice black ones in the final edition.

Stay tuned for an update of the final C64 Cherry keyboard which I hope to have ready in a jiffy 😉
UPDATE: The final version of the Mechanical Keyboard for the Commodore 64, the MechBoard64, can be found here (link)
© breadbox64.com 2018
wow!
Did you copy the shift lock circuit as used on the SX64?
Hi Gene. I didn’t copy the Shift Lock circuit from the SX64. I did not even know that it had a similar function. I don’t even have a SX64 so maybe I could have saved some development time if I had just copied it 🙂
This is awesome…and I have 1 cherry locking keyswitch 🙂 will I be able to use that instead of the circuit? I’d love to buy a board when you are ready.
Awesome job! 🙂 🙂 🙂
Hi there and thanks 🙂 I designed the keyboard with the option of exchanging the Shift Lock switch to the likings of the user. It is simply a matter of desoldering the two legs of the momentary switch (and cut/desolder the two pins of the LED), solder in the locking switch and move two jumper caps on the board.
I’m working on the final version as fast as I can next to my day job 😉 But hopefully soon.
fantastic job! Thanks for doing this! I am… kind of mechanical keyboard fanatic so I really prefer Cherry Blue over Red anytime. 🙂 So.. Is there any option to put Cherry Blue switch instead of Red ones ..? I don’t even own a *working* real Commodore 64 but I am trying to revive 2 dead C64’s. This would be great project since I hate the original C64 keyboard switches anyway.
Awesome Job!!!
Is this done for sale or just for you?
Hi guys and thanks for your comments.
@overdriver. You are not the only who has shown interest in the Cherry blues and the tactile clicky switches 🙂 However, C64 aficionados would most likely prefer the linear feel of the Cherry reds (or Gateron reds/yellows) as they are really close to the ‘feel’ of the original keyboard. At least in my humble opinion…
@Michael. As of now I’m doing this as a hobby project for myself to see if I can actually do it. I still think it is a bit early to get peoples hope up too much just yet :-).
Did someone just say “Kickstarter”? ^=^ Awesome work, MtnBuffalo! If this project comes to fruition and Phase5 will eventually deliver on their promise, then sign me up for two keyboards!
I really really hope that Phase5 will eventually deliver the new keys. Would be sweet to have a brand spanking new C64 🙂
I’d love to see one of these on my desk…
Screw the feel of the original (which is terrible) where can I send my pre-order for one with cherry blues installed ?
I’m a bit overwhelmed by the interest in my mechanical Commodore 64 keyboards. Thanks a lot guys 🙂
Currently I’m waiting for parts to come in from around the world (China, US and England) to make the next prototype. I expect those parts to arrive in late April early May. The long wait is primarily for parts needed for assembling the keyboard (screws, plastic spacers, pin headers, pin caps) and some of the electronic parts (resistors, LED’s). The China stuff is to keep the cost as low as possible for a keyboard.
I’ve spend quite some time weeding out the obvious mistakes I did on the first prototype. This includes, redesigning the frame to accommodate all types of metal keyboard brackets available for the C64C as well as the 3D printed versions. Furthermore, I designed a completely different mount for the stabilizers of the spacebar and the Return key. The 1.5u keys (Shift, CTRL, Function and RESTORE) also have support underneath to make them as stable as possible. Furthermore, the material I used in the first prototype was black acrylic glass (plexi) which shatters way too easy. The next version will use clear polycarbonate plates which are ridiculously stronger compared to plexi glass.
I have also added SIP sockets to the Shift Lock LED for an easy exchange of LED color. This way the color of the LED can be swapped to match the color of the power LED of the machine. All I have to do is to remove the keycap of the Shift Lock and exchange the LED by hand. Finally, the combination of the new stabilizer mount and frame have made the keyboard a lot stiffer. I therefore have high hopes for the next prototype! The results will be posted as soon as I have build and tested it!
I think it’s time someone makes a cherry-compatible Commodore keyset. With all the emulators out there and people selling stickers… well, it’s time.
In the meantime, count me in if this comes up for sale. I am slowly building up a “Neo 64” system, and this will definitely be a needed part. Right now, I’m using a Corsair mechanical keyboard, but I’m having to use X-Keys keycaps, and they’re not quite the same as having the real thing. (A good, fully relegendable keycap set is impossible to find.)
Unbelievable! Kudos to your determination and perseverance. If you don‘t make a big batch of these we will have to use force to persuade you ? Honestly looking forward to this.
Michael
You know with Ultimate 64 now released I’m pretty sure you would have lots of customers to buy this nice keyboard 🙂 Today there is the Ultimate 64, Brand new replacement cases, and the only thing which can’t be replaced yet (unless someone buy an old c64) is the keyboard ! So if you go for a kickstarter campaing, I will be in 🙂 I think you should consider a facebook page for good visibility when you think you’re ready for massive production 😀
This is awesome and a testament to the old adage, “no idea is a new idea”! A few months ago I looked into creating a drop in replacement for VIC20/C64 computers using mechanical key switches and new keycaps. I contacted http://www.dsi-usa.com in the US (I’m in Canada) and they said they could make them for about $65 each, but the tooling/development would likely cost at least $250,000 on top of that. With their min order of 3,000 units, that’s roughly $150 total investment in each, so they would need to be sold for at least $175 USD and that seems like a lot of money for a C= keyboard, even if it does use Cherry switches (for reference, I bought my Cherry MX Blue based, backlit full USB keyboard for $80 CAD on sale, normal price $120 CAD – add 30% to my cost when buying anything in USD…).
A rubber dome based alternative that could be purchased for $30 would be amazing, because even though it wouldn’t be perfect, it would be functional and affordable.
Good luck to you on your project, it’s a worthy cause!
Love this project and I will definitely buy at least one! I’ll throw my hat into the ring for a no-switches option as well.
I personally would likely not use original keycaps, I’d just use one of the sets that I already own. One suggestion on the crazy 9u space bar is to add some switch cutouts on the plate on either side. That way if I want to use a standard keycap set, I could use a normal 6.25u space bar and throw on a non-functioning 1.5u cap on the left and a 1.25u on the right. Or, more likely, I have a couple 7u space bars that would even things out.
As others have said, this would be an amazing Kickstarter! Maybe reach out to the folks at Input Club? They recently wrapped up the WhiteFox keyboard on Kickstarter and just launched another (Kira).
WOW, perfect – want one!
That’s absolutely awesome and what lots of people are really, really missing. Congratulations!!
Best, Stefan
Thanks from Italy. I see today this news about a new keyboard project. If it all goes well I want to take part one pieces too. My ideas infact is to have a new C64 with all new components – Ultimate64, new keyboard and case. Good work!!
This is a great project! I’m excited to see how this turns out 🙂 I have a C64 Reloaded MK1 inside one of the Kickstarter Blue C64c cases with a C64 Breadbin Keyboard waiting on keycaps from Phase5. THIS keyboard would be PERFECT and I would spring for a couple of them when you do go into production or a Kickstarter type of campaign! I also would LOVE the Clicky Cherry keys. My C64X case has them and I LOVE that keyboard! Always wanted the same ever since I got that case for the C64 🙂
Hi! First it’s a supercool project and second you think it will be possible to do the same for the Amiga 500/1200 keyboards?
I’m sure it is possible to do something similar to the Amigas 🙂 I just don’t own one of those machines so my interest is somewhat limited 🙁
Really nice to see that the C64 is still being kept alive by people like you. Very cool! Thanks for your hard work.
Hopefully the fabrication of the keyboard comes out well. I think that your approach to testing the manufacturing process is pretty smart and if you decide to go for crowdfunding, like KickStarter it would best to get out as many kinks out of the way as possible before doing so. The more successful projects I’ve seen use KickStarter as a means of Marketing and funding for the final push of mass manufacturing.
I do have a question for you, seeing that the C64 mini out and you going though this process of recreating the C64 keyboard do you think it’s worth it to create an actual working keyboard for the mini? Sorry, I know your main purpose for this project is for the C64 but I am curious and think it would be kind of cool to modify the mini.
Hi chackokhan and thanks for your comment. As of now I only plan on making a new keyboard for the original hardware. However, it may be possible to mod the C64 mini with a new keyboard as well. Could be a pretty cool project 🙂
If this becomes a thing, count me in. This, a new case, and an Ultimate-64 would be the perfect nouveau retro system.
Fantastic project! Your keyboard production is the missing part for buying myself the Ultimate-64 together with a new C64 case. I don’t want to cannibalize my good old real C64 computers to get new technology working. Keep up your work and keep us informed, at least when and where to buy. 😉
Love those cherry switches. Need one for my reloaded MKII. Well done. Looks like you can do anything you put your mind to.
Thanks Mongooseman 🙂
If you could find a way of implementing usb to PC aswell, it would then give you the option of using it as a pc gaming keyboard. If you look at a good mechanical PC keyboard they are not cheap, so to say you have one that doubles up as a c64 keyboard, you could justify the price no problem. It would be something i would use daily.
A Keyrah adapter would work for that.
This is just awesome. Can’t wait to buy one for my C64 Reloaded.
How much for a usb version for the pc? 😉
@Dave Ross: A Keyrah would work but there would be no space for the C64 motherboard. I am thinking of a fully working C64 that also can be plugged into a PC as a gaming keyboard. Switch between the two. One keyboard does all. Maybe space could be made to conseal a Keyrah? Dont know why but my mouth is watering thinking about it 🙂
Woah, I had the same idea some months ago! Good work! I already ordered MX Blue for my project. It would be great if I could buy your parts without switches for self-building! I’m also waiting for my phase 5 keycaps, so this would perfectly fit!
If the Mega65 Project ever finishes I’ll definetly try to build one of those, if it doesn´t finish I’ll settle for a regular c64 instead (win-win if you ask me!) so I would buy a Kit or two if you ever decide to make them available!, Congrats on the great work!
Me too! Let me know when these are available – I’m in!
Maybe you will consider possiblity to sell a proto DIY kits ? 🙂 I mean – mainboard, acrylic frame, stabilizers and key adapters? From my perspective it will be lot of fun to build this by myself (switches and electronic components I can order by myself right now :D) and maybe a bit cheaper…
I’m sorry for my impatience 🙂 but I badly want to bind with my ultimate64 board and new case 🙂
regards
Mike
Hi Mike, the prototype have some minor flaws which have all been removed in the next version of the keyboard. The next version will have a sweet looking black anodized aluminum bracket that is a lot stiffer compared to the acrylic plate. The purpose of the prototype was primarily to show the progress of the keyboard project and to show that it worked in a real machine. Permanently installing the prototype in a C64 is therefore not recommended. However, I hope to have the final version of the keyboard ready in the beginning of July 🙂
Well done! I sold my old commodore years ago – what a mistake. If you sell I’d love to buy one. Wayne from Adelaide Australia
Oh, there’s a market for it my friend. More than I think you realize. But in time, you will see that. 🙂
That’s tempting ! When are you going to sell those ? I’m in for one ! If there is a list somewhere, please add me to it.
Please see this project through. Just… Just make it happen! With all the recent hype around Retro Computing you might be able to make some nice money too. But even if you do it out of pure love for the legendary platform *which, I’m sure, is actually the case) it would be just pure awesomeness. By the end of 2020 we should have the Full Package:
1. Reloaded Mark II Motherboard
2. New Commodore 64c cases
3. 1541 Ultimate II
4. Your keyboard would complete the set!
(+ 5. Various accessories…)
All that is left to be done is reverse engineer VICII and SID and, since 6502 is already completely reverse engineered, find a suitable IC manufacturer to produce the Chips.
It would be such a glorious return of our beloved machine! So, yeah, if it’s not obvious by now, you have my full support – don’t give up on this project!
Best regards from Belgrade,
Milos
Hi Milos, your wait is over – the final version of the keyboard was presented a week ago 🙂 It is called the MechBoard64 and you can find it here (link).
Thank you for your fast reply. I just read the blog post – the keyboard looks great – well done! However, ‘the key caps guy’ is silent from February. Any info on that from from you?
Best regards, Milos
No, I’m waiting like everybody else on positive news on the Phase5 campaign on Indiegogo. Fingers crossed that they will come through 🙂
I’d love to get this + one of those C64 replicas and put some modern hardware into it… like something i could play Overwatch on 🙂 (like a LattePanda or something like that). It would make for a very funny portable low powered gaming rig I could drag around – lol(I would never want to do that with an actual C64… that would be a crime against retro hardware).
I would like to see a SX-64 version.