
Getting a brand spanking new Commodore 64 is no longer just a wet dream for a retro geek like me. With the new Pixelwizard cases (link), new motherboards (link, link) and new keyboards (link) the dream is certainly within reach. However, I still need new keycaps to finish off the project. The Phase5/Indiegogo campaign (link) have promised everyone new C64 keycaps more than 3 years ago (August 2015) and hopefully they will deliver eventually… For those like me who cannot wait, finding alternative solutions for getting new keycaps this is the blog post for you!
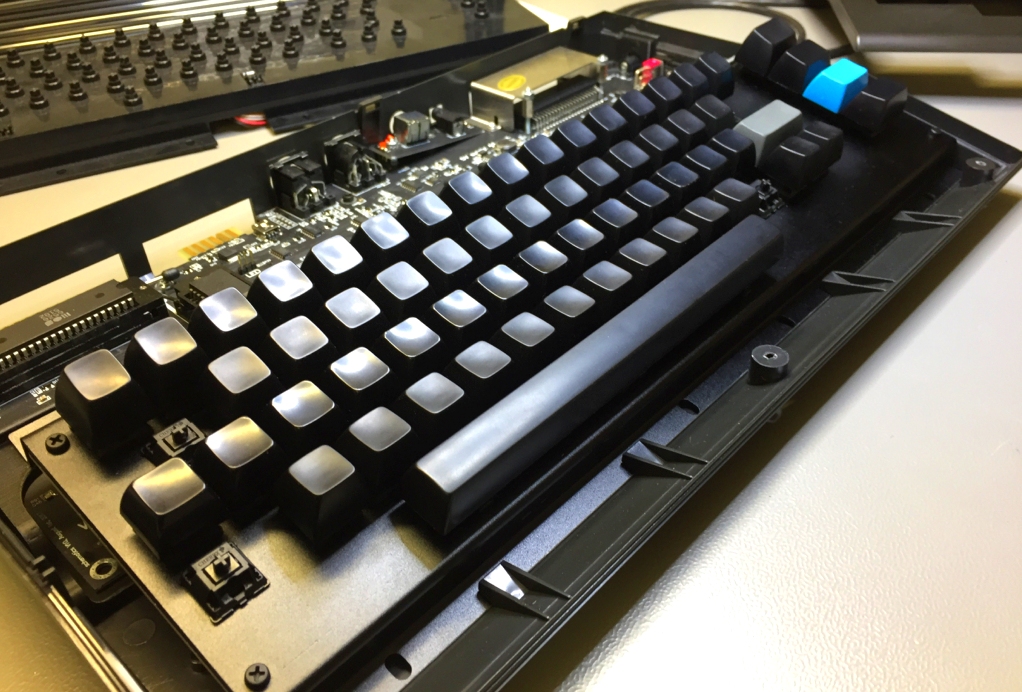
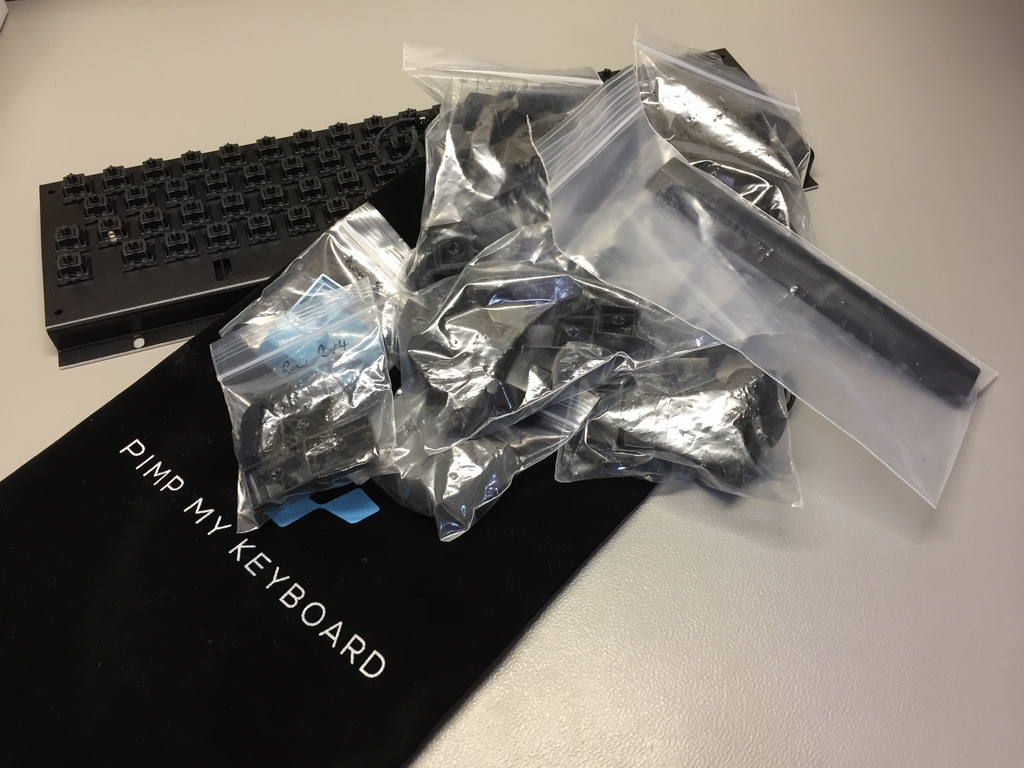
It is no secret that I would love to have a complete MechBoard64 (link) with brand new keycaps and get rid of the 3D printed adapters to accommodate the older C64 keycaps with modern microswitches. I therefore decided to se if I could get some off-the-shelf keycaps that would work with my MechBoard64. In this context, the biggest issue is the very long size 9u Spacebar of the original Commodore 64. To my knowledge only Pimp My Keyboard (link) carry these. The shape of the Spacebar is called SA Family and is made by Signature Plastics which owns the Pimp My Keyboard shop. The SA Family keycap shape is also pretty close to the original Commodore 64 keycap shape. I therefore ordered SA Family keycaps to populate an entire MechBoard64 with black Cherry MX switches. I got all black keycaps as it was not possible to get keycaps with letters on them… So I paid 161 $ including shipping from the US and 60 $ in VAT and customs fees for a set of keycaos with no lettering… The price was pretty outrageous but hey, I was on a mission to get a completely new Commodore 64!
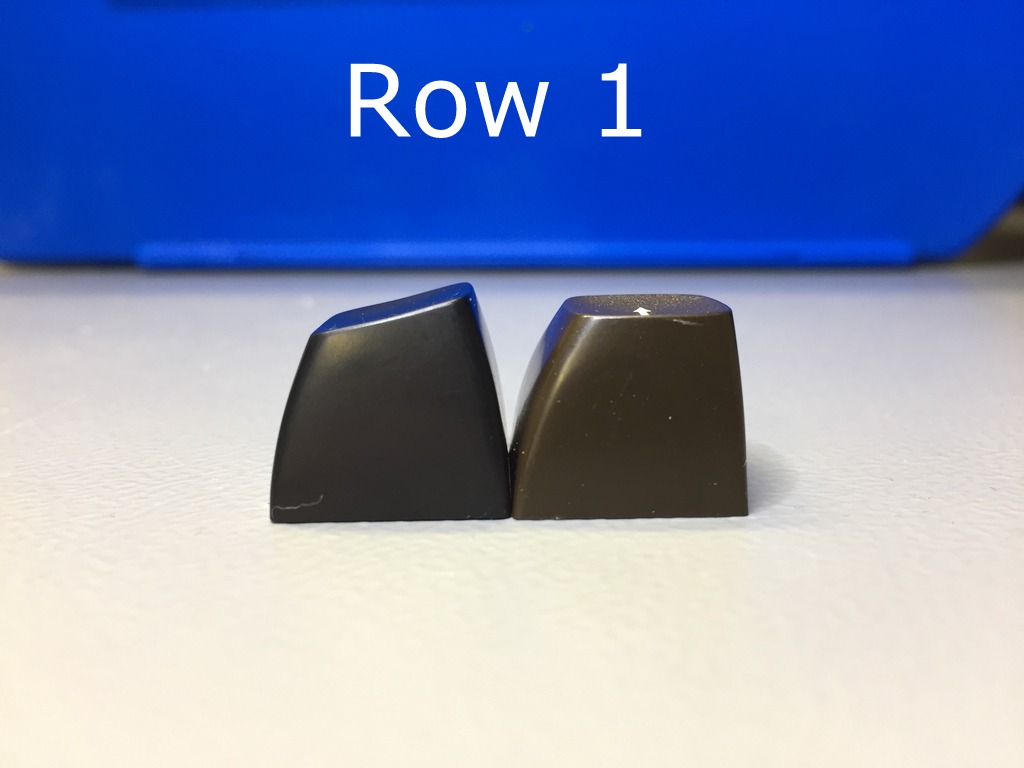
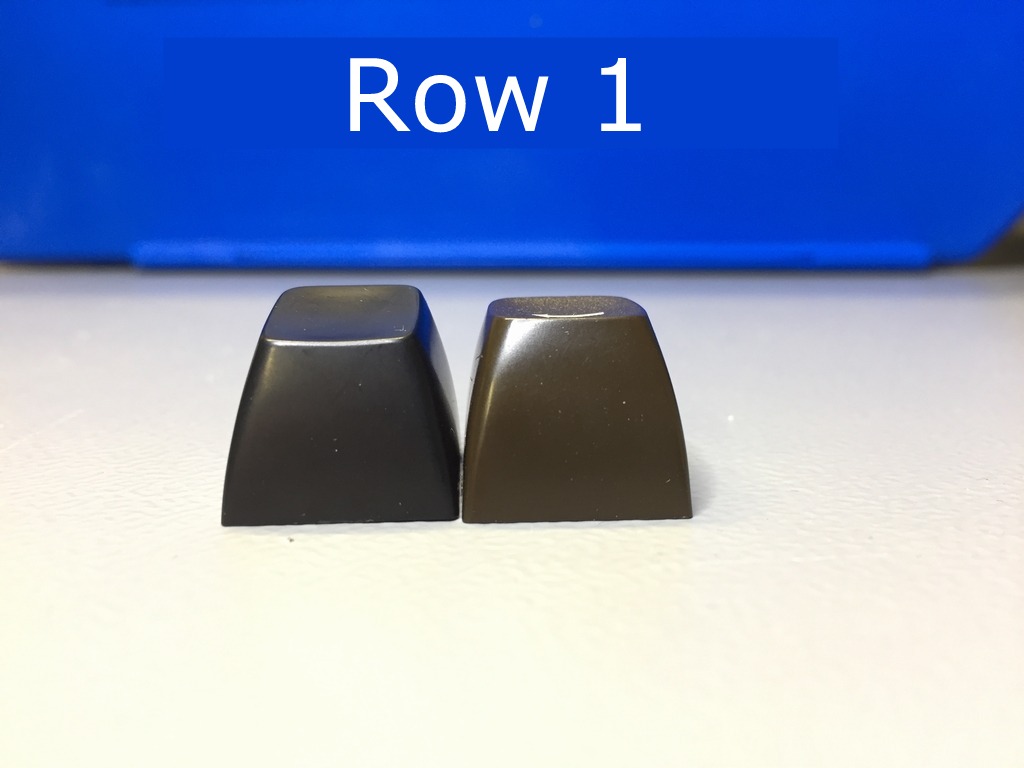
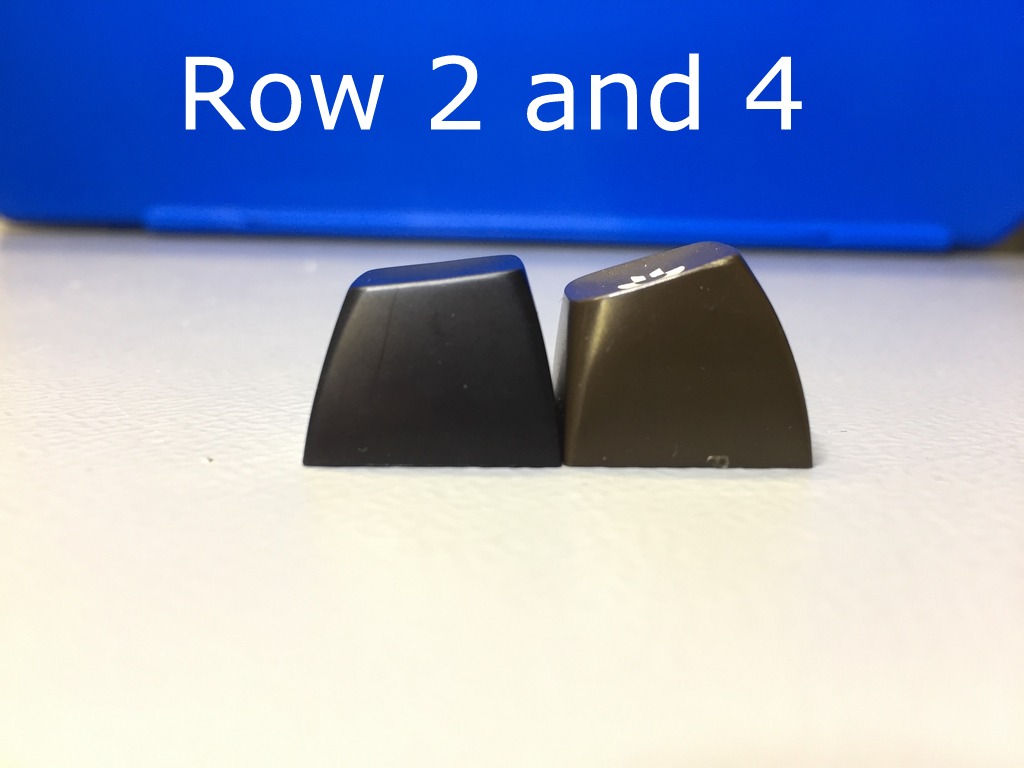
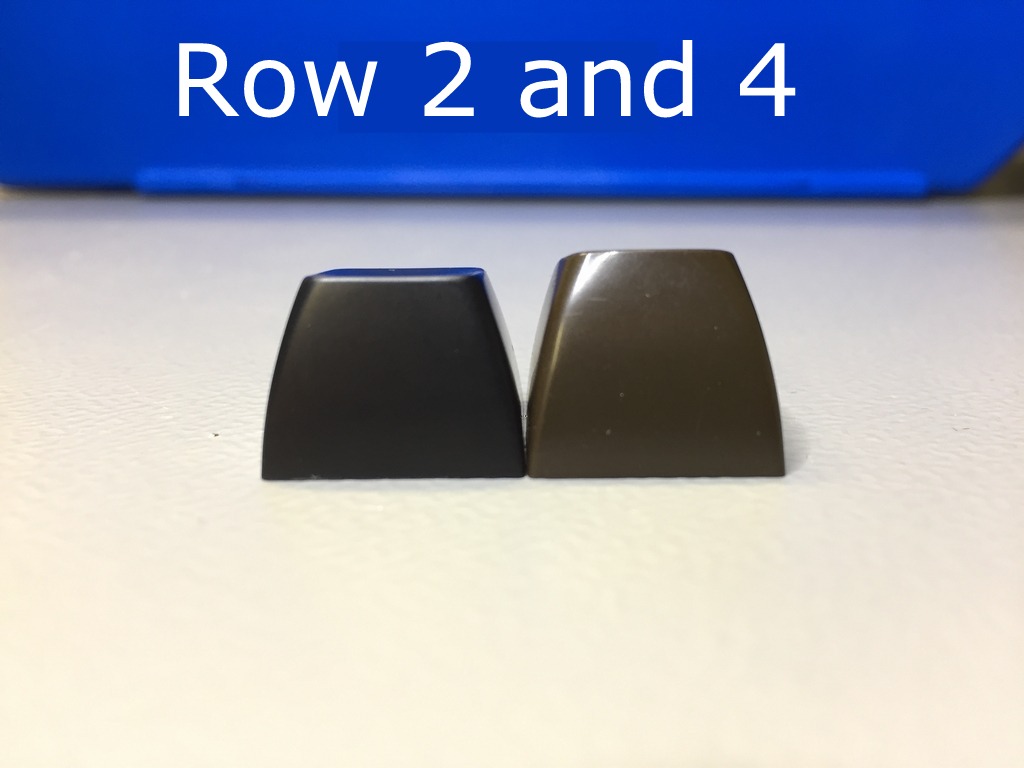
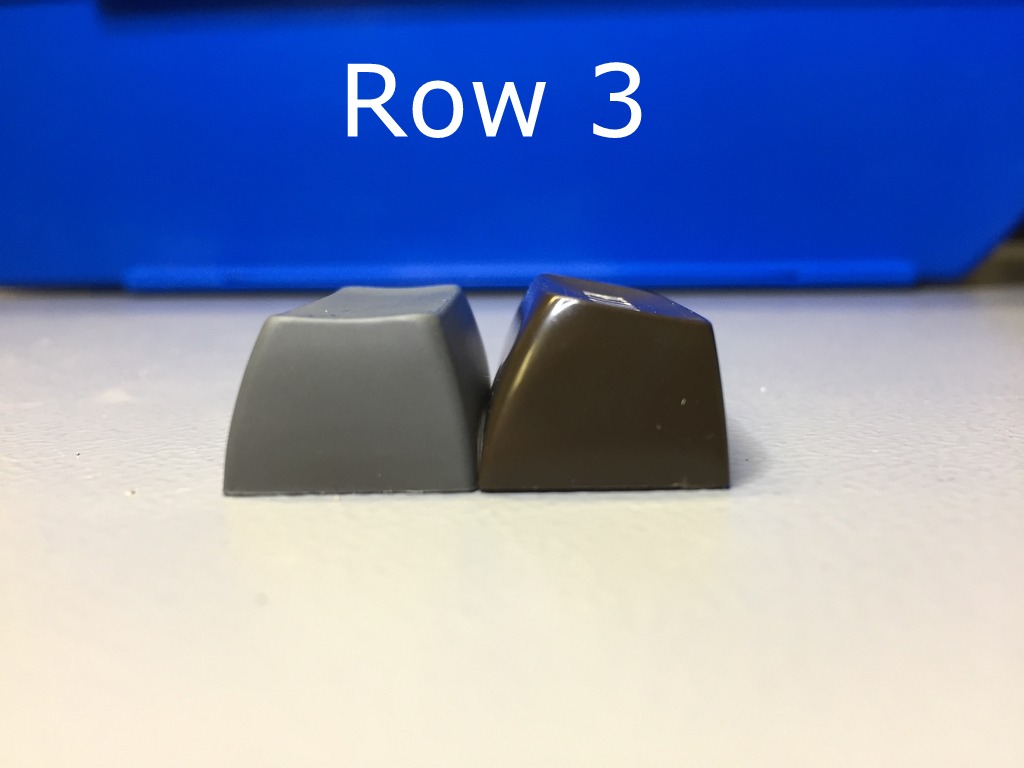
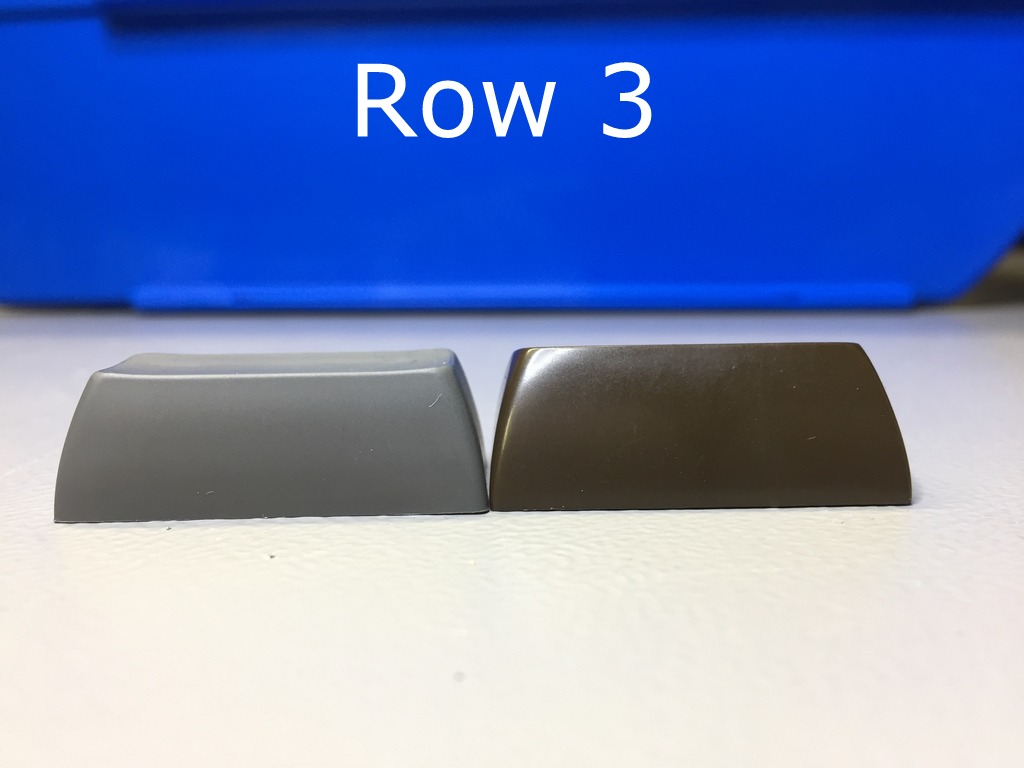
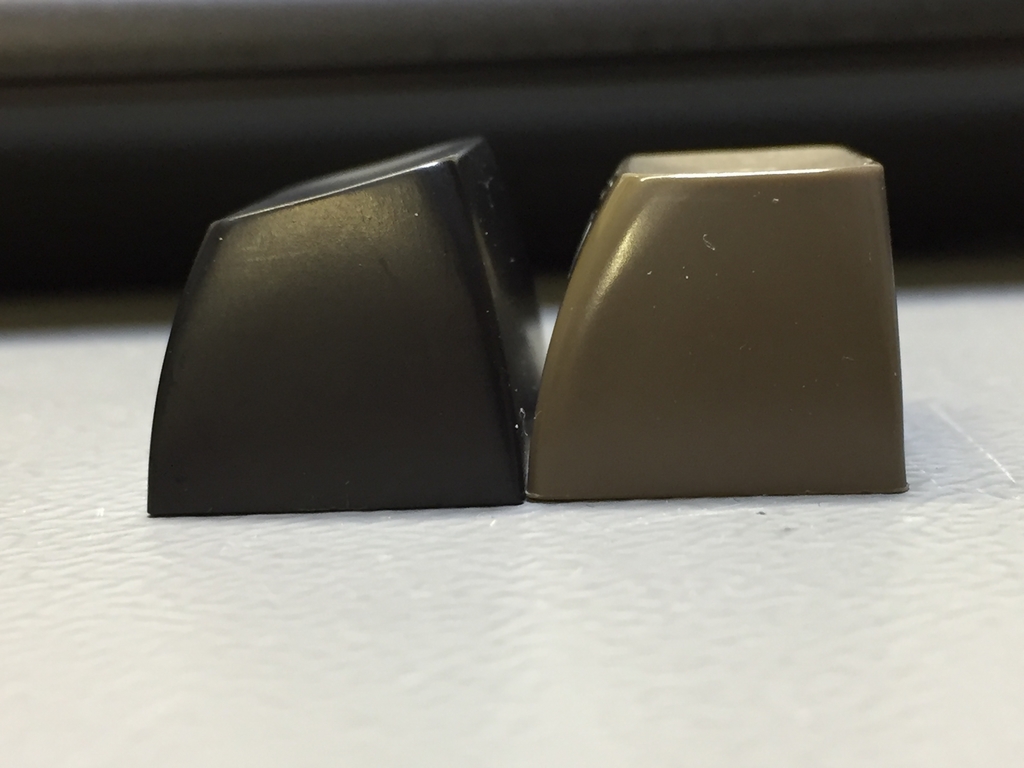
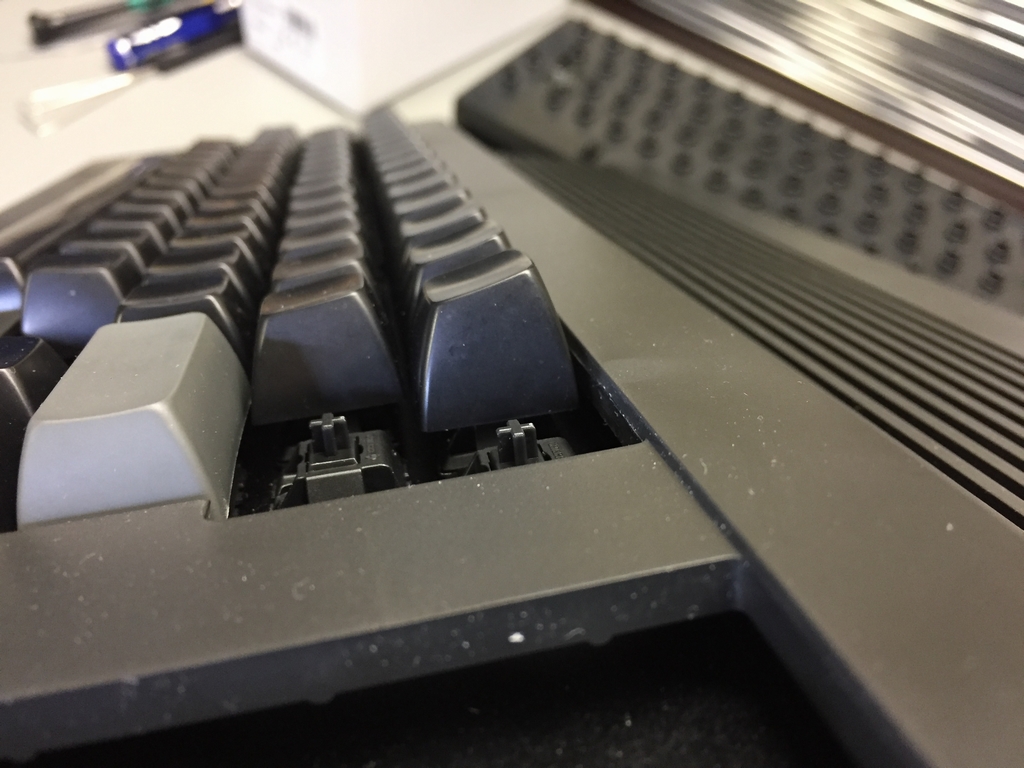
Here are some pictures of the different rows of keycaps for comparison. It is pretty obvious that the original C64 keycaps in most cases are a bit taller than the SA Family keycaps from Signature Plastics. But they do look pretty nice though!

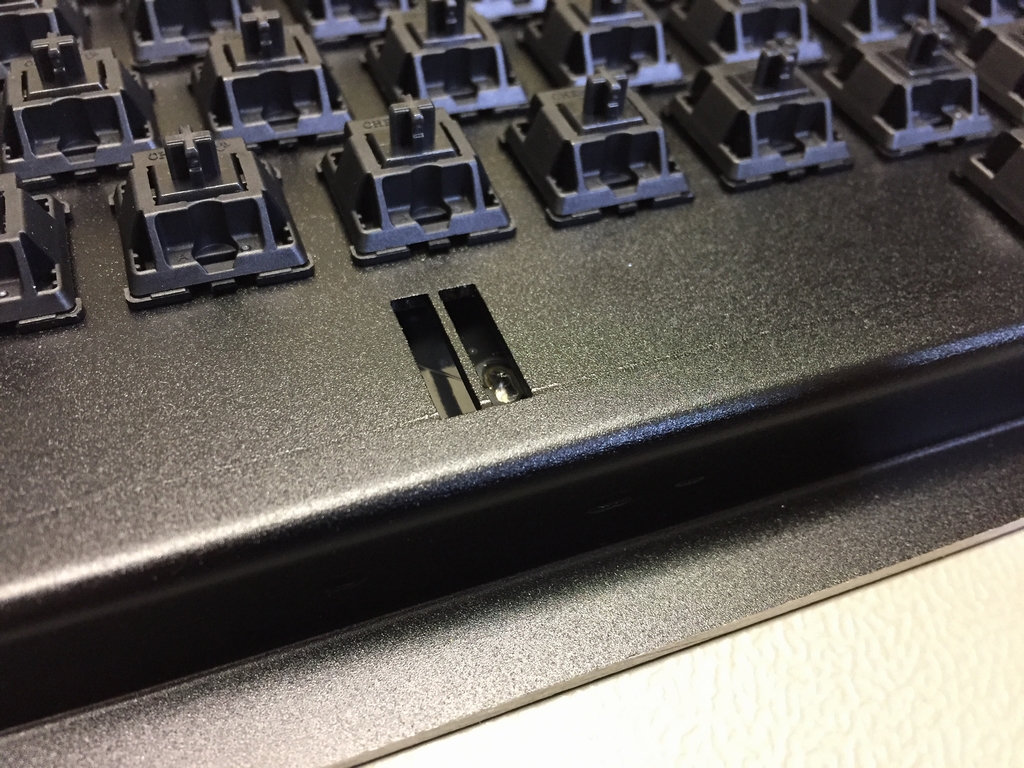
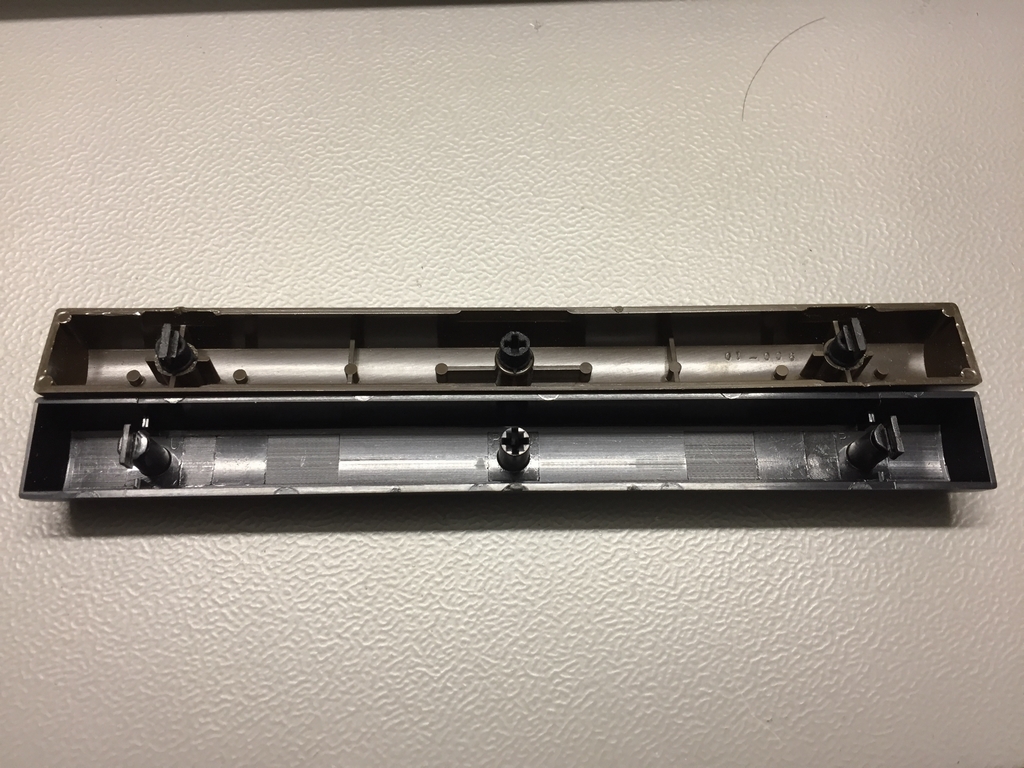
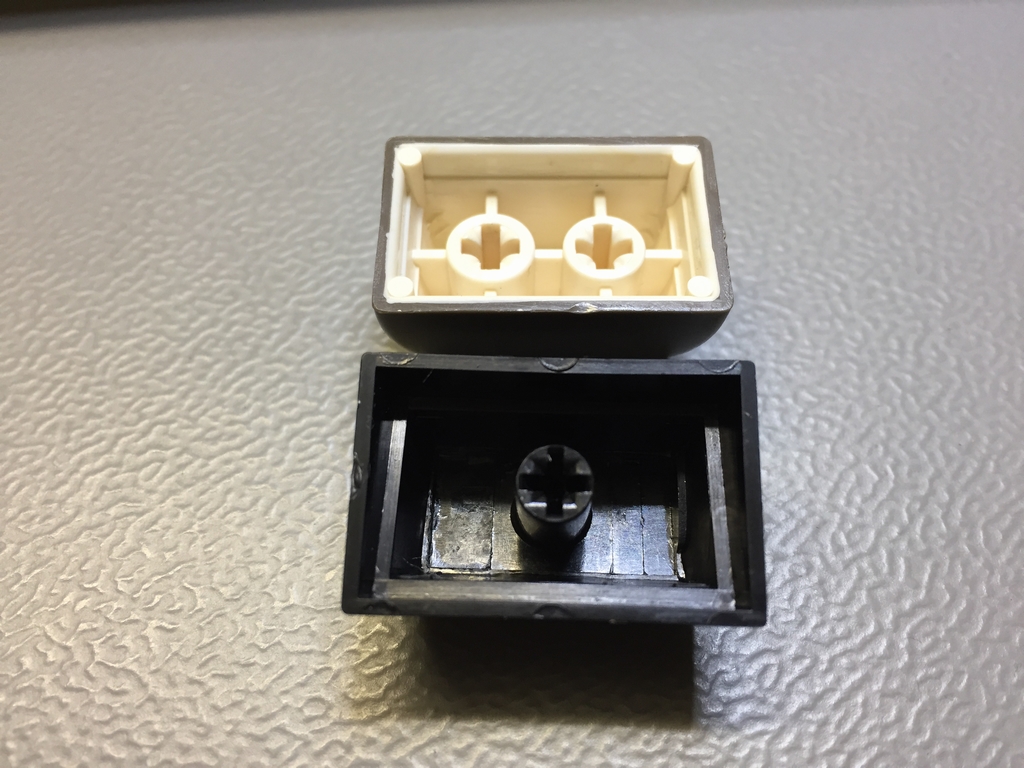
I already knew that the two female sockets of the SA Family Spacebar were placed further apart in comparison to the C64. I therefore had a prototype bracket made with an extra set of rectangular holes for the keycap stabilizers. This way both new and old keycaps will fit the bracket. After bending a stabilizer in the correct size, the new Spacebar fitted perfectly!
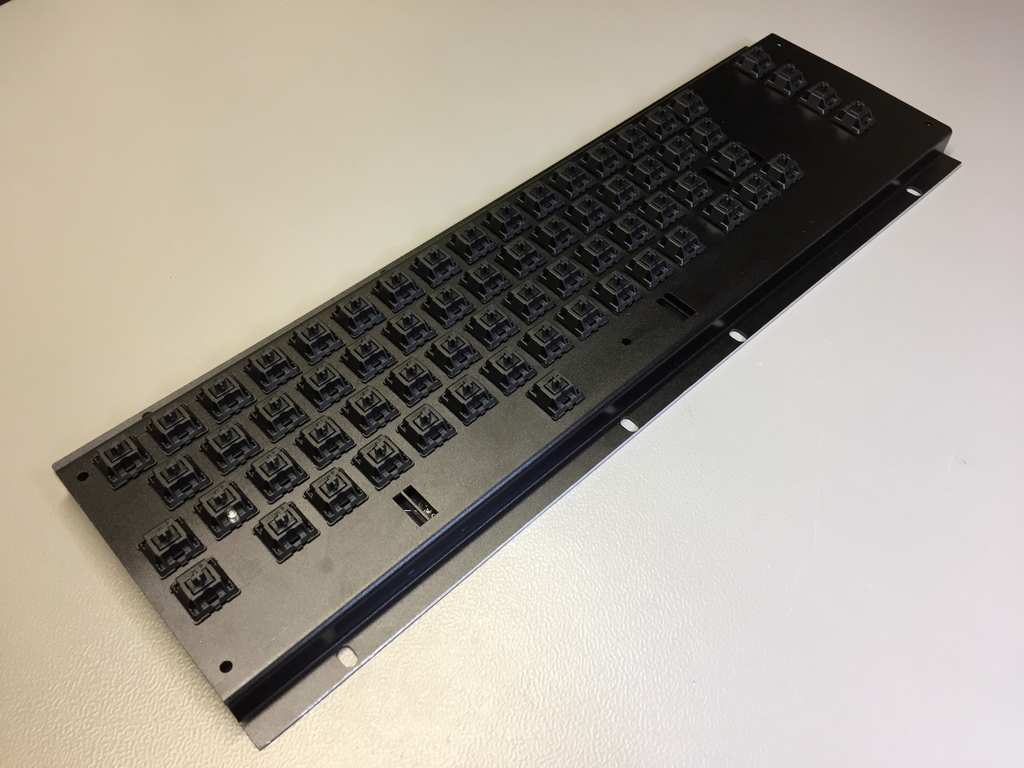
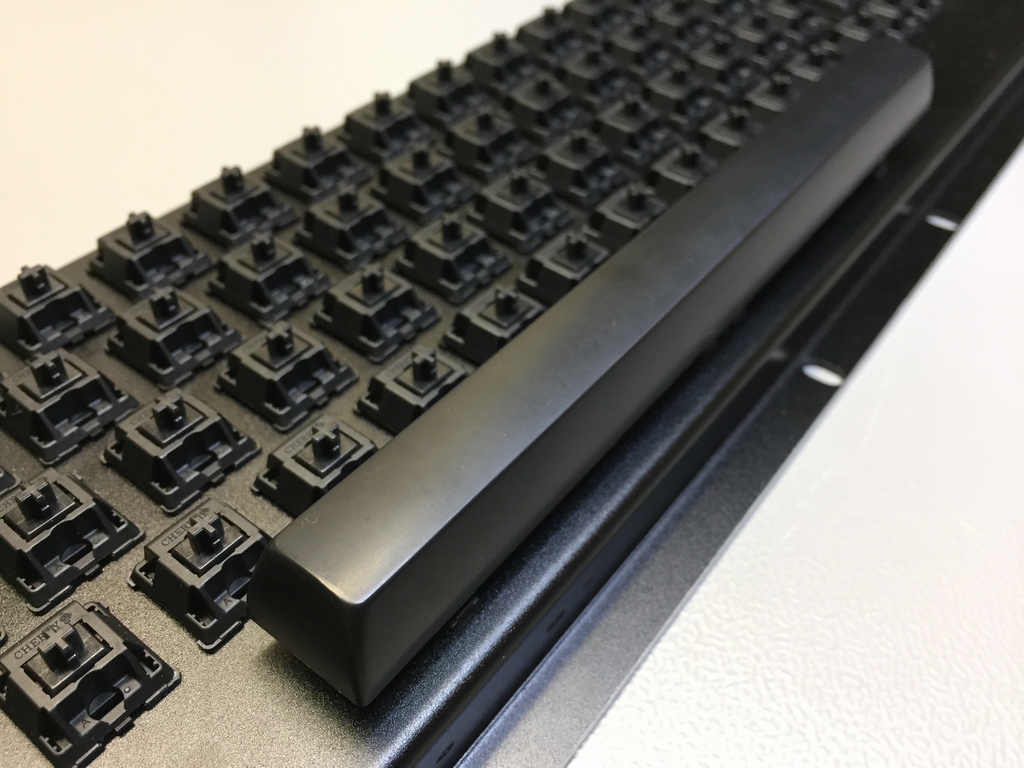
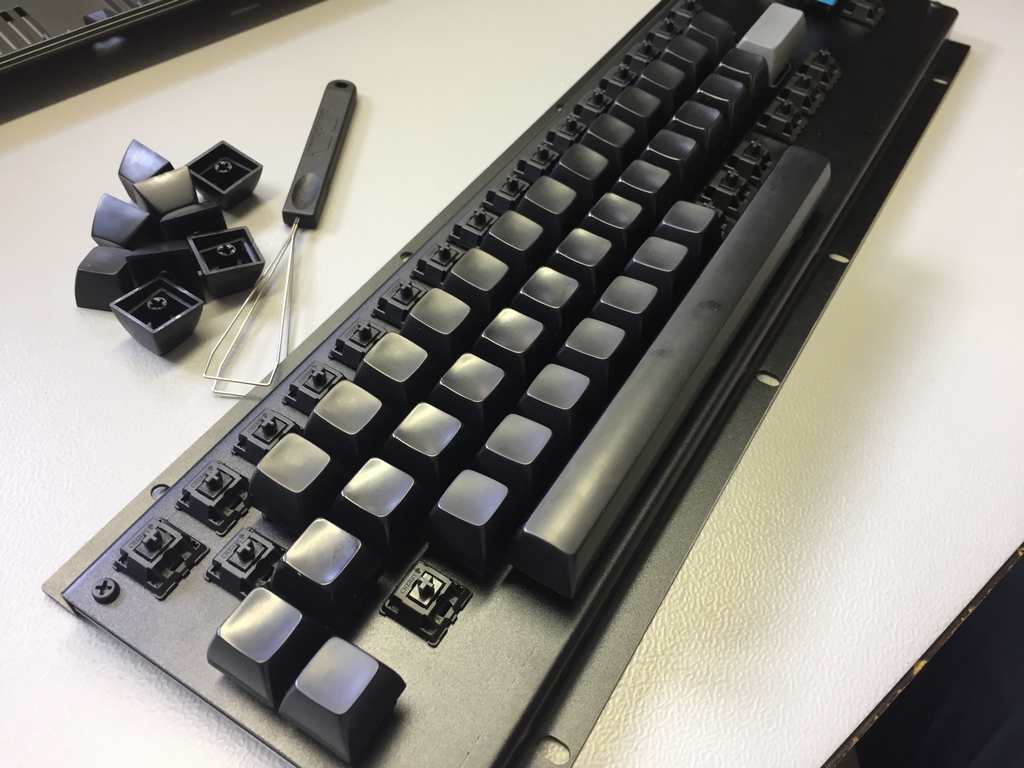
I then populated the entire MechBoard64 with all the 1u sized keycaps. I also added the Return key and the Function keys without running into any problems… I was starting to think this would be a complete success… So far, everything looked pretty good! Now on to the remaning size 1.5u keycaps.
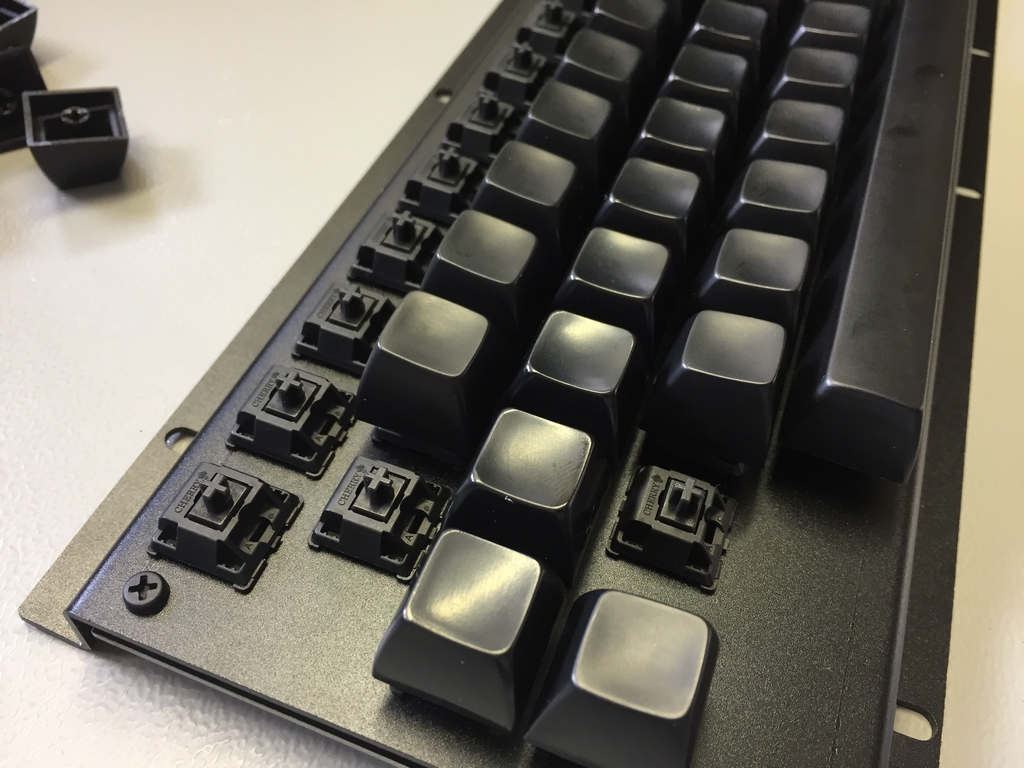

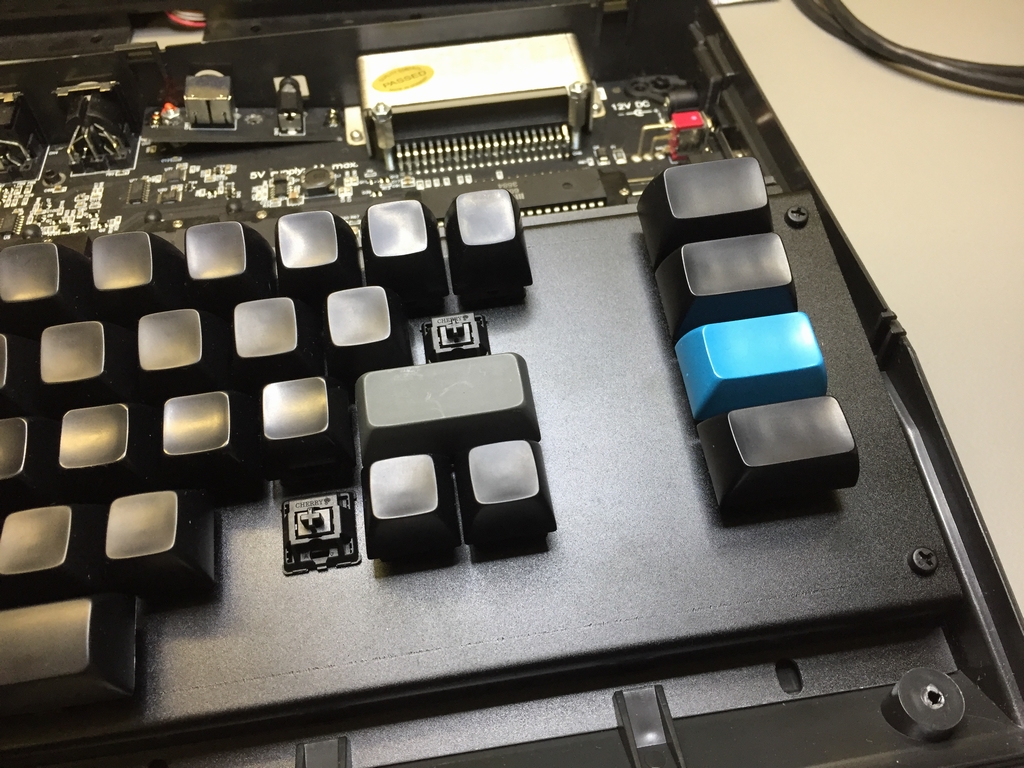
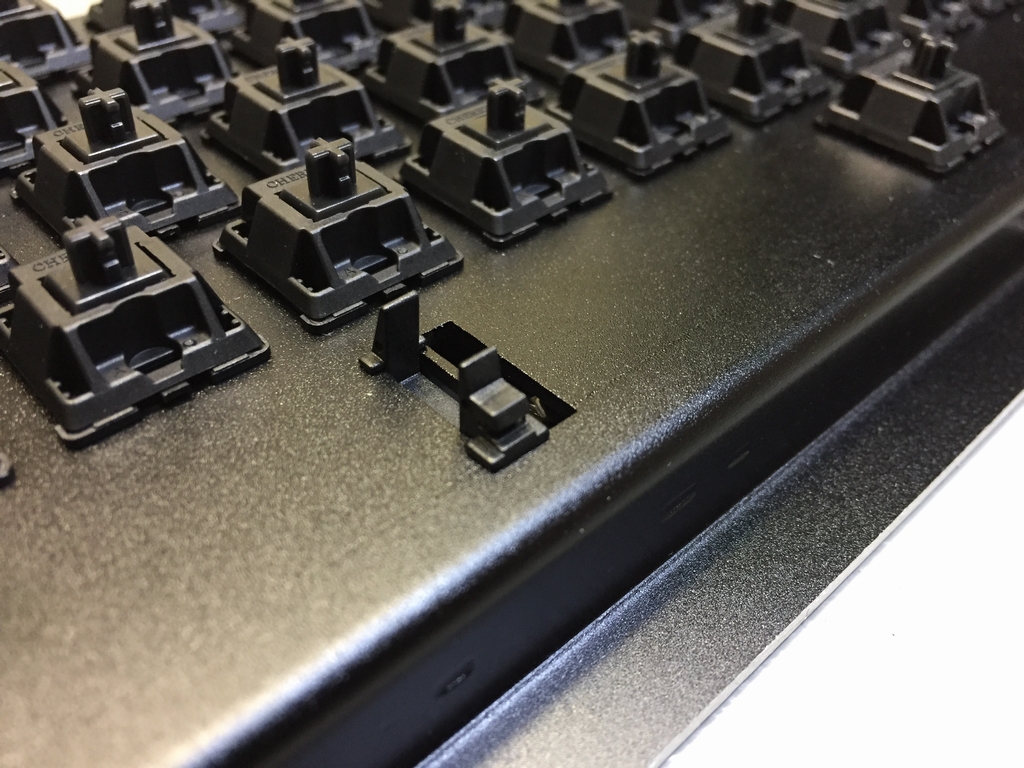
However, the bad news is that it all went downhill from here 🙁 What I did not realize is that the size 1.5u SA Family keycaps only have one female socket and it is placed in the center of the keycap. This causes the keycaps to be moved to the right, hereby making it impossible to make it fit inside the top part of the case. The same holds true for the rest of the size 1.5u keys (CTRL, SHIFT and RESTORE keys) as the surrounding keys are too close. Thus, none of the 1.5u keys would fit the keyboard!
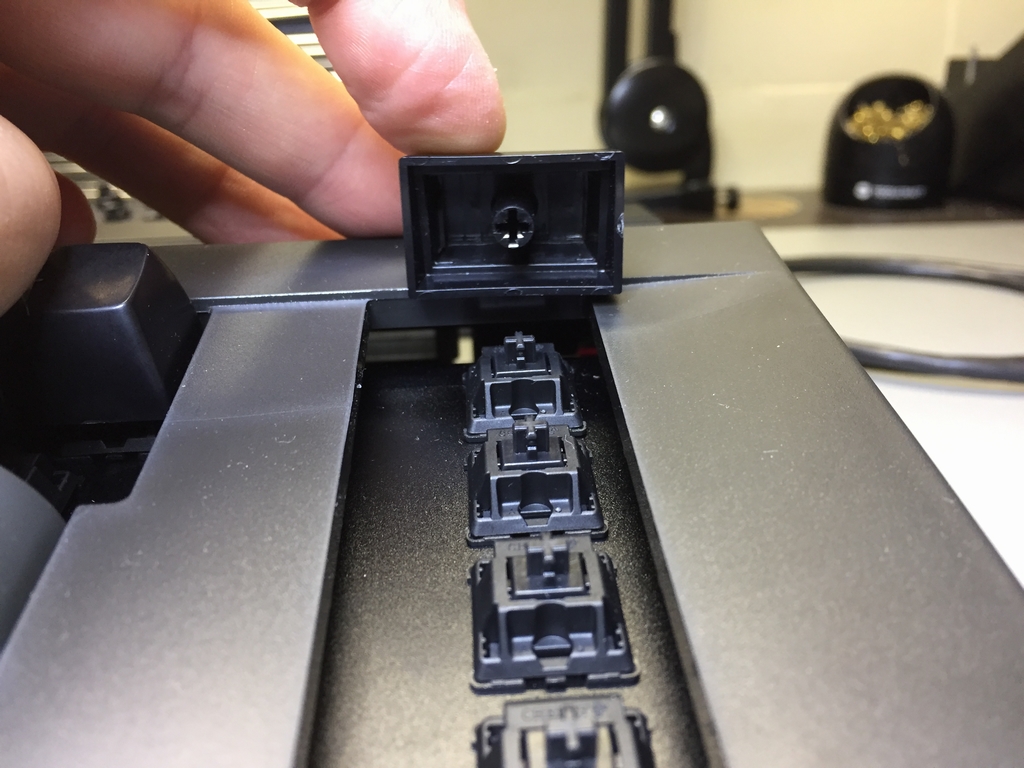
Furthermore, as the 3D printed adapters is no longer needed, the SA Family keycaps are placed lower in the frame. In my opinion waaay too low and therefore not even close to being an acceptable fit. They would actually benefit from having a 3D adapter to raise the height which was one of the reaons to abandon the original C64 keycaps in the first place… Bummer!

I have really racked my brain to come up with a solution that would make the MechBoard64 compatible with modern keycaps like the ones from Signature Plastics. However, in order to suit both modern keycaps and old C64 keycaps, I would have to modify the PCB as well as the aluminum bracket. This would obviously be in the form of special shaped holes for the size 1.5 keys. From an aesthetic viewpoint this would totally ruin the smooth looks of the keyboard (and probably make it a bit more unsturdy). Even if these modifications were realized, it would not compensate for the lower placement of the modern keycaps in the frame.
So the sad news is that I’m still back to waiting for Phase5 to eventually deliver new keycaps that will fit the MechBoard64 without any hardware modifications. Well, at least I’m the only one who have wasted a heap of money on some useless new keycaps on my quest for a brand new Commodore 64 :o(
© breadbox64.com 2018
Very nice and promising post at first, but with a very sad ending though 🙁
Hi,
Been a while, but just read this post and thought I would let you know I have attempted to make my own keys using resin and a cast made from silicone latex. It did not turn out very well, but i am sure it could be done properly if someone had lots of hrs spare and plenty of patience. It can be done by taking a mold of any commodore original key. I just took a cast from the top side of the key and then hand drilled a hole off to one side afterwards. It worked, but as it was a first attempt it had many imperfections (link, link, link). There is a video on youtube of a couple of guys who do this extremely well (link). They take castings of both the upper side and underside of the keys. They then use some sort of pressure pot to force out any air bubbles. The best thing about making resin keys is you can add multiple colours and also add materials into the mix to give certain effects. I was hoping to try make a C= key and have the C= logo sat inside the clear resin. I am willing to give it another go when I get time. I am also thinking about finding the type of pressure pot they use. I am thinking if we can make a mold of just the keys we need, we can make a batch. Watch the video and let me know your thoughts.
Also, I would like to add. The pictures of the C64 above with the black keys look really good, so you are nearly there. I can understand how frustrating it is, but keep going:)
Hi Neal, that looks awesome! You should consider making the key in a way that makes the 3D printed adapter unnecessary. Would be really cool to hae a transparent key with the C= logo inside… Looking forward to see more from personal key factory 🙂
I’d love to see a version of MechBoard that works with a modern keycap set. The PCB should be no problem, you could have double holes for all the 1.5u keys, so the switches could be soldered in the centered or offset position. This is quite common practice in the custom keyboard community, and a lot of kits do this in order to accomodate for ex. multiple bottom row layouts (with or without windows keys and similar).
The metal plate / bracket is a bit more tricky – it can work by having larger cutouts for the 1.5.u keys (sometimes refered to as a “swiss cheese plate”)… some people don’t like these because it makes it more difficult to properly align swithes when assembling the board, and of course for aesthetic reasons. I (and I’m sure a bunch of other people) woulnd’t mind though as the holes are covered by the keycaps and won’t be visible.
Hi Nick, I would also love to get new keycaps 🙂 The PCB modification is pretty easy while the metal bracket will be a bit more tricky. I also expect alignment issues and the obvious visual eyesore. However, I see a few main issues with a ‘one-keyboard-to-accommodate-original-and-modern-keycaps’-solution. Firstly, the height of the bracket have to be adjusted as the modern day keycaps (e.g. SA Family) sits lower on the microswiches. Secondly, the 3D printed stabilizer stem that is used to keep all 1.5u keycaps hozizontal when fully depressed will go straight into the larger cutout when using an original keycap.
In my opinion, the best way to ovecome this is to make a brand new MechBoard64 specifically for modern day keycaps. However, a new set of keycaps (like the SA Family I’ve tested above) probably still costs around 120$ after being custom printed with PETSCII characters. And that is most likely if a batch of 1000 keycap sets are produced… I therefore hope that a new crowdfunding campaign will eventually emerge and make new keycaps available that will fit the original stems of the Commodore 64 keyboards. This approach will have a market of millions of potential buyers.
@MtnBuffalo: Check the MaxKeyboard. It is much cheaper. Here are parts from my order:
ANSI Layout Custom Color Cherry MX Keycap Set (SKU: MIX-COLOR-104-ANSI-TP-6-0): 40$
2x R1 1×1.50 = 16$ (8$ a piece as you need two to cover the missing function keys)
Add 16$ for two more keys to cover the holes around the 6.0U spacebar. May 3.99$ more if you want a more standard 6.5U spacebar (not a 6.0U one) surrounded by two 1.25U keys (not by 1.5U keys). So 72-76$ + shipping. And I’m talking about a single order (printed!). No group discount for hundreds of sets.
Quote MtnBuffalo: ‘In my opinion, the best way to ovecome this is to make a brand new MechBoard64 specifically for modern day keycaps.’
I second that.
I’m just hoping you sorted this out!
I hope that Jim Drew’s keycap campaign on Indiegogo will soon come to an end :o) You can find more info here: link