
(Well, it’s still work-in-progress but a protoype should soon be ready for testing…) During the last year or so, new Commodore 64 motherboards (link) and new Commodore 64C cases (link) have hit commercial retro market. On top of this (and hopefully very soon, Phase5!!) we’ll also get new keycaps (link). To compliment all these great new items, several forum posts have discussed the possibility to produce new keyboards as well. However, so far I’ve only seen one who has actually made one and that was on deskthority (link). The keyboard is called ‘MeC64’ and it is based on mechanical Cherry MX switches. It can be used as a standard USB keyboard or as a C64 keyboard. As I’m only interested in getting new keyboards for my commies and nobody else out there want to make some for me, I have decided to do it myself (angry smiley!!!). In theory it should be quite simple to create a new keyboard PCB that would accommodate Cherry MX switches. It is basically a matter of copying the original keyboard PCB, have it made and start soldering… Well, as easy as it may sound, things like that still tend to take forever to complete… This post is to show the progress of my project and some of the components that will go into the keyboards. Feel free to comment on my choices!
The drawing of the frame that the Cherry switches will be attached to is done. I just need to have it laser cut in a piece of metal at a local metal shop. The layout looks like this.
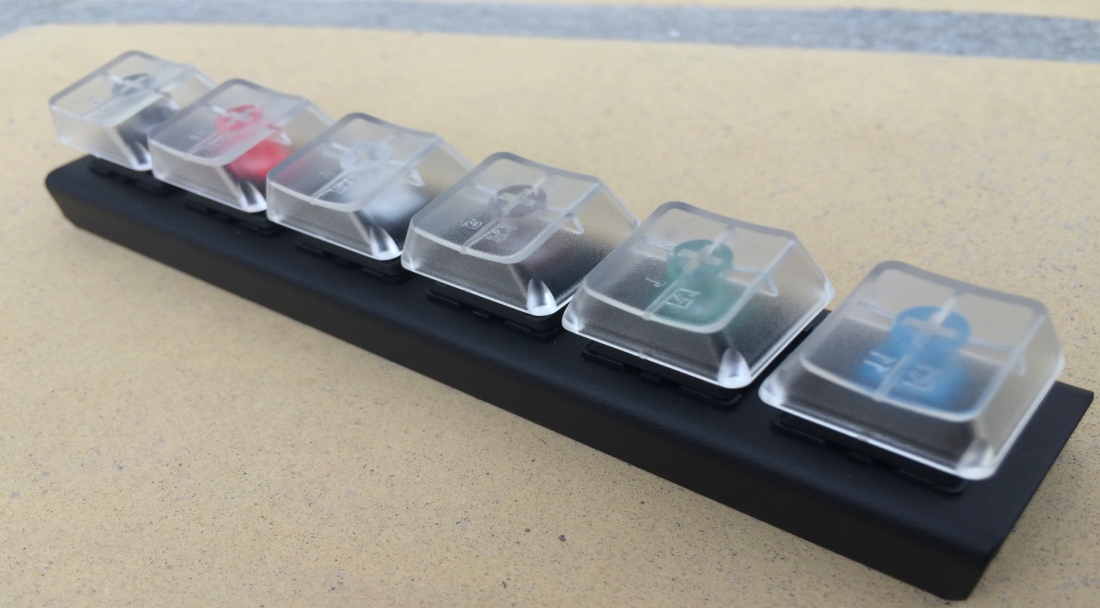
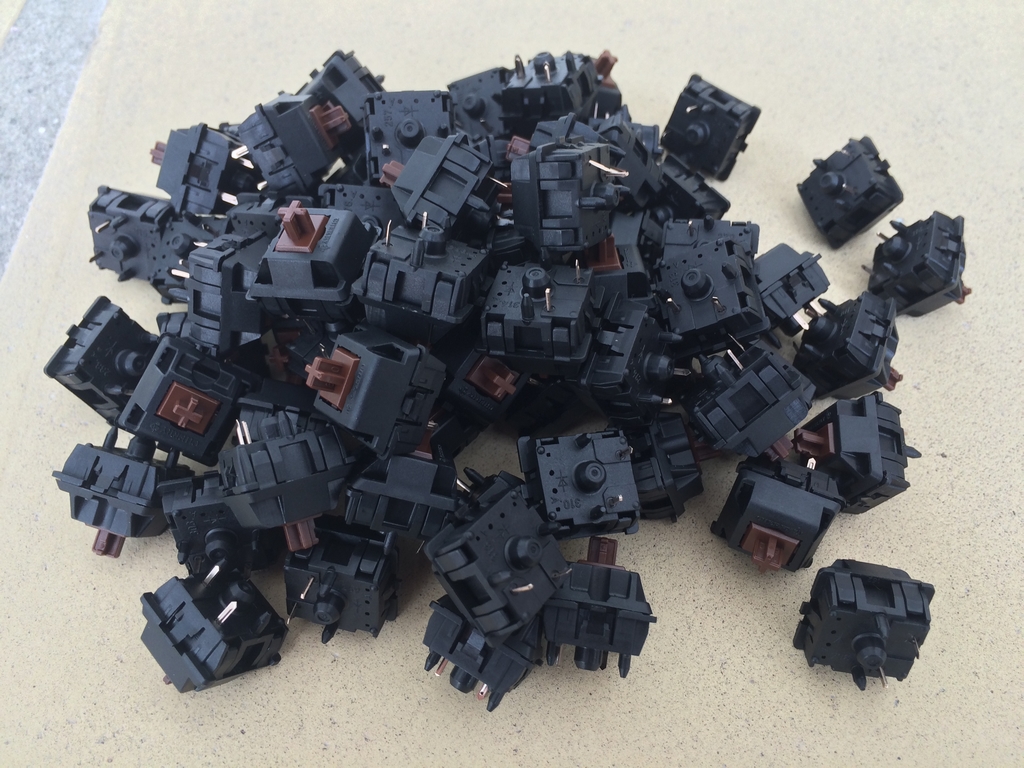
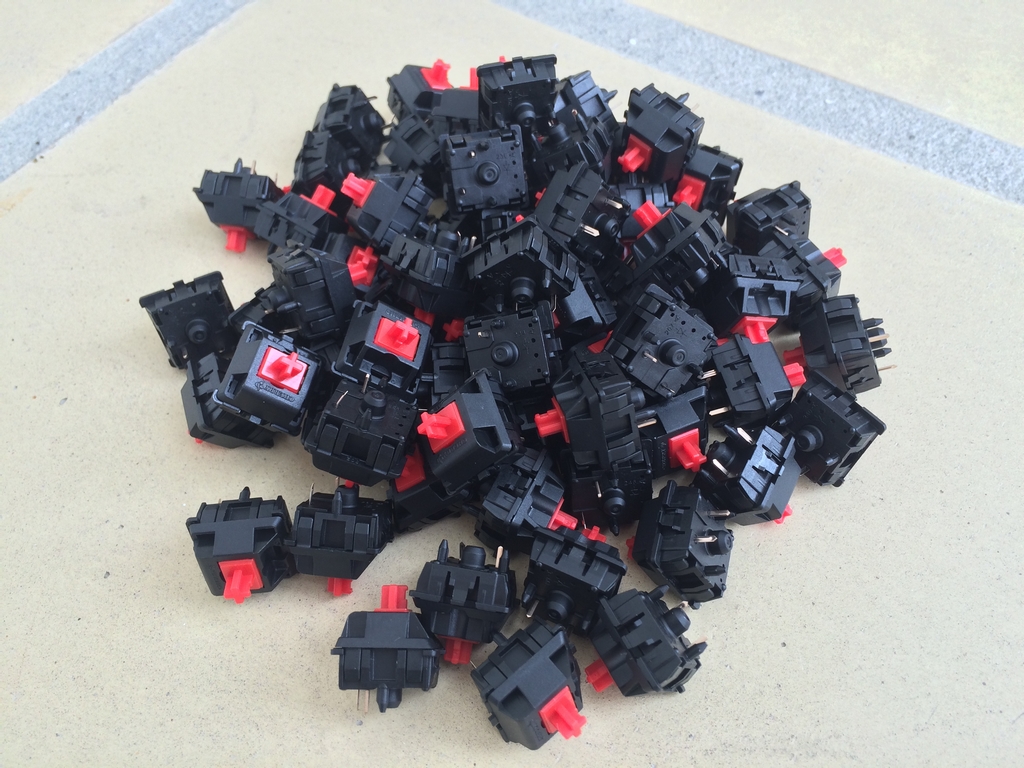
I have decided to use Cherry MX switches as these are easy to get (including spare parts) and have been used in the gaming community for years. To get switches that resemble the feel of the original keys, I have chosen red and brown switches for my keyboards. Both swithes are linear but only the brown has a tactile bump. I also had to get the six key switch tester with 6 types of Cherry MX switches. All this device does is to give the user the ability to compare the feel of the different switches. This tool is more a ‘nice to have’ than a ‘need to have’ item! I think the feel of the Cherry MX Red is the one closest to the original C64 keyboard.

Here are the piles of Brown and Red Cherry MX switches.
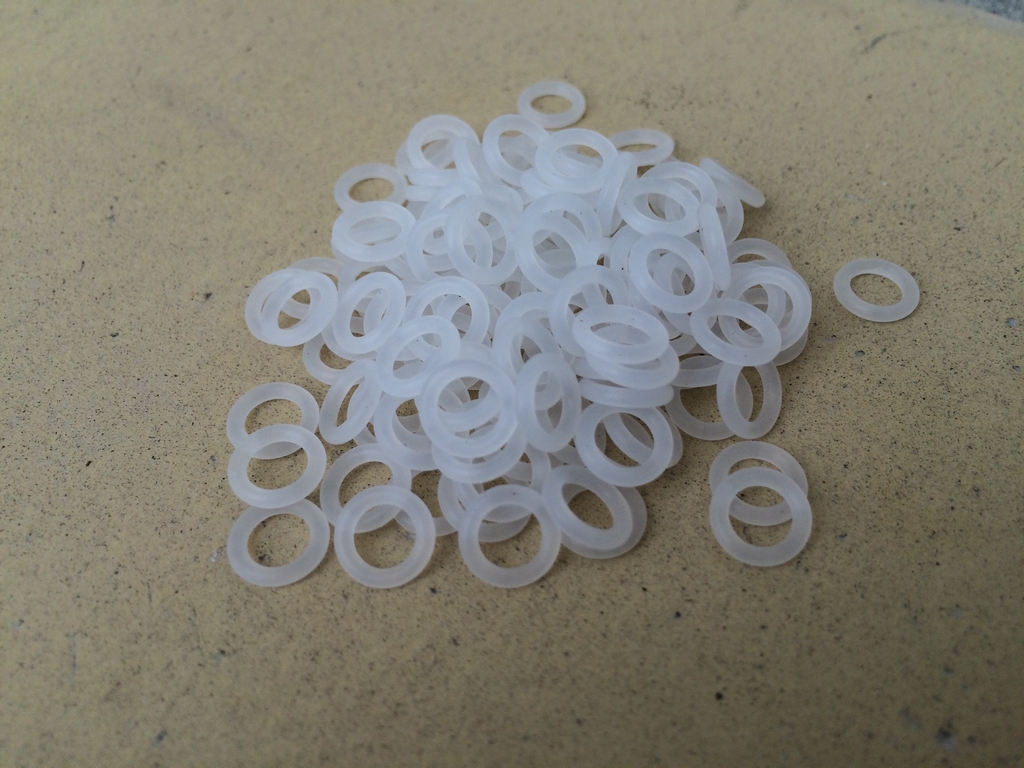
Damper O-rings to eliminate the “clack” from the collision on mechanical keyboards when’bottoming out’.
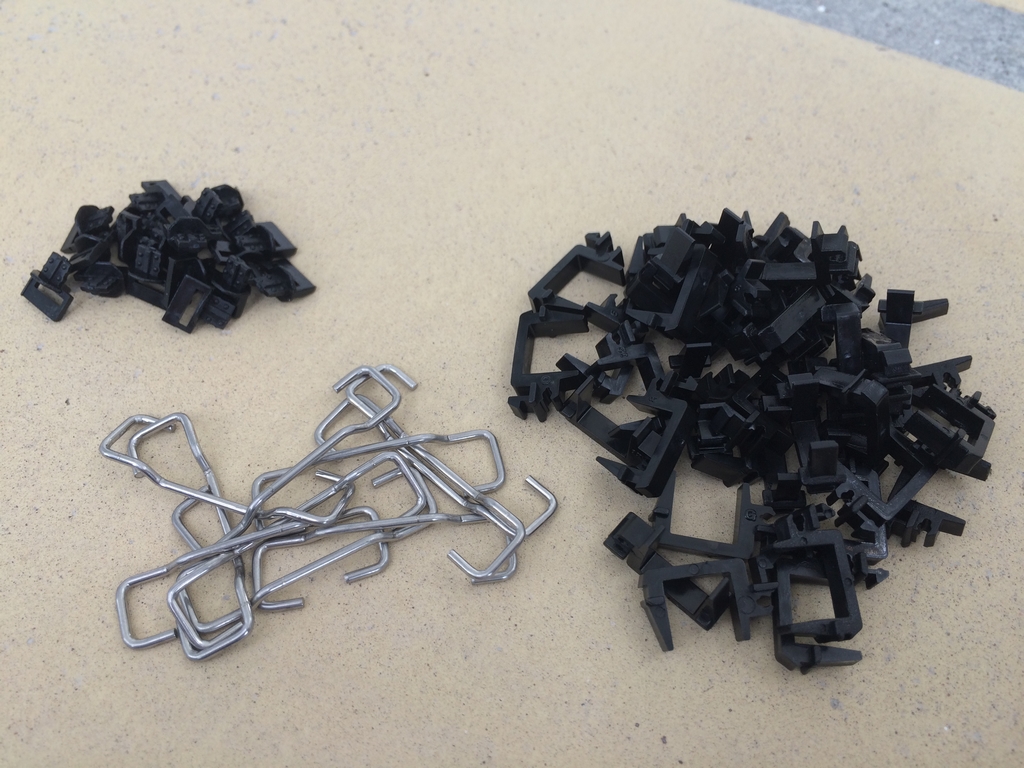
Stabilizer springs and clips for the RETURN key. Stabilizer springs for the spacebar are in the mail and should land on my doorstep within a couple of days.
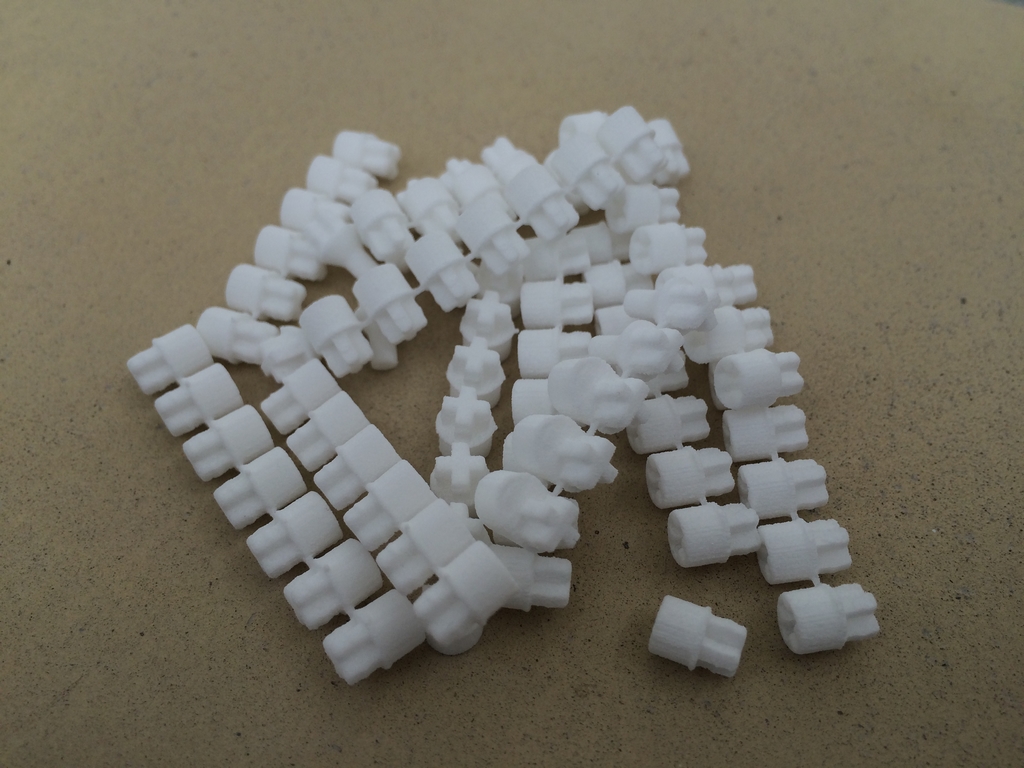
3D printed keycap converters to use original Commodore 64 keycaps on Cherry MX switches (link).
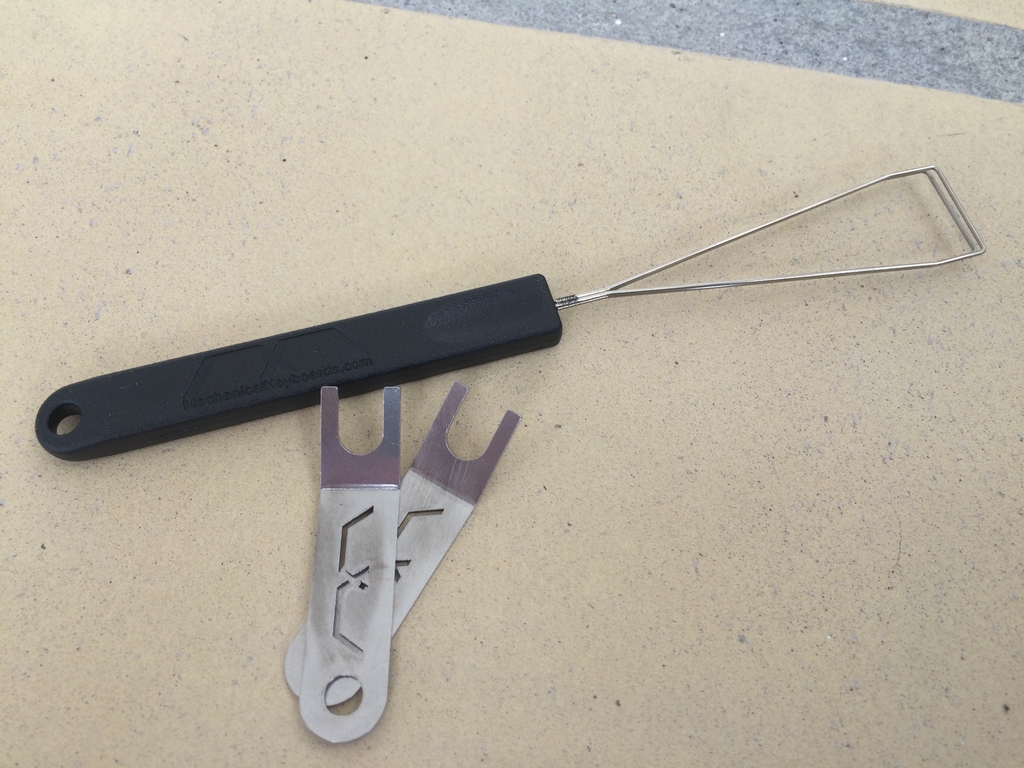
A wire keycap puller tool (for gently removing key caps) and a tool for separating the top and base parts of Cherry MX switches.
I’m currently working on creating the PCB and after completion, have it made somewhere. I really hope to have a working prototype within the next couple of months! So stay tuned for more info on the project!
UPDATE: the first prototype of the new Commodore 64 keyboard can be found here (link) and the final version of the keyboard, the MechBoard64, can be found here (link).
© breadbox64.com 2016
Excellent – I’ll be following your progress!
Awesome – can’t wait to see your progress! Ever since I managed to get a Commodore 64 Reloaded last year I’ve been looking for a keyboard, so here’s hoping your work pays off (and that you would consider launching a Kickstarter, eventually! ^=^).
Hi there! I did the same thing – looked for somebody who would take the time to make some new keyboards… It seems that most of the work involved is the craftsmanship in physically making the frames that hold the PCB and then of course a lot of soldering. I currently plan on making two new keybords for my own C64 Reloaded boards (maybe a few more as the cost for having additional frames/PCB’s made are drastically reduced after the first prototype). If everything works out (and the looks of the keyboards are acceptable) I may consider putting out the drawings/schematics if people want to make their own keyboards.
A Kickstarter campaign may be a little too much for me as I don’t have any experience in producing stuff nor selling it to make a profit 🙁 If it should be done (and not by me), the frames should be made in plastic to keep the costs down (I plan to make mine in metal) and the soldering of the switches should be made in another way than me sitting in my dark basement with a soldering iron 🙂
Nice! Keep up the good work, and let us know. I love the whole idea of having a completely new C64, with just a few chips being left from the original. 😉
Hi Rasmus. I’ll keep you updated! I hope to have something ready around Christmas…
How are you handling the shift lock? I know the latching cherry mx switches were discontinued some time ago and I’m currently looking for a source for them. To save on I/O Commodore went with an 8×8 keyboard matrix which makes the layout for cherry switches a pain. I also plan to use RGB Neo Pixels and RGB blues with clear bodies in my design further complicating the board layout/ trace routing.
Hi Bryan, I have been searching for a few of the discontinued latching Cherry switches but without any luck. I’m planning on using the original Commodore shift lock if I don’t manage to get some cherry ones. It’s a much bigger project than first anticipated…
Hi there! I’d totally be down on buying a PCB and mounting plate if you feel like doing some sort of group buy (Along with any of the other parts where it makes sense to do so :P). :D.
Hi Lori, I have considered doing just that 🙂 However, the project is not exactly moving at light speed, so I’d rather see how the first few prototypes end up before starting to take people’s money… I really hope to have something to show you guys within a few months. If I don’t hurry Jens Schönfeld may have his keyboards ready for the upcoming C64 Reloaded V2 sale 🙂
Guten Tag, please keep me updated. I’d really like to buy one or two replacement keyboards. All the best from Switzerland 🙂
The project is moving forward – slowly but it’s moving! I’m currently working on the PCB using SprinLayout. I’ll keep you updated!
This is great! You’ll sell a ton of these. I can’t wait!
Really looking forward to this! 🙂
Best of luck with the rest of the project!
Exciting project. Do you have a social media channel or email list for us to subscribe to? Would love to stay current with updates to your project. Best of luck!
Hi there. Yes, the project is still in the works even though it has taken a lot longer than first anticipated. Other projects and repair jobs keep pushing the C64 keyboard project to the side. However, I do plan on finish it eventually! I’m currently working on the PCB layout…
As the only person on Earth I do not have a social media account nor an active email list for you to subscribe to. I guess I’m very old-school in that regard 🙂 But please bear in mind that I only plan to make a very limited number of keyboards (2-5 pieces) to show that it can be done. I may release my blueprints for others to create their own keyboards but I have not decided on that part yet.
OK, will someone please tell me how the original Commodore 64 keyboard works? All I wanna know is how to work the cursor keys – like how do I move the cursor around? Do I put pressure on a specific spot of the key or should I combine the movements with a different key?
You need to press one of the SHIFT-keys to alter the direction of cursor 😉
OK, thanks man I have been wondering so many times. Thank you so much for explaining it to me.
The keyboard frame is 99% done and the PCB only needs a few hours of work before I send off the prints to production in China. Cables have been orderd yesterday from Australia and header pins will be picked up at the local electronics store later this week. Currenly I’m basically triple checking everything before the prototypes can be created.
Great News!
Fingers crossed. I believe there is a considerable market for this (looking at the brilliant new C64 cases, and developments like the C64 reloaded or the FGPA Ultimate64)
Hey MtnBuffalo, do you have renderings that show what the keyboard would look like??
Hi there, no sorry – I’m just a hardware guy 🙁 The C64 keyboard will visually look a lot like the MeC64 on Deskthority (link) but obviously without the USB option. However, mine will have the option of placing the keyboard cable at two different locations on the board depending on the motherboard revision it will accommodate (link). This way a shorter cable can be used to keep things neat and tidy.
The basic layout you have for the PCB looks great! The keyboard on my C64 doesn’t feel that great anymore, and a replacement like this would be amazing! Would love to know how much something like this would set me back.
Please keep in mind that I (currently) plan to make a very limited number of prototype keyboards (2-5 pieces) for my own machines. However, I may make the blueprints available for others to create their own keyboards but I have not decided on that part yet.
The price of the boards is kinda ‘ridiculous’ due to the way I have manufactured them: PCB production in China, cables from Australia, metal frames will be laser cut at a local metal shop, the precision bending of the frames will be done by a local blacksmith with the correct tools, the Cherry mx switches (+ stabilizer springs & clips) come from the US, the cable header pins come from a local electronics store and the soldering of it all is done in my basement. I still need to find a suitable replacement for the shift/lock key as the Cherry Lock key is no longer being produced. And last but not least, I need to get the ‘CherryMx-to-C64-keys’-adapters 3D printed somewhere as Shapeways don’t want to print them anymore 🙁
Oh, wow! That’s quite a lot of things to keep track of. Regardless, I’m looking forward to the proverbial money shot :-). The PCB layout you linked earlier looks sweet, and it makes a lot of sense to have two different connection points for the wiring harness as well.
As for getting things 3D printed, instead of looking at Shapeways, you can take a look at 3dhubs.com and find someone near you that is offering print time on their personal printer. Hope it helps you out 🙂
Thanks for the 3D printing link. That may be both cheaper and faster than Shapeways 🙂
I’m now done with drawing the keyboard bracket. The PCB layout is also completed if I could only get a heap of Cherry mx Locking switches… As this doesn’t seem like an option, I’ve decided to make the keyboard more future proof in regards to parts (and to do a little bit of over-engineering!). I’ve therefore added a very simple push-on push-off circuit to the keyboard PCB. This way I can use one of the standard Cherry switches for activating the Shift Lock. I also added a small LED that lights up underneath the Shift Lock button when it is activated. This way the user can see if it is activated or not – much like the Caps Lock on a modern day keyboard. Everything works on a breadboard and I will test it inside a real machine tomorrow 😉
Did it work? When can I have it 😉
Well, the keyboard PCB including the push on push off circuit is all done and ready to be sent off for prototyping. I also managed to scavange a few Cherry mx locking keys for testing purposes. When I receive the PCB’s from the manufacturer I’ll have the brackets made at a local shop. So everything seems to be coming together. I then have to do some more testing and of course do a post on it 🙂
For me the only big discomfort of the C64 keyboard was the cursor keys (as many computers in 80’s era). I would have like them like this (link). Ciao 🙂
He he…that is so cool 🙂
Hi. A doubt. With the Commodore to cherry adapters, the keyscaps are more distanced than normal?( greater height respect the base)