
I’m not proud of it but I’ve cheated! It’s a horrible thing to do but I simply didn’t have the patience not to… The initial idea was to grab my kick-a$$ Stihl chainsaw, go fell a suitable oak tree, use my mobile sawmill to make some thick two inch planks, make them dry in the backyard before turning them into new joysticks. It would have been pretty cool to create some new Commodore 64 joysticks from oak wood that I’ve felled myself in a local forest. However, oak planks of that thickness could take more than a year to dry and there is no guarantee that it would not warp or split during the drying process. So I cheated and went to the local sawmill and bought some pre-dried oak for my next Commodore 64 joystick project…
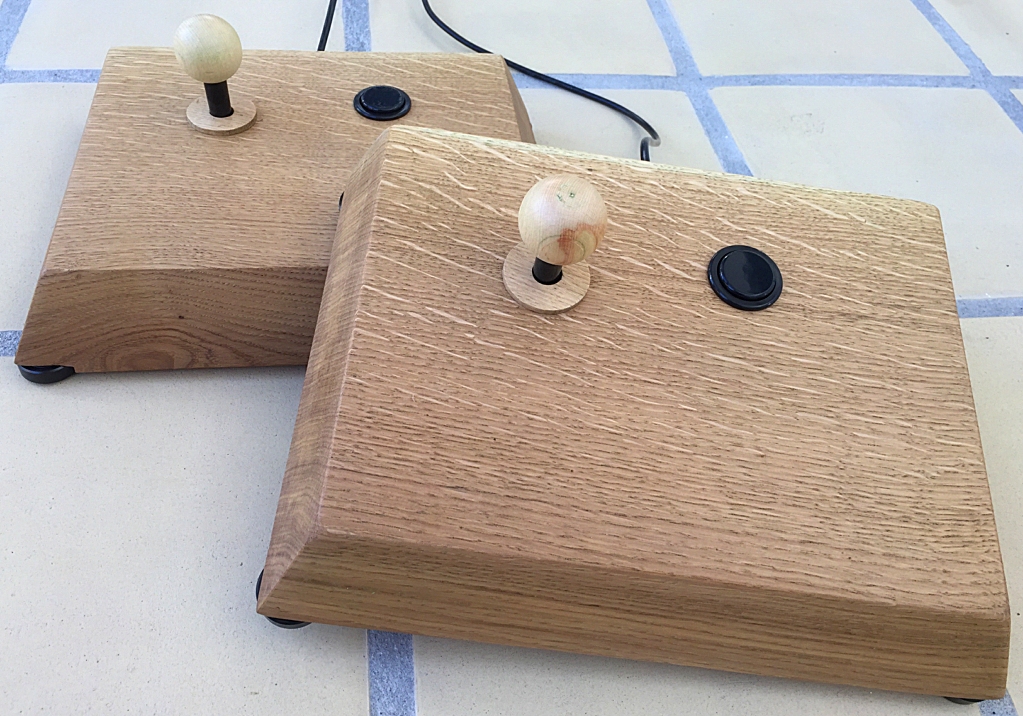
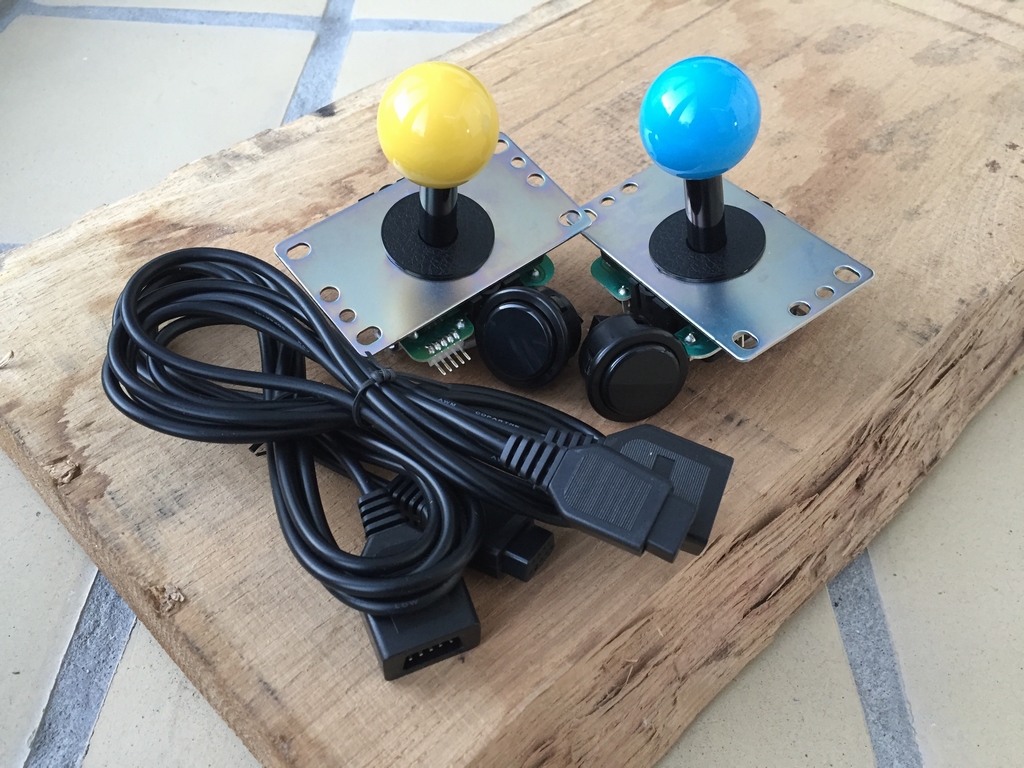
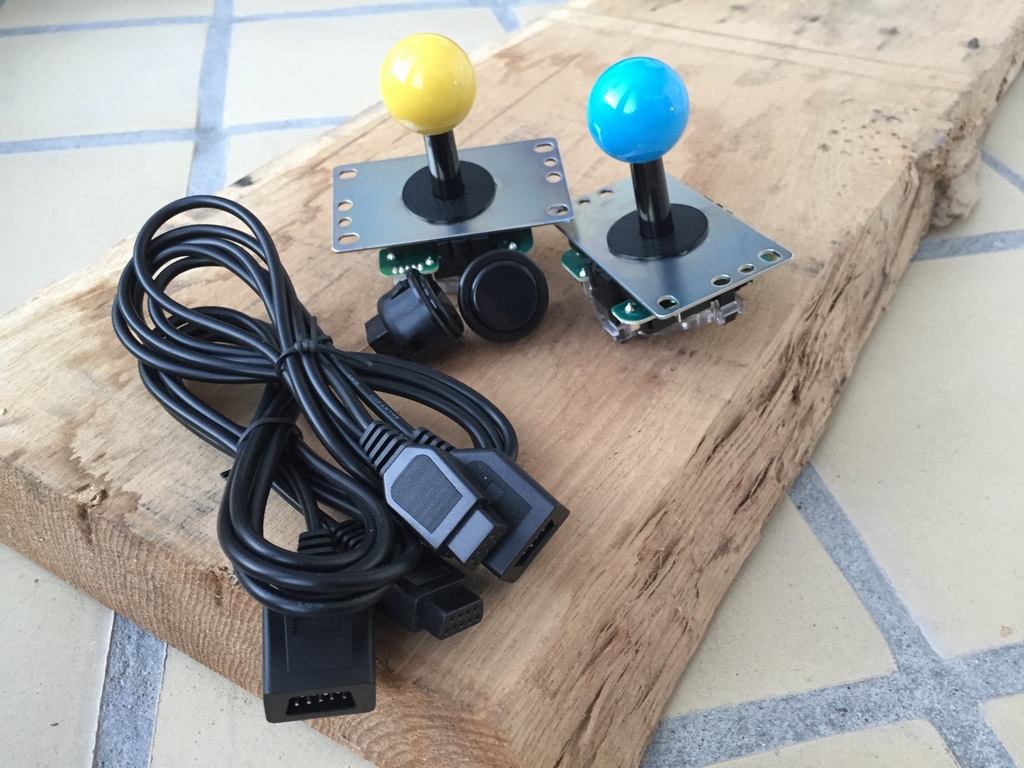
The original joysticks for the Commodore 64 were both sturdy and precise for their time (link). However, if even more stealth-like precision is needed, there are alternatives that may surpass the old plastic C64 joysticks. At least in my opinion… As I really enjoy playing platform games like Montezuma’s Revenge (link), I wanted to build new joysticks that were both precise, sturdy and not looking like something I could just go buy at the local games shop. I have previously build a few fight sticks from wood (link, link, link) but all those sticks were made for modern game consoles or MAME. This time I wanted to build two Commodore 64 joysticks from a solid oak plank, add some Sanwa JLF joysticks, some Seimitsu PS-14-G 30mm snap-in buttons, some black aluminum feet, and finish it all up with custom wooden balltops and dust washers.
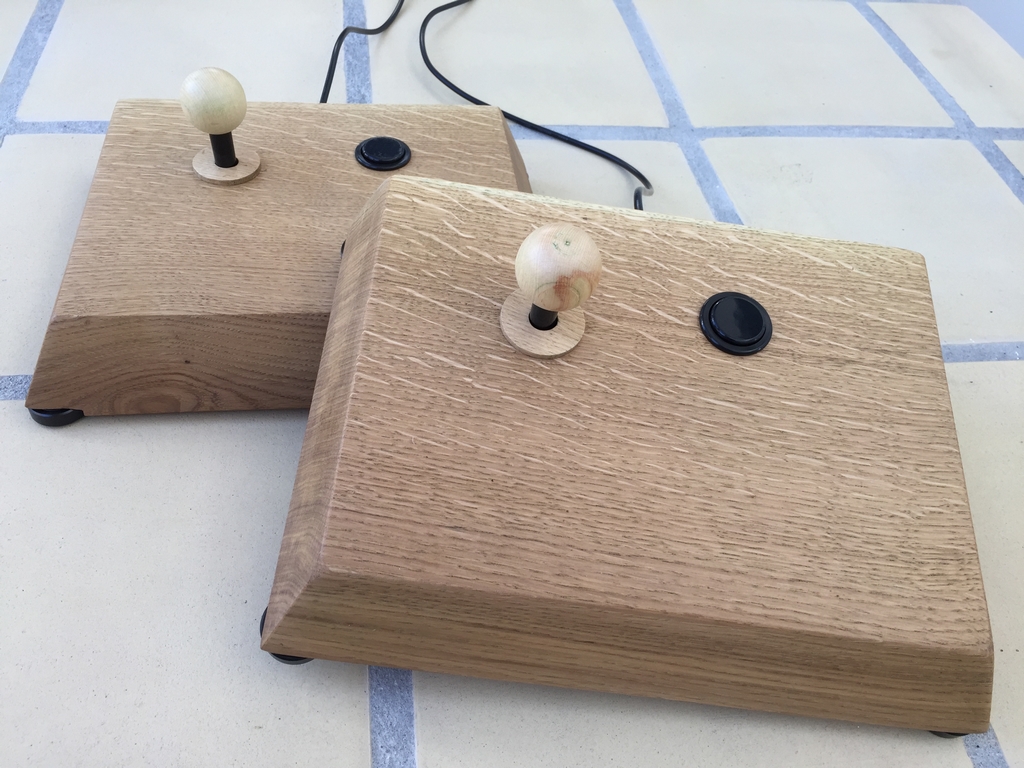
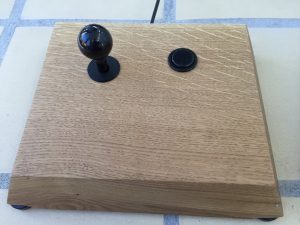
This is how the joysticks ended up looking. The rest of the story can be found below…
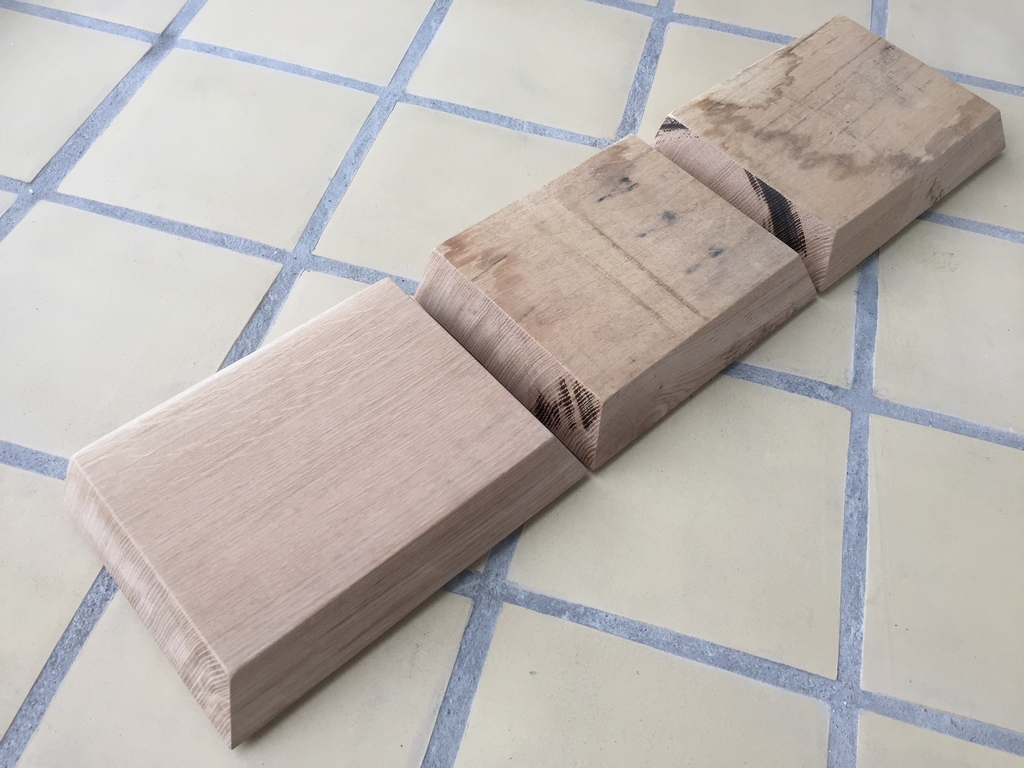
The Oak Plank
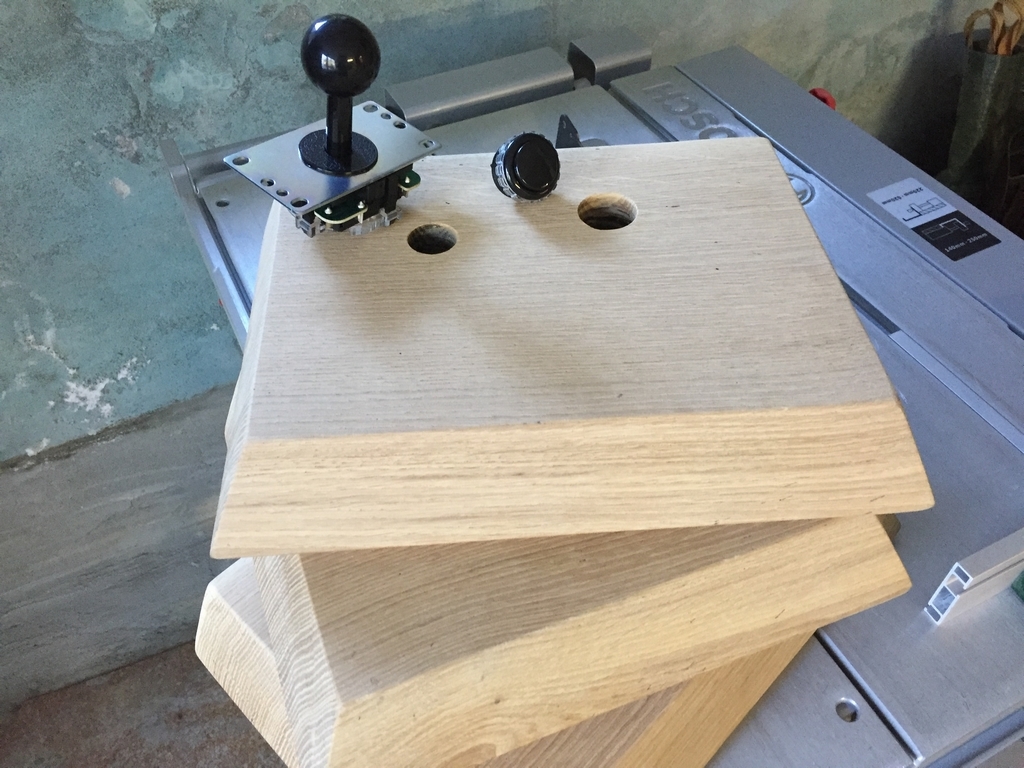
As stated above, I cheated and went to a local sawmill and picked up a 1 meter (39 in) pre-dried oak plank in 57 mm (2.2 in) thickness and a width of 22 cm (8.7 in). The plank was then cut into three 30 cm (11.8 in) pieces using my table saw and sanded down with an orbital sander.
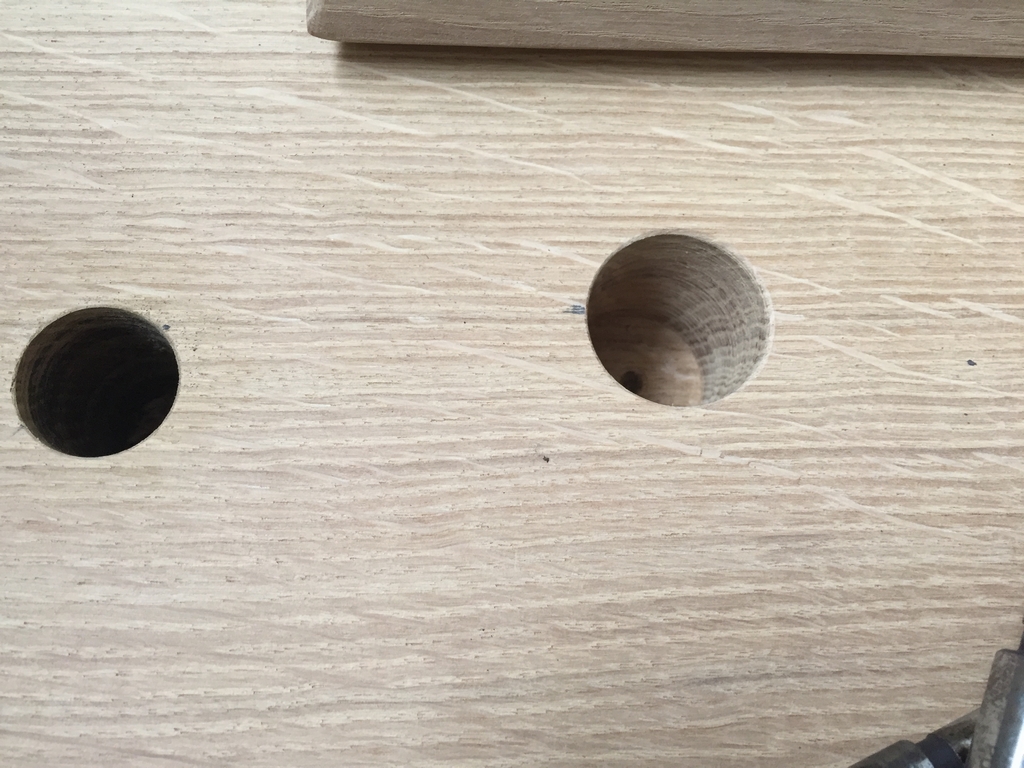
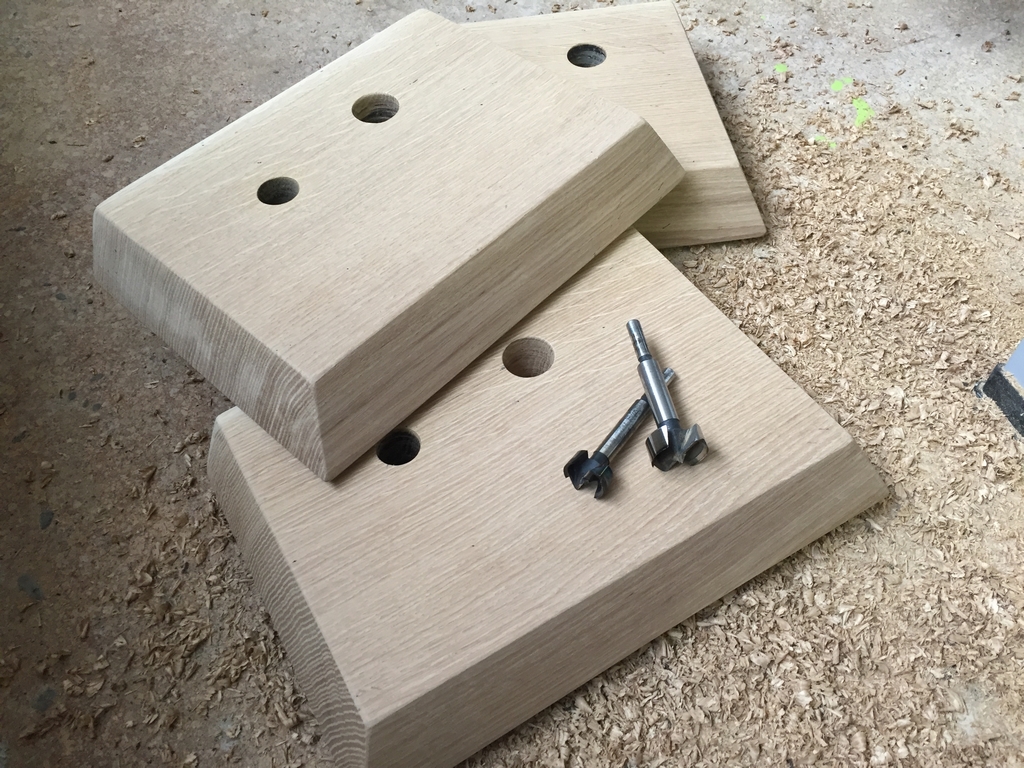
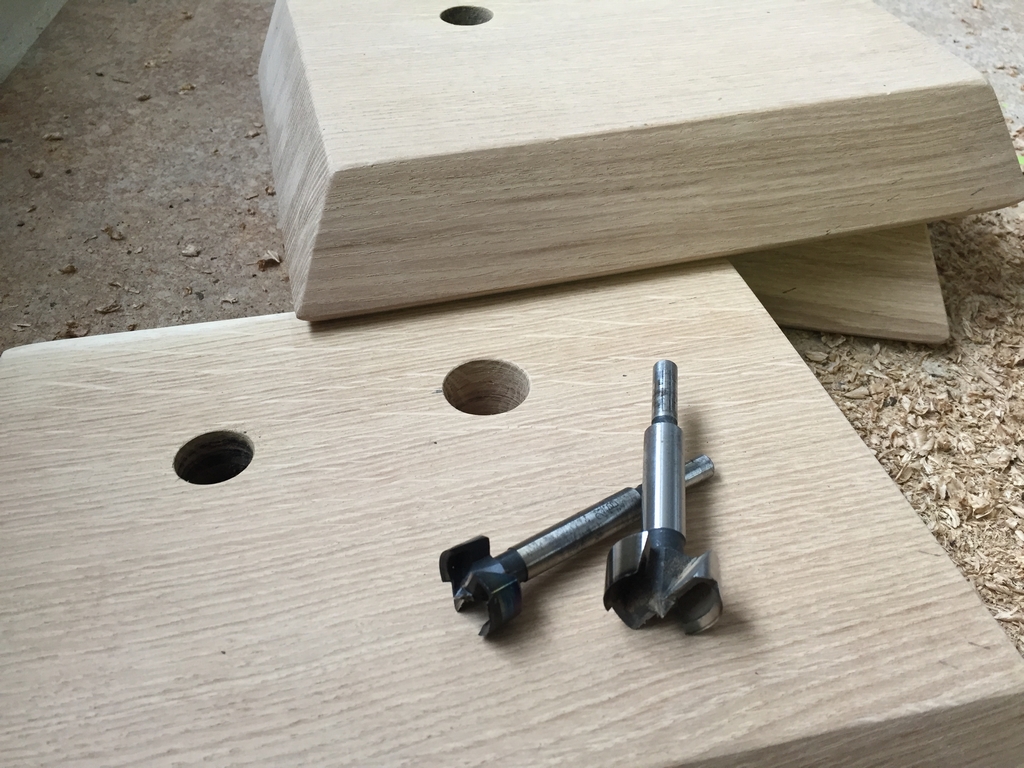
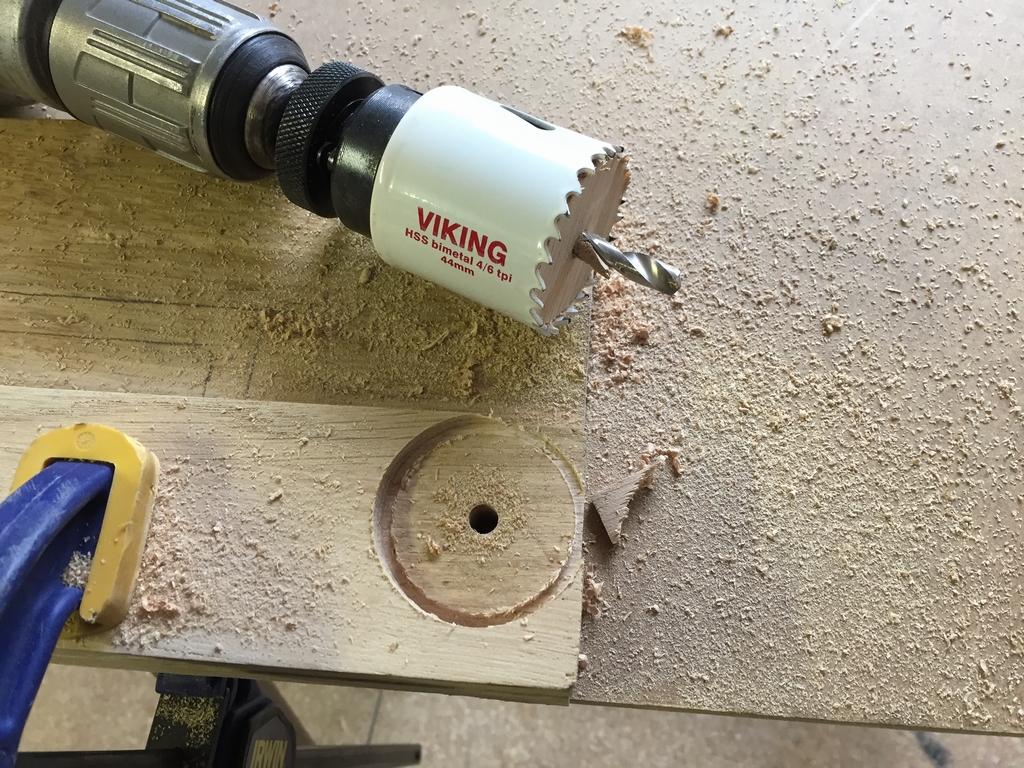
Making room for the Joysticks and Buttons
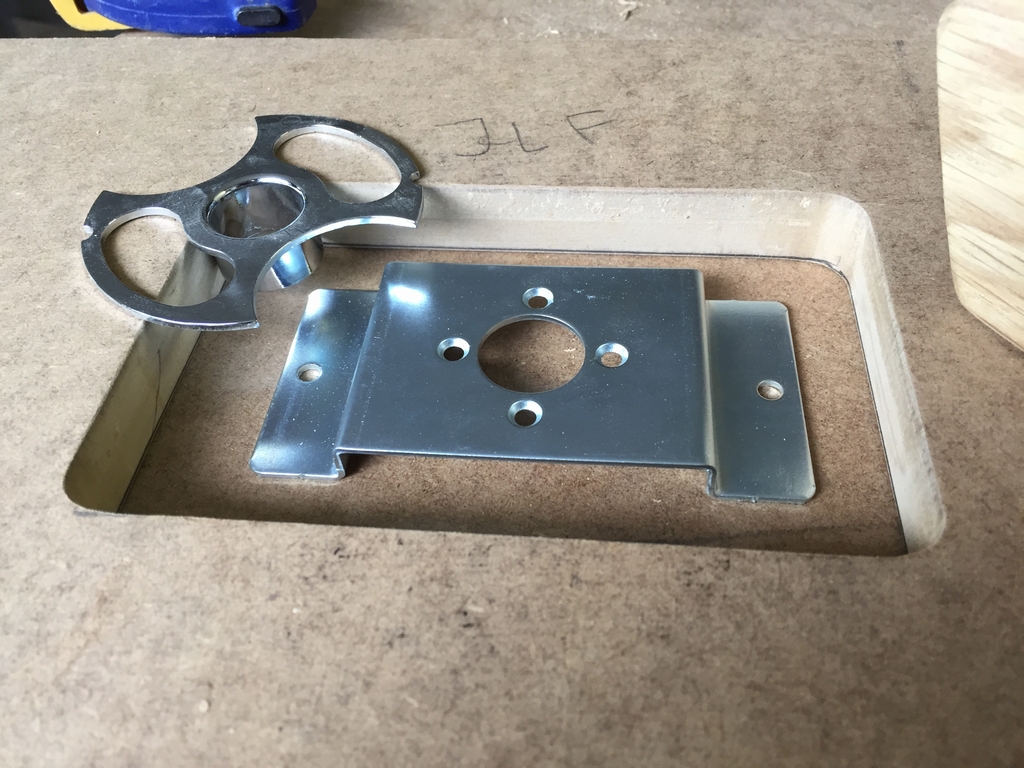
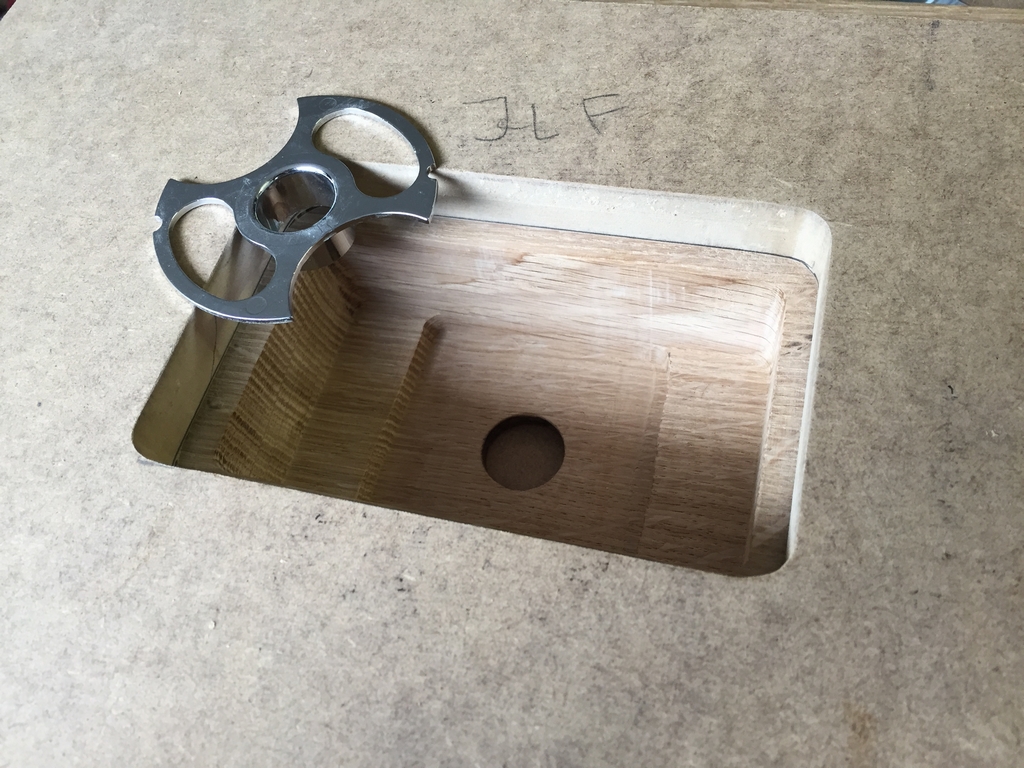
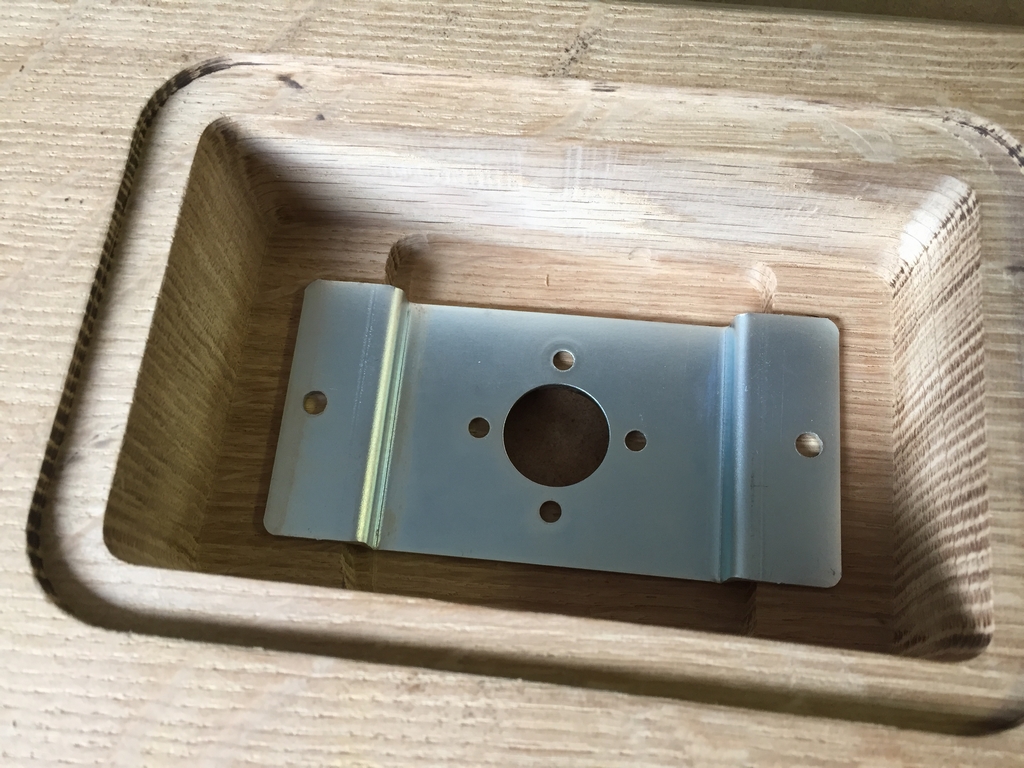
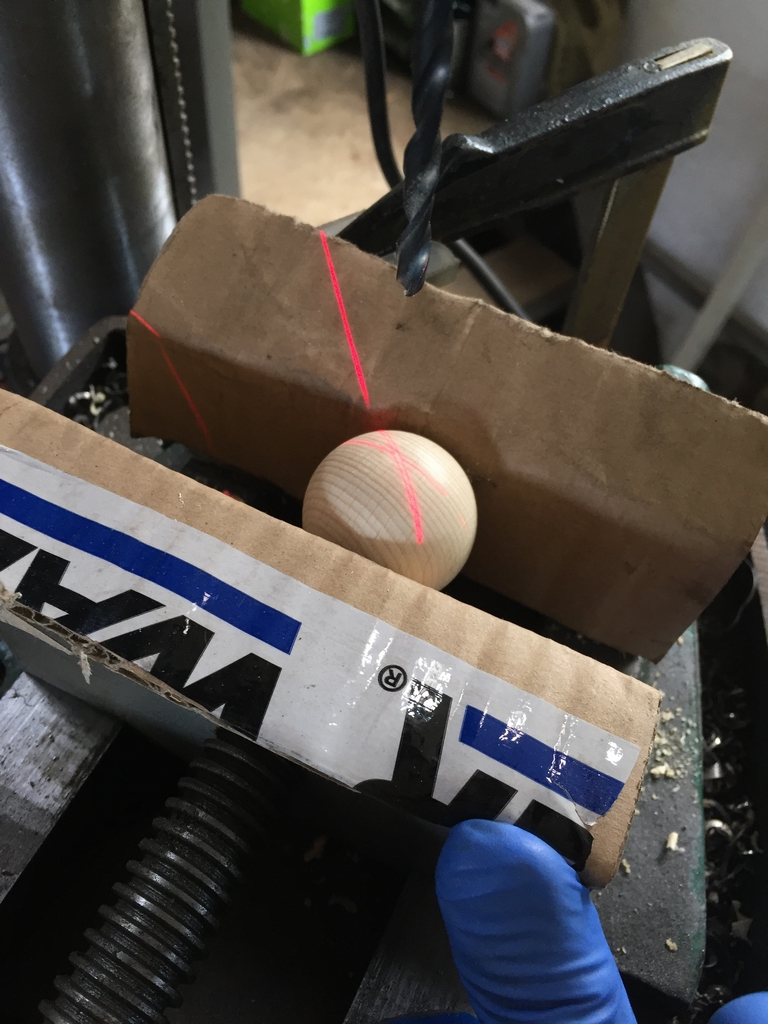
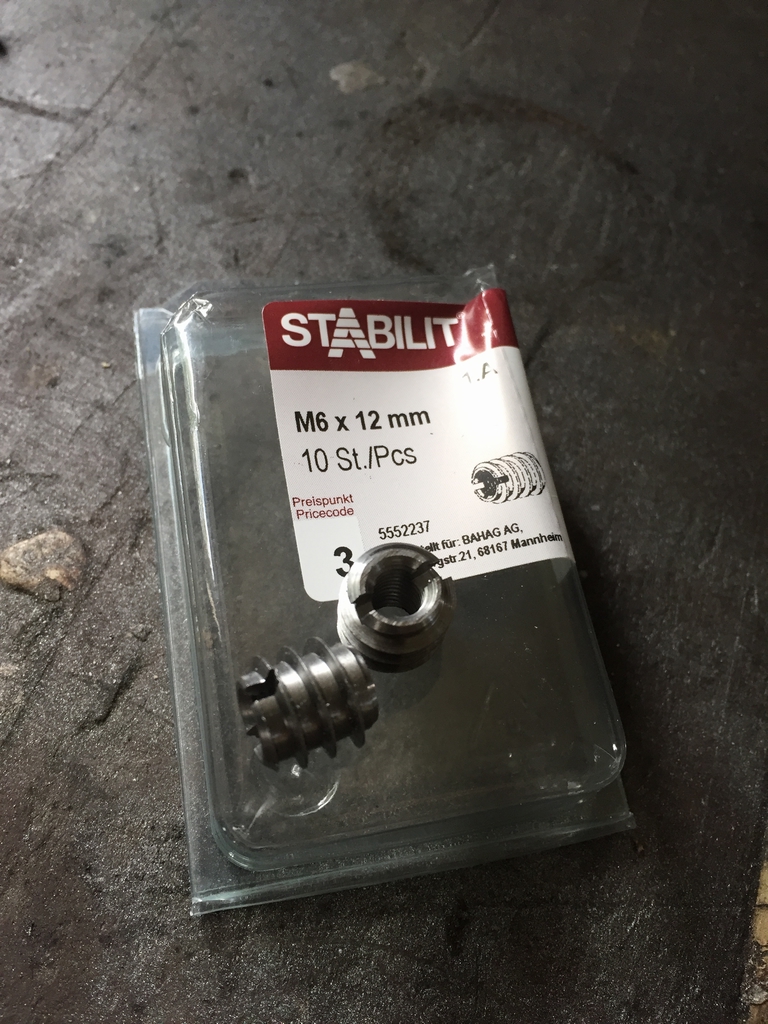
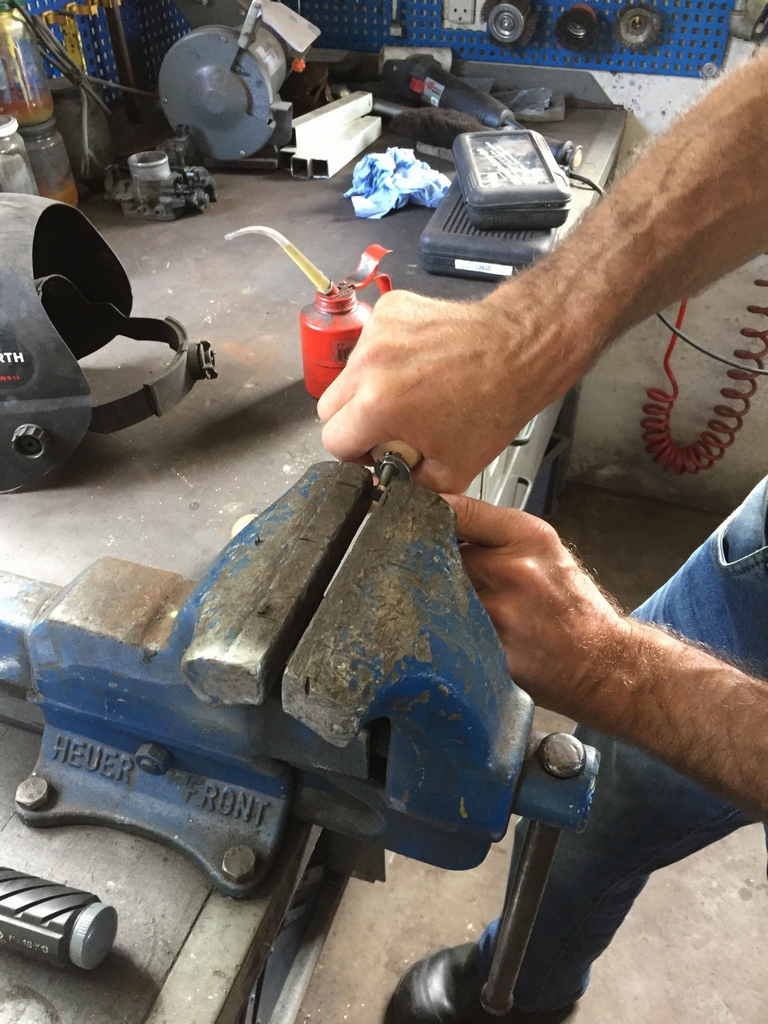
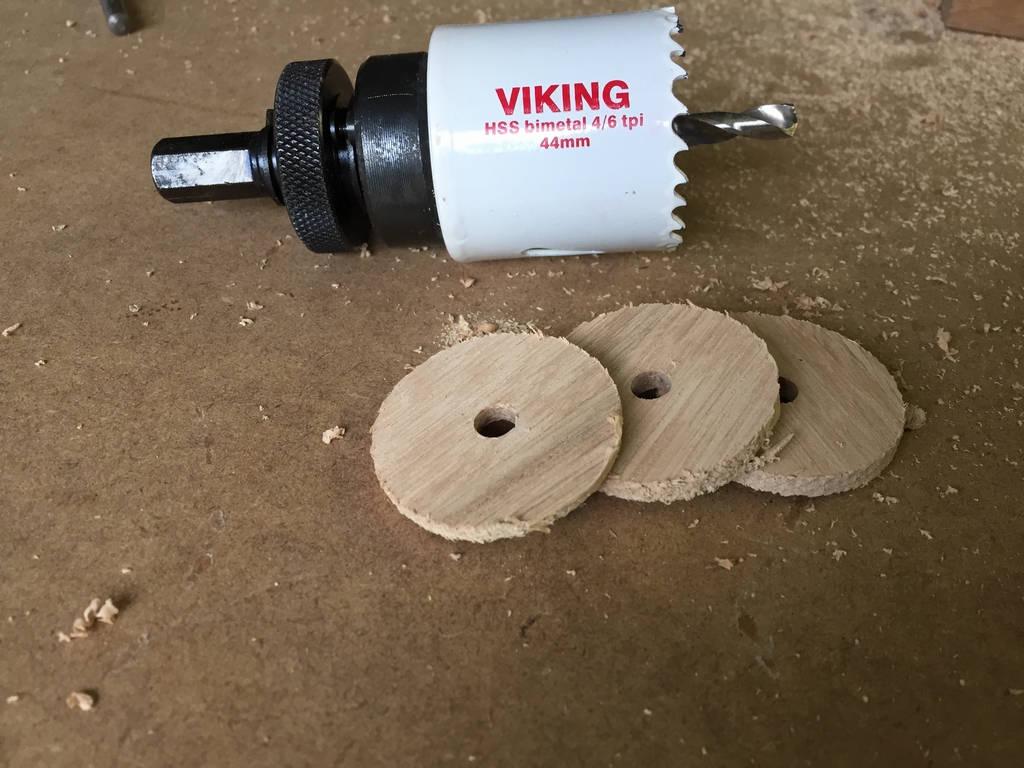
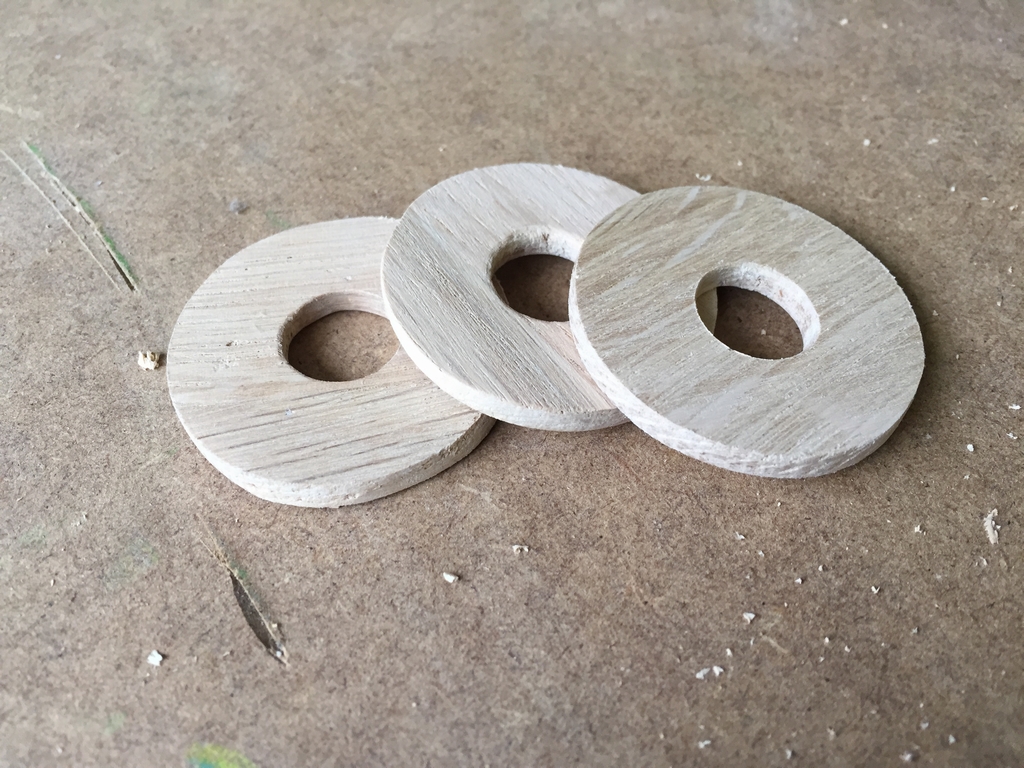
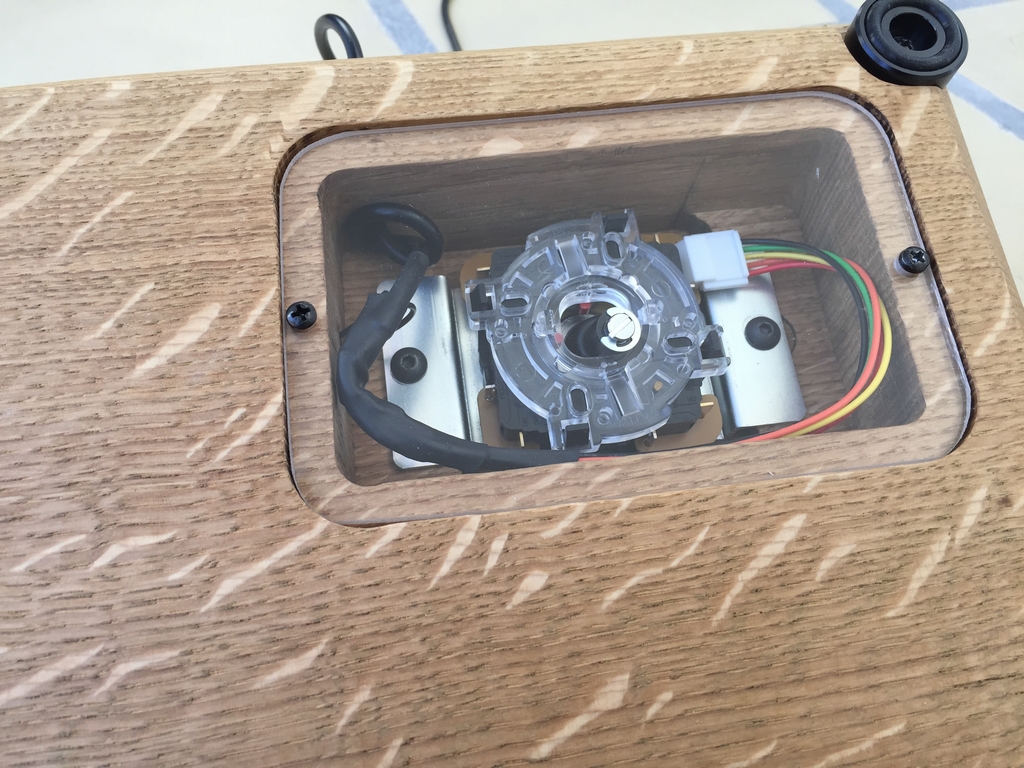
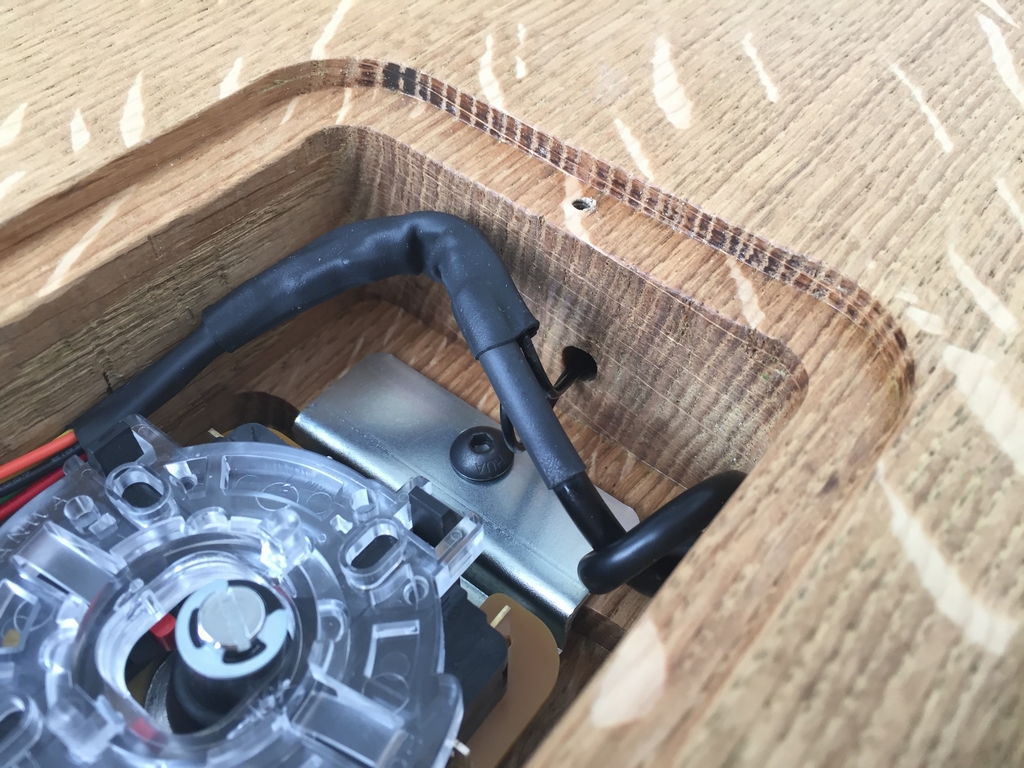
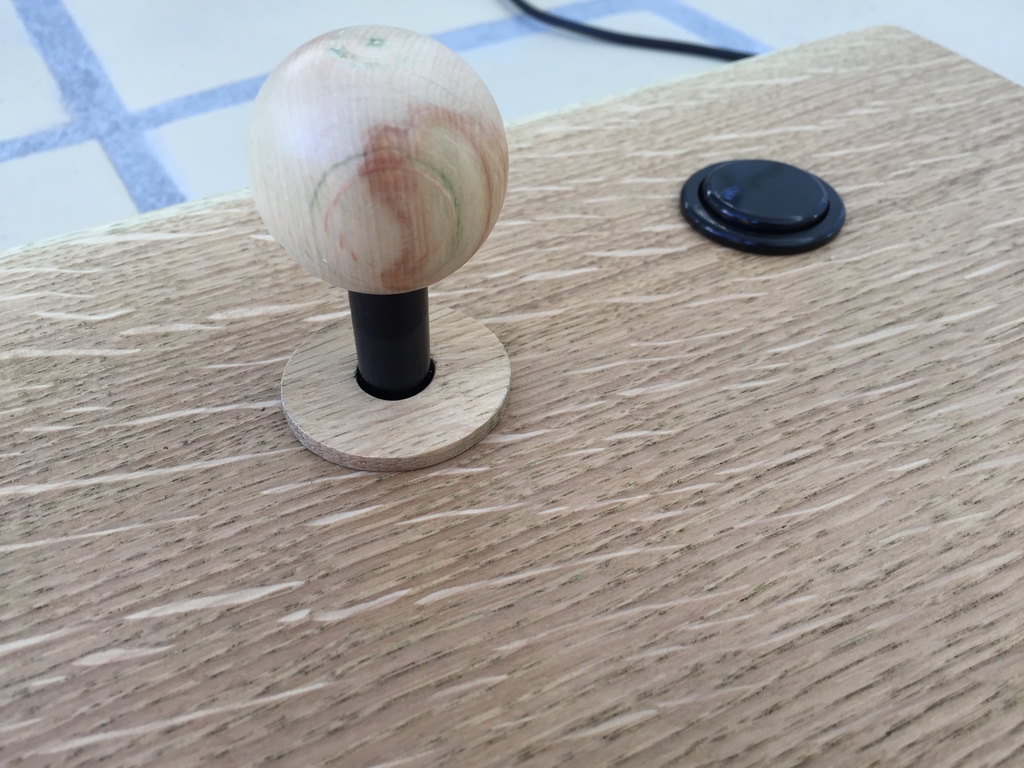
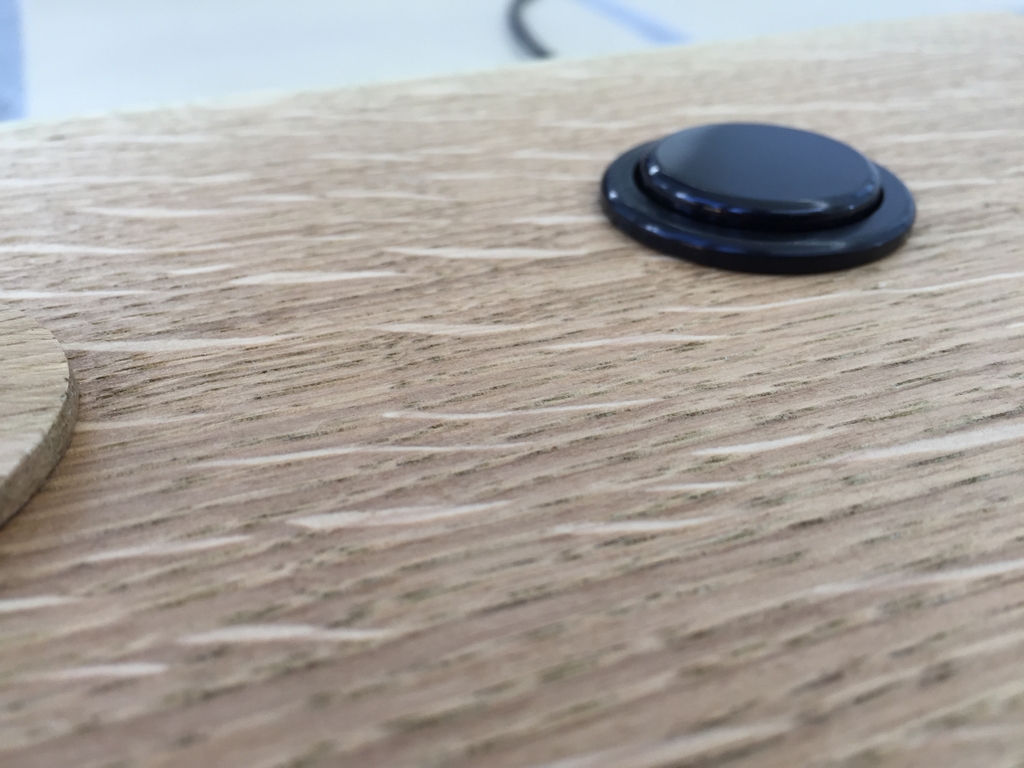
First I made holes for the buttons using a 30 mm forstner drill bit. Next up was cutting the big hole for the joysticks. I made a template for my router to make the cutting easier and more precise. To place the Sanwas joysticks as close to the top of the joystick as possible, I used Sanwa JLF-P-1 mounting plates. The mounting plates were fastened to the internals of the joystick by using M6 threaded insert bushings. This approach makes fastening of the joystick invisible from the outside… The button shown in the fourth picture is a Seimitsu PS-14 GN screw-in button and was later exchanged with Seimitsu PS-14-G 30mm snap-in buttons.
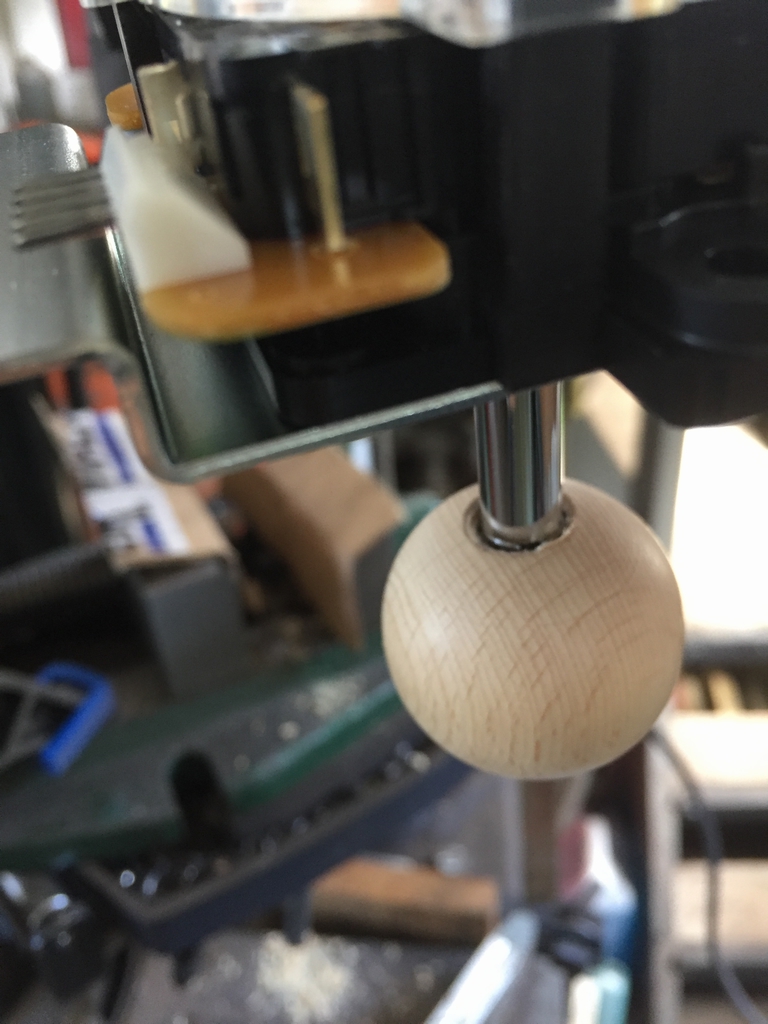
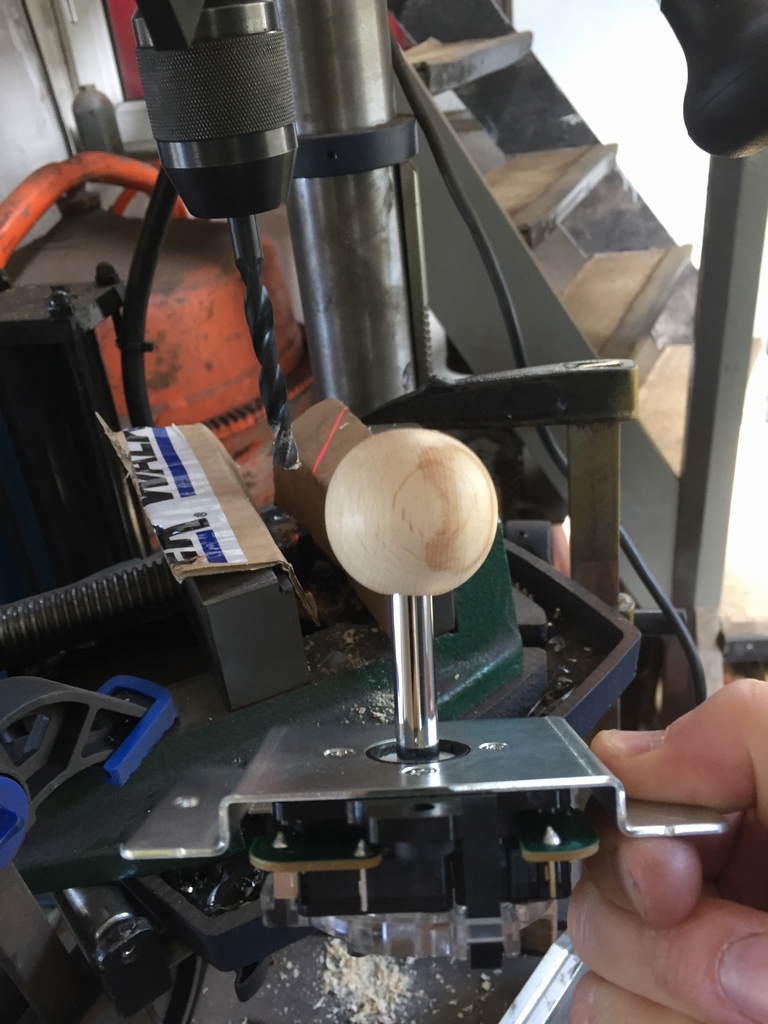
Ball Tops
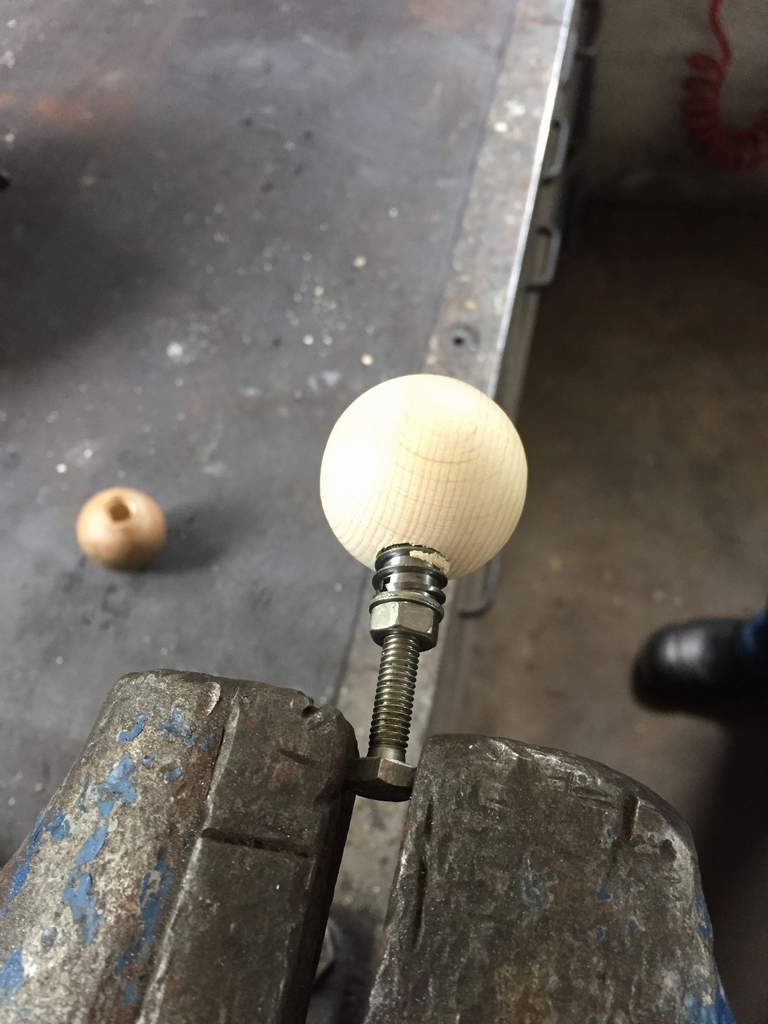
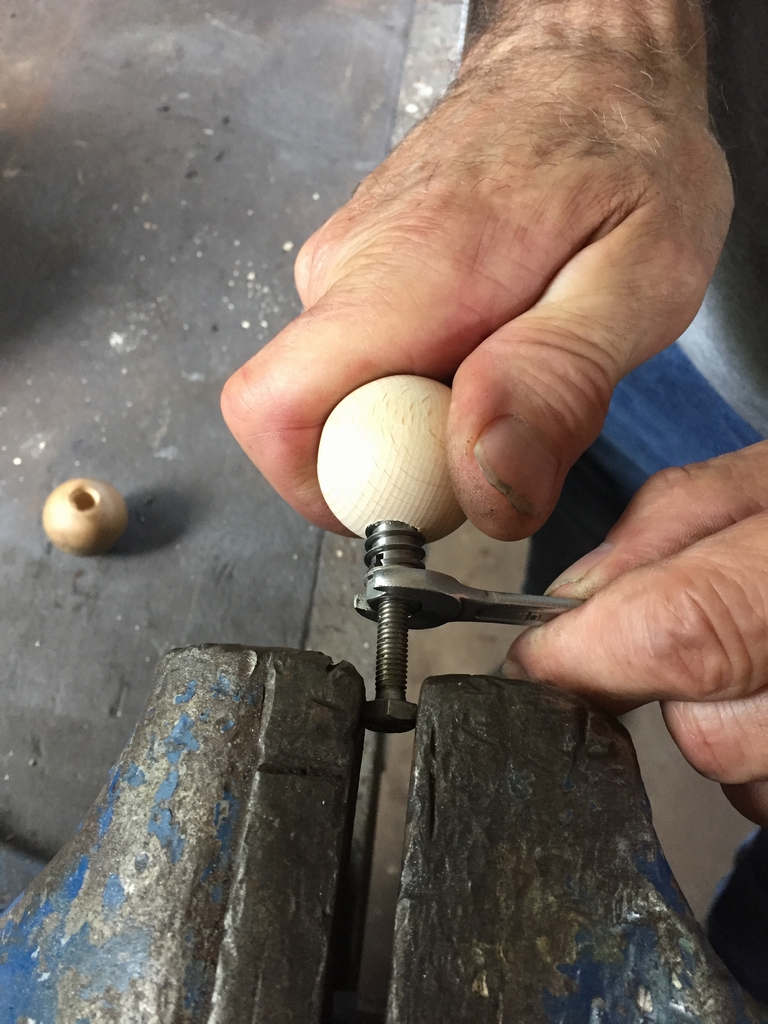
I used 35 mm wooden balls to make some nice ball tops. The holes were made with a bench drill and some M6 threaded insert bushings were used to fasten it to the joystick.
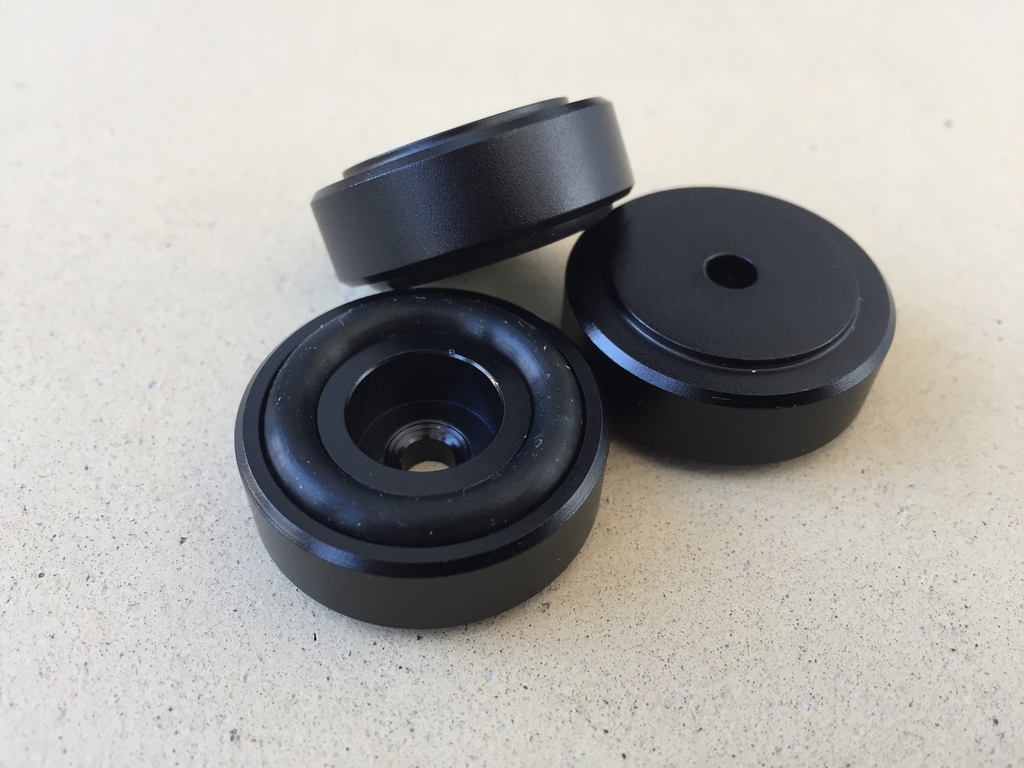
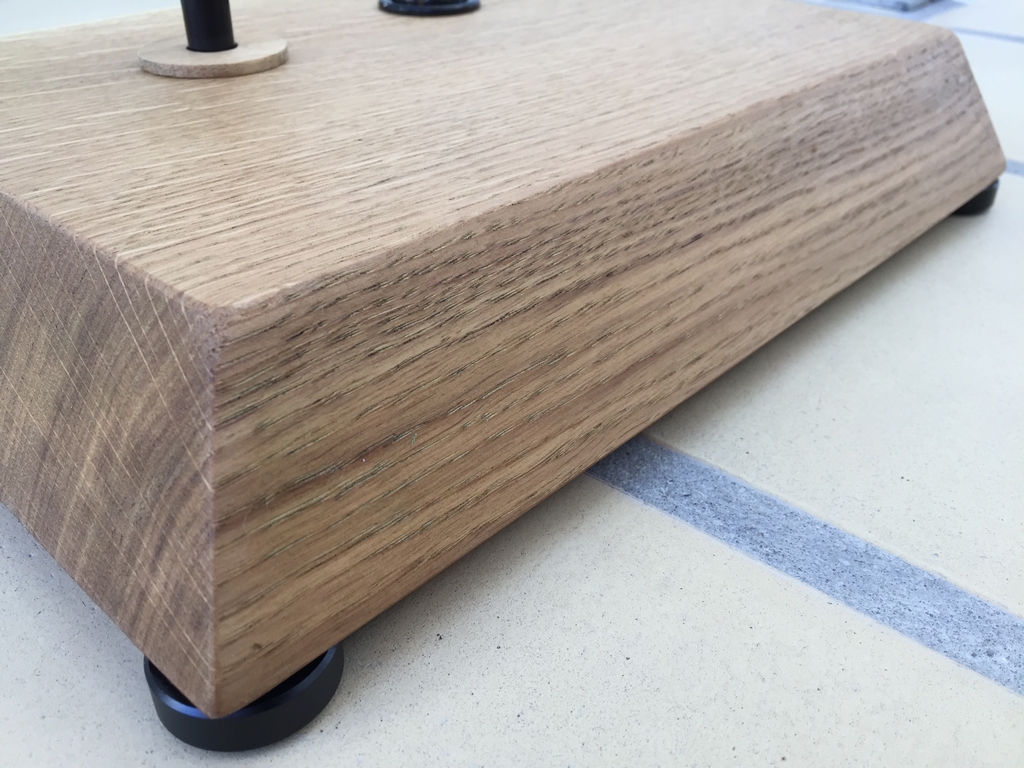
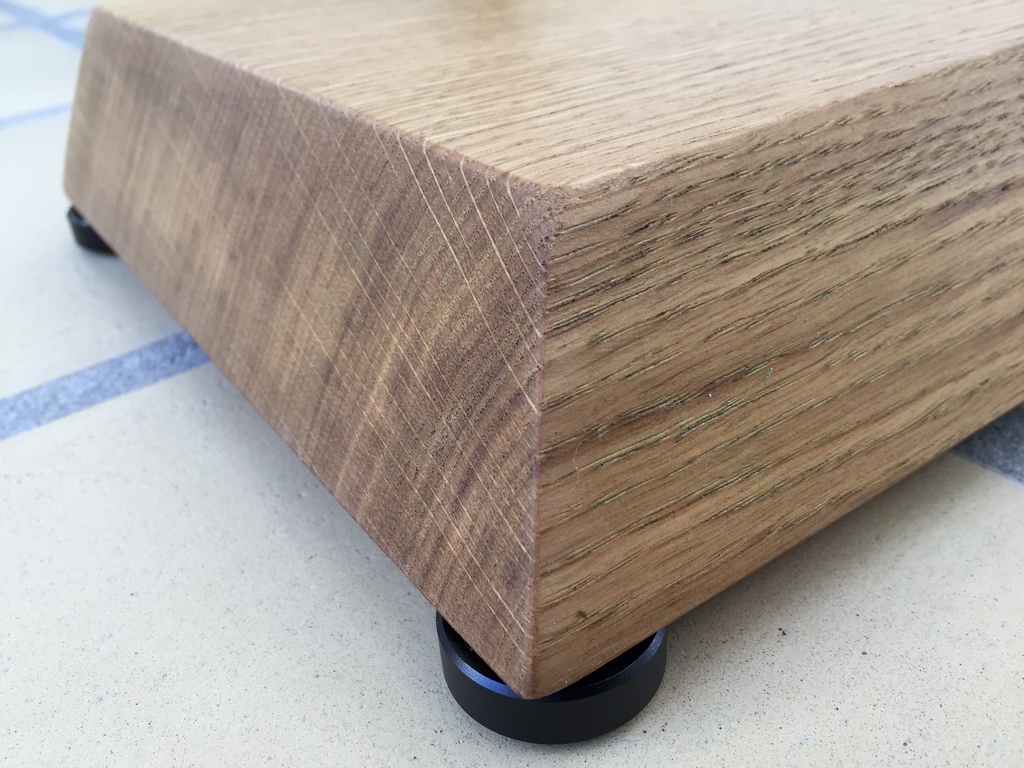
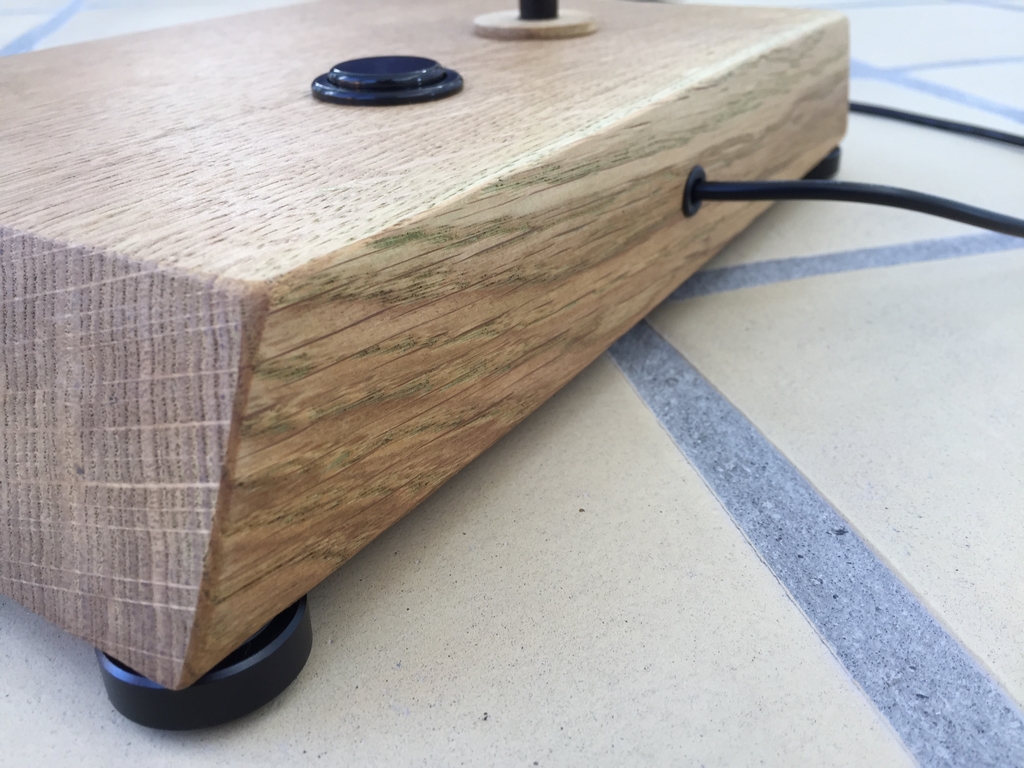
Black Aluminum Feet
I used these black aluminum feet to make a nice finish. They are made for turntables or other hi-fi equipment but also seems applicable to wodden joysticks…
Dust Washers
Next up was the creation of oak dust washers. These can be bought online, but are silly expensive so I just made my own…
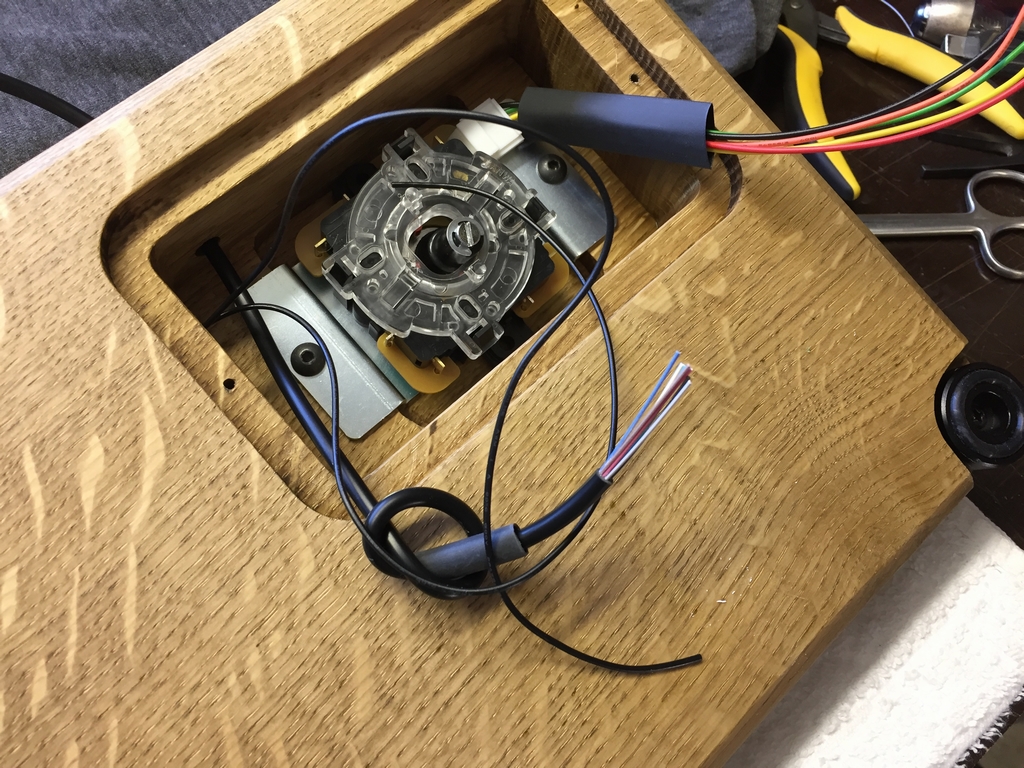
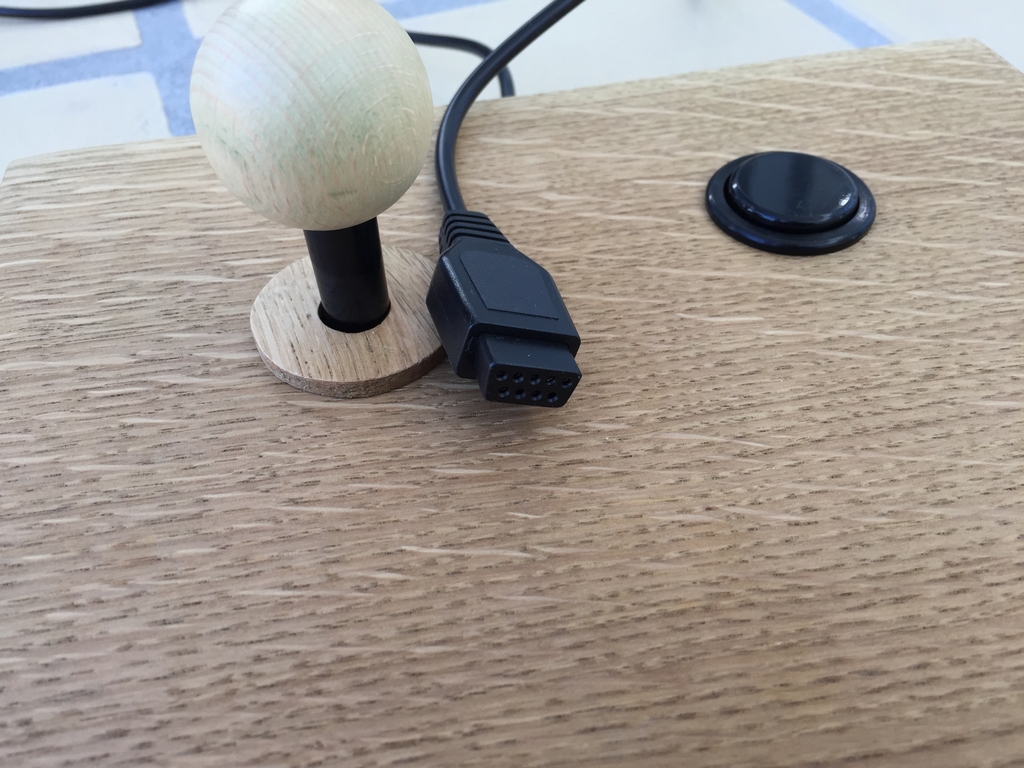
Wiring the Joysticks
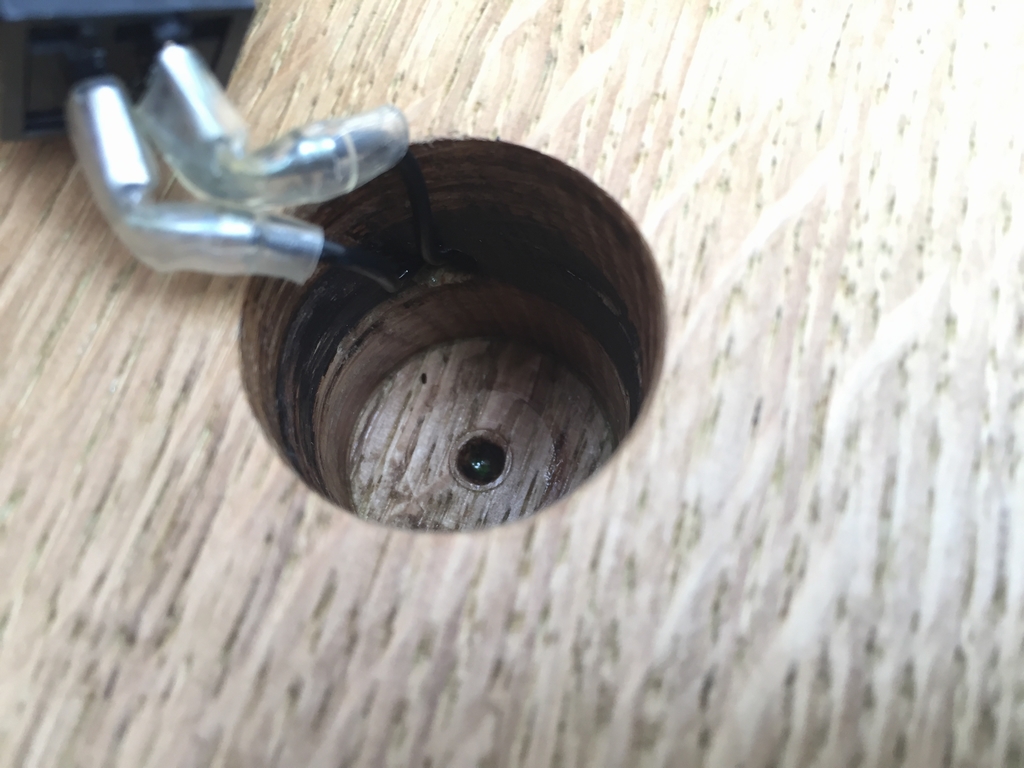
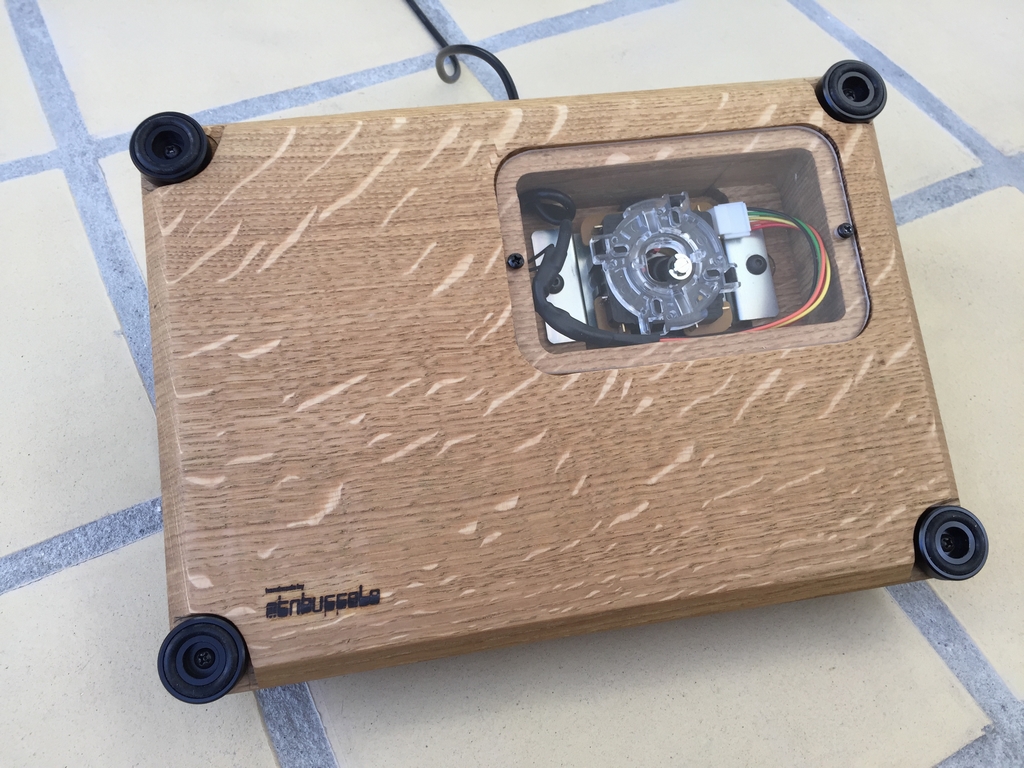
I used some 9 pin extender cables for connecting the joysticks and fire buttons. The fire button hole did not penetrate the bottom of the joystick. In order to connect the button, a small hole was drilled from the main joystick hole to the fire botton hole. The Sanwa JLF came with a harness which made it pretty easy to connect the wires correctly. This is what it ended up looking after everything had been shrink wrapped…
Finishing up
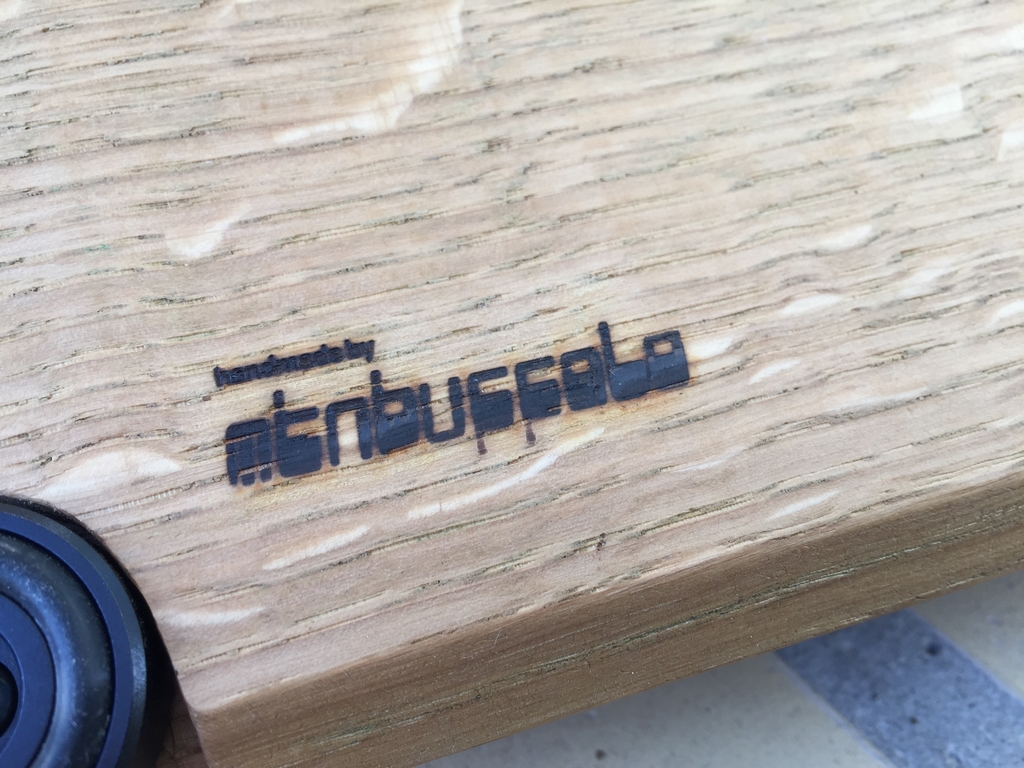
I then oiled up the joystick to withstand the sweaty palms and fingers during gameplay! Three layers of oil made a nice finish… I used oil that is made for tables. The very last thing that needed done was the plexiglass/acrylic boards to close the internals of the joysticks. And of course the burning mark on the bottom of the joystick stating that the joysticks were ‘Handmade by MtnBuffalo’.
This is how the joysticks ended up looking after quite a few hours in the basement..
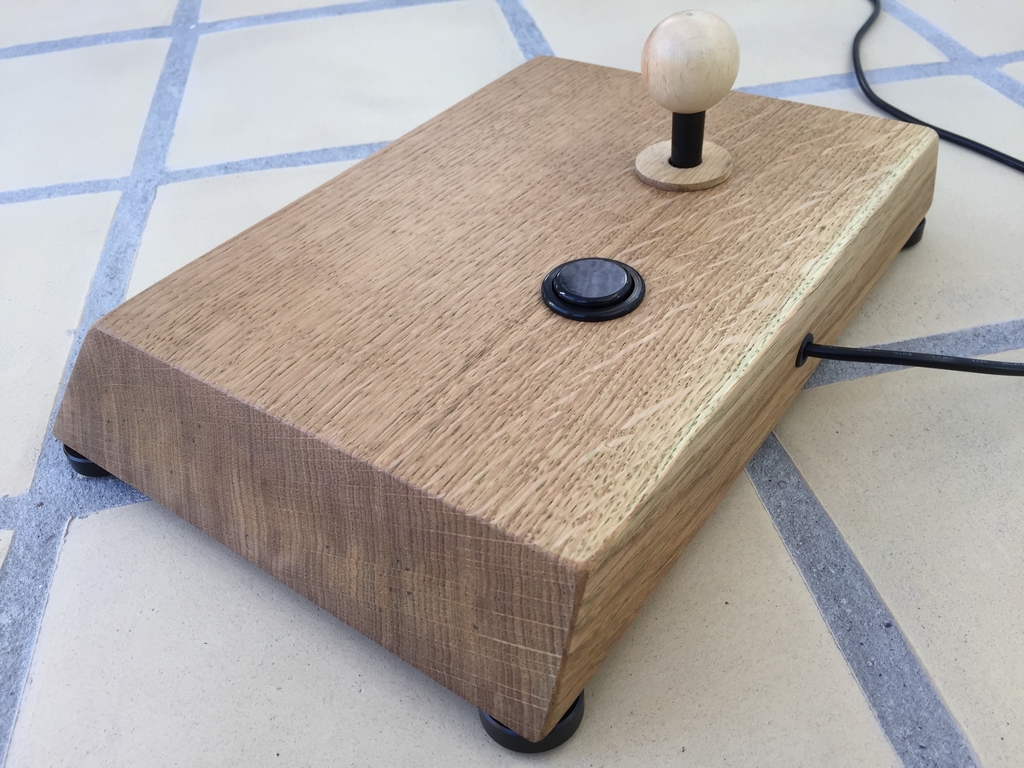
The wooden ball tops and dust washer can of course be swapped for the standard plastic versions…

Now it’s time to start some serious Commodore 64 gaming!
© breadbox64.com 2018
You rock, man. I want them 🙂
Thanks Rob. They are also rock solid 😉
Very cool, that’s a great idea for a joystick.
Fantastic job! How did you wired the button? I can’t figure it out 🙂 it looks that it’s just a solid piece of wood. One of the cleanest stick build I’ve seen, you’re really talented.
Thanks 🙂 The fire button hole does not penetrate the bottom side of the joystick. In order to wire the button, a small hole was drilled between the main joystick hole and the fire button hole. I have added some more images to the post to make this step a little clearer 😉
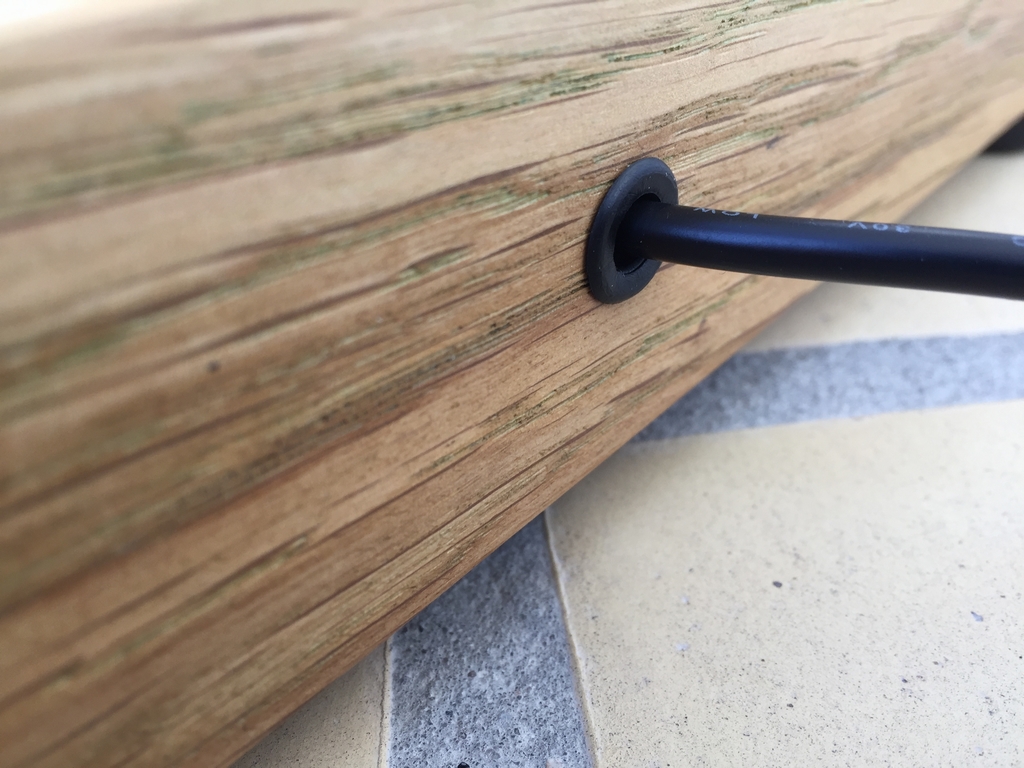
Beautiful project! I’m impressed by your woodworking skills. I’m curious about the black plastic you have where the cable enters the stick. What are those called in english?
I’ve made a joystick too, by the way (link) 🙂
Thanks superrune 🙂 I really like your 3D printed joystick! The part you refer to are rubber plugs with a collar that I cut the back end off to let the cable through. I don’t know what they are called. Got them from a metal company that uses them after galvanizing pipes. Before galvanizing pipes, small holes are made at the ends to let the hot zinc out. The plugs are put in afterwards to keep water from getting inside…
Thanks! I’m looking for something for the cabled version of my stick. I’ll see if I can use something similar. Looking forward to your next blog post, love following your projects!