
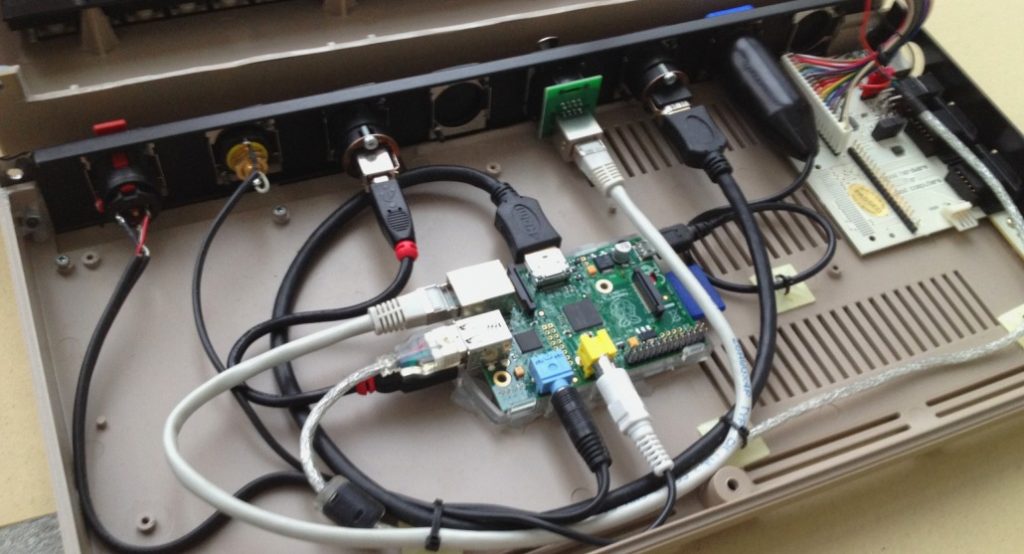
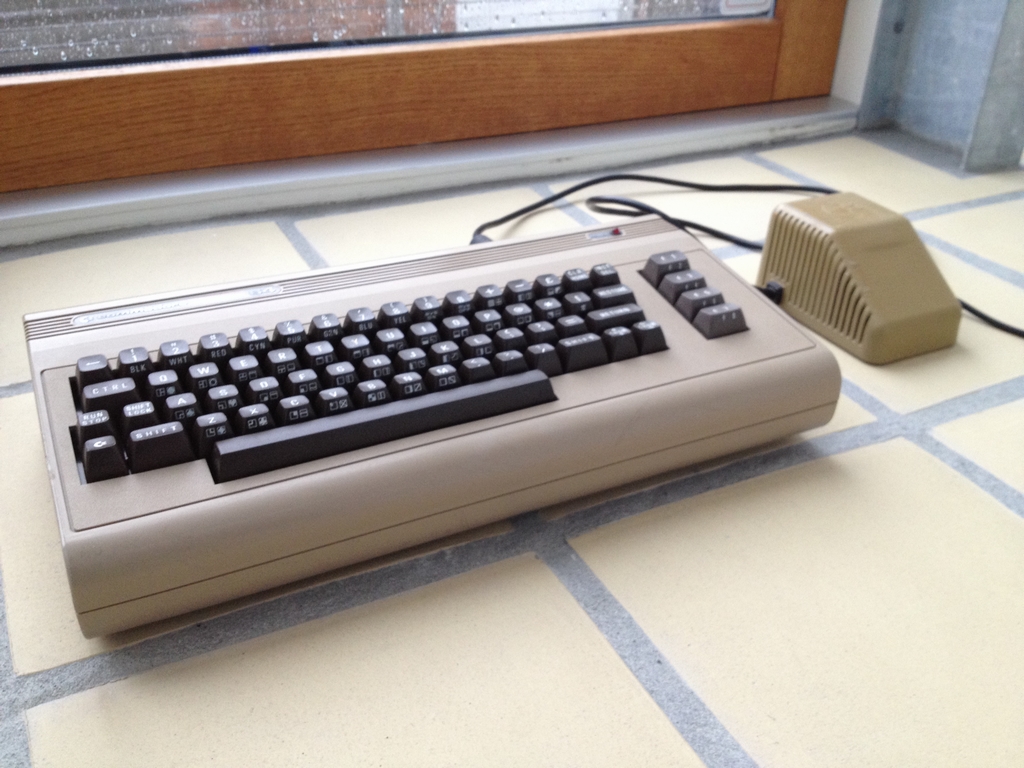
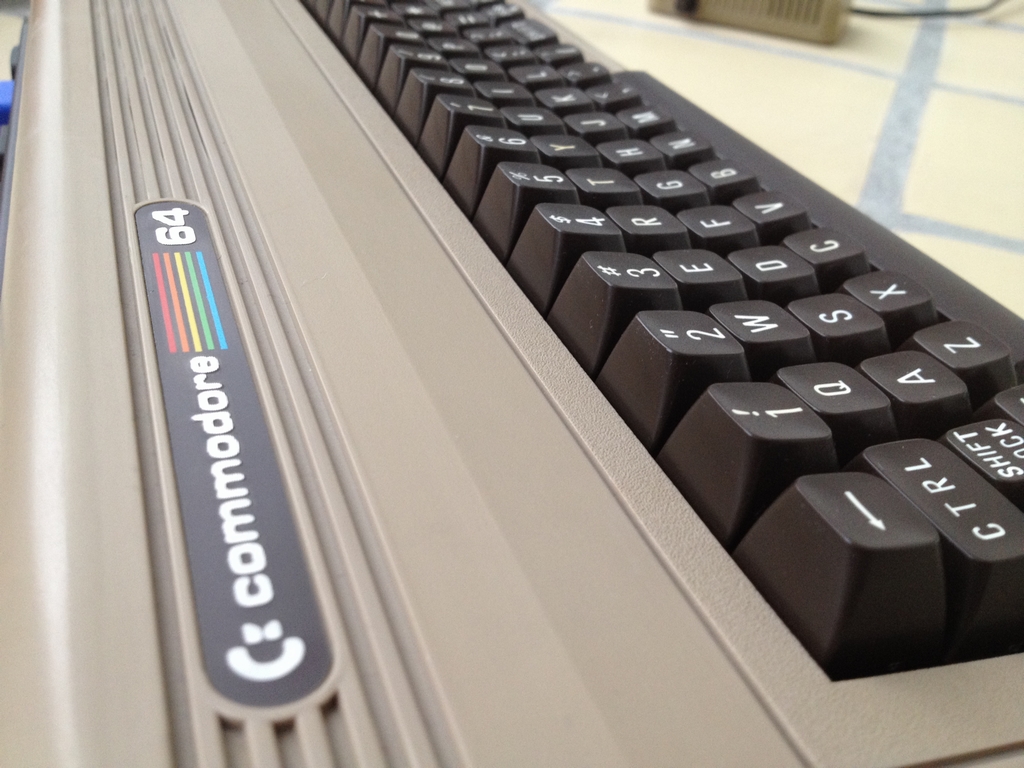
For some reason I had a Commodore 64 breadbox case, a RaspberryPi and a Keyrah PCB filling up my spares box. I really can’t say why my spares box is so well equipped, but this is how I got on the ‘C64 RaspberryPi mod’ wave. The RasPi is basically a small 45 $ computer with build-in HDMI, USB-ports, sound, network and some other stuff for hardware add-ons. To make the mod I basically assembled all the cables, installed the appropriate software and made a small arcade machine of the left over pieces from my spares box. This is how the machine ended up looking on the inside.
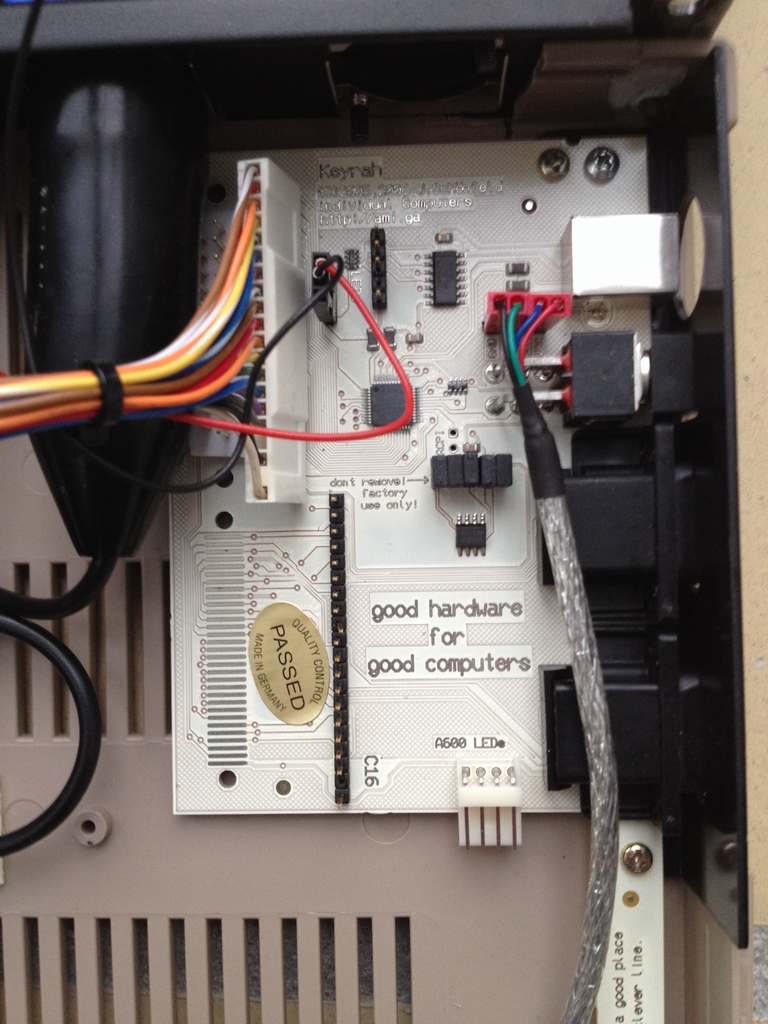
The first thing I did was to get the old Commodore 64 keyboard assembled with a Keyrah in order to have it work as a modern USB PC keyboard. The Keyrah PCB allows connection of classic computer keyboards (like the Commodore 64) to modern computers via USB. It also supports digital joysticks by translating the joystick events to key strokes. It can be bought from Individual Computers. I made the USB connection internally in order to connect it to the RasPi.
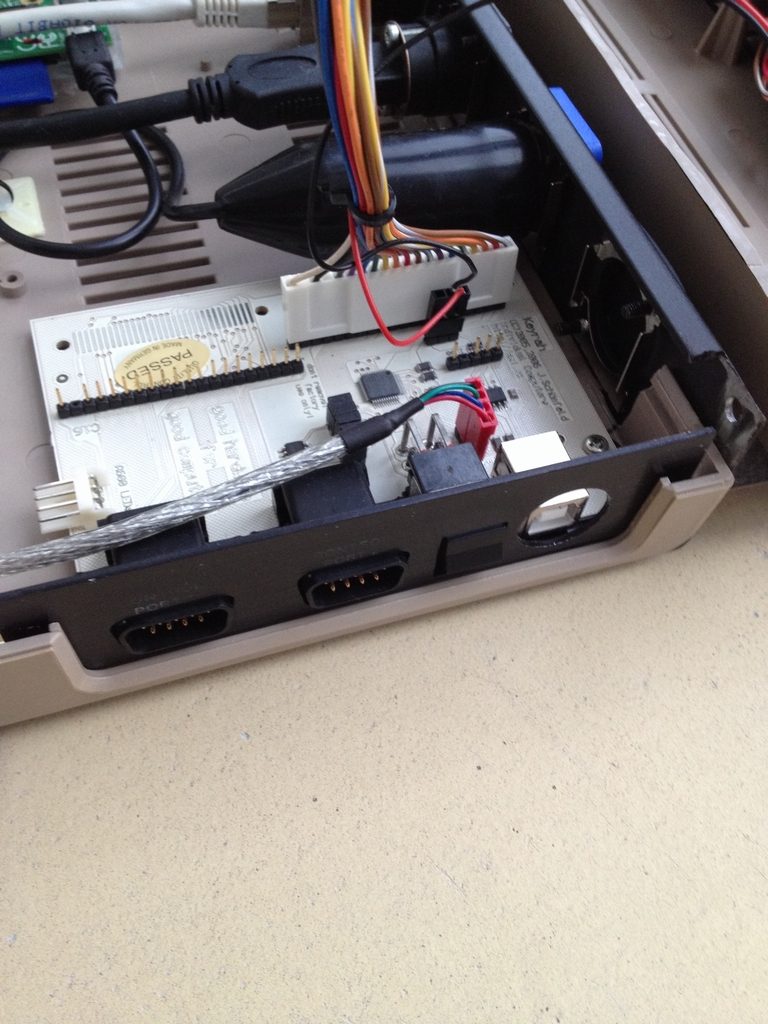
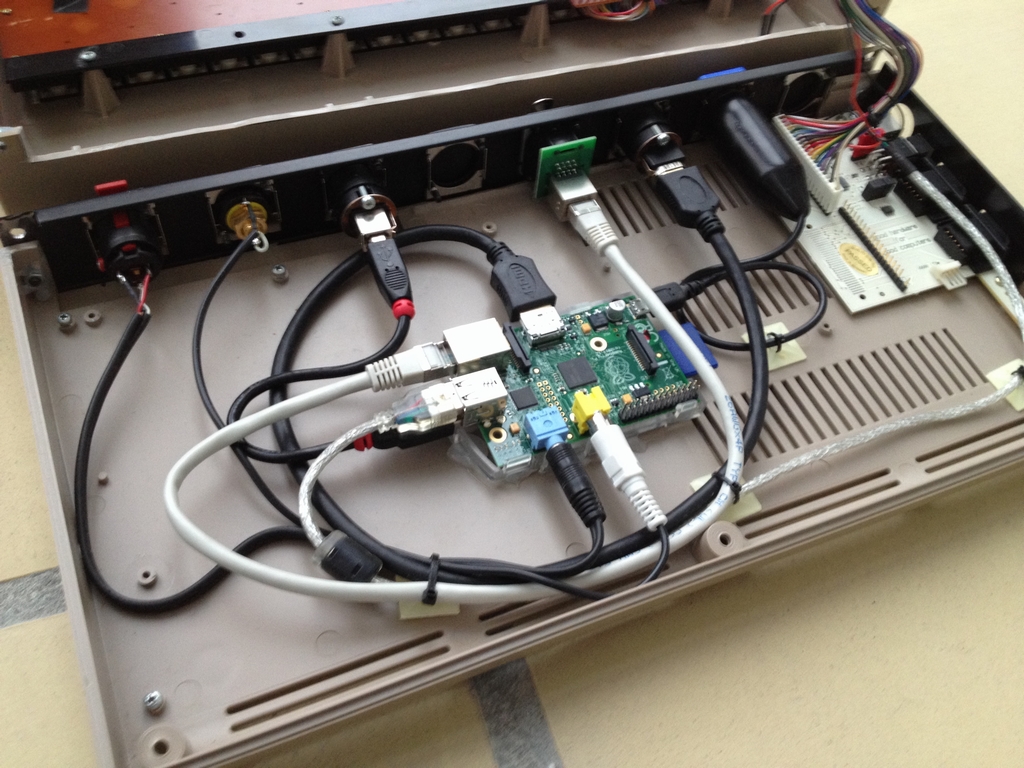
As I wanted the machine to visually resemble the original Breadbox as much as possible, all wire connections from the RasPi were transferred to plugs from Neutrik which could then be reached from the outside of the case. I tried to make verything as nice and tidy as possible… I had to trim out some of the case material in order to have the rack mount fit.

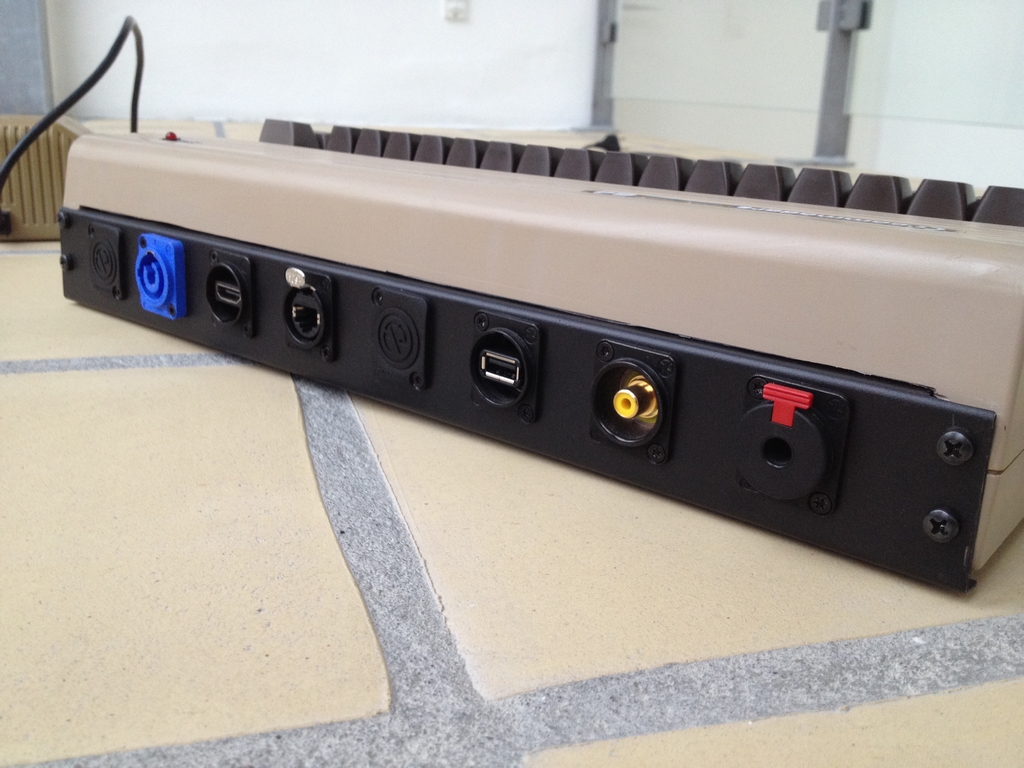
The RasPi runs on 5V DC. Instead of using an ugly modern ‘wall wart’ power supply I used an original Commodore PSU by simply removing the 9V AC line and connect the 5V DC to the power plug from Neutrik. These images show the blue power connector and the side of the machine with the Keyrah installed.

Data is stored on a standard SD card. First I installed a standard version of Raspbian Wheezy to test if everything worked as expected. With this software it is basically a rather slow Linux PC.
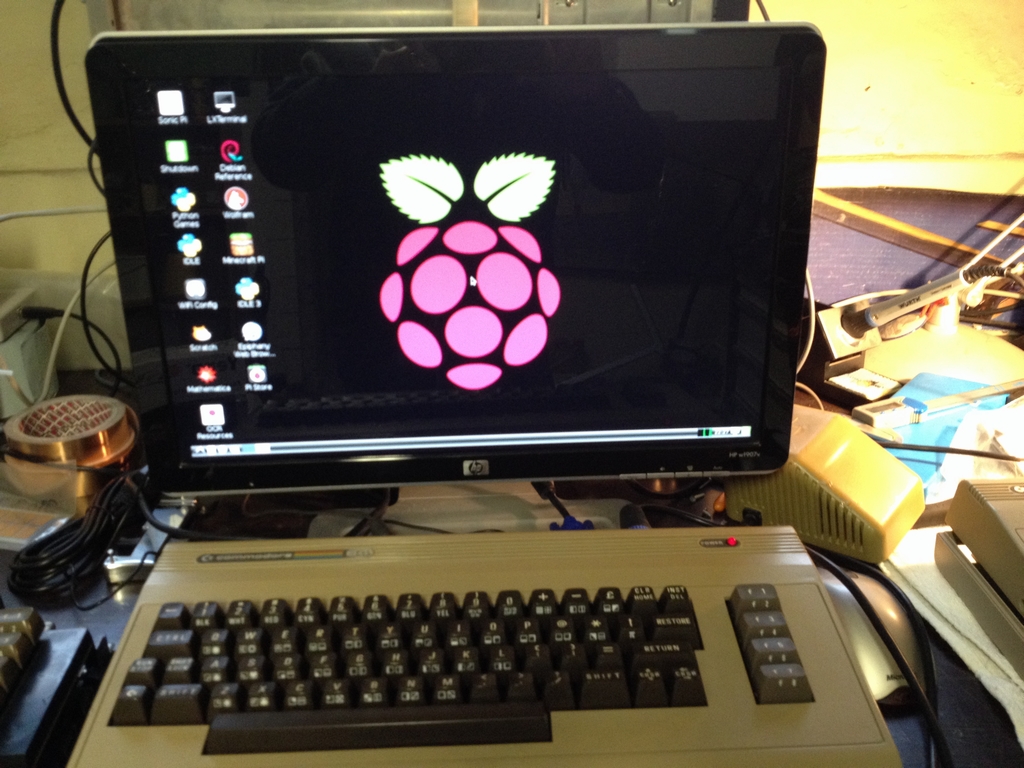
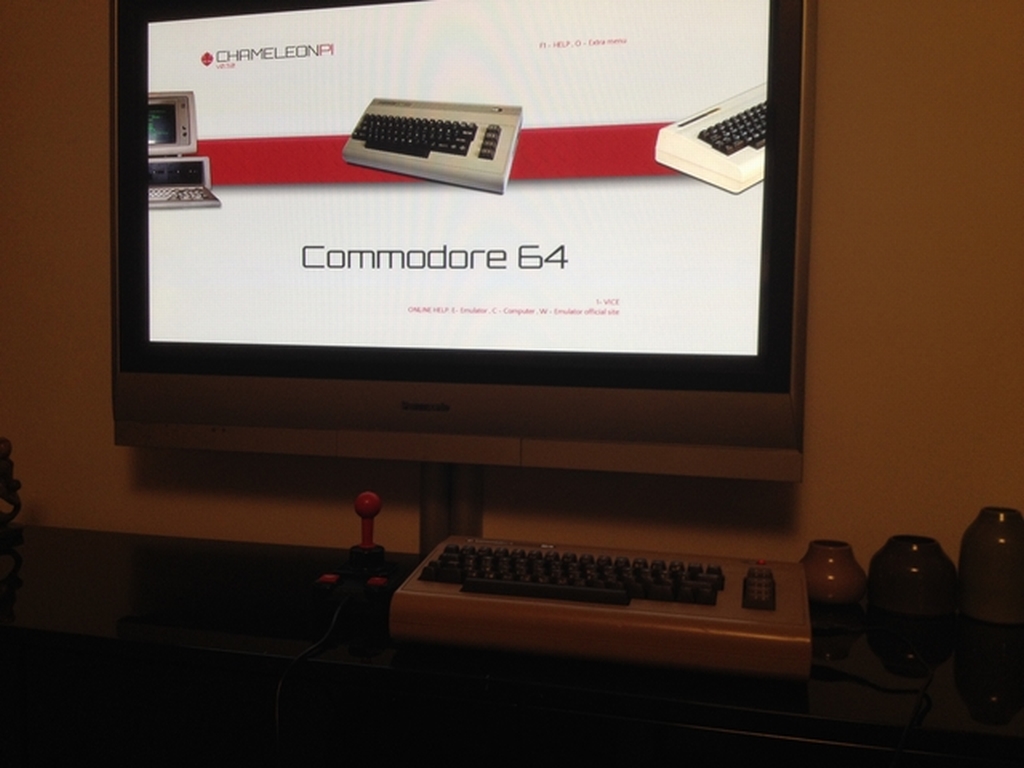
However, I wanted the system to automatically load into the ‘arcade mode’ as I did not intend to use it for anything else than gaming. A version of ChameleonPi was installed which has a lot of different emulators already installed and ready to go. I’ve made a small video of how the machine works in action with the game of Commando:
As the RasPi has a HDMI connection, it is really easy to hook it up to the flat screen TV in the living room.
Update: Check out the latest Commodore 64 RasPi mod – The C64 RetroPie Mod (link)
© breadbox64.com 2015
I absolutely love this project. Outstanding job!
What I think it needs is a complete set of 3D printed parts that attach to the default board screw locations to internally close off all the rear factory port openings in the case, and have openings there-in for all of the Rasp Pi connection points you have. This would maintain the aesthetics of the 64. Also, perhaps a spyder that again will connect to the board locations to allow the Rasp Pi to be securely screwed in. AND, perhaps something like the 64 Reloaded Power Plate for the USB connection where the power DIN connector used to be.
Looks like I have a few parts to order so I can get going on this one! Here comes another icomp order! Heh…
COREi64
Outstanding! That would be absolutely awesome instead of having to basically cut off the entire backside of the machine. Will the 3D printed plugs accomodate the Neutrik connectors or is it up to the user to drill them out?
I remember using tons of hot glue to attach the RasPi to the base of the C64 case. Using the already available connections points is defineately the more sofisticated approach. Cannot wait to see what you come up with!
Keep up the good work!
Hi,
Given that you put me onto this awesome project with your post, once I’m done designing it, I’d like to send you a set free of charge for you to review, if that would work for you?
I had not really thought of what kind of connectors I’d use, however, if you could provide me with specific part numbers for all of the connectors you used, I’ll order them and design it around those connectors. They look like really nice connectors. My only concern about those connectors you used, are if they are too tall to work with the natural openings in the back of the Commodore case. Perhaps you could comment on that as well.
I could then offer it with openings for those connectors, or solid, where people could drill their own holes in the cover plates.
Any thoughts you have to contribute to the design would be great.
What I envision is a very natural deployment, where the donor case is not damaged at all in the project, such that the case could be deployed back as a working authentic 64 if anyone wanted to go back to that with their unit.
I also plan on designing two sets of “kits”. One that will work on a Commodore 64 breadbin, and the other would be for a VIC-20. Perhaps even one for the 64c case. Will see.
Thanks,
Thomas
COREi64
…making me an offer I cannot refuse… I would be delighted to review your 3D prints!
The connectors I used are from Netutrik which produces audio connectors and receptacles for professional use. They should be available in North America. The connectors I used for the C64 RaspberryPi Mod are these:
USB: Neutrik NA USB-W-B
PowerConnector (Female): Neutrik Powercon NAC3MPA
PowerConnector (Male): Neutrik Powercon NAC3FCA
Phone jack: Neutrik NJ 3FP6C BAG
Phono Jack yellow (composite video): Neutrik NF2D-B-4
LAN: Neutrik NE8FDP-B
HDMI: Neutrik NAHDMI-W-B
The frontplates of the connectors are 26x31mm [1.024×1.220inch] while the cut out holes must have a diameter of 24mm [0.945inch]. I just did a quick dimensional check on a C64 Breadbox case and the height of the Expansion port is only 22mm [0.87inch] while the Cassette and User ports are just 15.4mm [0.605inch]. The Neutrik option will therefore not fit inside the natural case openings without having to damage the donor case. The solid plug option, in which users have to drill their own holes to accomodate their individual connector choices, might therefore be the best solution.
Personally, I would like to drill holes in the 3D printed plugs for the circular port openings in the case (Video, Serial and RF) for power, USB and video and use some other connectors than those from Neutrik. A barrel connector should be able to fit in the Aerial Port (RF-antenna port), a male USB-B connector should fit inside the Serial Port and an original Commodore 64 8-pin female video jack could have the composite video and audio signals soldered on to it from the RaspPi so it would connect to a TV as an original machine would. A female HDMI connector may even fit inside the hole. Finally, I would seal off the larger ports (Expansion, Cassette and User ports) using the custom plugs you’ll be making.
I don’t know how large the 3D prints may be, but a very wide print which seals off all the rear side openings would make it easier to drill out holes and attach the plugs as more material is available for the fixation. This might not be an option as I know 3D printers are quite limited with respect to the size of the final print.
I’m really looking forward to see what you come up with!
Thanks for your reply. I’ve been plugging away at this project and am almost done.
Documenting the build over here if you’d like to see the progress and photos (link).
As for ports, I found a number of possible interface cables on ebay that I’ve ordered, and am now waiting for them to arrive. Already have the Keyrah now. I couldn’t be happier so far with how the design is coming along. The raspberry pi noses into the cassette port area such that you have access to the microSD card with the machine buttoned up. Going to use heatsets in the plastic framework to easily screw down the raspberry pi. On my final machine, I’ll probably put heatsets into the case bottom and lid as well (as that’s what Commodore SHOULD have done with their machines).
Still tweaking the design. Each time I make a change, I print it out for fun to see how close I’m getting. Ending up with a mountain of development prints. Heh.
Anyways, won’t be too much longer and I’ll have it finished. As promised, I’ll be sending you a set for your review for giving me the idea!
Thomas/COREi64
I must say, this is such an awesome project! Looks like the project is really progressing and the final version is getting closer. I’m looking forward to holding the actual pieces in my hands and see how they fit in a case.
I have a spare transparent Kickstarter Commodore 64C case that I might use for the project. Would be a shame not to show off the cool 3D prints on the indside, right? Will the 3D prints accommodate the rectangular power hole of the C64C case or is it made for the Breadbox only (circular hole)? And what about colors – are orange or green options?
…cannot wait to get goin’ on my ‘C64 RaspberryPi 3D Print Mod’ mod…
The first version of the parts will only fit a breadbin. This is because the userport area is actually recessed into the bottom of the case in a breadbin. This precludes these parts from fitting into a 64c case.
However, this is not the last version of this bracket set that I’ll be designing. The original gameplan (which I’m still on track with) was to design it around a breadbin case first, then modify the design to work in the 64c case and lastly modify it one more time to work in a VIC-20 case.
As for colors, they’ll be available in pretty much any color. I’ll be able to produce them in black, white, red, yellow, green, blue, purple, orange, brown, silver or transparent. So anyone wanting them will really have a decent selection.
Furthermore, I’ve come up with another alternative.
It occurred to me that perhaps someone doesn’t want to buy a Keyrah, and wants to either develop their own solution or possibly use the C=key from Retro Innovations. So, the final part that I’m designing in this bracket set is a bracket for the right side of the case to cover the power/switch/joystick port opening. It will contain a mount to hold the C=key (or not) depending on what the builder wants to do.
The major rear bracket set is now done and fits perfectly. Just have to set the heatsets in and post some photos. The right bracket still needs a bit of work, but that’s close as well.
If your desire is for a 64c style case bracket set, that’s the one I’ll send you for your review. You’ll just need to tell me what color you’d like it in.
Thomas
COREi64
…a C64C style bracket set would be awesome for the transparent Kickstarter case that I plan to use for the project! A Keyrah V2 has already left Individual Computers in Germany and should arrive here shortly. Regarding colors, I have to go with green as this should look pretty nice in the transparent case! Cannot wait to see the pieces in real life.
Sounds good, green it is. Just designing a case for the Schema Wifi modem, then I’ll be back to converting the breadbin design’d framework into one that will work in the 64c case.
Thomas
COREi64
Green is going to be so sweet! I already ordered a RasPi 2 Model B for the project and the Keyrah V2 is already here…
Hey MtnBuffalo. I’ve been checking your website for a week or so and wanted to ask you something. I will get a Commodore 64 sometimes next month and want to put some modern hardware in it. The only thing and probably the most important is the keyboard. How can I hook it up internally without a Keyrah module? A dude on maximumpc.com has done it in a way I don’t exactly understand. Would appreciate your help and thanks in advance.
The build on the website you are referring to is of a replica of the original Commodore 64 breadbox. It is called a Commodore 64x barebone (produced around 2011 I think) and it comes with a modern USB keyboard. The case is prepared for modern PC hardware. However, the keyboard connection is done using headers so you’ll need to connect the keyboard cables directly to the motherboard of the modern PC that you intend to install in the machine.
The machine described in this post is of an original C64 in which I have removed the motherboard from. The keyboard is therefore the original made in the early 1980’s. In order for this to work with a modern PC, the connection must be converted to either USB or PS/2. The Keyrah is one option (USB) while the C=key from Retro Innovations (PS/2) is another option if you do not want to make a board yourself.
Would it be possible to add a SID chip into the mix? I know that dual SID chip bread boards are already a “thing” for upgrading the sound capabilities of the C64. What if that was modified to handle the audio in conjunction with the new HD audio add-on for the RPi ? I found one on Amazon that was not much more than the RPi3B itself.
You could create a pretty inexpensive SID player if you also added a USB MIDI dongle or a USB midi keyboard.
Sounds very interesting 🙂 I have no direct experience in modding RasPi’s with SID add-on devices. Definately sounds like a cool thing to do and get real SID sound out of the RasPi.
The 64c framework is now complete. Check out the end of this thread for photos (link).
If you’re still interested in reviewing it, let me know.
Thomas/COREi64
This will certainly make the build/mod sooo much easier to do! …and no cases get molested using the kit… Great work!
Yes, I would be delighted to get my hands on those 3D puppies 😉
I’d like more information on that USB to 4 pin dealie. I need to make one to use my pi internally just like yours. Can you tell me where I can buy one/get the parts to make it if I need to?
Hi there, the red connectors are called JST/BEC connectors and you can get them on Ebay. They are commonly used in smaller RC airplanes/helicopters. You need the male version (not very logic, I know) as this has a female pin. I used a USB cable from my spare’s box, that I downsized to minimize the internal cable mess. The 4 USB wires were crimped to the JST/BEC connectros using a long nosed plier.
Hi, why don’t you try the Combian64 distribution? It boots in a few seconds and includes the Vice 3.0 emulator and also supports Vic 20, C128 etc. More info can be found on my page (link)
Cheers 🙂
Carmelo
Hi Carmelo! That looks pretty cool!
Genio !!!