
Introduction
I own a near mint Commodore 1541 diskette drive that I only use for special occasions. At those times I drape my sweaty hands with white cotton gloves, gently release my original Montezuma’s Revenge diskette from its paper pocket and with my breath held I carefully place the delicate diskette inside the behemoth mouth. And I’m sweating bullets whenever the drive comes with its roaring ‘clack clack clack’ sounds because it has trouble finding the correct bits on the magnetically coated plastic disc… Truth is that I rarely use the diskette drive for a pretty good reason – I only own a few original game titles on disk and those are all collector’s items (at least for me they are!). Even though my original C1541 has been modded with JiffyDOS to increase loading speeds, it’s just not the most convenient way to load and save programs on the Commodore 64. As we all know, there are heaps of alternatives that kinda makes the old original diskette drive obsolete.
In this context several alternatives exist with different price tags and functionality. I am personally a big fan of the cheap SD2IEC mass storage solution that uses an SD card for data storage (e.g. games and programs) and interfaces with the IEC bus of the Commodore 64. It does not emulate the 1541 diskette drive completely, but it reads quite a few D64 and PRG files and it supports JiffyDOS natively! Nevertheless, currently the most sophisticated diskette drive emulator available is the 1541 Ultimate II+. This device should cover all your diskette drive needs and a heck of a lot more! So why would someone even challenge this device? Well, if the primary functionality of the 1541 Ultimate II+ could be emulated on cheaper hardware but without the lack of support that the SD2IEC has, then there might be a worthy competitor…
The pi1541 Device
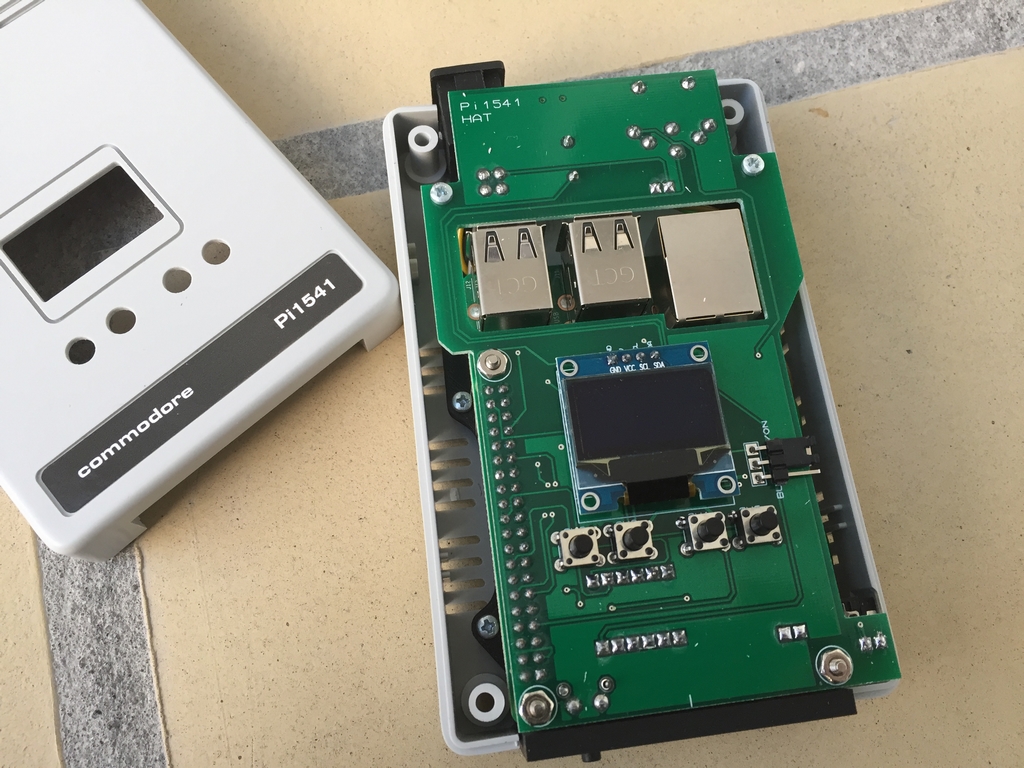
Recently a new piece of hardware for emulating the Commodore 1541 drive has surfaced. It is called the Pi1541 and is a real-time, cycle exact, Commodore 1541 (and Commodore 1581) disk drive emulator that runs on a Raspberry Pi 3B (or 3B+). The software is free and the extra hardware (the ‘piHat’) needed to complete the device is pretty simple and relatively inexpensive. The Pi1541 provides an SD card solution for using D64, D81, G64, NIB and NBZ Commodore disk images on real Commodore 8-bit computers including the C64, the C128, the VIC20, C16 and the Commodore Plus4.
The device was created by Stephen White and all piHat drawings have been made available from his website. The current version is 1.18 and it now supports USB drives with FAT32 file systems. It will boot from the SD card and if a USB stick is inserted it will switch to it. More info can be found here (link).
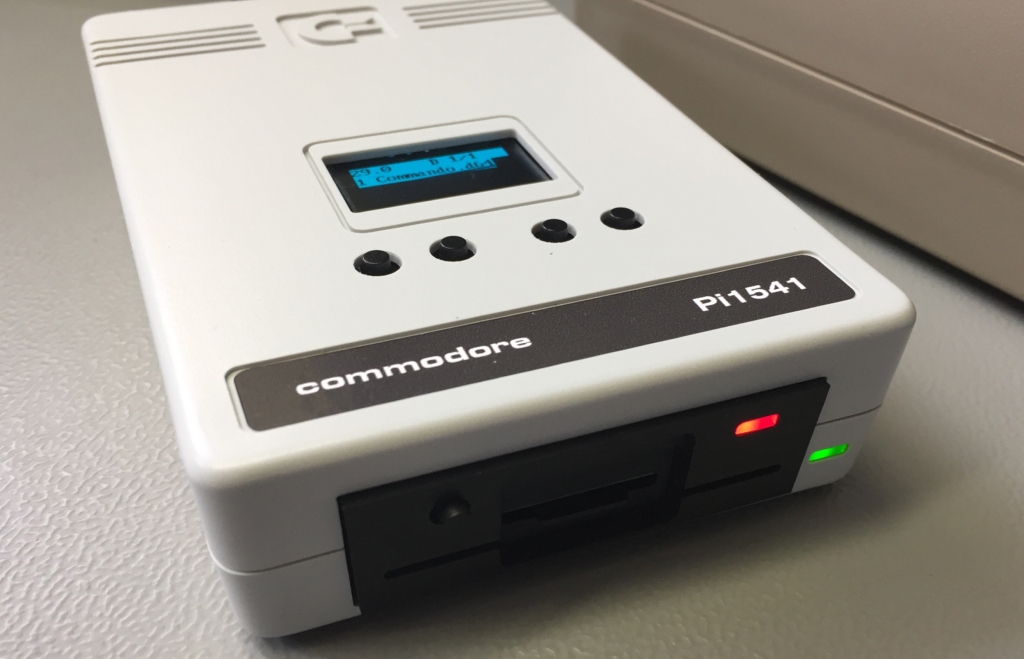
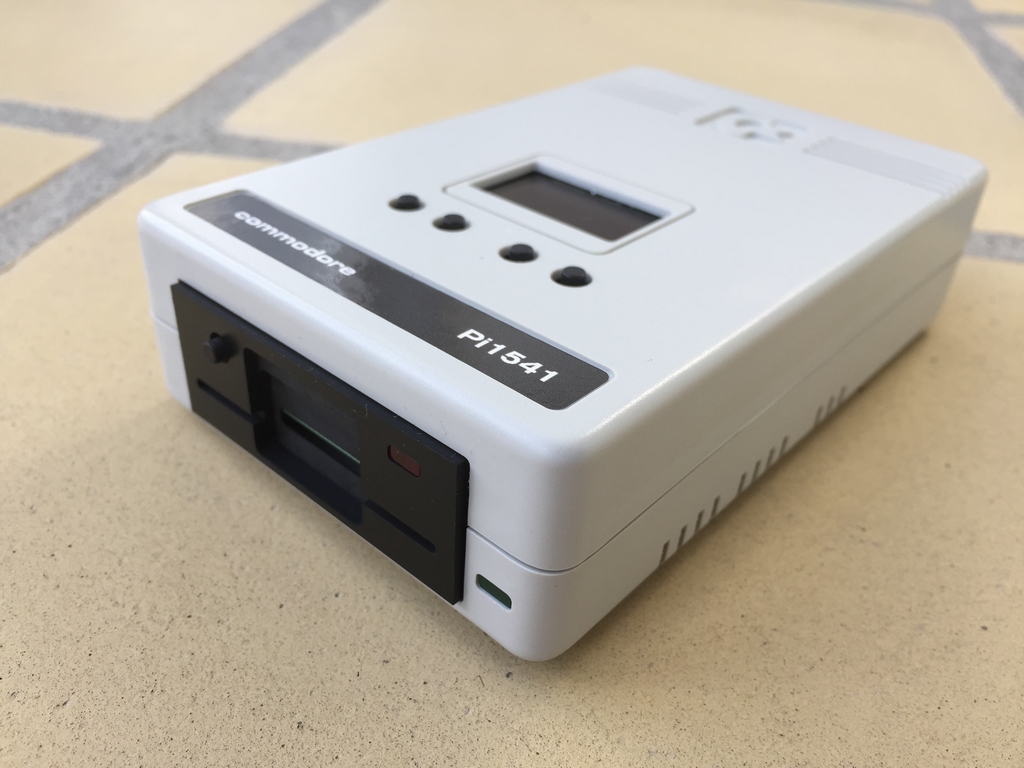
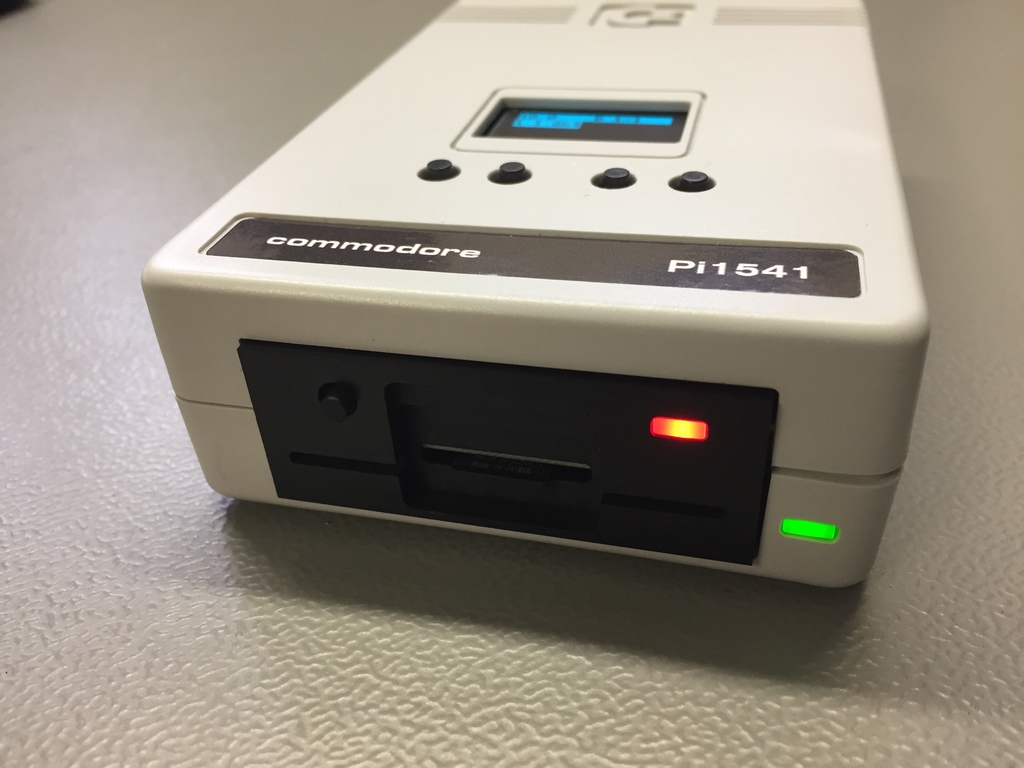
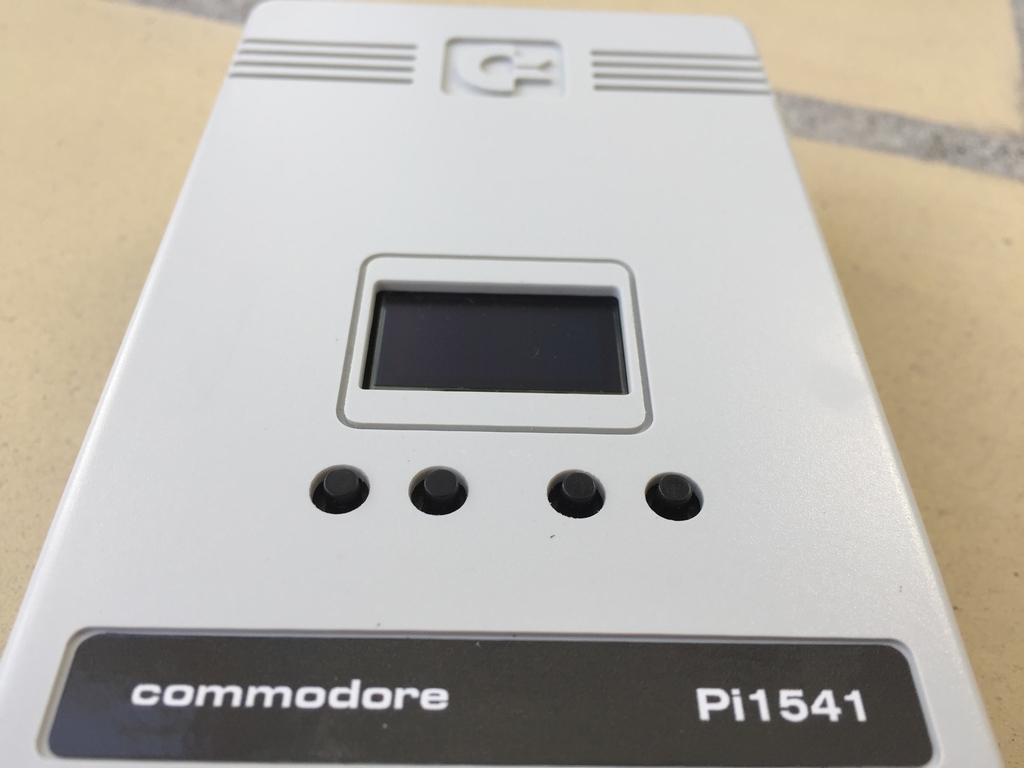
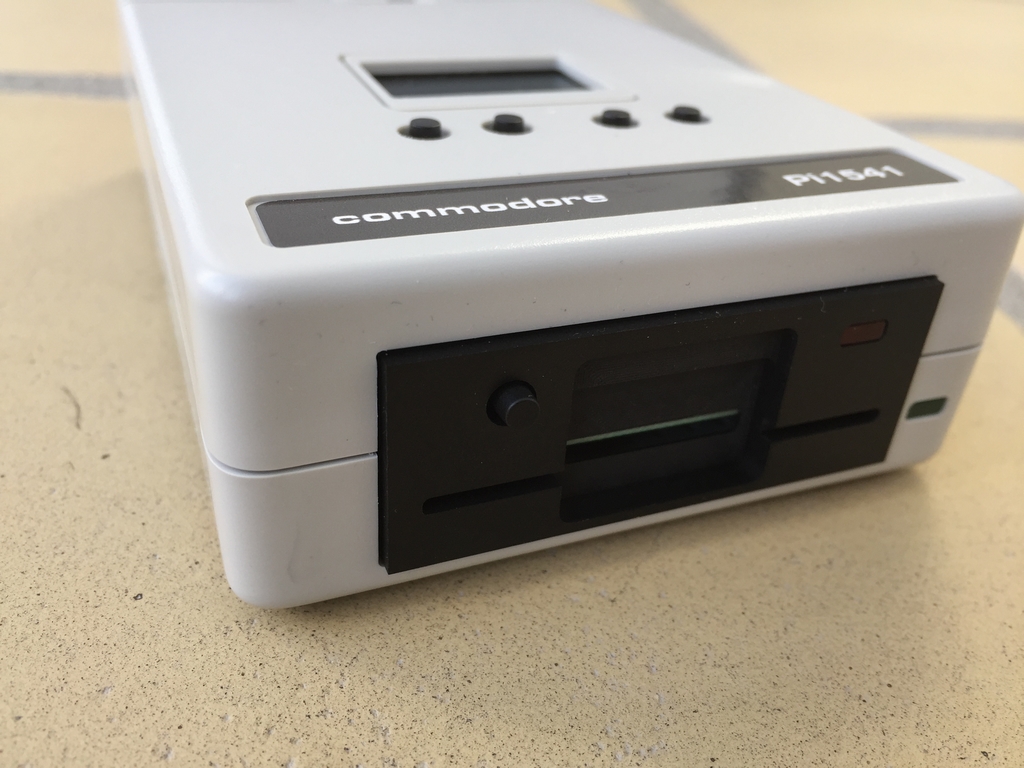
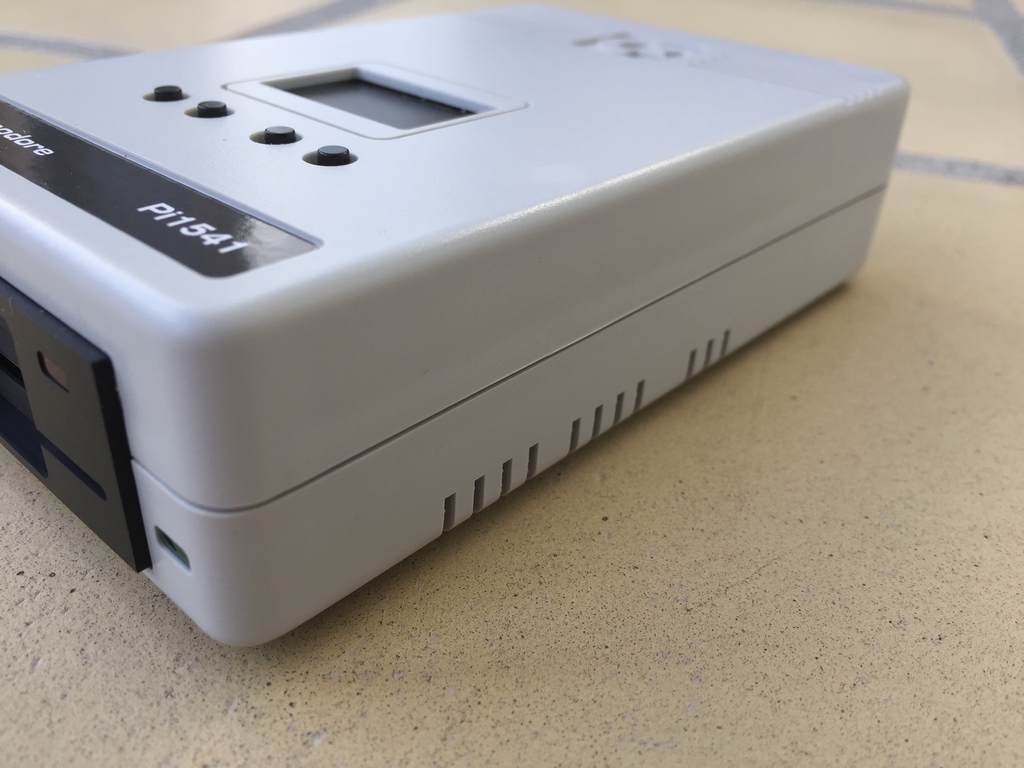
My version of the Pi1541 came as a complete ready-to-go device and included a nice case, a RaspberryPi 3B+, PiHat, SD card, cable and SD card with programs.

Pi1541 vs. SD2IEC
Stephen White created the Pi1541 as he was a little disappointed in what the SD2IEC solution offers while the other FPGA solutions were too expensive for many users. He therefore started to implement a Commodore 1541 on a Raspberry Pi in order to reach his goal of making a highly compatible and relatively inexpensive SD card solution for all Commodore 8-bit machines. As the original Commodore 1541 diskette drive is a computer itself (with CPU, RAM, Kernal etc.) creating an inexpensive, cycle exact, SD card solution has taken longer than other systems.
The Pi1541 differs from the SD2IEC in several ways. Key is that it emulates both the 6502 (CPU) and the two 6522 chips (CIA’s). Any code it is asked to run is run in a cycle exact way. While the SD2IEC only supports a limited set of fast loaders by attempting to guess the fast loader from the code that is sent to it, the Pi1541 can execute code on its emulated 6502 core and therefore supports a vast range of fast loaders (games and demos) – even copy protected originals should run on the Pi1541 device. To be honest, this all sounds pretty good to me!
The device even has implemented a file browsing and selection system using the Raspberry Pi’s screen and keyboard. This way folders can be navigated and disk images selected and the Pi1541 behaves like a SD2IEC device. But once a disk image has been selected the Pi1541 drops down into full cycle exact emulation and compatibility is nearly 100%.
The Pi1541 Hardware
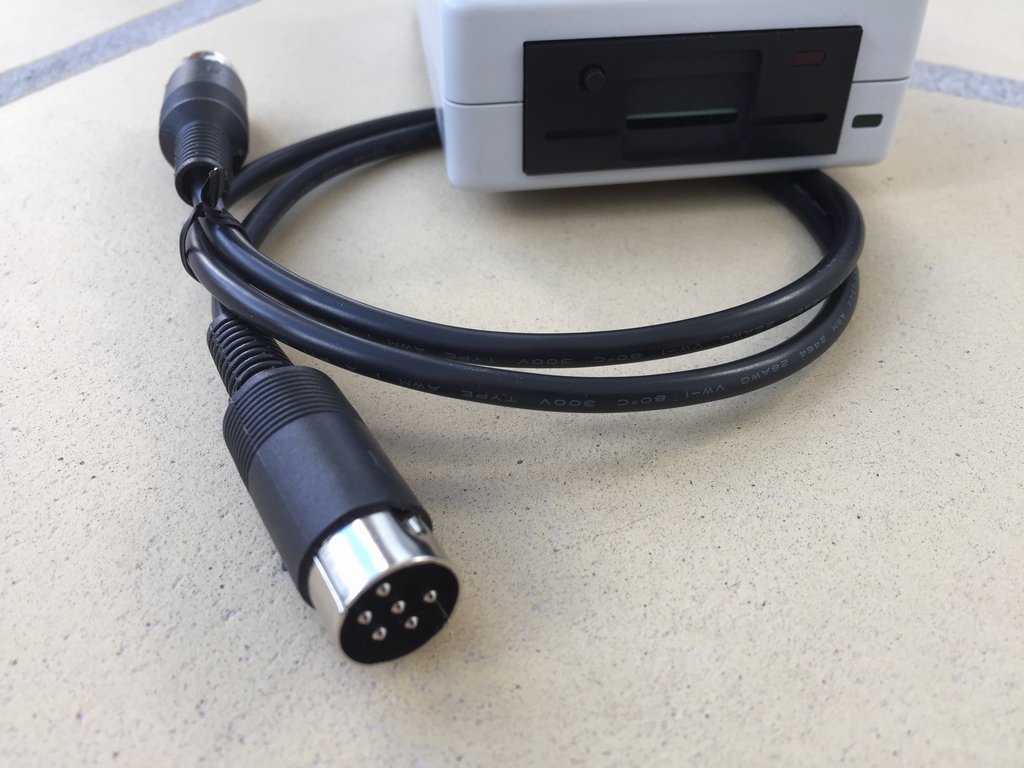
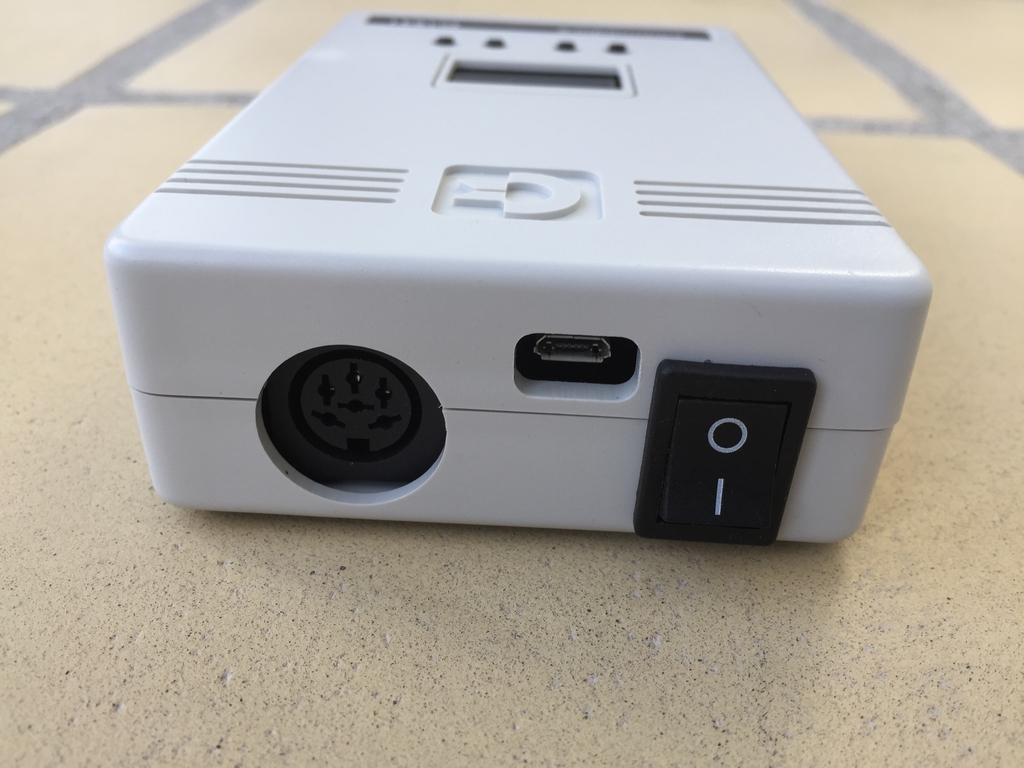
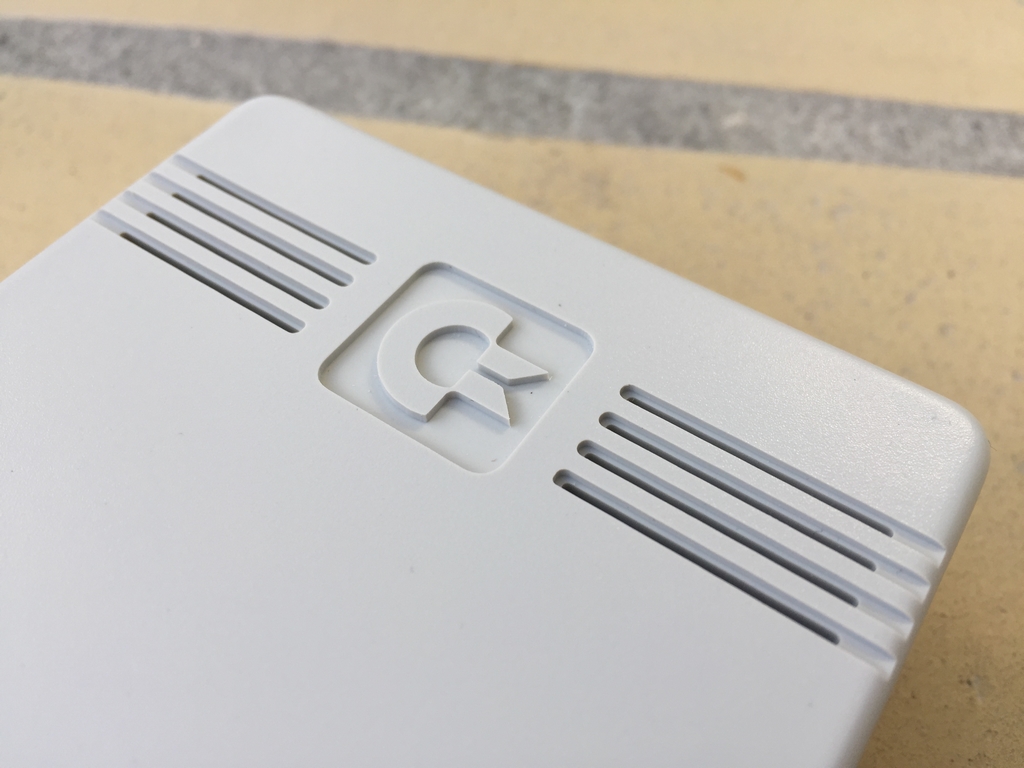
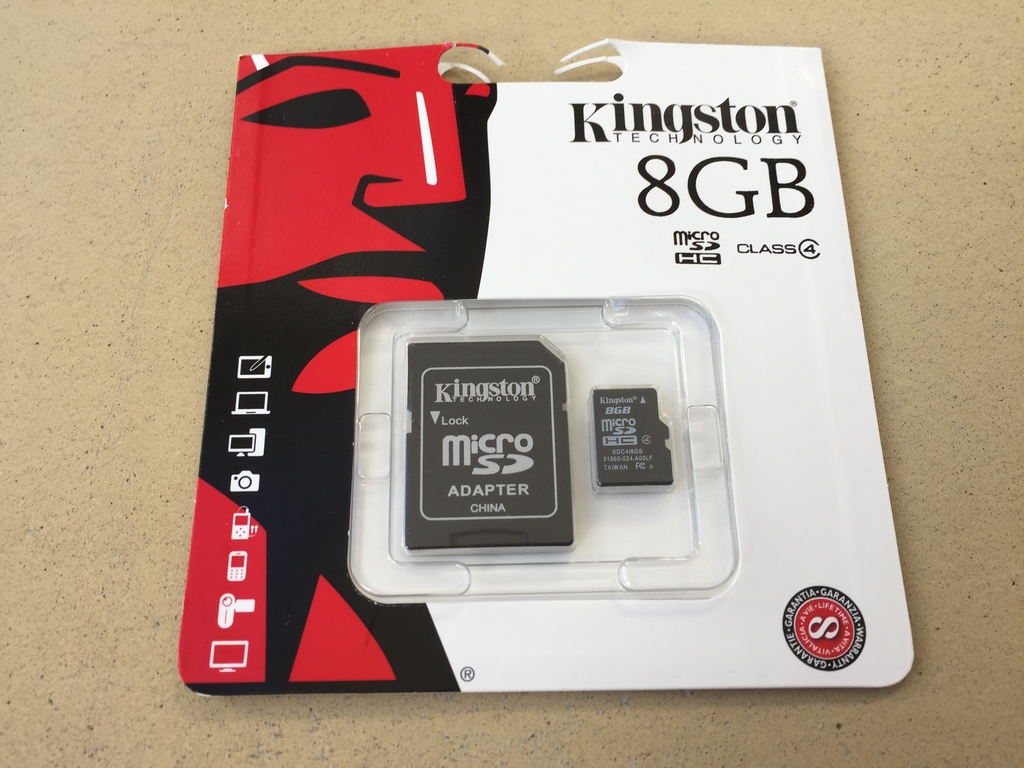
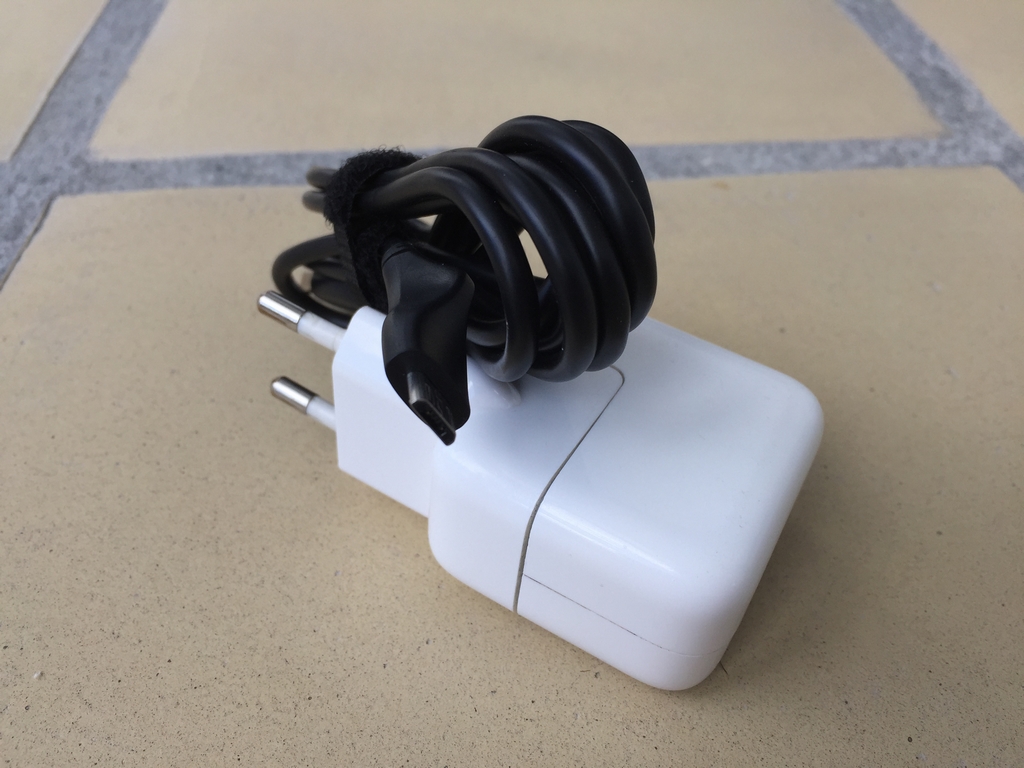
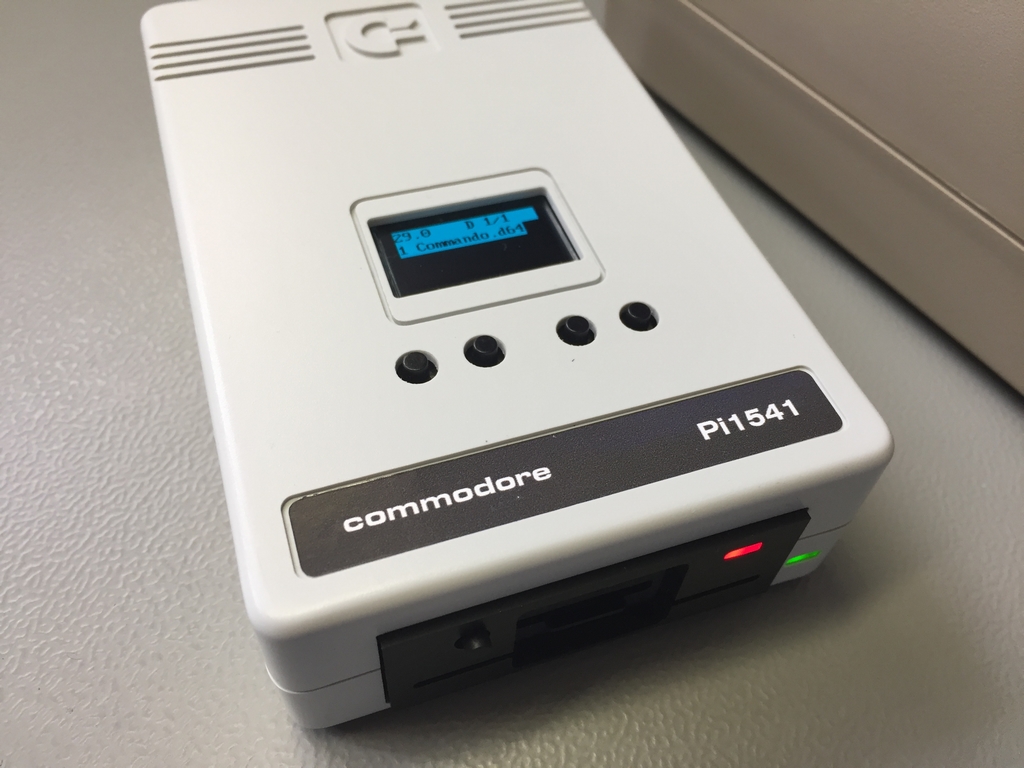
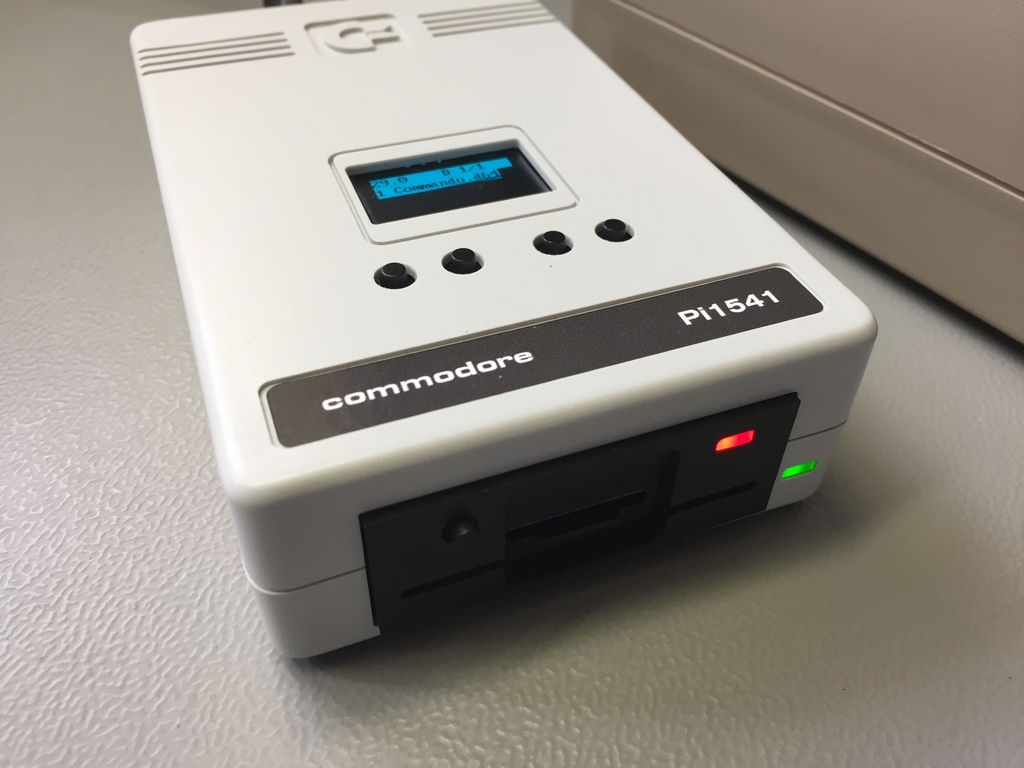
Several sellers on Ebay offer the piHat hardware for about 40-60USD and even cheaper as DIY kits. Lazy as I am, I simply purchased a completely finished product from an Ebay seller called despegatop. He makes a complete device with a beautiful grey case with the Commodore logo, Raspberry Pi 3B+, an OLED screen, a buzzer to resemble the original sounds of the C1541, an IEC cable and a preinstalled 8 GB SD card. On top of the case is a blue 128×64 dot OLED. All I had to provide myself was a 5VDC source to power the device. Thus, a mobile charger and a mini USB cable was all that I needed to get started.
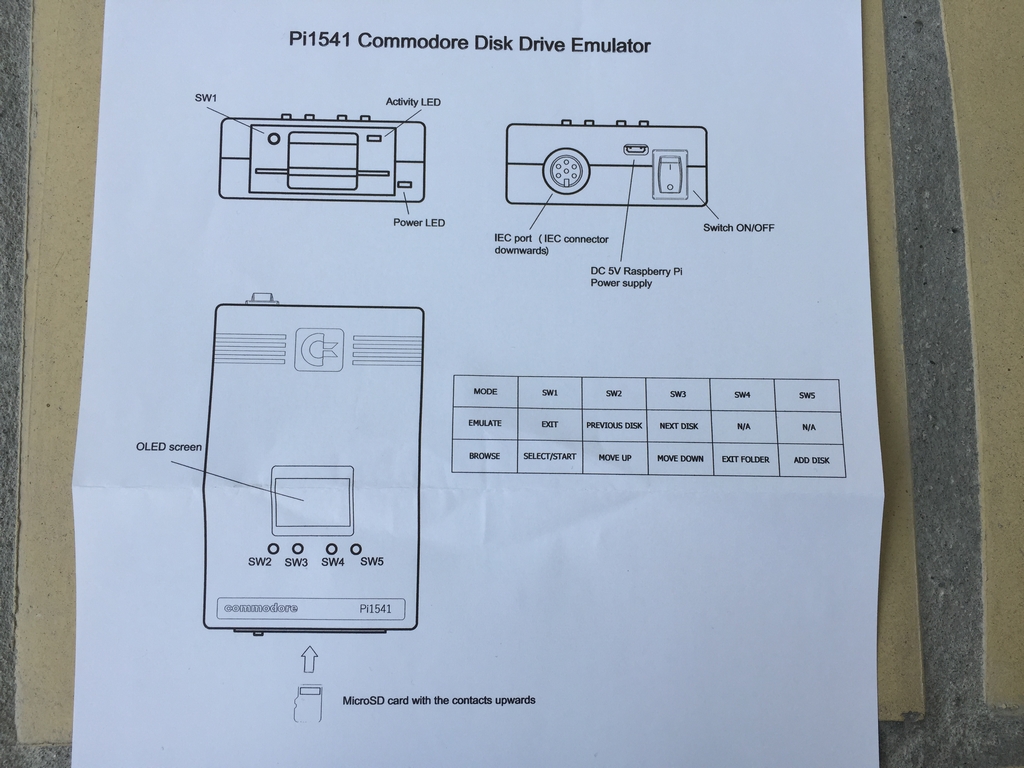
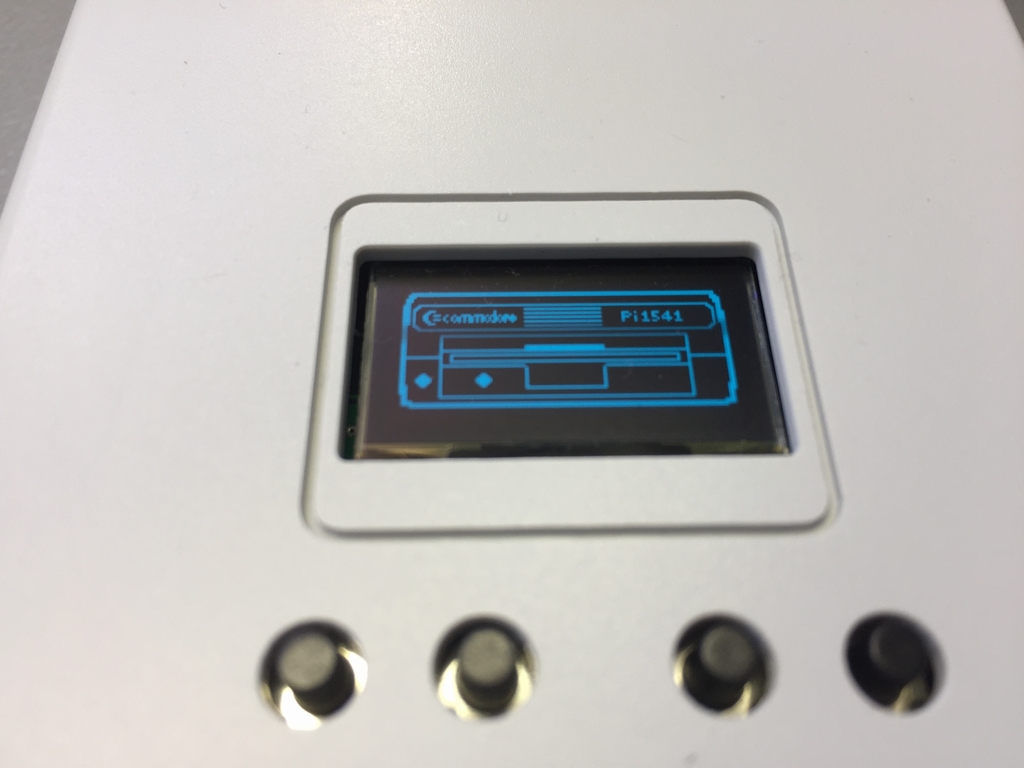
The Pi1541 that I got looks like a small Commodore diskette drive with a button on the front and four buttons on the top of the device. Each button has different functions depending on the current mode of the Pi1541. A green and red LED light up when the drive is powered on and when data is being processed.
The price tag surpasses that of the 1541 Ultimate II+ cart from Gideon by a few Euros, so I was really eager to find out if I got some real bang for my buck. Could this be a true 1541UII+ killer? This is what I was about to find out.
Testing the Pi1541
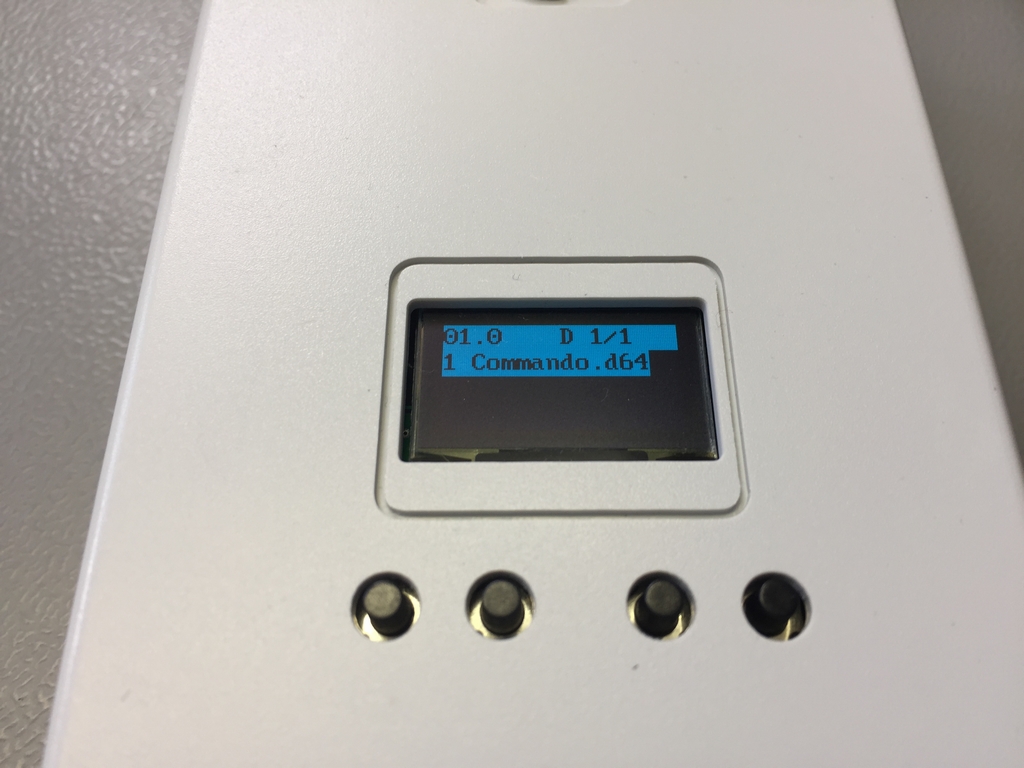
The Pi1541 came with a pre-installed micro SD card with all the files and programs needed to get started. Didn’t want to make things too difficult, right? First thing I did was to misplace the SD card and we all know that back-ups are for sissies… After quite a bit of cursing and jumping about in anger, I pulled myself together and contacted the Ebay seller. He was very kind and provided a copy of all the files – thanks despegatop! I then copied all the files to a Maxell 16Gb SD card and managed to load a game of Commando before the SD card crashed. Like really crashed! It even made my PC crash whenever I inserted it into the SD card reader. The exact same thing also happened with the second Maxell SD card. Note to self, never ever buy SD cards from Maxell!! As I had a test to do, so in with another SD card. This time from SanDisk and I was finally ready to start my tests!
I went to the Pi1541 developer’s homesite and downloaded the latest version of the kernel software (V1.18). After inserting the SD card in the card slot in the front of the drive and switched the power on, the device finally booted!
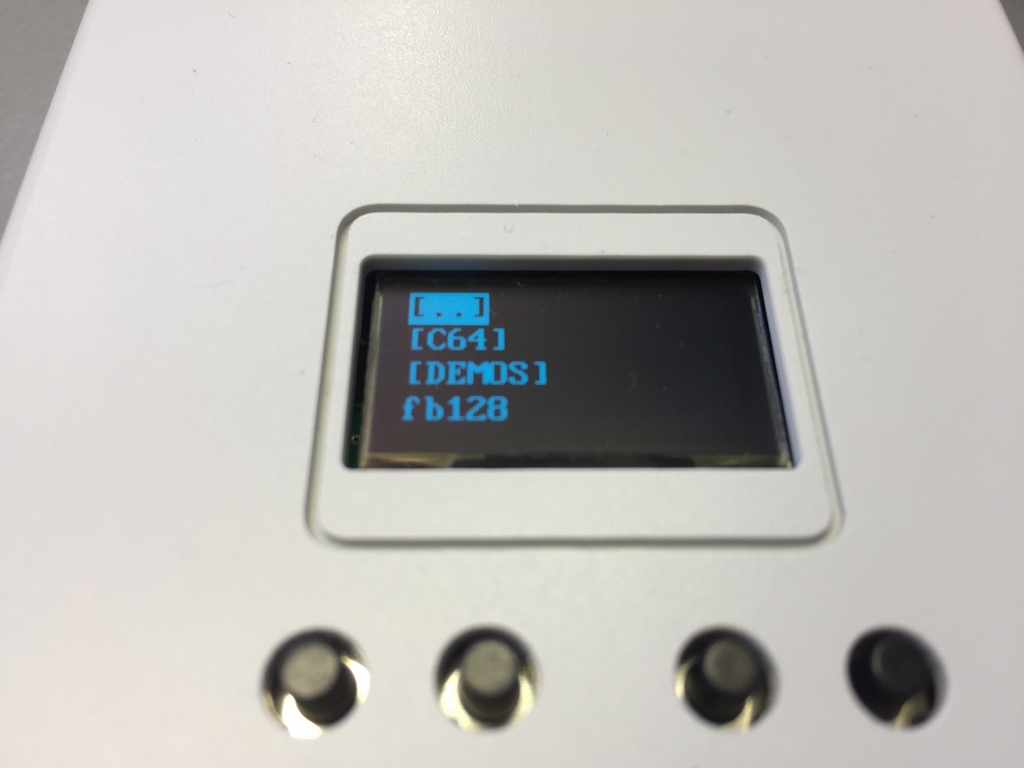
The Pi1541 runs in two modes: SD2IEC mode (browse mode) and Commodore 1541 mode (emulator mode). In browse mode, the device works like a SD2iEC and the 5 buttons can be used to select specific files using the little OLED display on top. Switch1 = Select/start, Switch2 = move up, Switch3 = move down, Switch4 = exit folder and Switch5 = add disk. After a program or game has been selected, the file is run by typing the BASIC ‘LOAD”*”,8,1’ command on the Commodore 64. As soon as this is done, the Pi1541 enters emulation mode and acts exactly like a Commodore 1541 Diskette drive. The Pi1541 even has implemented the original drive sounds that the original C1541 has! However, I never managed to make it go ‘clack clack clack’ like the original whenever something went wrong during the readinc/writing process…
Loading a single file game or demo, as described above, is pretty straight forward. But what if I wanted to play a multi-sided disk game or demo? The easiest way to accomplish this is by making an .LST file (list file) like on a SD2IEC device. The .LST file is simply a text file in which the order of the multiple disk sides are listed. Thus, a two-side game named e.g. Huggar1.d64 and Huggar2.d64 will simply be written into the .LST text file and saved in the same directory as the two disk files. By selecting the .LST file using the FB64 program (CBMFileBrowser), all disk images in the file will be loaded into the Pi’s memory and the first one mounted. Depending on the number of images this may take a few seconds. You can now use the buttons (1-5) connected to the GPIO pins (the 5 switches) to swap between disks (disk 1-5). Disk side 2 is selected by holding down Switch2 while pressing one of the other buttons. The Pi1541 has to be in Emulator mode for this to work!
What about JiffyDOS? This I what I really liked about the SD2IEC as it supports JiffyDOS natively without doing anything special to make it work. The Pi1541 has a config.txt file in which other ROM files can be specified. While in Browse mode, the 5 GPIO buttons can be used to select specific ROM files specified in the option.txt file. If e.g. JiffyDOS is placed at the ROM2 position, holding Switch2 while pressing one of the other four buttons will change the current ROM to that. Pretty easy!
Final Thoughts
How much bang did I get for my buck and is the Pi1541 a genuine 1541 Ultimate II+ killer device? Well, that is really not that simple to answer. The specific version of the Pi1541 I bought had a super sweet looking case, an OLED, a RaspberryPi 3B+, an 8GB micro SD card (that I lost…) and an IEC cable all ready to be used without me doing anything. However, it has the same price tag as a 1541 Ultimate II+ (which is an incredible device on so may levels). While I think of the 1541UII+ as a ‘complete’ device with everything ready to roll out of the box, the Pi1541 is more for the computer enthusiast who likes to fiddle around with the hardware and don’t mind spending hours setting everything up to his or hers specific needs. The end result is nearly the same, but it is just a little more difficult to get there.
I really have to say that Mr White et al. have really added something incredible to the Commodore 64 scene! And kudos for making everything available as open source. I cannot even imagine what the Pi1541 will be able to do in 2-3 years time. But stating that it is a ‘1541 Ultimate II+ killer’ may be a little over the top. And what about the SD2IEC? Is the Pi1541 a better more versatile device? Sure! It’s also at least twice the price of a SD2IEC device when including the price of a RaspberryPi, the PiHat, the cable etc.
The big question is, will I use the Pi1541 instead of my SD2iEC and/or my 1541 Ultimate II? The short easy answer is no it will not. I really don’t play any games that cannot be run on a SD2IEC device. And if I ever want to run a demo or game that cannot be run on a SD2iEC, I simply use my 1541 Ultimate II. But the Pi1541 is most certainly a very nice product that is still being developed and maybe in the near future, its possibilities may surpass those of the 1541 Ultimate II+.
NOTE: This article has also been been published in Europe’s #1 C64 scene disk magazine – Attitude #19 by TRIAD (link, link).
© breadbox64.com 2019
To say it in fewer words, this is the perfect device for 264er users (Commodore 116, 16 and plus/4) to get their new images to load on the machine and save their 1551 device. The 64er user should buy the Ultimate 64 instead.
The one thing I don’t understand, why comes this device in a beige color and the Ultimate 64 is black and not vice versa?
Where did you get it?
Hi Ross, I purchased the device on Ebay from a seller called despegatop 🙂
This particular model is expensive because of the nice looking injection mold case but the cheapest options will cost you far less. Most PI hats will cost you on ebay around $40+shipping+the Pi. I won’t lie to anyone, the Pi without that case looks ugly 😉
I don’t have a PI1541 or 1541 Ultimate II+ but I believe the Pi is well suited for people that already own a few other devices like an EasyFlash 3 Cart and maybe they will like to upgrade from their sd2iec device and of course they don’t own a Ultimate II+. The Pi1541 + easyflash isn’t an 1541 Ultimate II+ but is quite close… I know the UII+ does other things like REU but cost more unless you get that pretty nice Pi that you got from Ebay.
The Ultimate II is about $200 Australian dollars, not including postage. The Pi1541 is approximately $100 Australian dollars give or take, depending on which model Rpi, what pihat you go for, and whether you make it yourself. The $100 is for a premade B model hat with an oled screen, and an Rpi 3b+. So you could easily get that cost down below half the price of the 1541 Ultimate depending on how much work you want to put in. If you have plenty of money to throw down for hobbies, go with the Ultimate. If you want to save money and, with some effort, get something with virtually the same functionality, go with the pi.
Greg, Where can I order it?
Greetings, Erwin Van Loo
Hi, I would like to buy a fully assembled Pi1541 like yours. Could you tell me where I can buy it? I looked up despegatop, but he doesn’t seem to have any to sell. Thanks and good evening.
Hi Dilsia, I would simply drop him a PM on Ebay and ask him if he has one more to sell 🙂
Thanks for this help! People who have the Pi1541+oled and no screen connected to the RPI should know that there’s a problem with multidisc, disc swapping isn’t easy. So the solution is given here. Just use the PI1541 like a SDIEC with FB64 menu. Then CREATE a .LST file on a game/demo folder. The trick is you must load the LST! Then even more tricky, when it ask for “turn disc”, you hold and press button 2, look at the oled screen, see what happen when adding button 3. Yep, it’s not “eject” 5 button…
So I got one of these NanoPi NEO-LTS boards a while back (link). It is wholly linux based. I was wondering if there would be a way to convert or if there is code already for linux vice arduino ?? Or maybe you could point me in the right direction.
Hi David, it’s the first time I’ve seen the device you are linking to. Looks very nice! However, I do not know if there is a version of vice which supports the device. Sorry 🙁
Hello! Where can I buy this device with this type of case? Thank you
Hi, I got mine from a seller named ‘despegatop’ on Ebay. Look him up and drop him a PM – I’m sure he has more of them nice cases ;).
He is not available on eBay any more. I think similar thing is sold on Amibay. Advantage of this device is that you can use RPI for other projects as well, not only for PI1541.
Hi, I would like to buy a fully assembled Pi1541 like yours. Could you tell me where I can buy it?
Hi there, I got mine from an Ebay seller called despegatop. He may not sell them anymore, but several other options are available out there if you don’t want to tamper with the hardware yourself 🙂
Another advantage over the UII+ is that you can use the Pi1541 on most other Commodore machines like VIC20, the C16/plus4 models and the C128.
The UII models are specific for the C64 since it uses the cartridge port while the Pi1541 can be connected to the IEC port which is available on pretty much most popular Commodore machines
If you’re looking for one like the one used here I’m not sure if hes gonna make anymore but I bought the last one a week or so ago. Got it at sharewareplus.com and immediately bought it since it said one left.
I’ve tried reaching out for the past 2 weeks to despegatop via eBay and I believe the same individual goes by Testsson on Amibay – no response. None of the other cases for sale look anywhere near as good as this, so I ended up getting the hat alone from commodore4ever.net – excellent support/communication from the owner.
To add to David’s comment, do not bother with despegatop via eBay. He does not respond to emails sent to him – All I want to do is buy the device from him. So I got mine on ebay, with case, for £25. 2 days to arrive – now that is service.
For the price of the built one with raspberry pi or the Ultimate 2, buy 2 1541 drives and they will last you years, , whats the point ?
Richard, the point is being able to get disk images from the PC to the C64. Even with a PC 5.25″ drive you cannot write C64 floppies on the PC. The PC drives do not read or write to disks in the same manner as a C64 drive. It’s more than just a formatting issue, the data is written differently on a physical level.
I just got my Pi1541 hat and Raspberry Pi 3 model B in the mail today, paid about $60 US total. I have a 3D Printer so I will be able to make my own case, many designs are over on thingiverse.com. One thing I am looking forward to is possibly being able to copy images to and from the Pi1541 with my real drive (a 1541 clone from the era, the FSD-2 Excelarator Plus).
I received the kit minus the pi3. One thing I am missing is what options I need to enable for the specific pi1541 hat this kit uses. My OLED display is disabled. I probably just need to enable the correct options, but how I know which ones? “i2cBusMaster”, for example. I have no idea what the correct option would be.
Also, Steve’s site mentions needing a custom IEC cable. Is this true for *all* pi1541 hats?? Maybe the voltages are already correct on despegatop’s hat so I can just use a stock IEC cable? I haven’t see anyone else mention this so I assume it might be for early DIY kits.
Hmmm…could be power supply related. My 5V 2.5A power adapter should be enough but maybe 3A is better for this pi hat? When I tried a couple of other USB based power supplies, the problem got worse. My Raspberry pi power LED even shutdown after it booted!
MtnBuffalo, what are the power ratings on the complete unit your received?
Hi akid, I just used an old Apple PSU and an USB cable. This worked without issues for me. I don’t have the the pi1541 device anymore, so I cannot tell you how much power the device needs. However, if you use a PSU rated for running aRasPi3 PSU I’m sure you will be fine 🙂
In 2020 I ordered from the same seller on Amibay, which the postal system during Coronavirus lockdown proceeded to lose for several months. The seller does not respond to Amibay messages but he had the 1541 listed on eBay which I bought and which I specifically asked him to ship via UPS/DHL. The 1541 arrived a couple days later from Spain to the USA. Eventually the Amibay package arrived via post office. Very nice cases. No cable though in the kit.
I bought the Pi1541 from this seller on Amibay and eBay after the post office took months to deliver my Amibay order and I thought it was lost in the Atlantic Ocean. Seller does not respond to IM on Amibay but did promptly reply on eBay. I asked him to ship DHL/UPS/FedEx and about 4 days later the Pi1541 arrived. Very nice case. I was inspecting the kit earlier today. I need to order the Pi3b+‘s from Amazon and SD card to assemble them. Also didn’t come with IEC cable unfortunately. Need those too. Money well spent. All other kits are very ugly.
Hi Boyd, happy to hear that you managed to get your Pi1541’s. The cases are the nicest I’ve seen so far 🙂
Hi Boyd, and anyone else who may know: What is the pi hat guy’s latest alias on eBay? I tried replying to his thread under the alias “Testsson” on AmiBay but then I realized he labelled as “inactive user” on there. I’ve also been trying to find him on eBay under the name “despegatop” but no luck there either. Does anyone know this guy? I’d like a good hat with a case that’s known to fit on it and that doesn’t look ridiculous on my desk, and it’s surprisingly hard to find such a thing prebuilt.
I considered myself lucky to have obtained one from despegatop via eBay last year. After solving a problem with the CPU heatsink interfering with the level shifters, the emulated 1541 seemed to work fine for the most part. I had some trouble loading some disks but I shrugged if off as not 100% compatible. I noticed inconsistencies later on and really felt I shouldn’t be having them with a “cycle exact” device. When the firmware update to allow for temp readout became available, I was seeing temps exceeding 60 deg C. I thought this was high when the reported operating temp should be closer to 52 deg C. I decided to take apart the unit and saw a clear problem– my heatsink had become dislodged. It was resting at an angle on top of the CPU! This would obviously not help cool it properly. I originally used what I had on hand to secure the small copper heatsink, which was a small piece of black adhesive tape. Securing the pi hat on top could have put some pressure on one side of the heatsink that eventually lifted it off on one side. My next step will be to locate some thermal glue instead. Perhaps that will hold it. I was curious if anyone here is seeing high temps with their unit. This is perhaps the only downside to having the nice custom enclosure. It is good at trapping heat.
I am loving the Pi1541. But as you noted, load times are just as slow as a real 5.25″ unless you use something like JiffyDOS. I installed the JiffyDOS Kernal ROM IC on the board and my machine is sucessfully loading the screen that says: JIFFYDOS V6.01 (C)1989 CMD.
On the Pi1541 I have swapped in the 16 KB file called JiffyDOS_1541-II.bin renaming it Jiffy.bin. The Pi1541 seems to recognize it as it shows on the small screen on the Pi but I keep getting
?LOAD ERROR
READY.
Whenever I try to LOAD”*”,8 from disk. I am able to flip the JiffyDOS switch back to the stock ROM and load programs without a problem. Any idea what I am doing wrong?
Hi Levi, good question… Have you tried a different version of DiffyDOS to see if that’s the reason? If you boot your C64 into JiffyDOS and type ‘@’ and hits ENTER, you’ll be able to see information of the kernal on the disk drive (JiffyDOS or CBM Kernal). This way you can check whether or not the Pi1541 is actually using the expected kernal. Good luck with playing around with your nice device 🙂
Does anyone know if this will work on a Pi alternative such as the Libre Computer SBCs?
Does anyone know if this Pi1541 will work with the Commander X16 Single board computer? It supports an IEC serial cable connection and Commodore C64 DOS commands.