
According to Microsoft, about 14% of all Xbox One gamers have a temporary mobility limitation and 8% of their gamers have a permanent mobility limitation. I did not know that, nor have I ever even considered that physically disabled gamers may experience issues when playing on the Xbox One without special hardware! I was therefore positively suprised when I was told about Microsofts’ new Xbox Adaptive Controller (XAC), which is a device that can be customised to the needs of different physically disabled users (link). For the development of the XAC, Microsoft collaborated with charities including The Cerebral Palsy Foundation, Special Effect, and The AbleGamers Charity to research its user base.
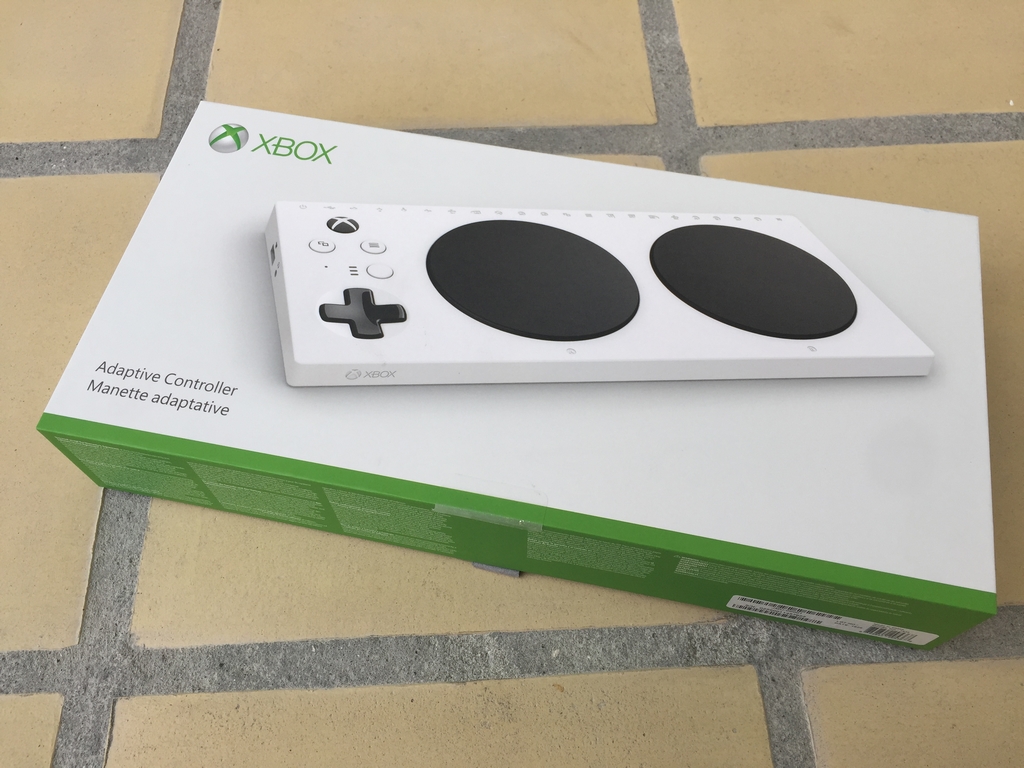
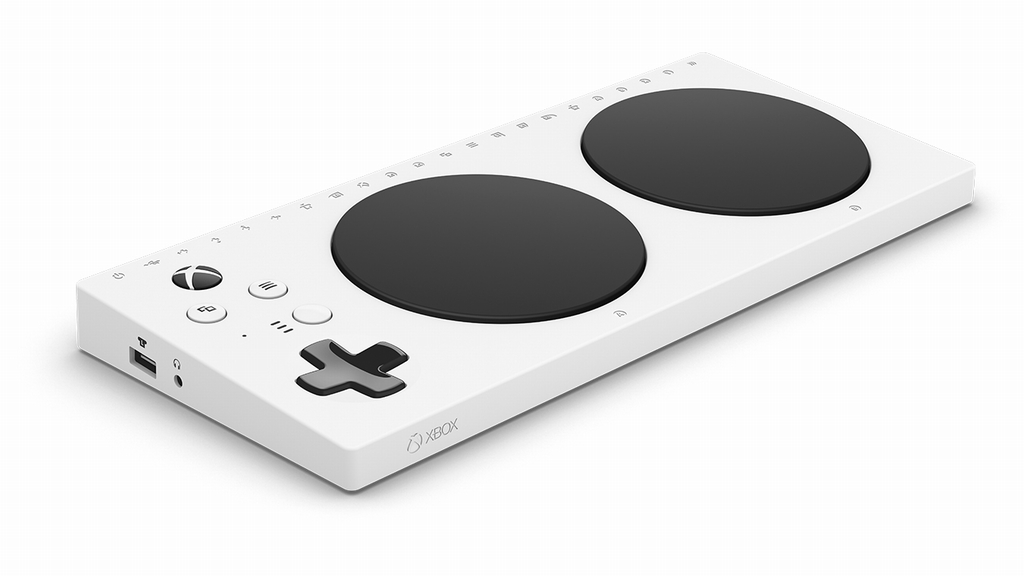
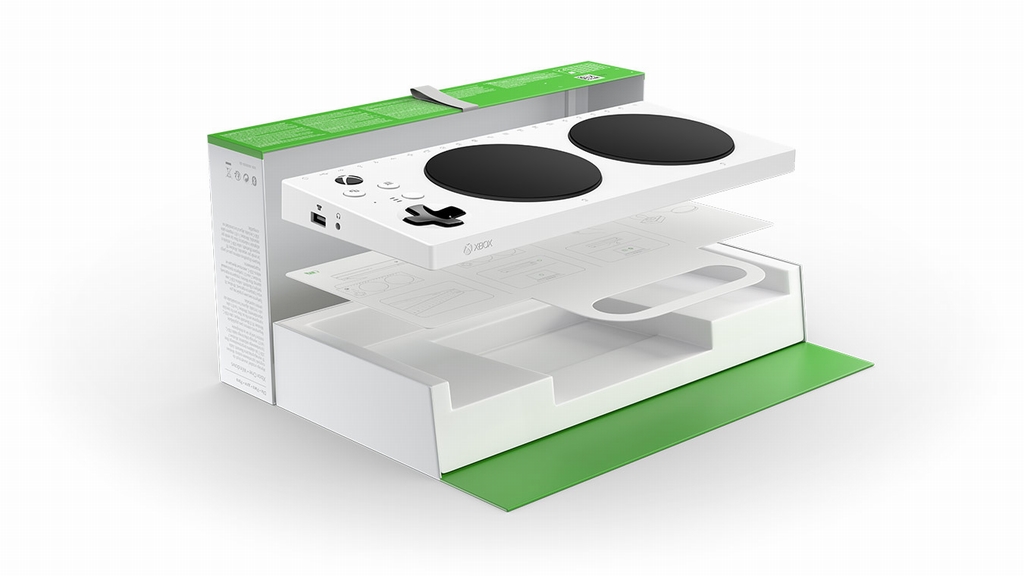
The XAC is a flat controller and has two large round black buttons on the top, two USB ports on the sides and several accessibility ports along the back. The large black buttons can be operated with one’s feet or hands and the XAC has screws on the bottom so it can be mounted onto wheelchairs and tables. The XAC supports external devices that can be plugged into the controller, including one-handed joysticks and mouth-operated joysticks. The accessibility ports on the back each represent a button on a standard Xbox One controller. The XAC retails for about 100 $ and a lot of effort has been put into the controller. The result is a sturdy looking controller that does not resemble a cheap kids toy. The designers have thought of almost everything when designing the device. Even the cardboard box it comes in has been designed with the physically disabled people in mind – it can be opened wihout any special tools (or teeth!!). Kudos to Microsoft for creating a device that does not have profit as its main goal!
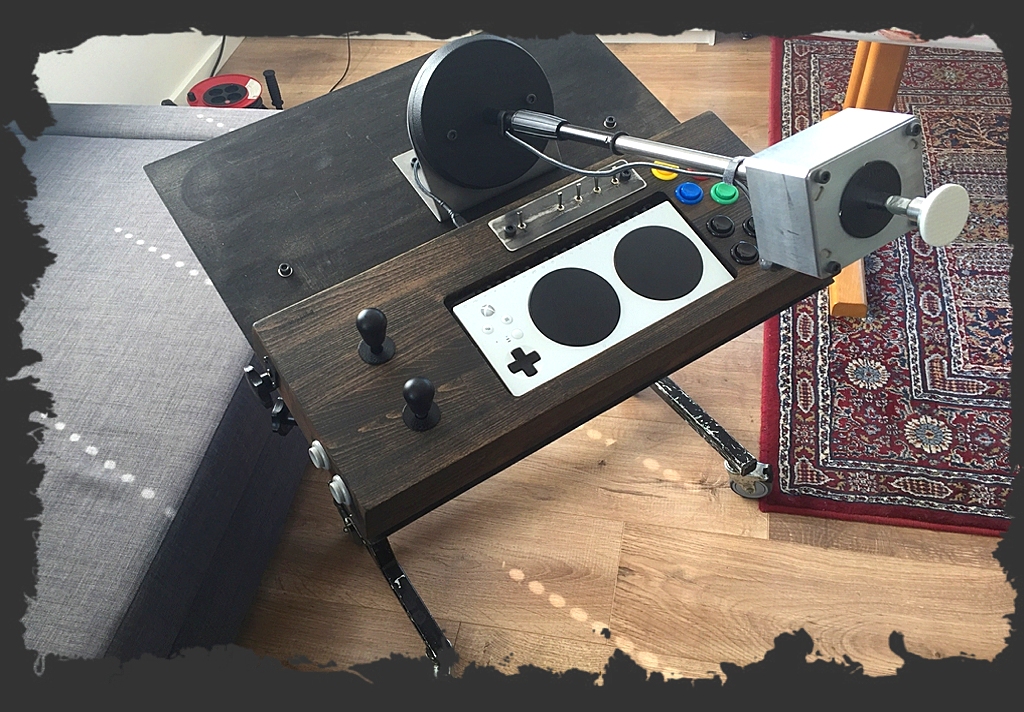
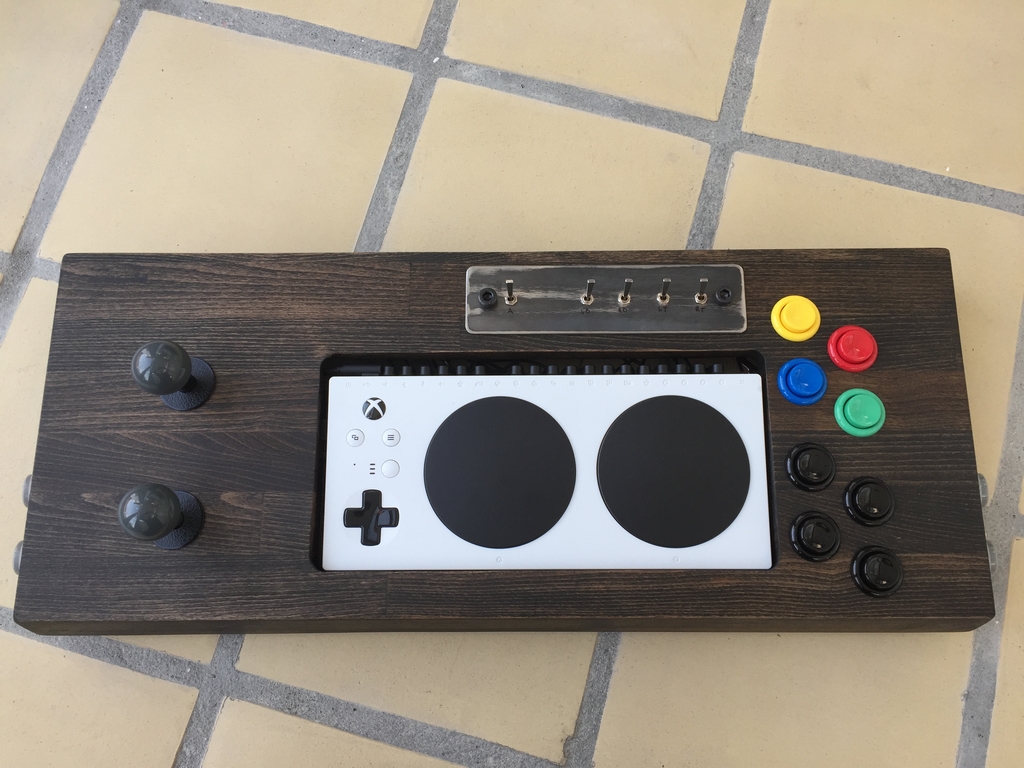
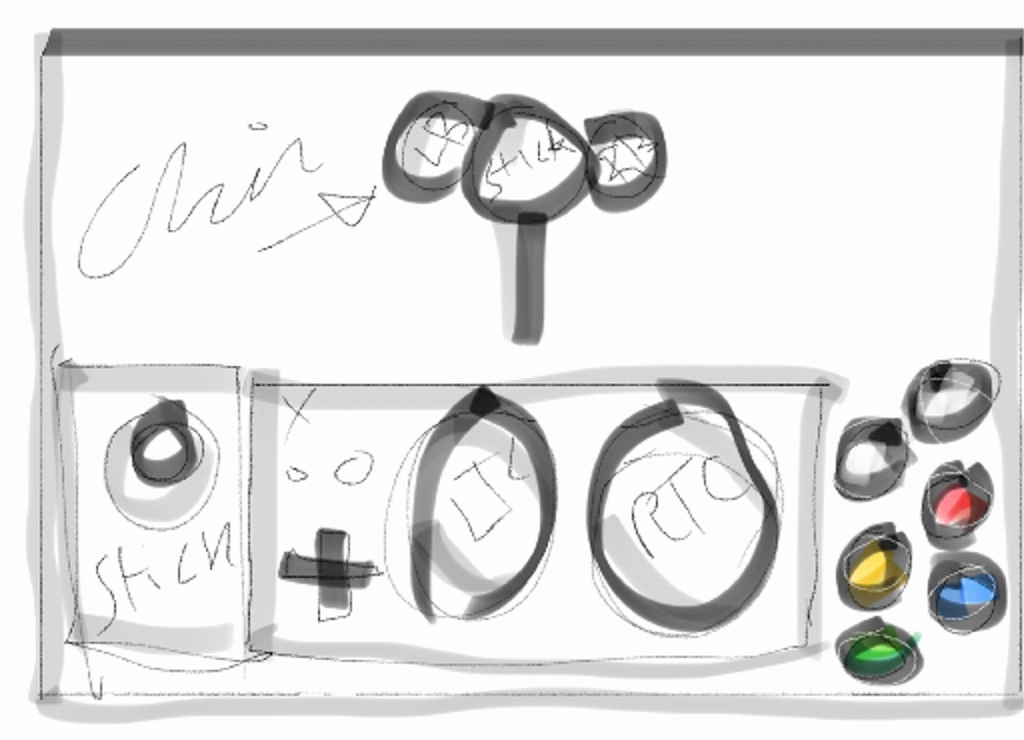
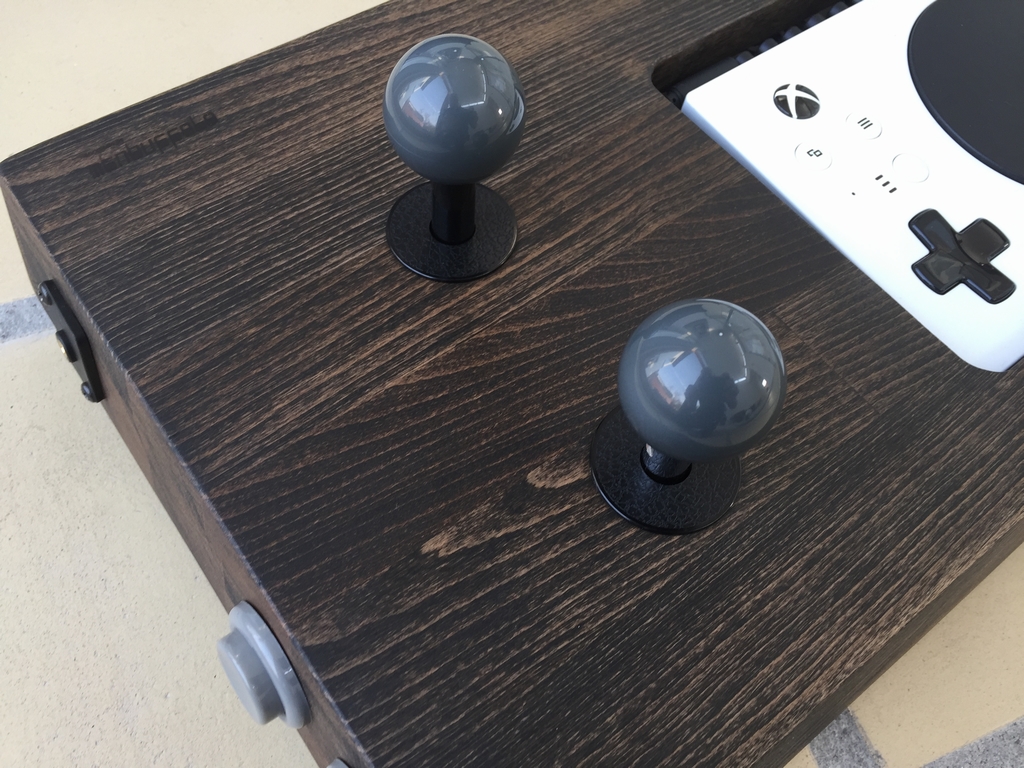
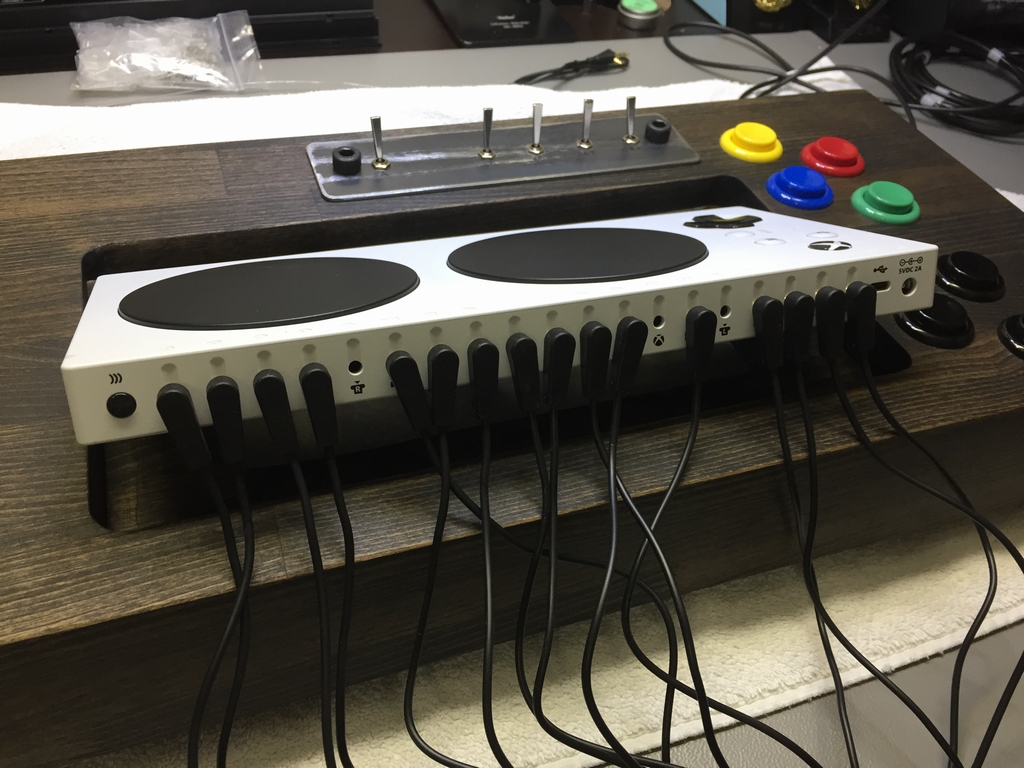
I was introduced to the device by a tetraplegic (memo to self: never ever dive into shallow water to impress girls!!) named Thomas who loves playing on his Xbox One – alone or with his wife using the co-pilot feature. Previously, he had been playing with a rather old fightstick developed for tetraplegics, but it was starting to get kinda sloppy and imprecise. He therefore asked me if I would help him build a new joystick based on the XAC as he had seen some of my previous wooden joystick projects (link, link, link). Being genuinely flattered by his nice comments, I immediately accepted. Over a time period of about 4 months, we met numerous times to ensure that all parts were placed correctly to make his gaming experience as effortless as possible. Customization is key when setting up joysticks that are not being operated by a gamer’s fingers but by his (or her) hands and chin! Don’t want to limit the game time due to an improper setup, right? This is how the finished Adaptive Chin Check joystick looks like. Below is the tale of how it came to life.
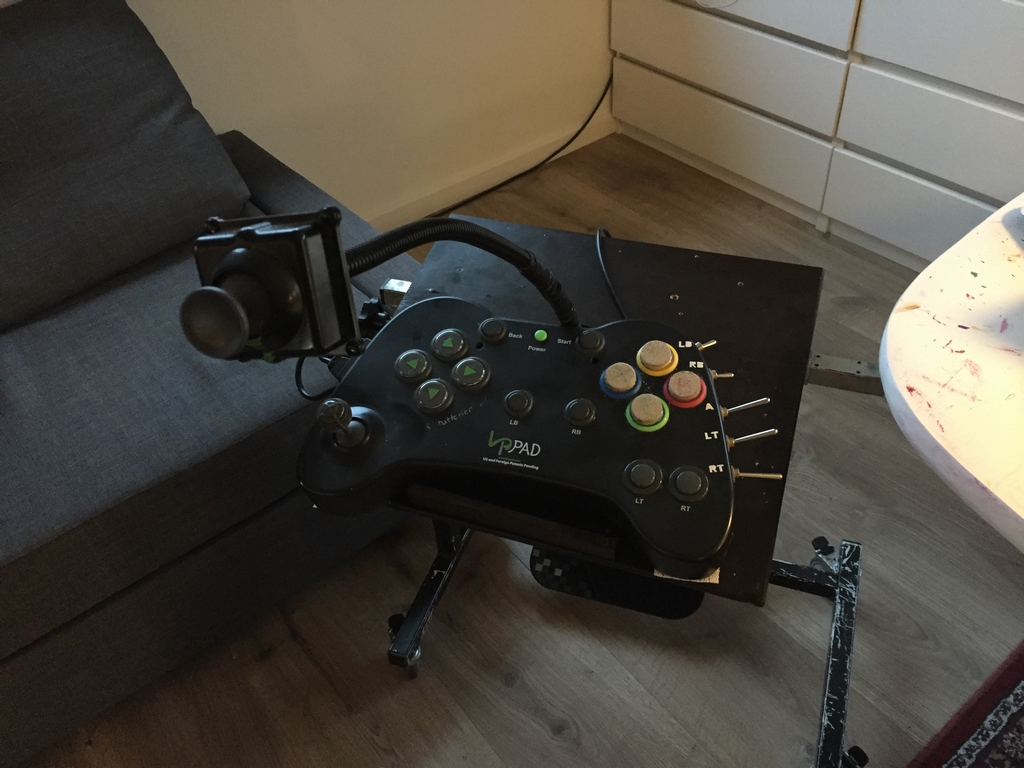
Old Joystick
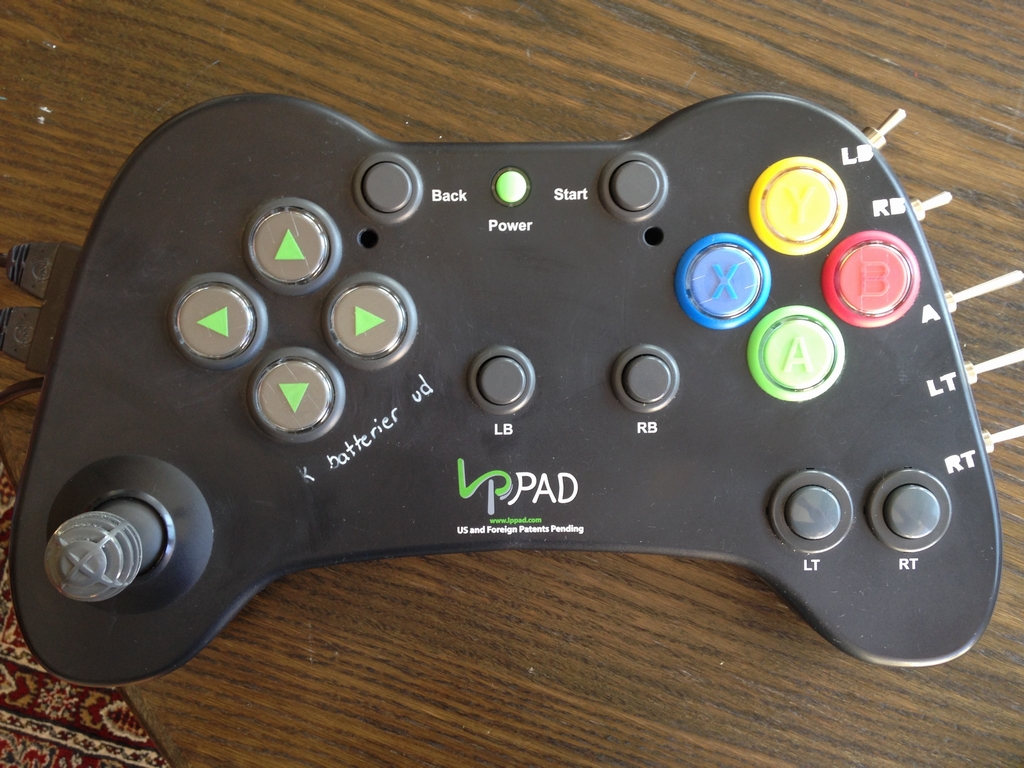
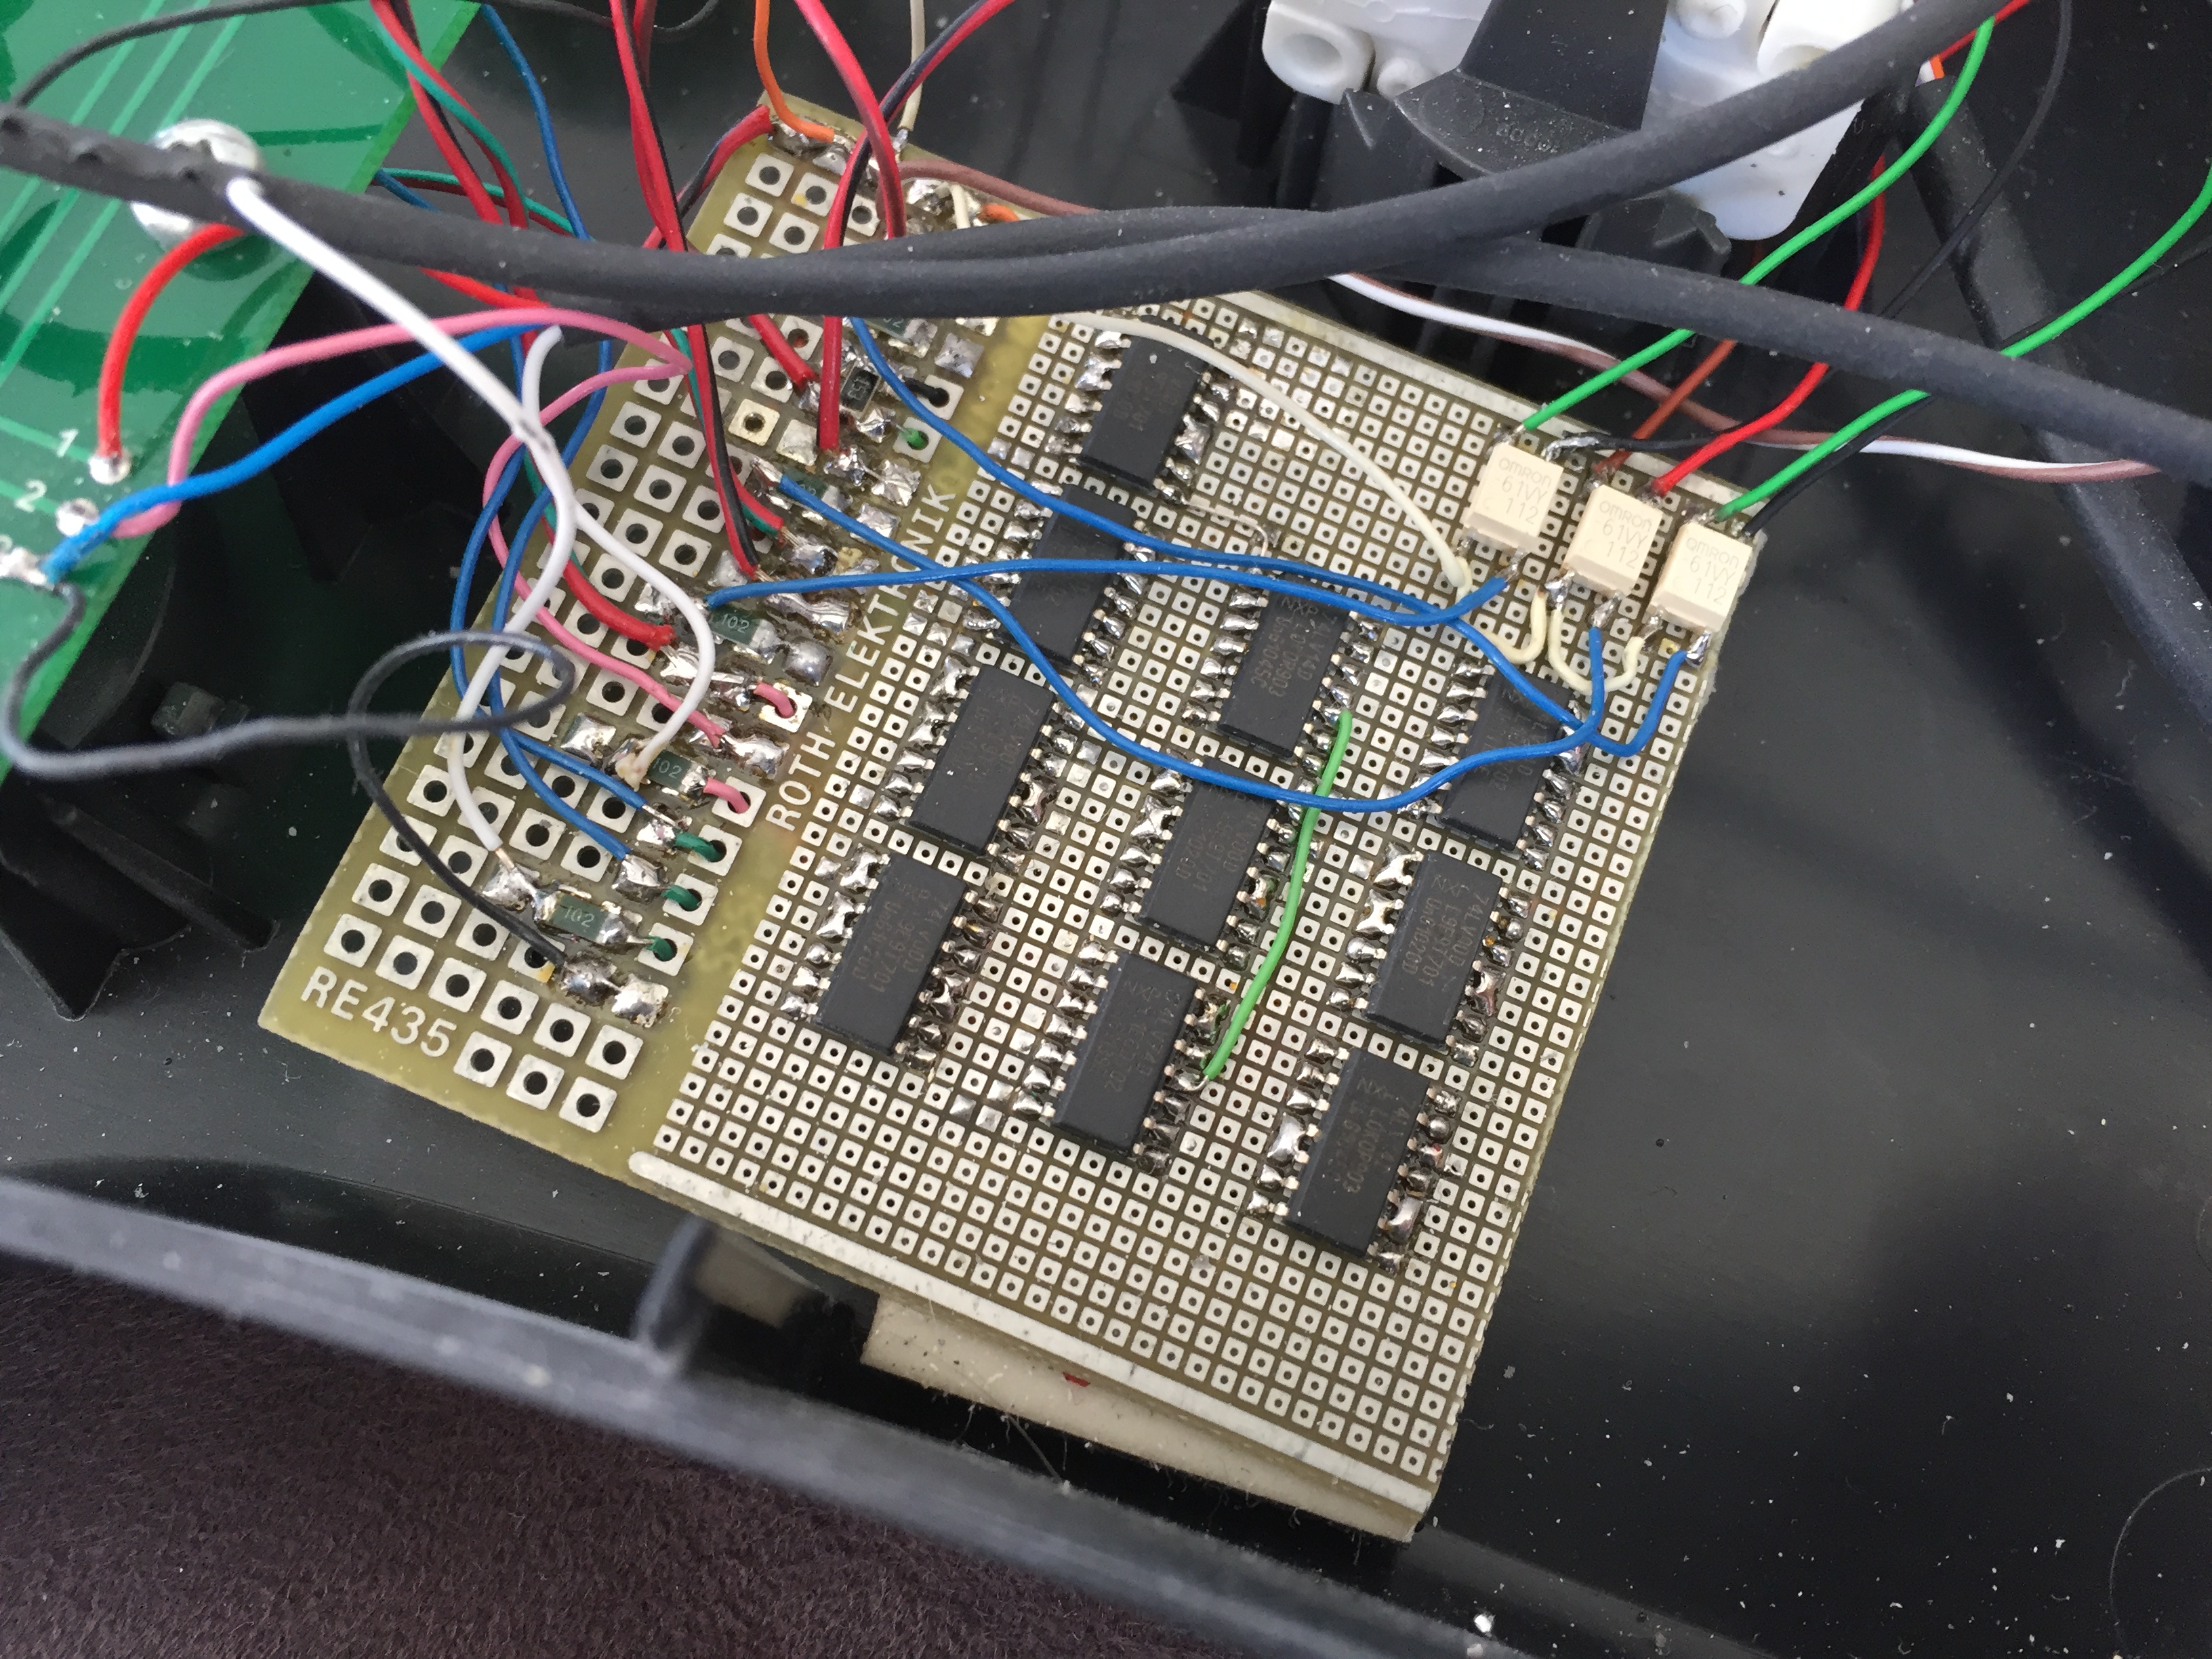
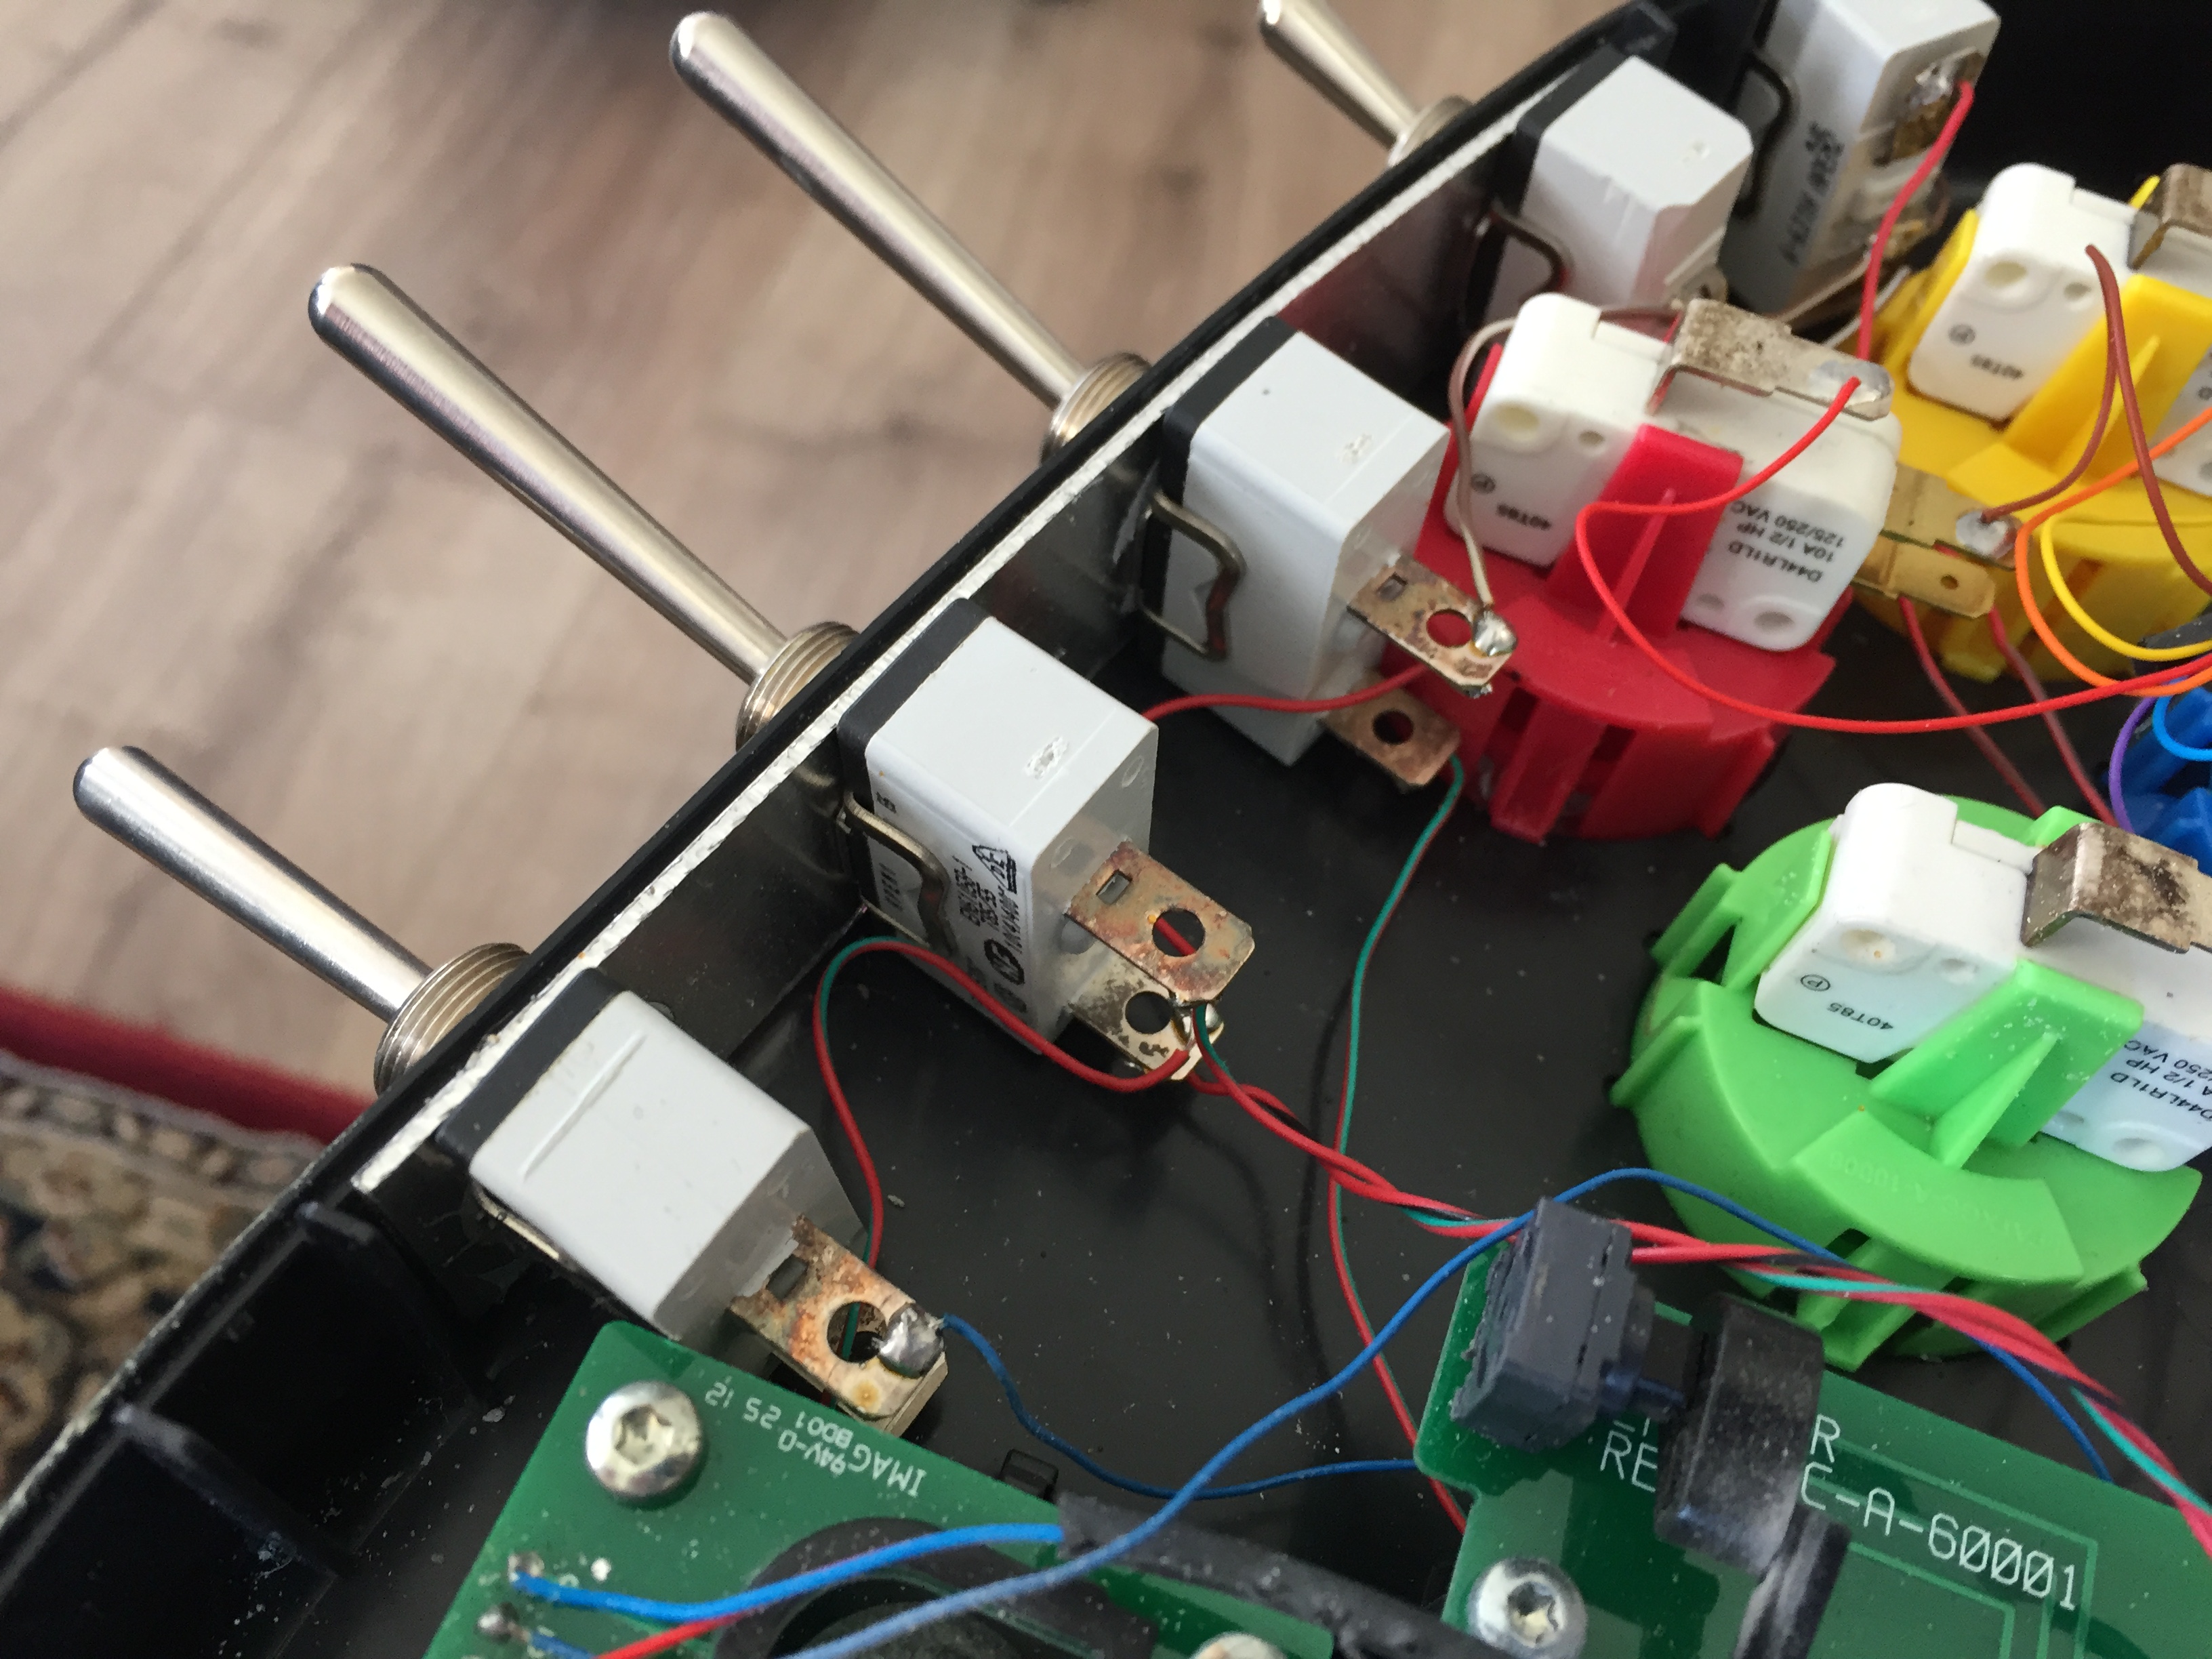
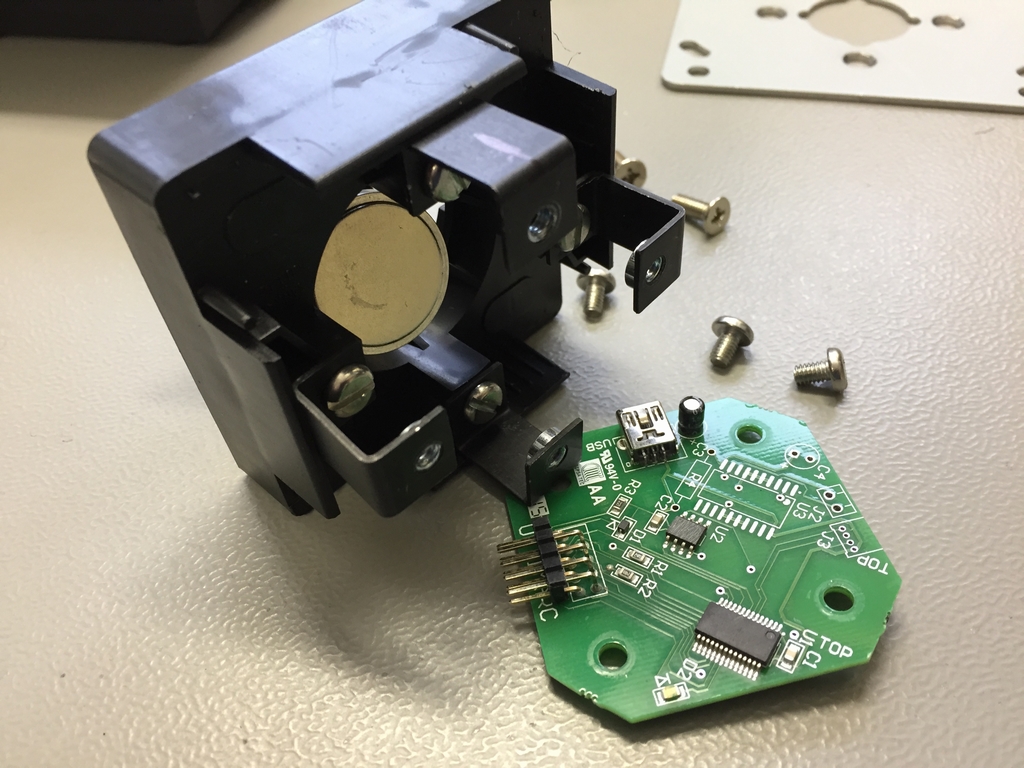
This is the joystick Thomas had been using for quite some time to play on his Xbox One. The toggle switches on the right shoulder are for activating a push ON/push OFF function of different buttons (LB, RB, LT, RT and A). In some games these buttons need to be activated (continously held down) while accessing special accessories like weapons or inventory by pressing another button before being released when the choice has been made. This may sound easy, but as Thomas have limited dexterity, this is an almost impossible task to do really fast especially in a heated gaming situation – don’t want to be killed by zombies unnecessarily, right? The toggle switches enables the Push ON / Push OFF function which activates a button by pressing it shortly (this will keep it activated without being physically pressed). Thomas can then press whatever other button is needed to choose the inventory/function, press the button again to release it. The functionality is something I have never thought could be an issue… Internally this was created by a small PCB full of small IC’s and a heap of wires.
I reused the joystick trolley as it can be be adjusted up/down and tilted to get the best angle of attack.
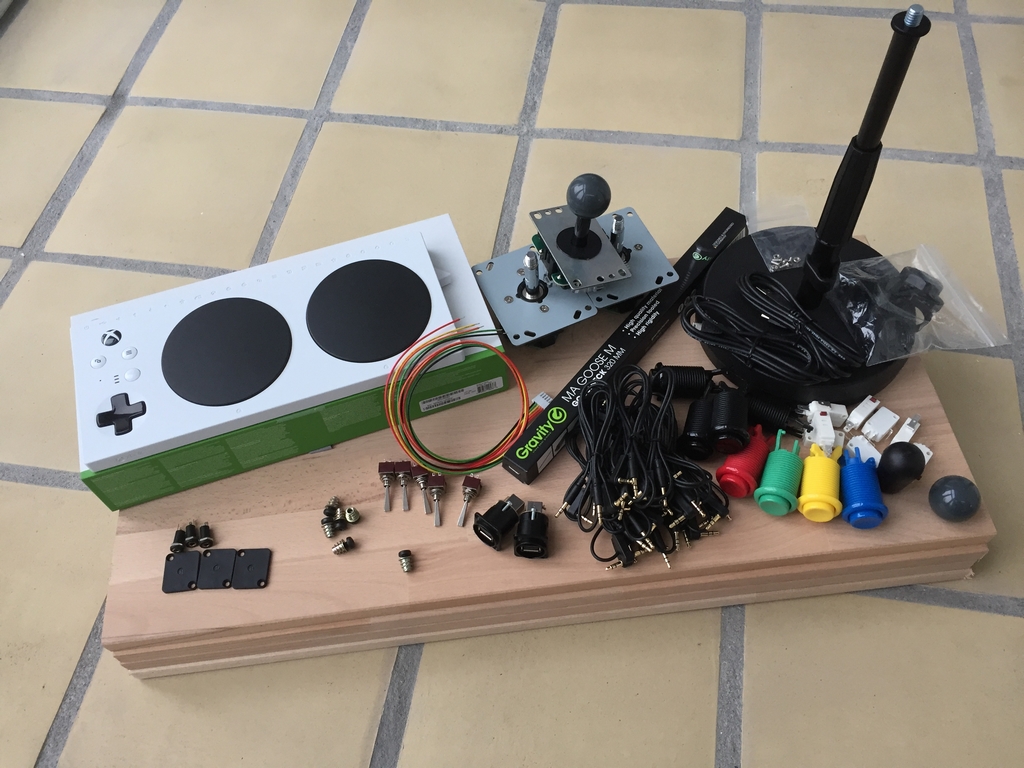
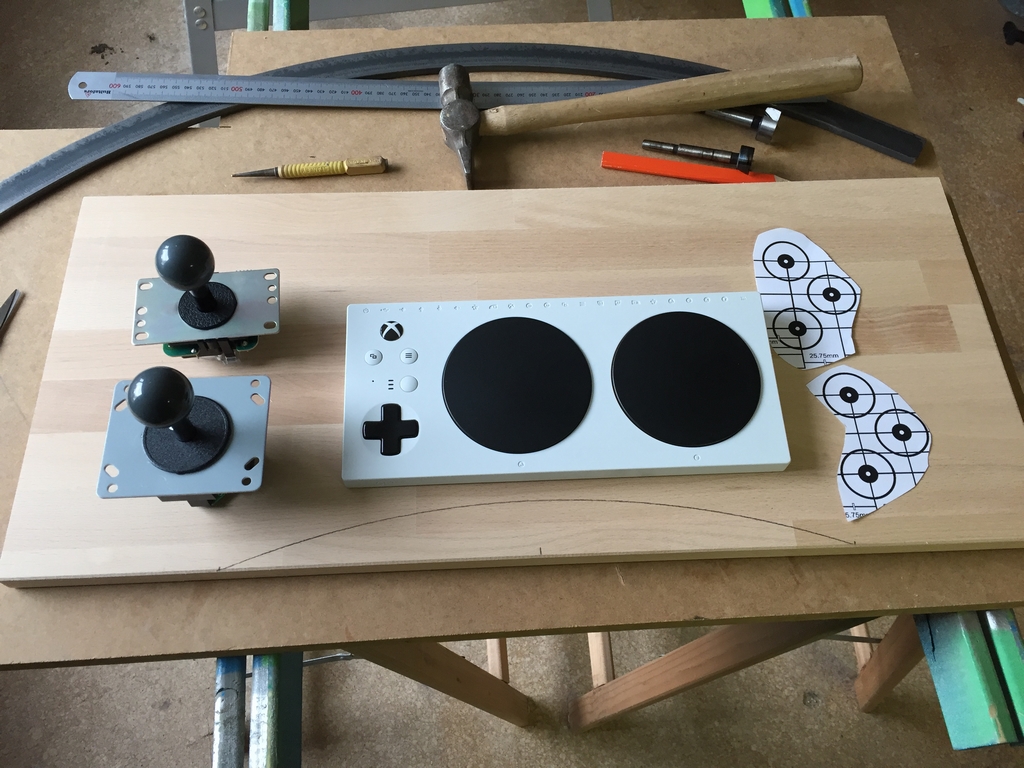
New Hardware
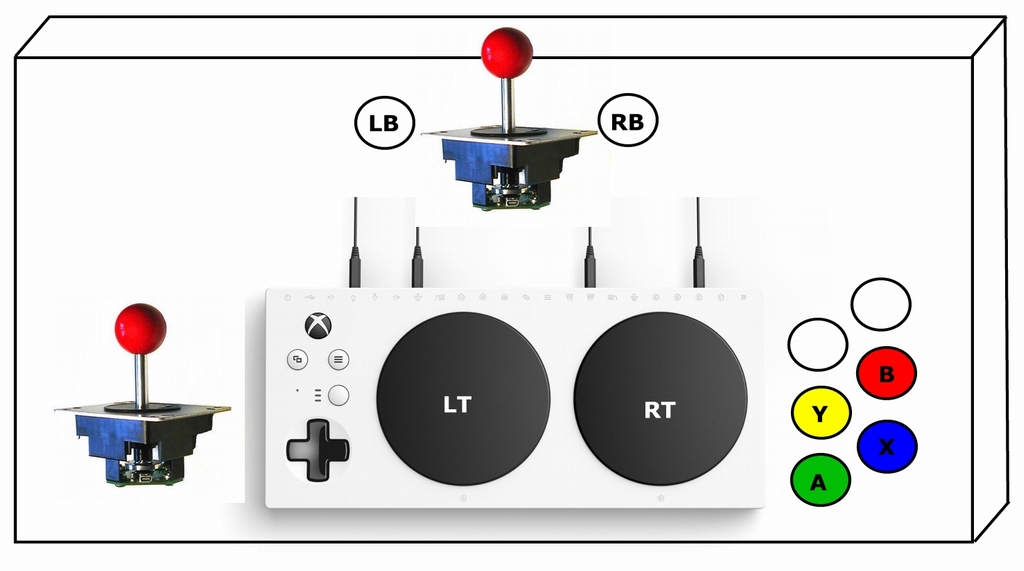
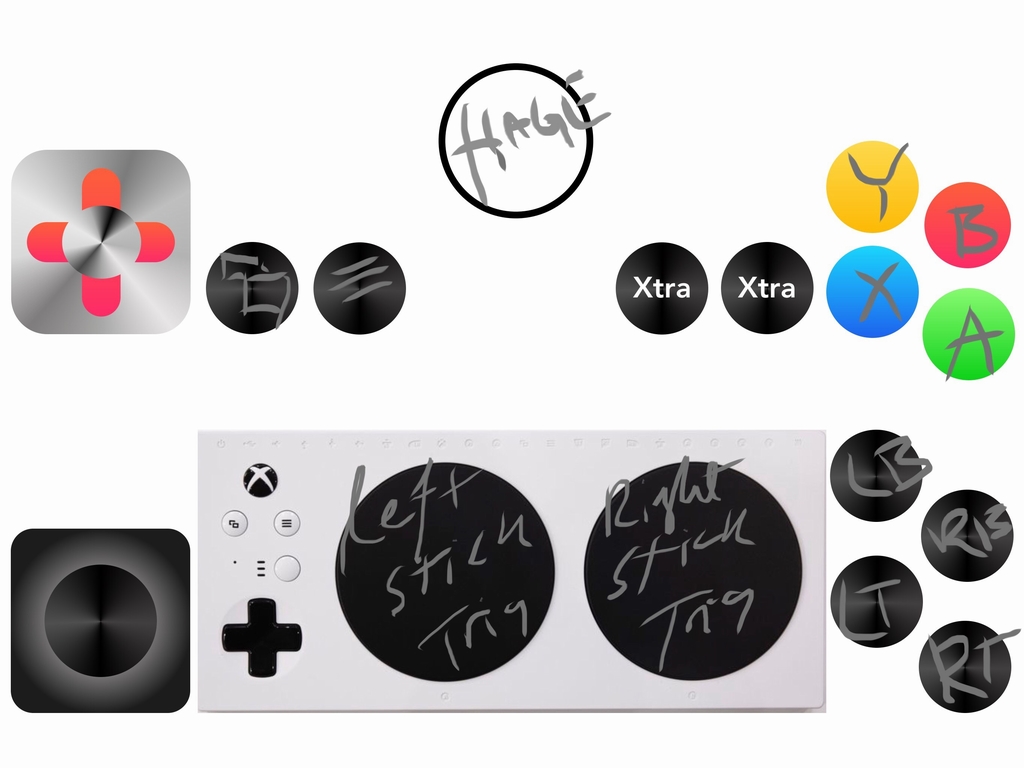
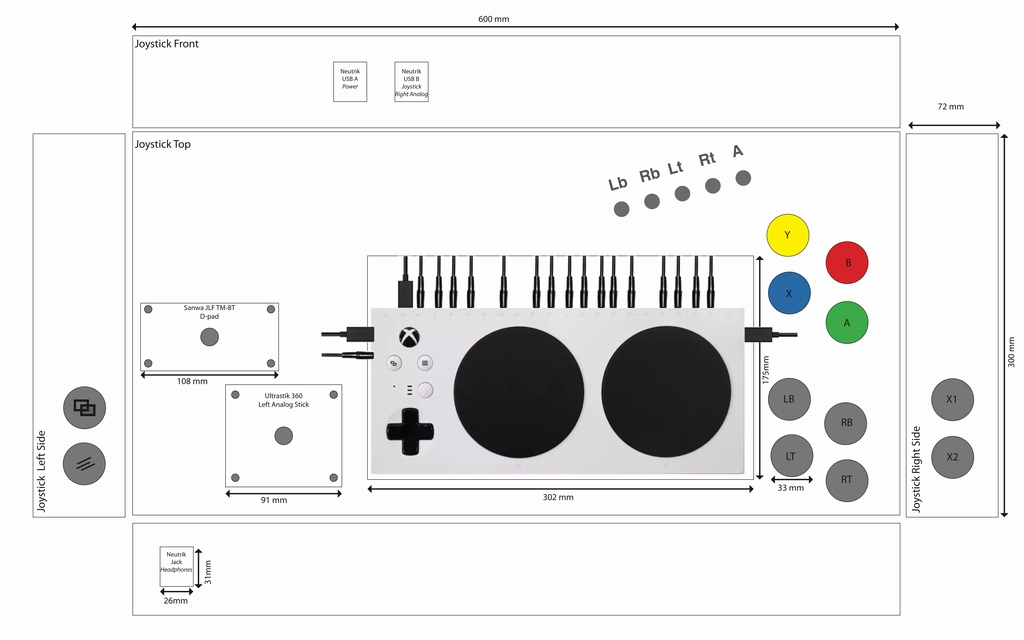
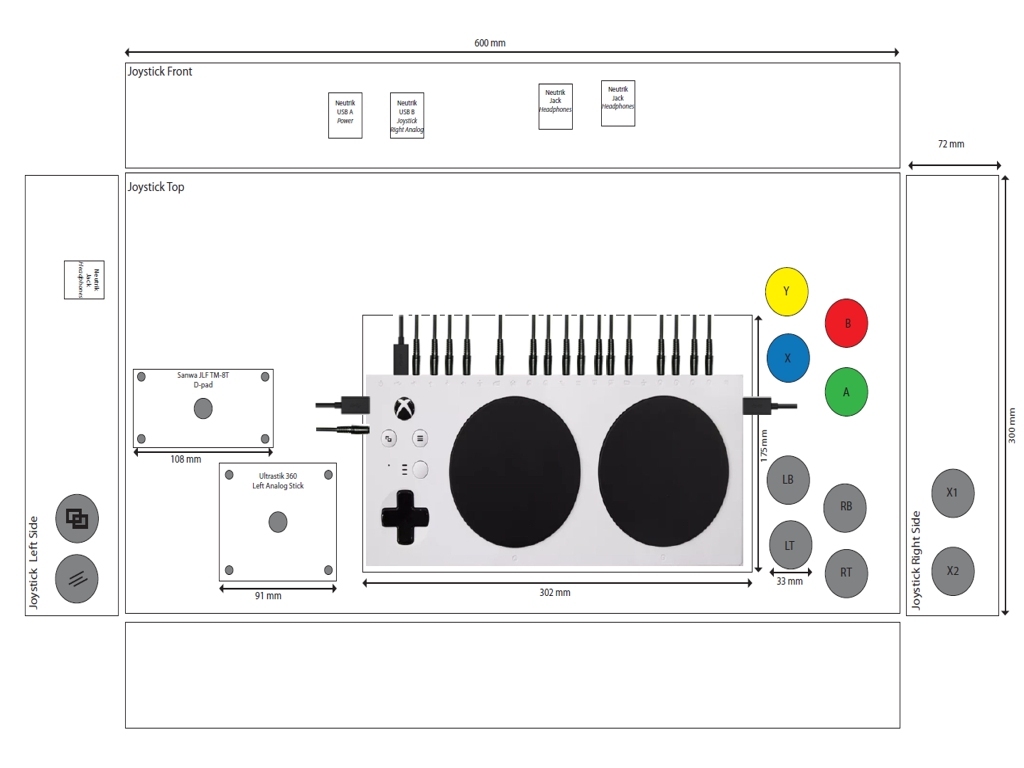
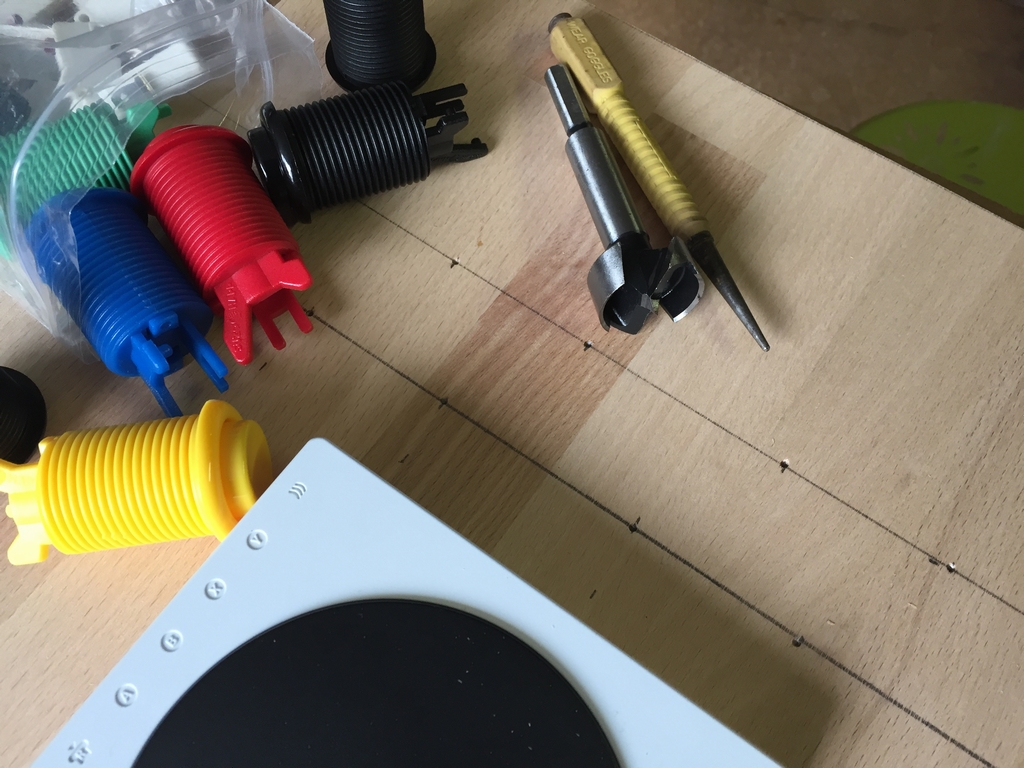
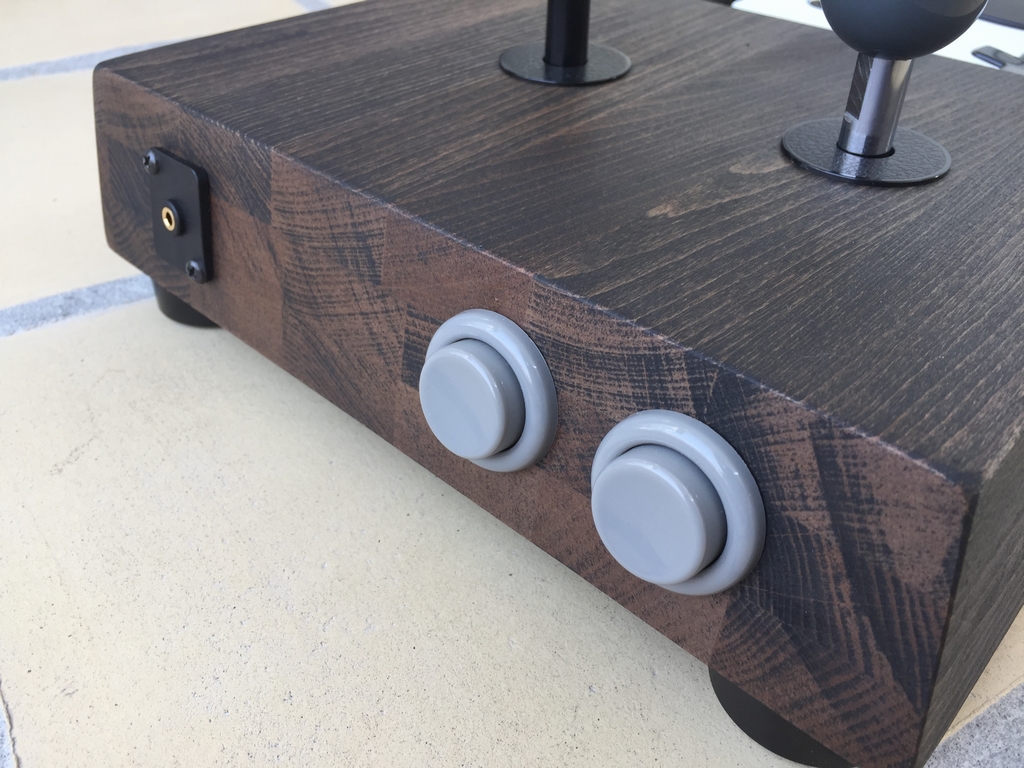
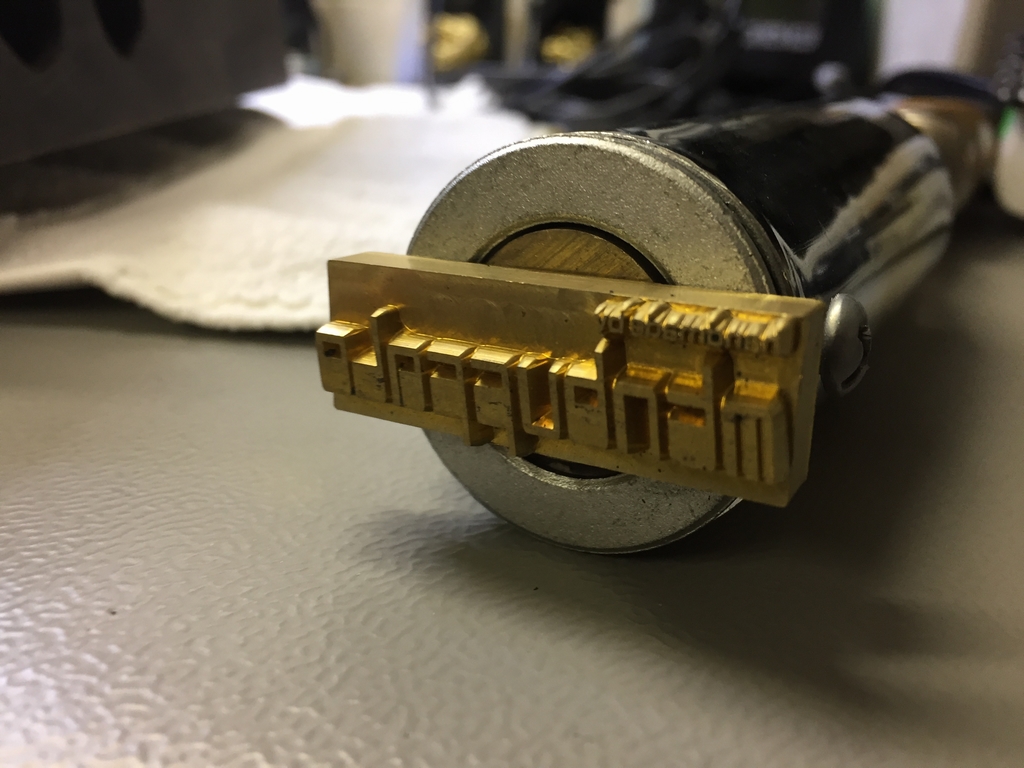
This is the hardware that went into the Adaptive Chin Check joystick. The base is of course the XAC. Two analog Ultimarc UltraStik 360 (link) joysticks were used as the left and right thumbsticks of the original Xbox One controller. The joysticks come with an USB cable and can be plugged into the XAC without any issues. A digital Sanwa JLF joystick was used as the directional pad. All push buttons were Happ Arcade buttons with E-switch microswitches as they exhibit a tactile bump and click when being activated. Furthermore, the plunger doesn’t travel below the rim part of the button hereby making it easier to activate when using the side of the hand for activation. Short mini-jack cables were used for all the connections. Finally, three mini-jack plugs were used for headphones out (sometimes wifes just don’t appreciate the Western sound theme of Red Dead Redemption 2 or the heavy soundtrack of GTA 5…) and for two optional input devices like external push buttons. Quite a few drafts were made before we settled on the most optimal design.
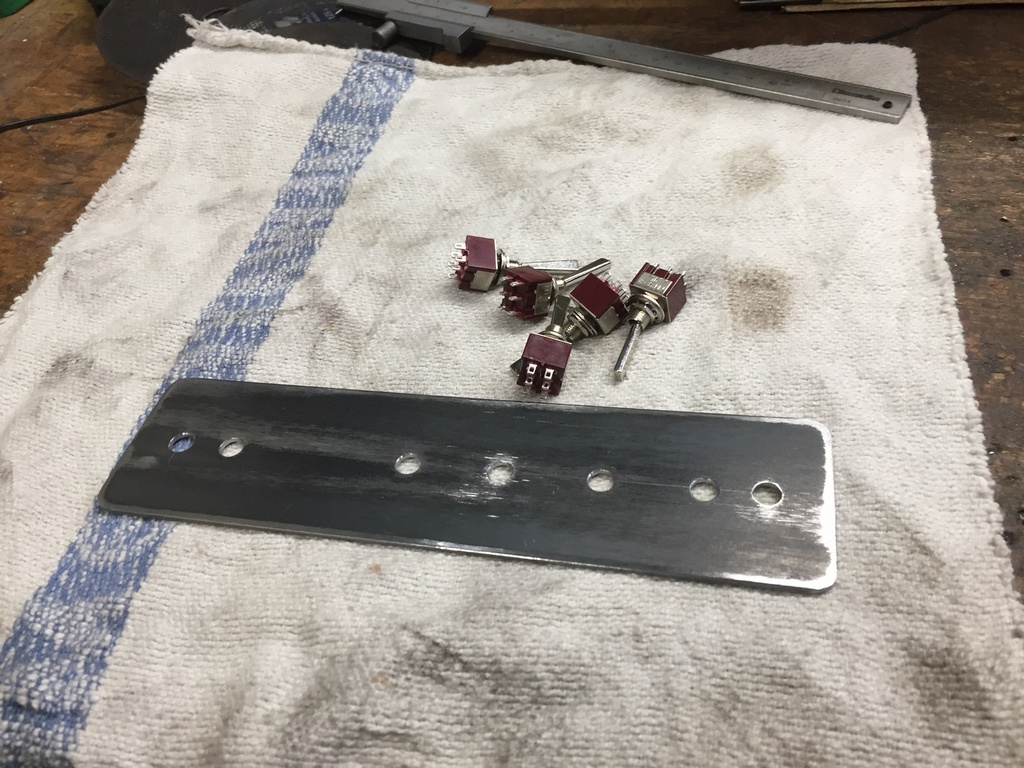
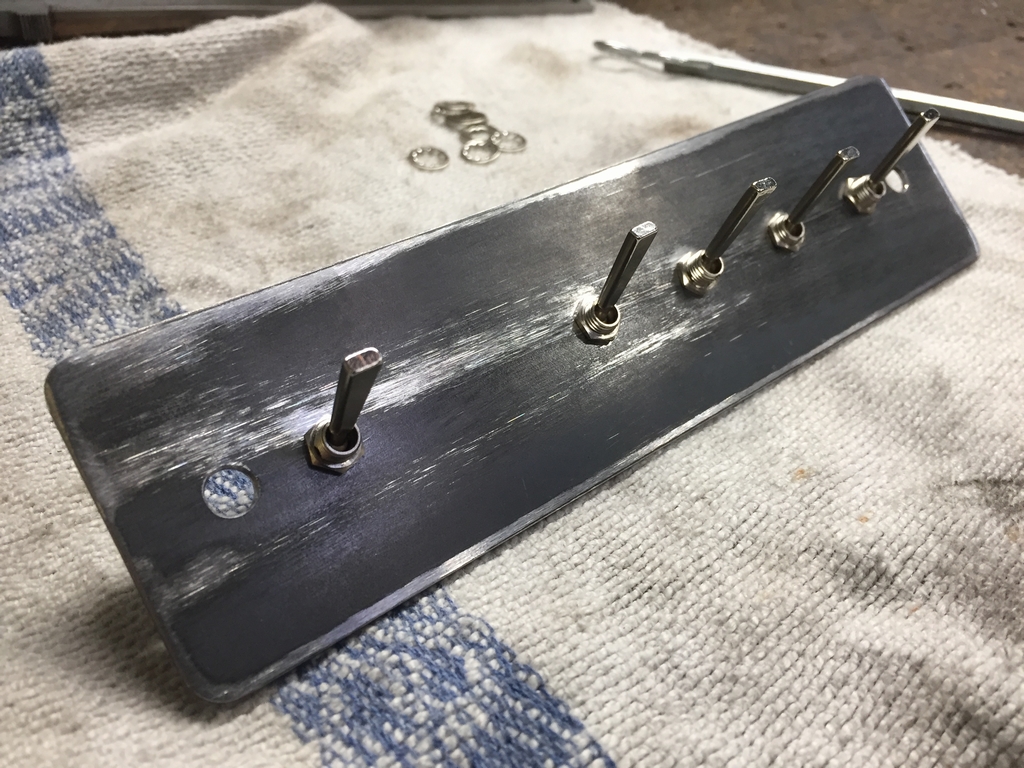
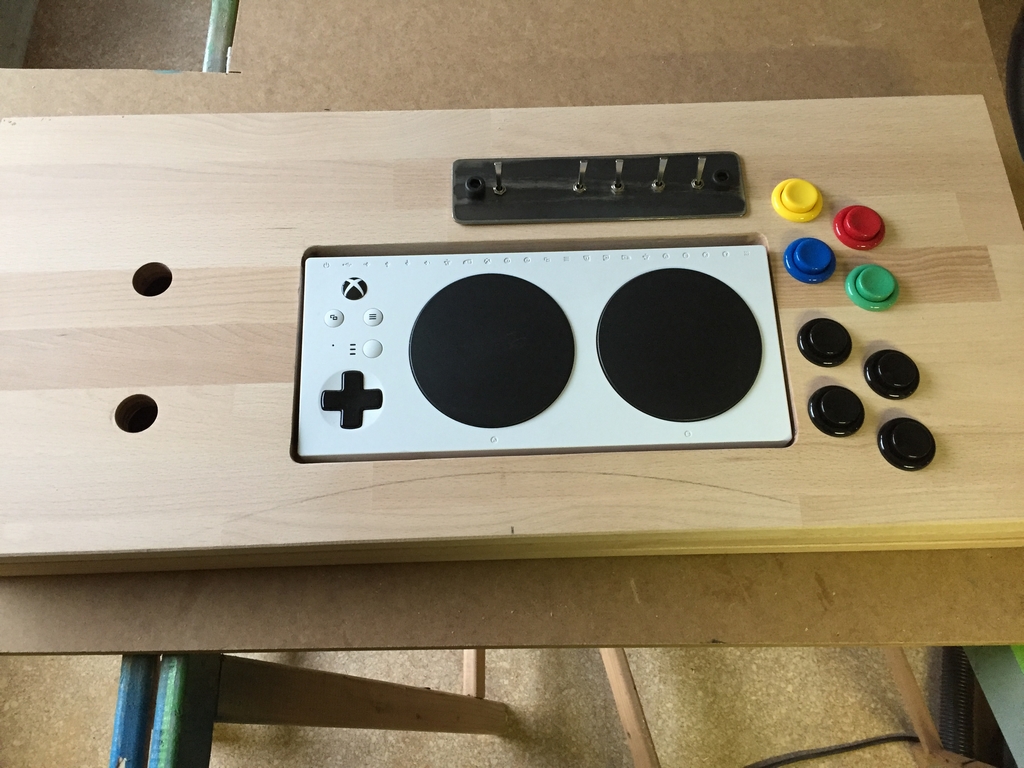
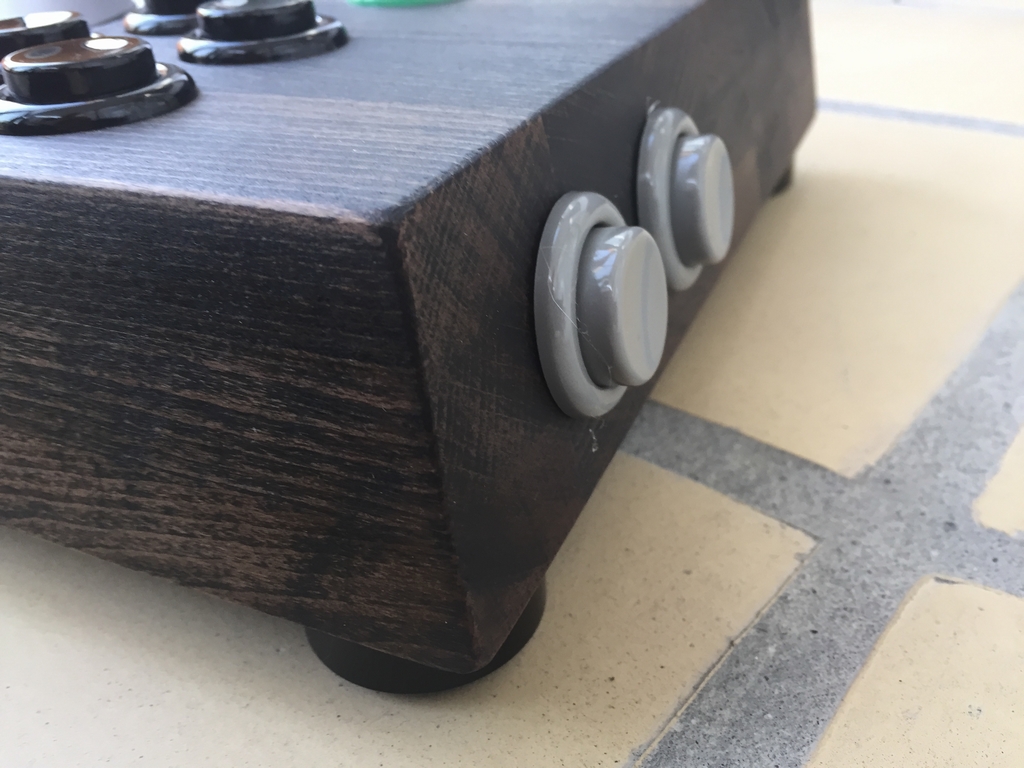
Toggle switches
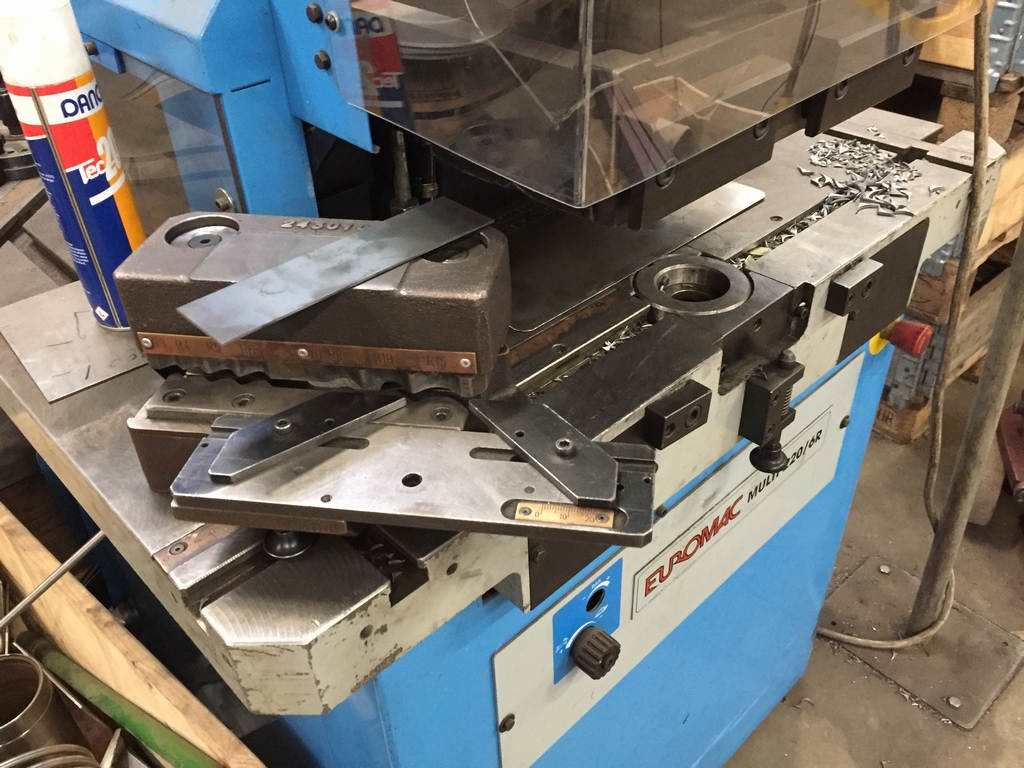
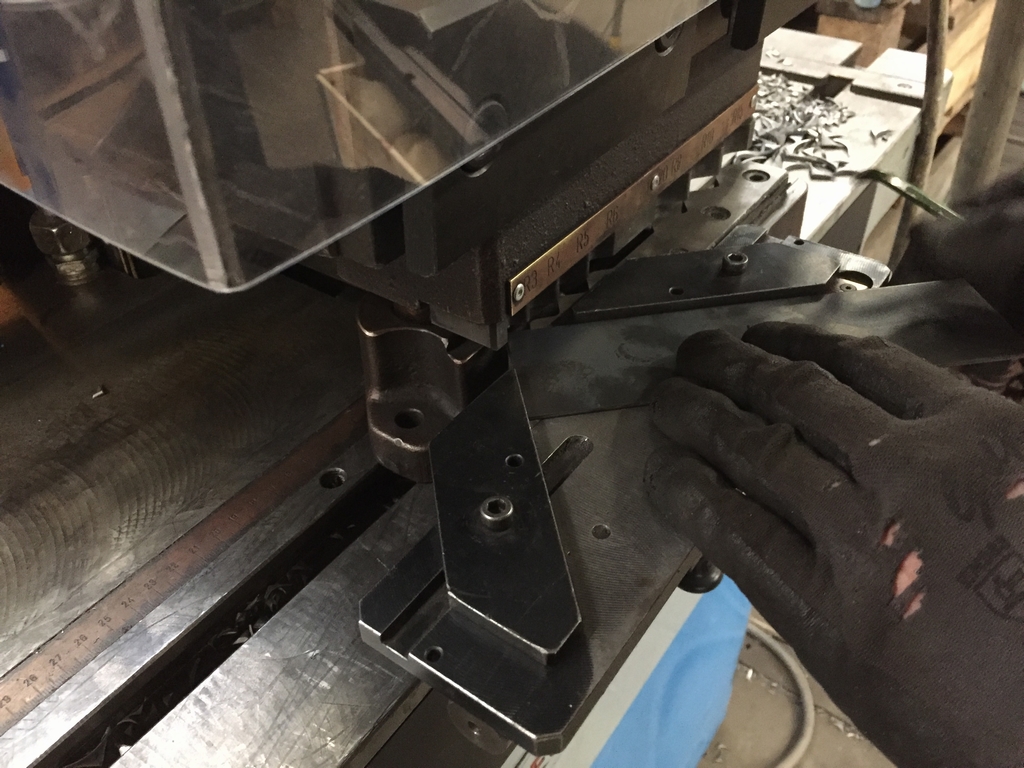
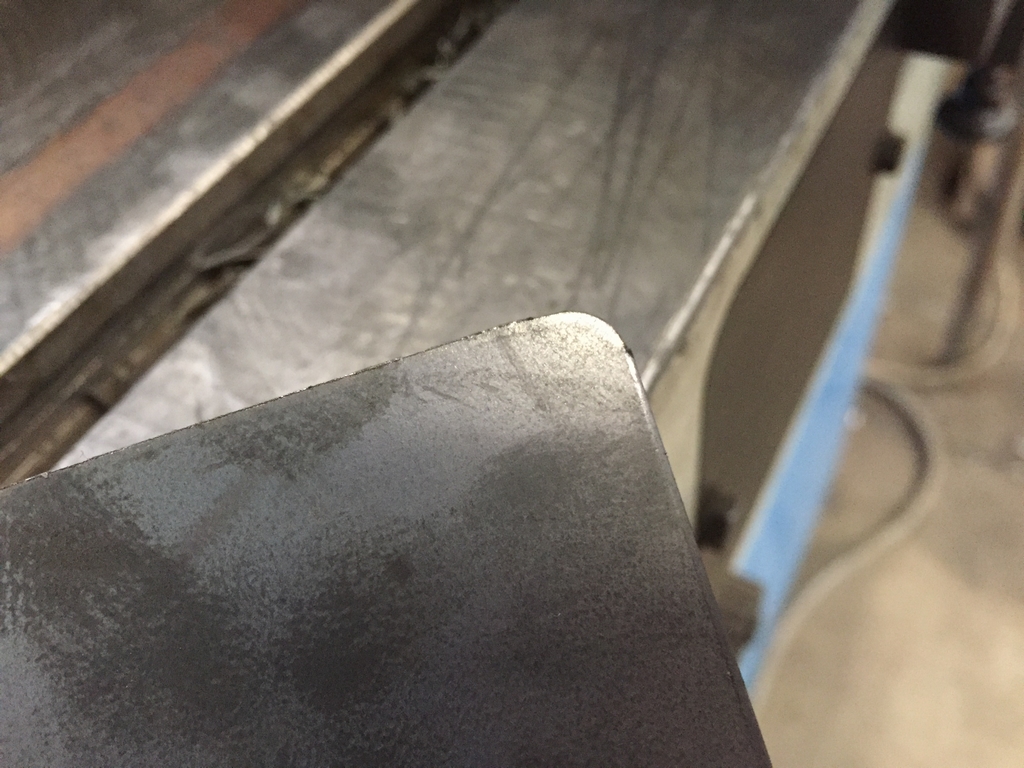
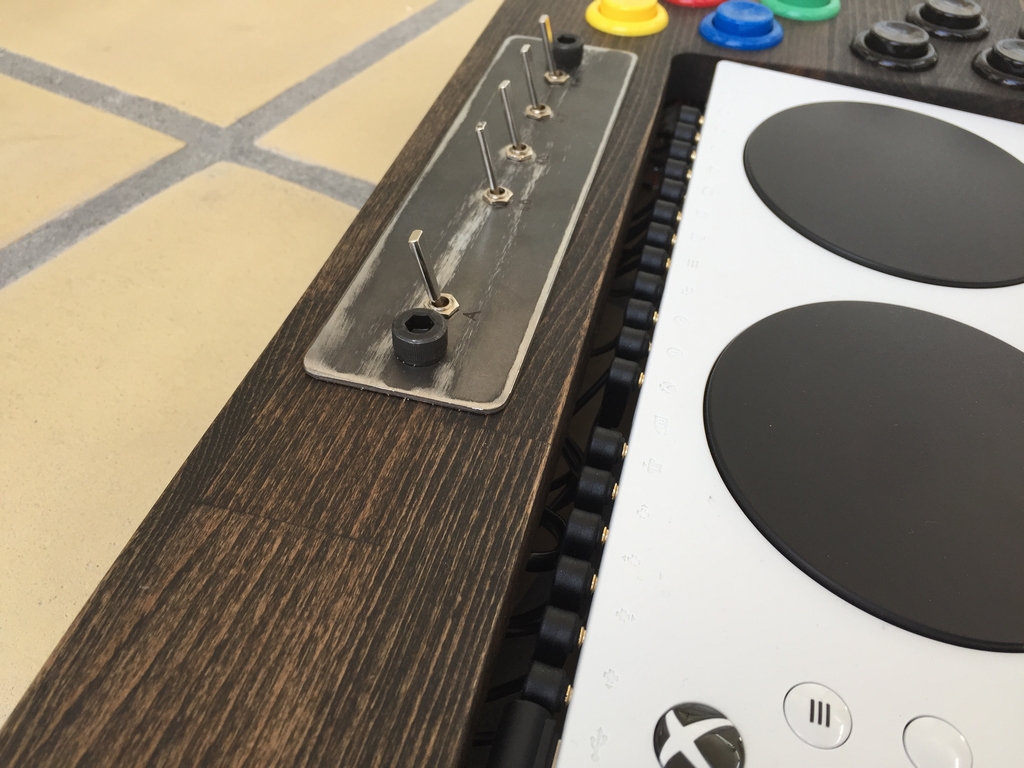
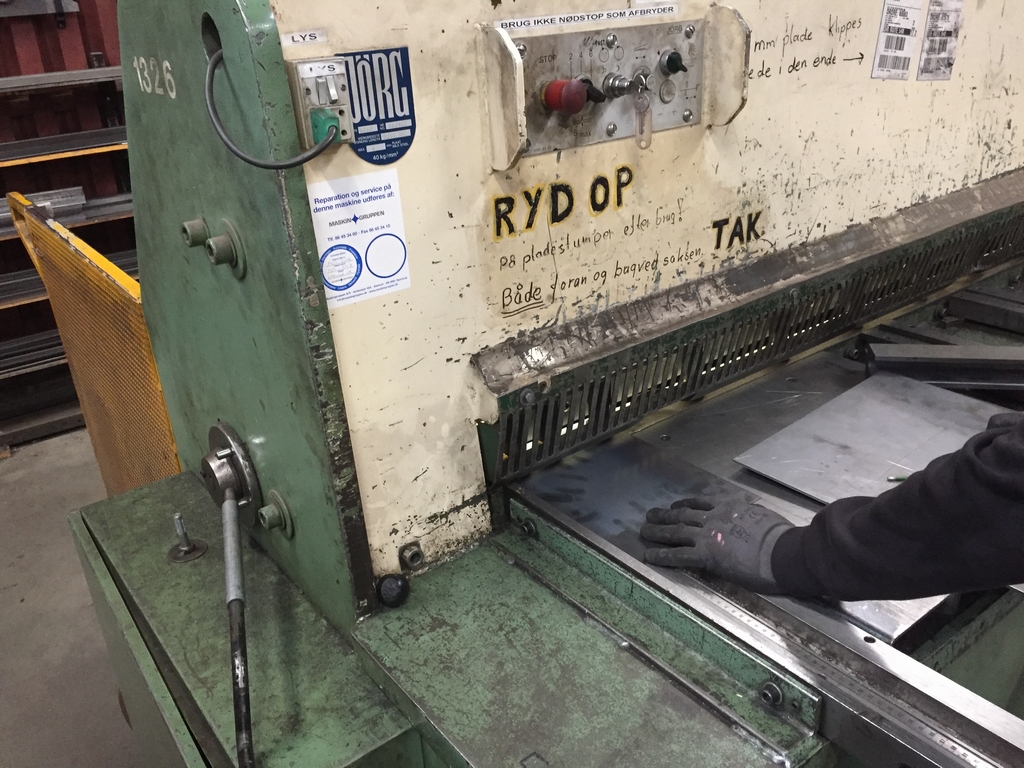
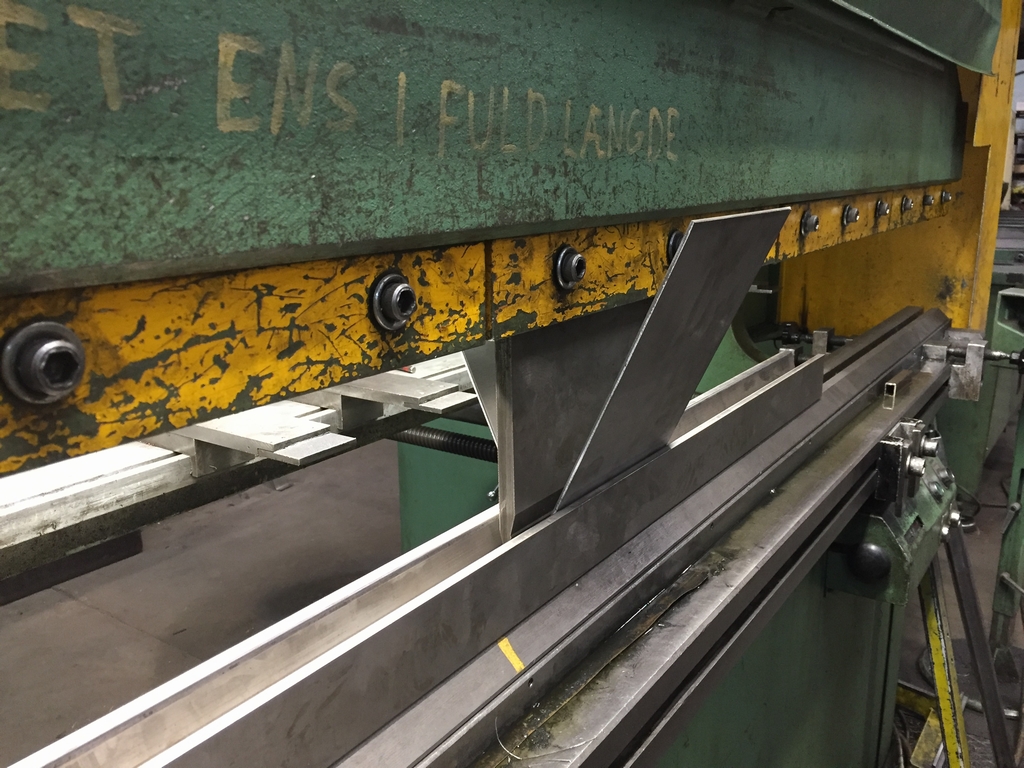
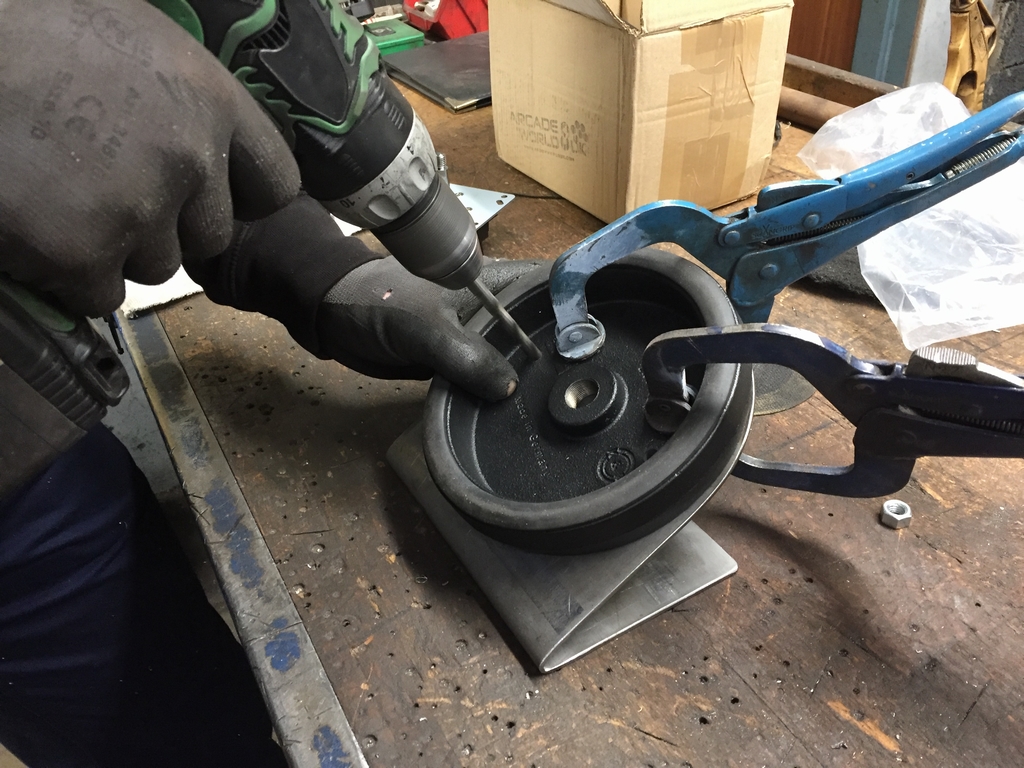
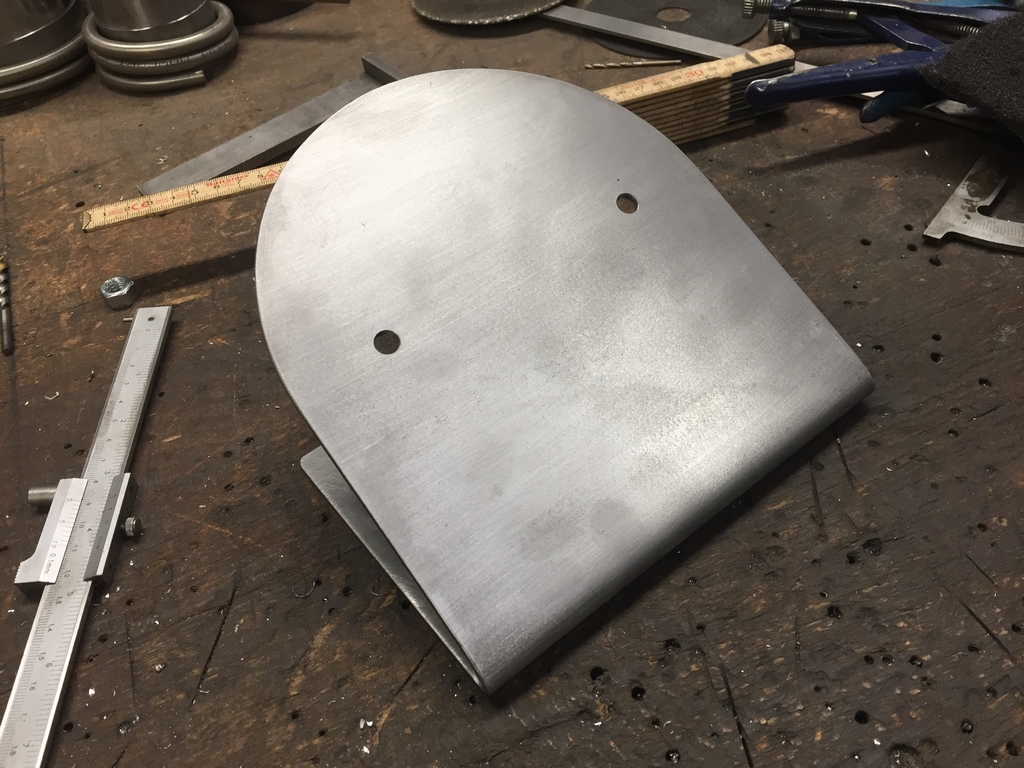
As I didn’t have the electronic parts to make a Push ON/Push OFF system for the RT, RB, LT, LB buttons like on Thomas’ old joystick, I simply used some toggle switches to continuously activate the buttons during gameplay (a future upgrade of the Push ON / Push OFF function is currently on the workbench…). Therefore a row of toggle switches were installed. When activated, they each function as if the RT, LT, RB, LB and/or A are being continuously pressed. A special machine were used for cutting the corners of the plate into a perfect shape before drilling out the holes for the toggle switches. I got some switches with extra long arms to make it easy to grab them. The metal plate wasn’t polished as I like the industrial looks of the metal with the black color stemming from the production.
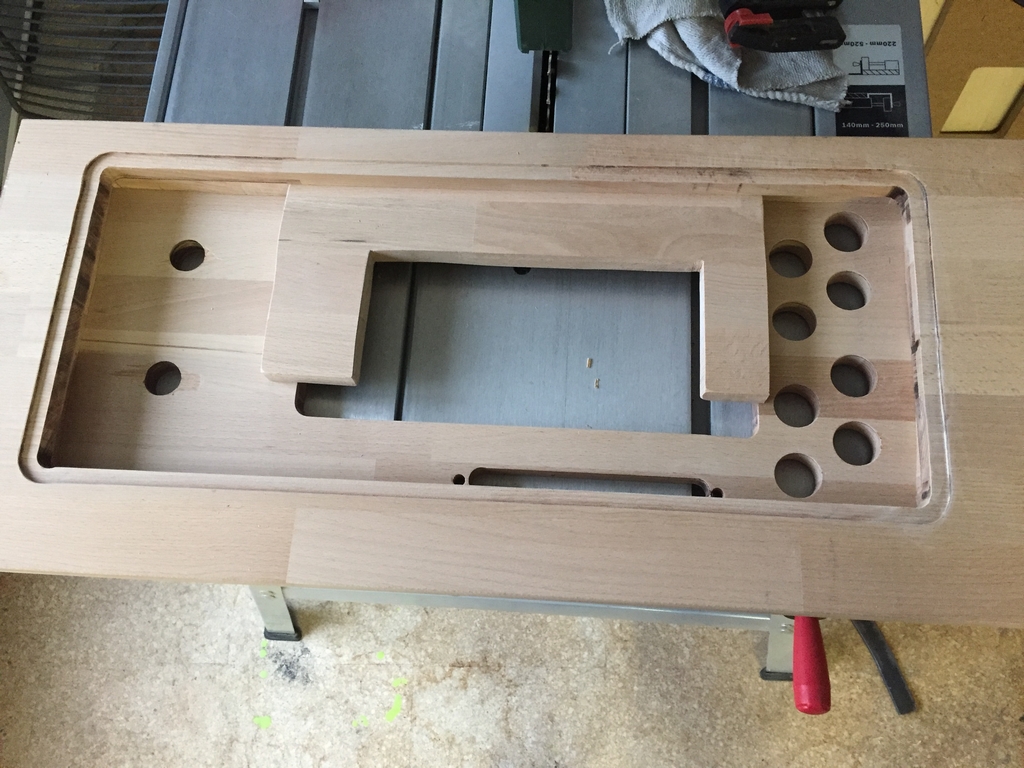
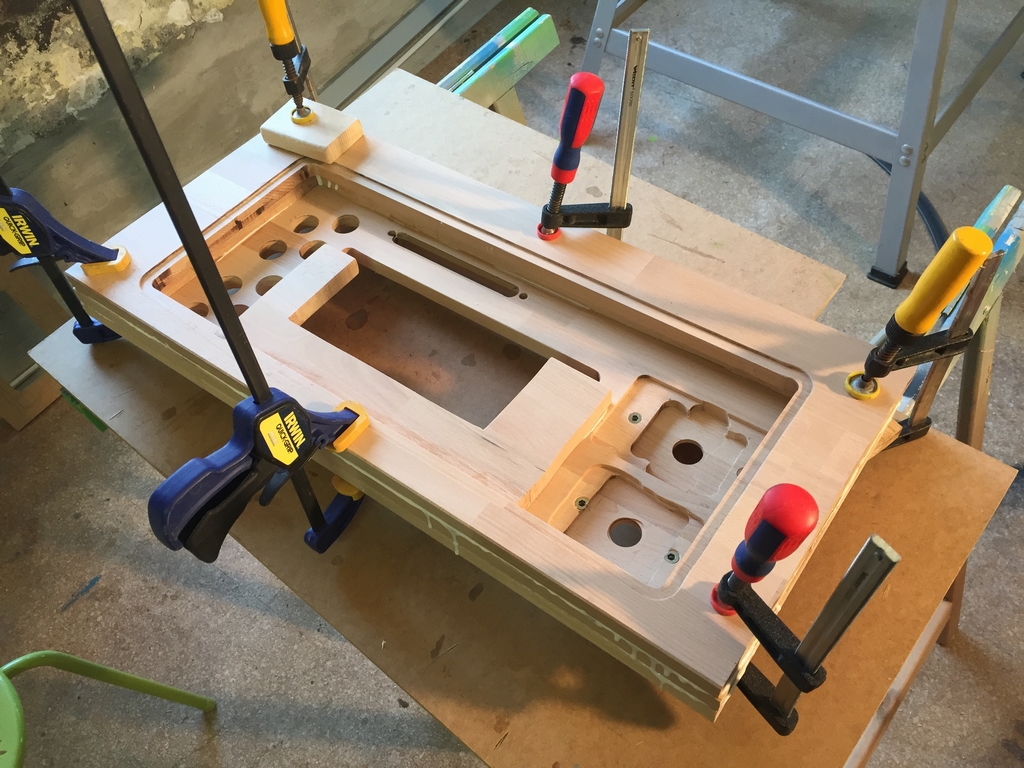
Joystick Base and Layout
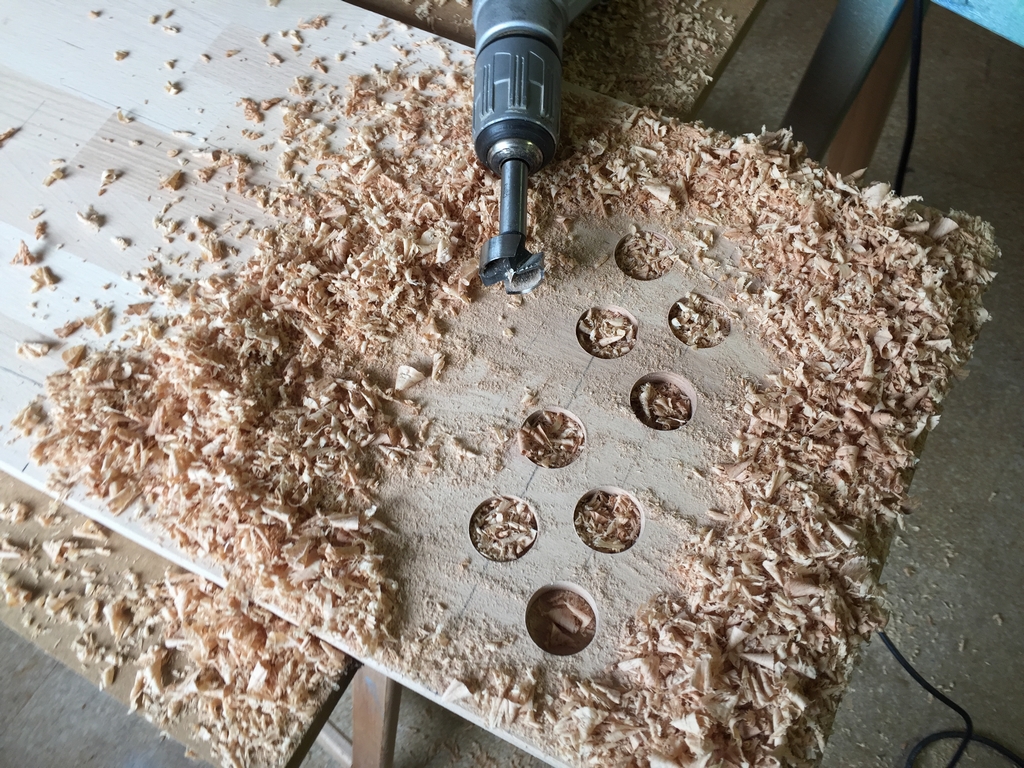
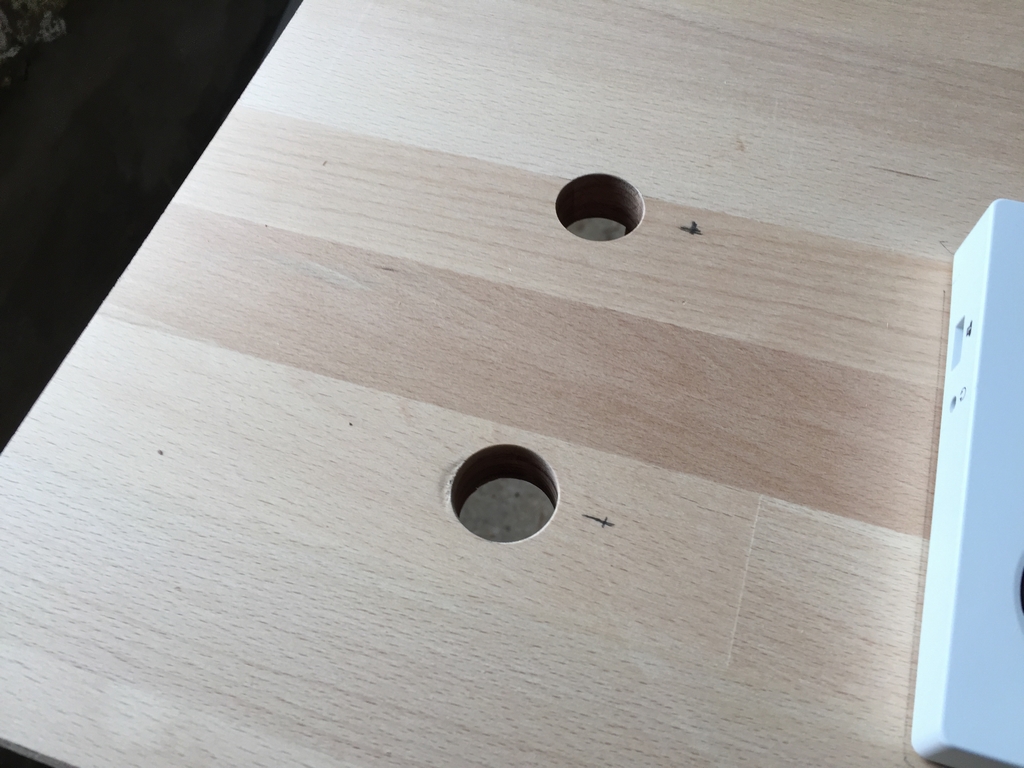
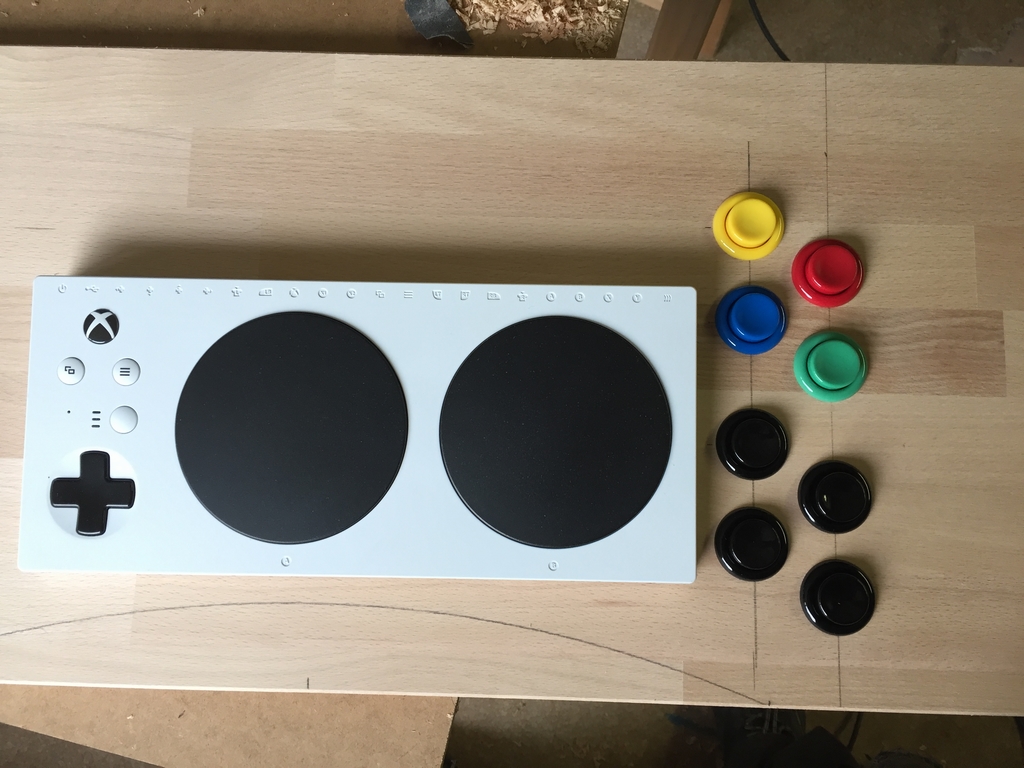
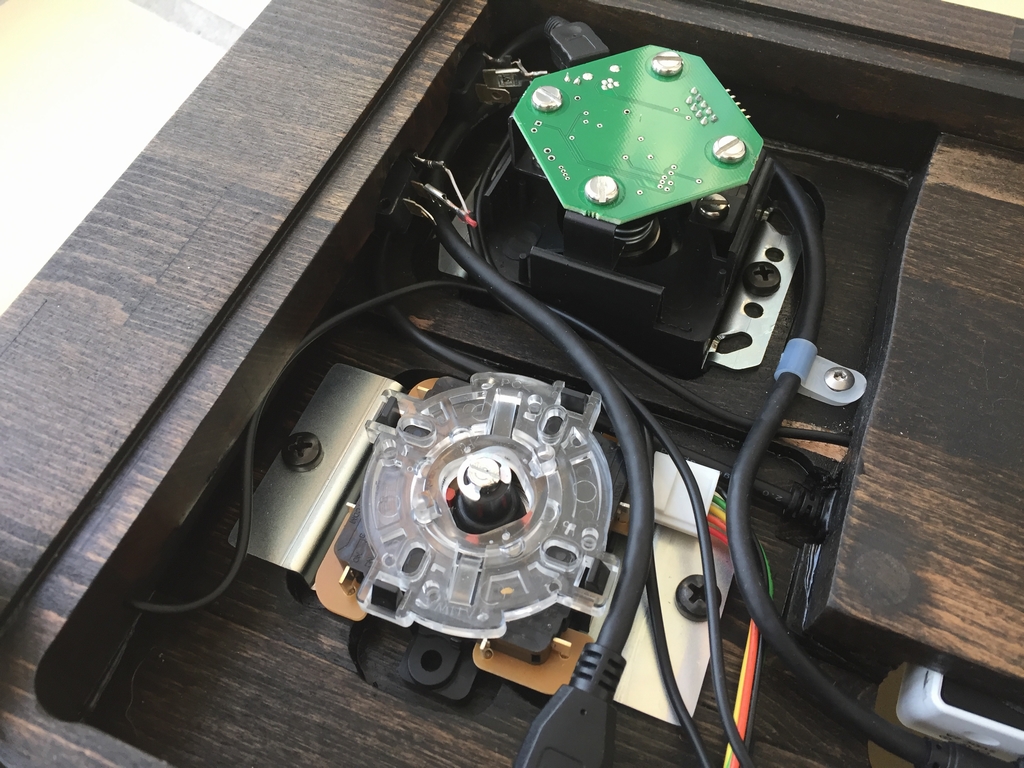
First up was the creation of the wooden base that would hold most of the parts. I used a wooden shelf that was cut and later glued. After some fine tuning of the specific location of the buttons it was time to drill some holes! As described previously, the left thumbstick was replaced by an analog Ultrastik 360. Directly on top of that was a Sanwa JLF digital joystick mounted. Personally, I would have placed the Sanwa JLF stick (D-pad) diagonally from the Ultrastik 360 to make it as easy to reach with my left hand wihtout interferring with the other joystick. However, it turns out that during gameplay, the JLF joystick will be used by Thomas’ right hand and has therefore been placed directly above the other joystick. This is why it is so important to know the gaming routines of the user…
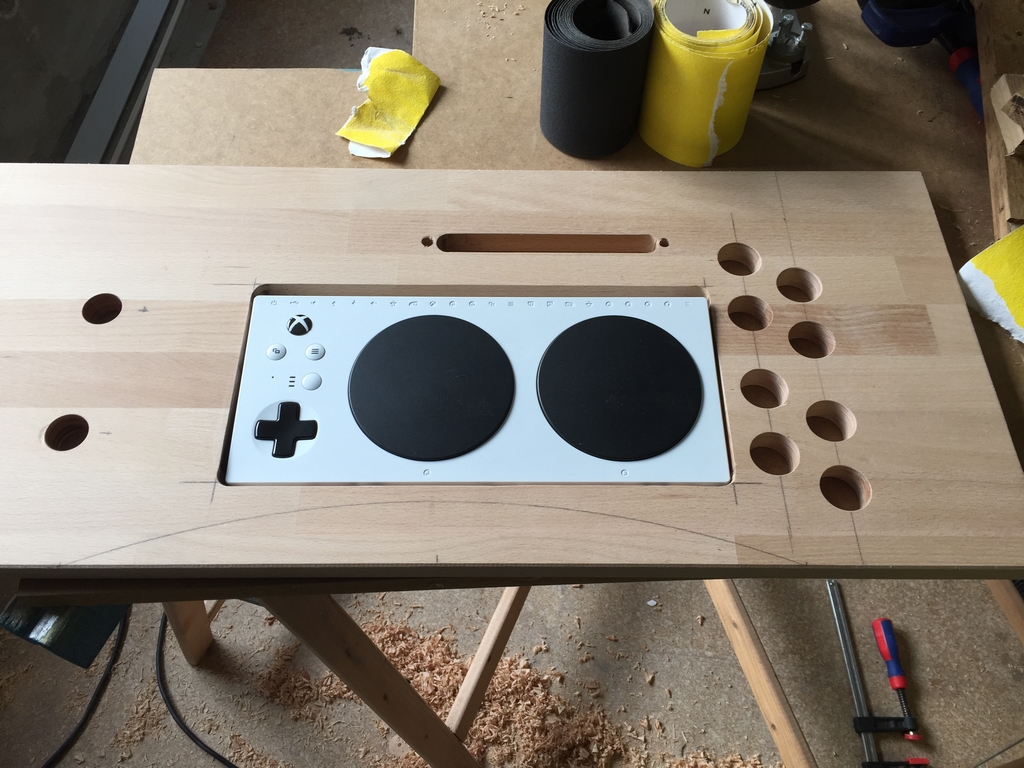
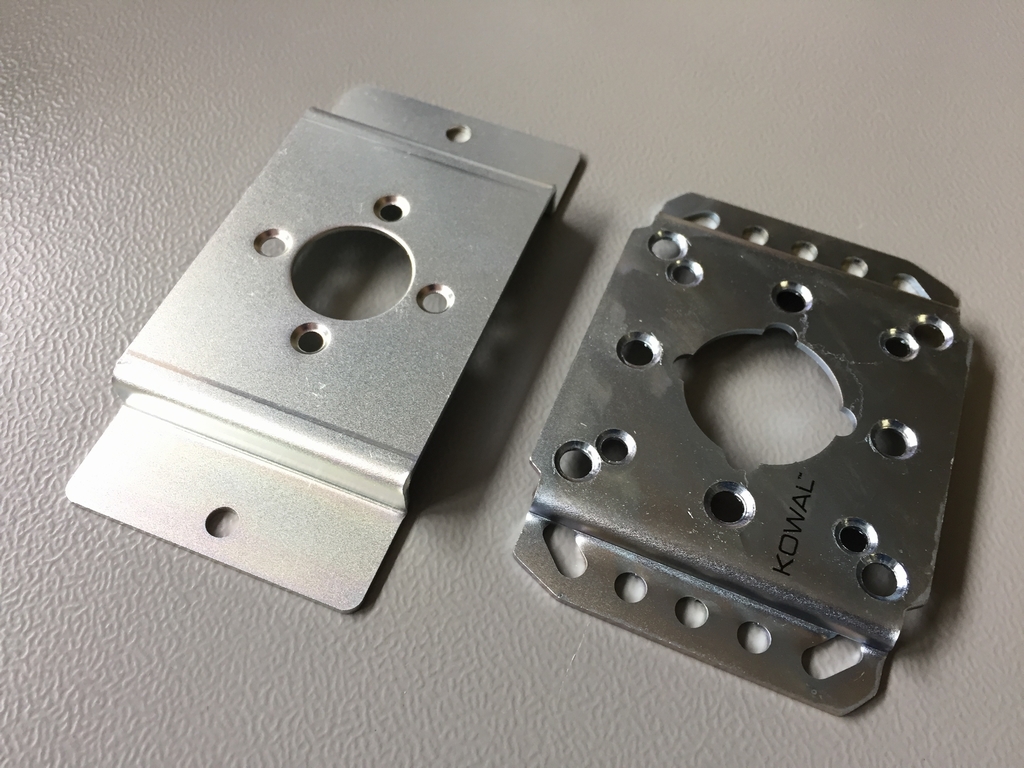
Next up was the installation of the joysticks. I replaced the mounting plate of the Ultrastik 360 with a plate from Kowal to raise the joystick as close to the wodden top as possible. The Sanwa JLF joyatick had a Sanwa JLF-P-1S mounting plate installed. Then it was time for some routing…

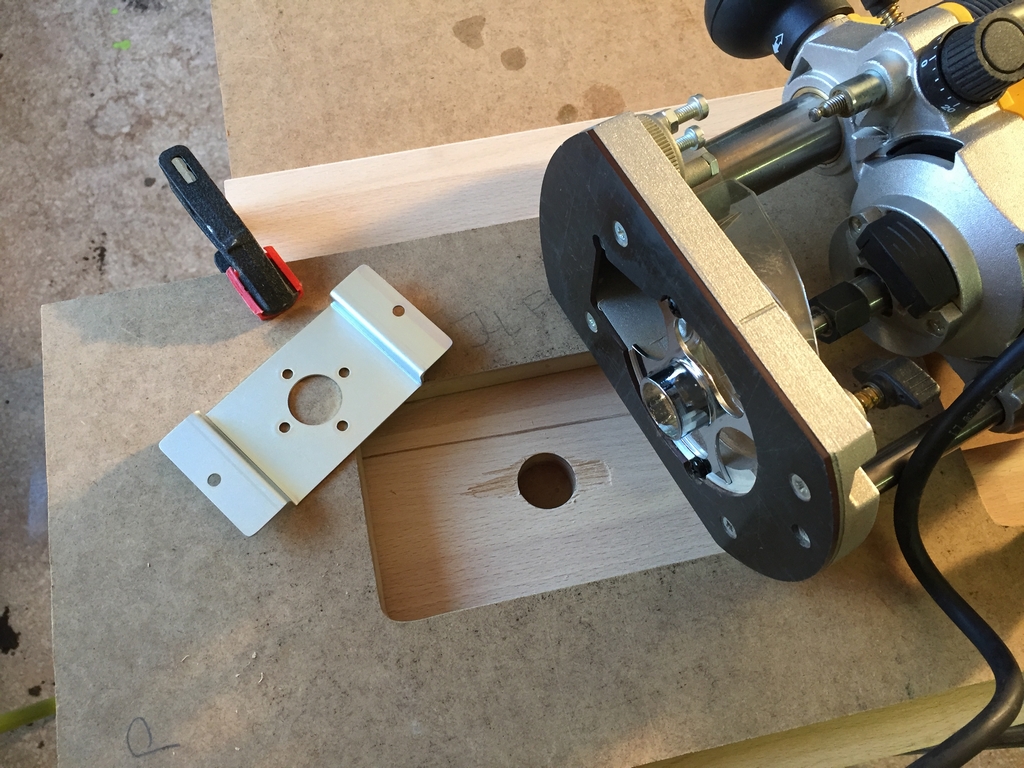
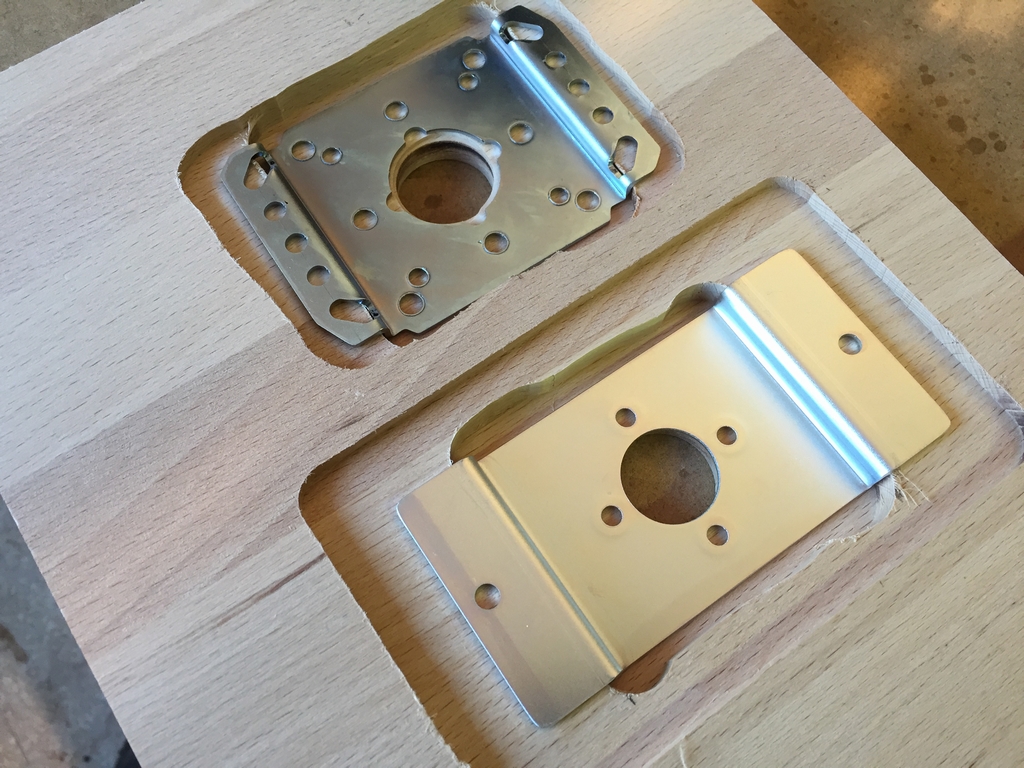
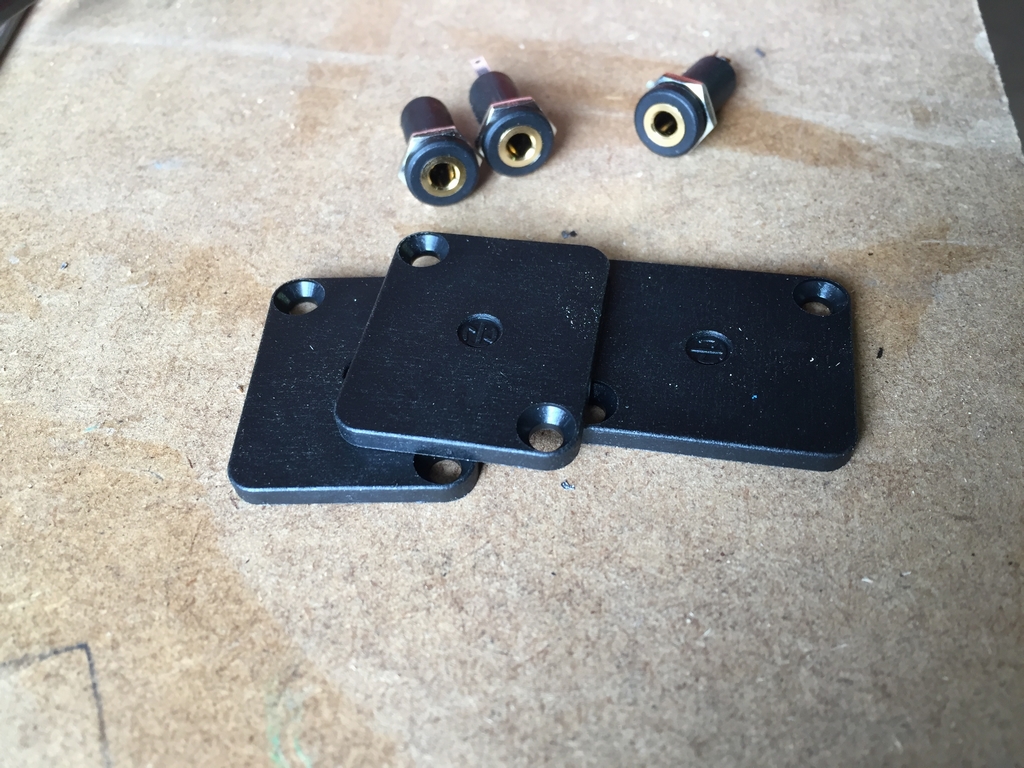
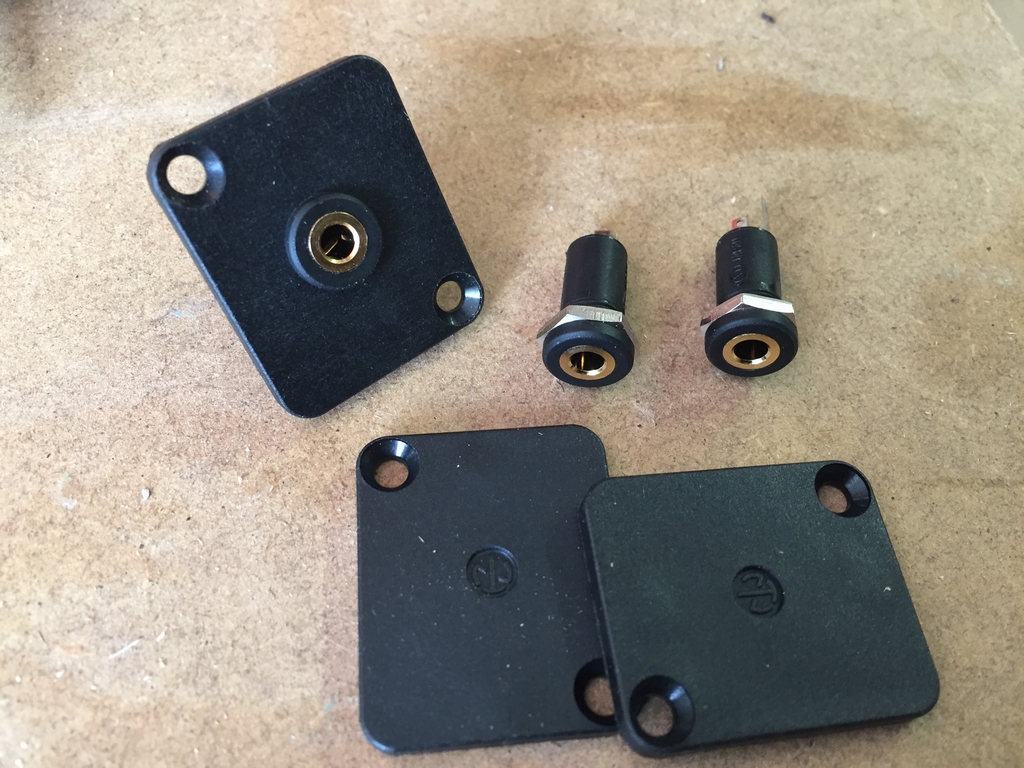
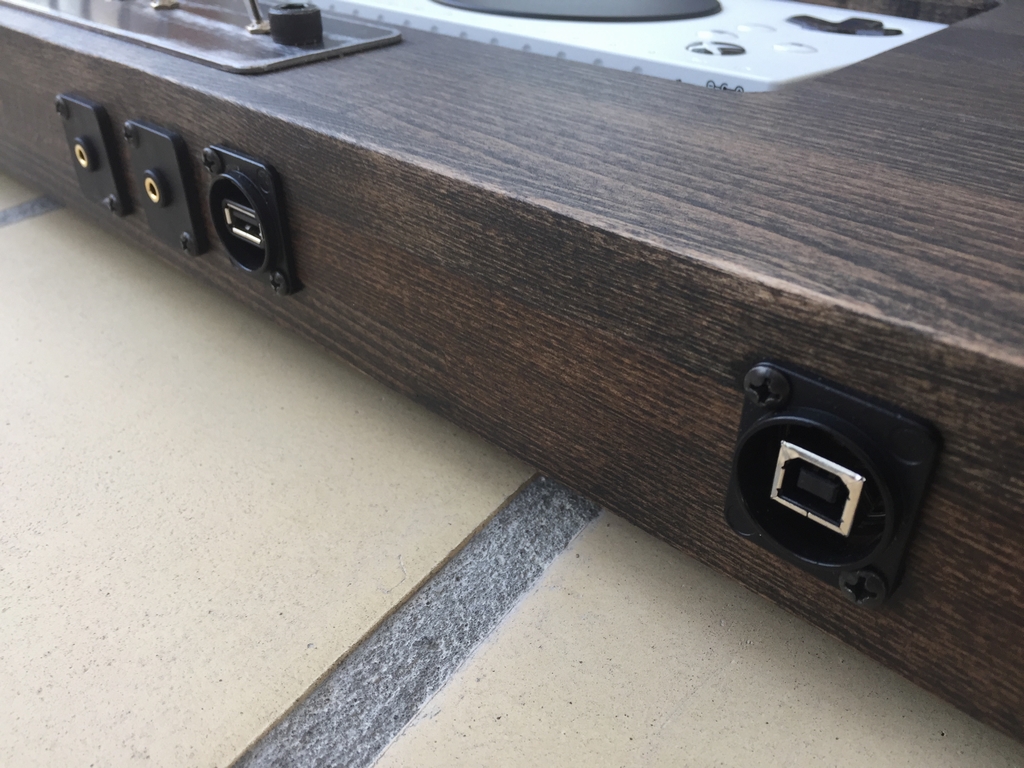
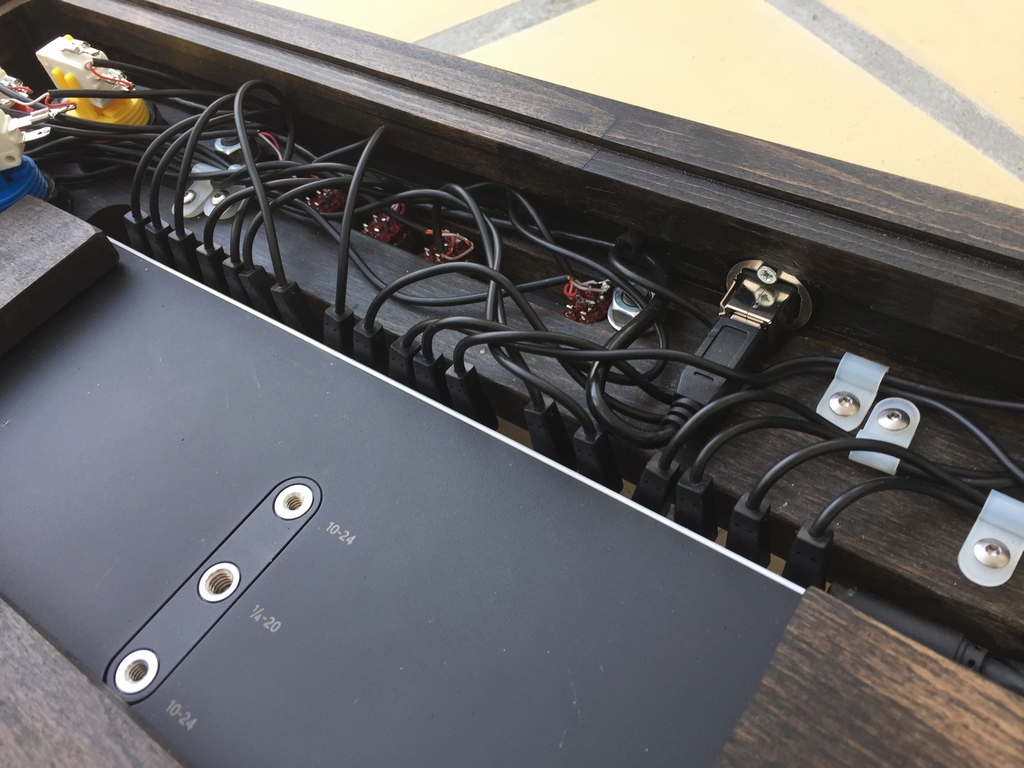
The XAC has two extra input ports called X1 and X2 which can be used for both digital and analog inputs. To access them as easily as possible I added some mini-jack ports made from small mini jack plugs and Neutrik blanking plates. All analog inputs (X1, X2, LT and RT) use the ground leg of the mini jack cable for activation, while all digital inputs can use either (ground or right channel). This is only important if using stereo mini jack cables… (don’t ask, but I eventually figured it out!)
And then everything was glued together and tested.
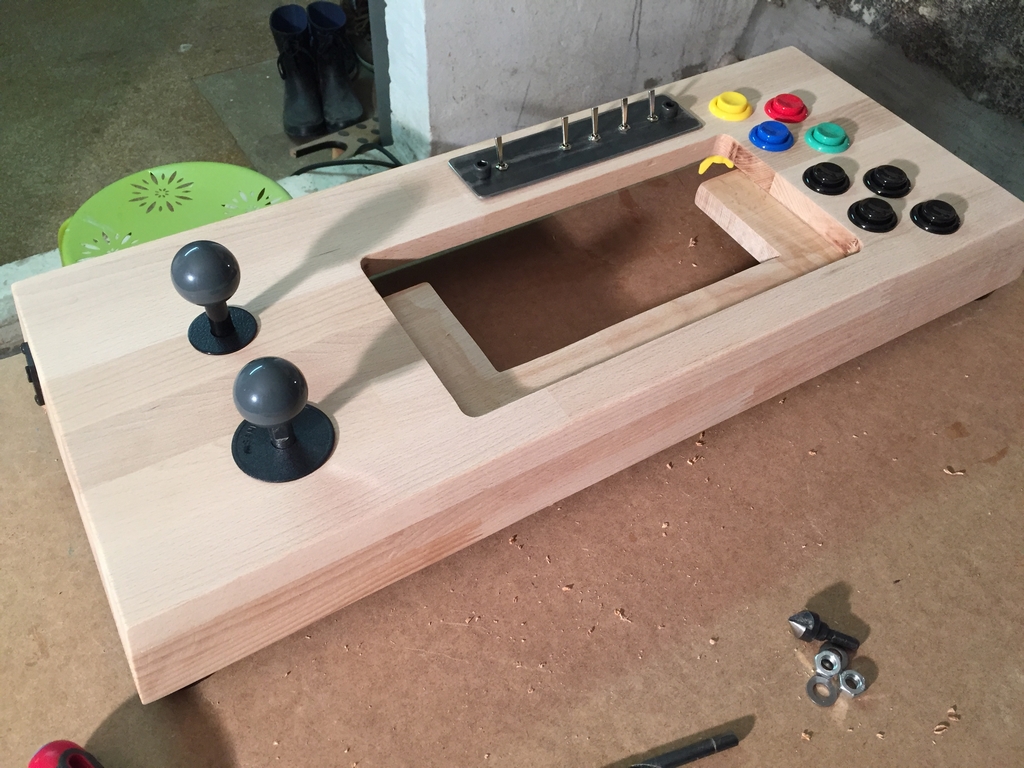
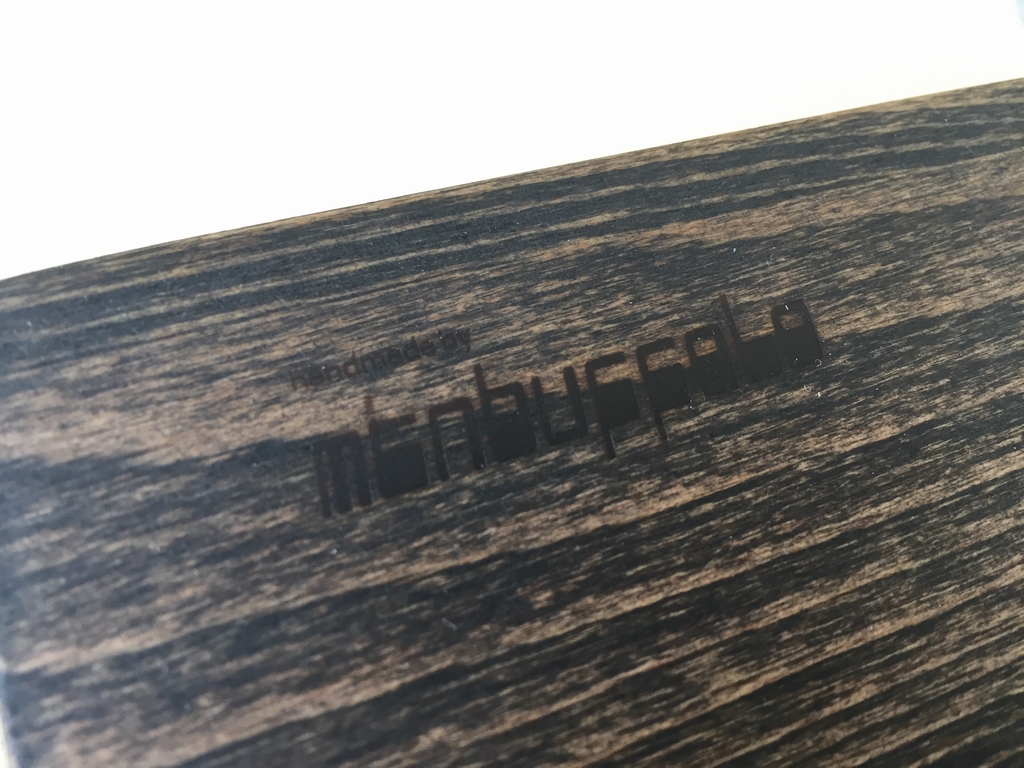
I added some black wooden oil made for kitchen tables to give the joystick a nice finish. This should also make cleaning the joystick a little easier. After some further tests, the grey ball tops were later replaced by black bat tops as Thomas found them easier to grap onto. I finished off the wooden part of the stick by burning my little logo to the top left corner.


Connecting all the wires
It was then time to connect all the wires. It looks really messy but it’s pretty straight forward and was done in a few hours.

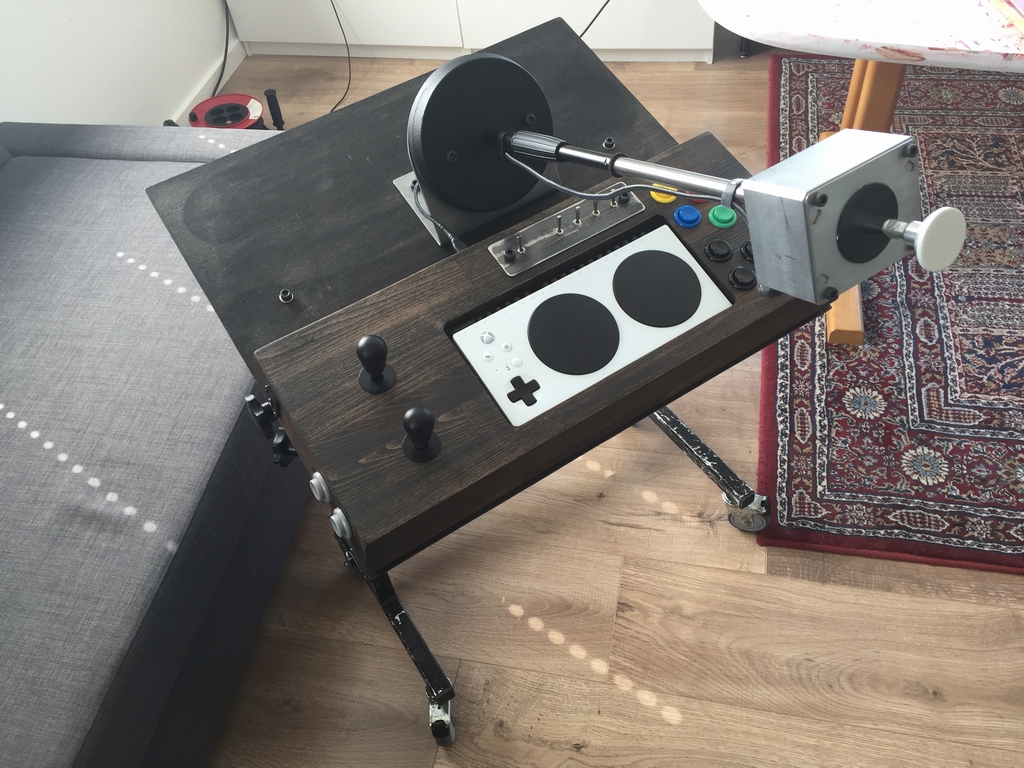
Chin Operated Joystick
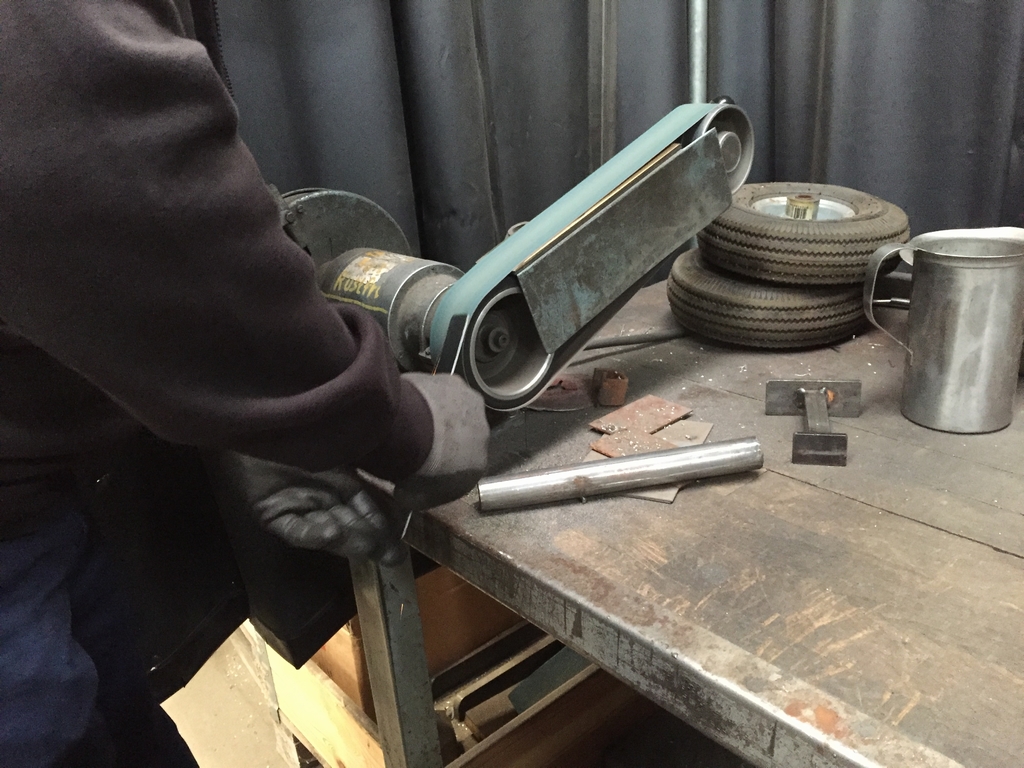
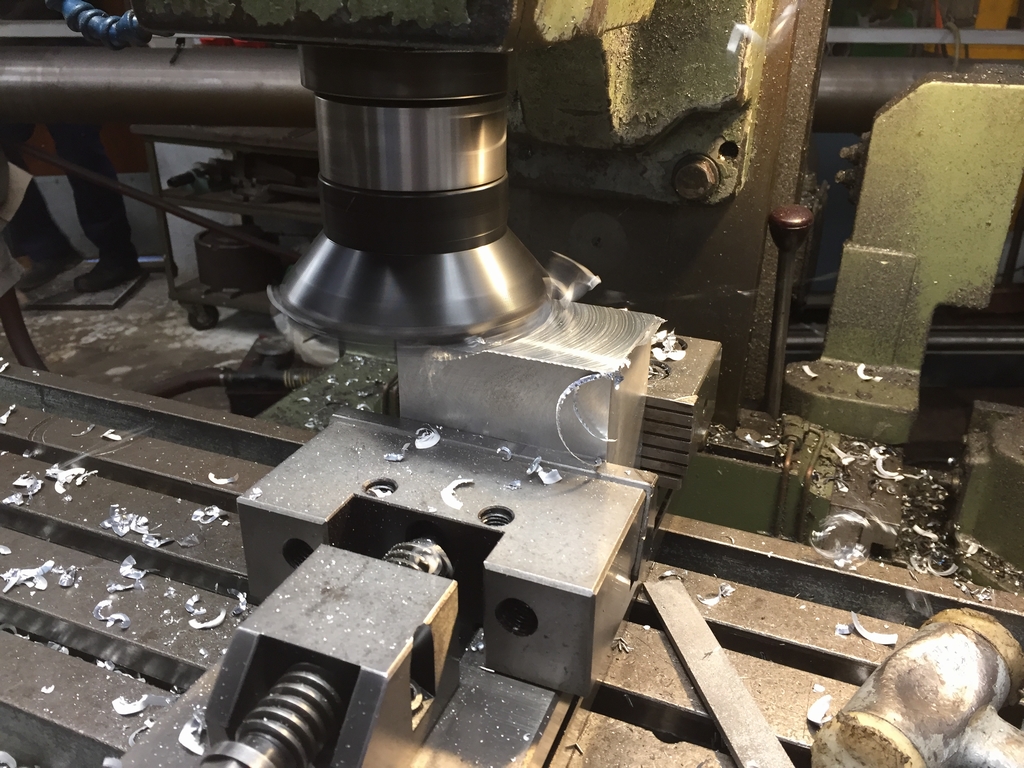
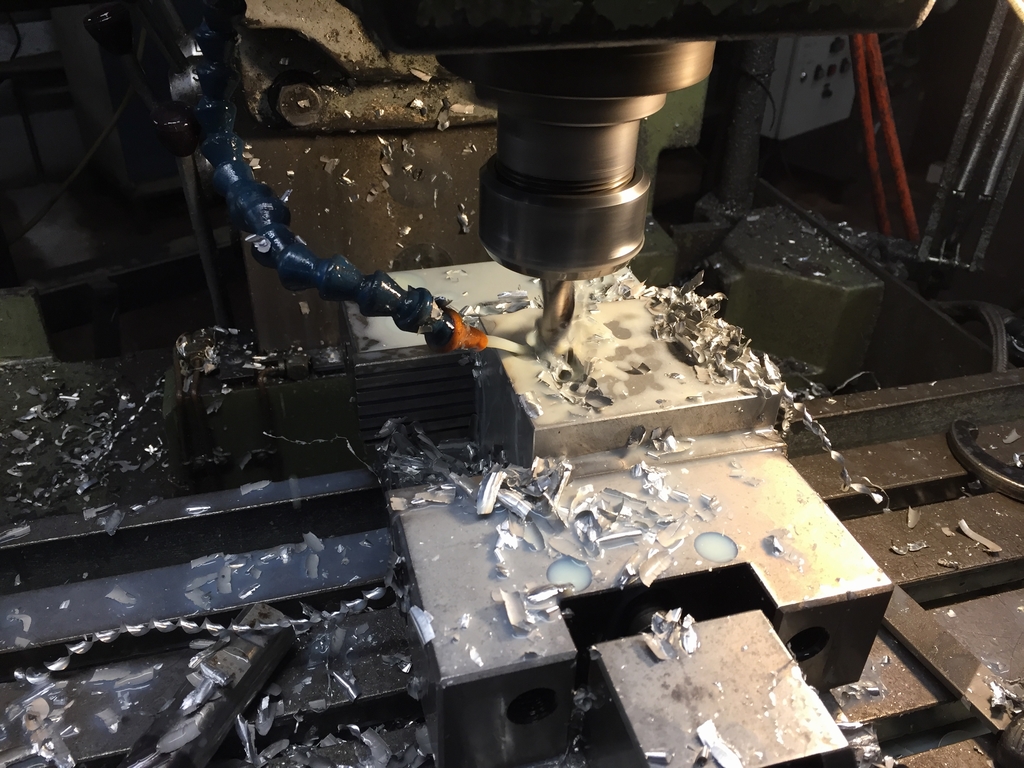
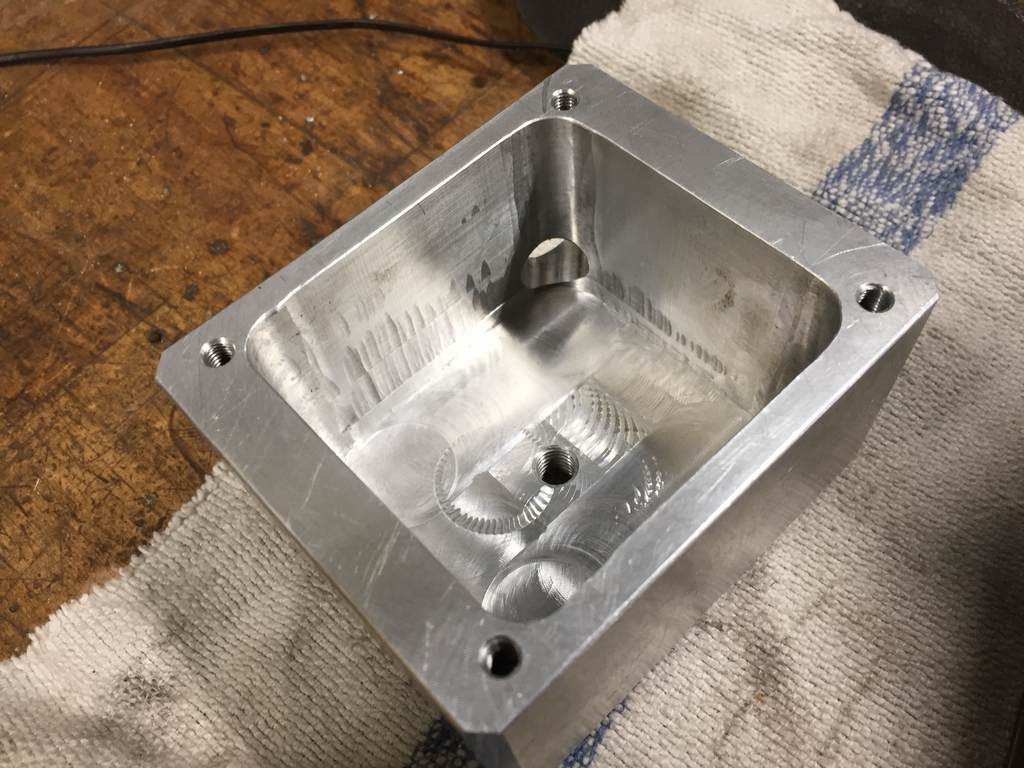
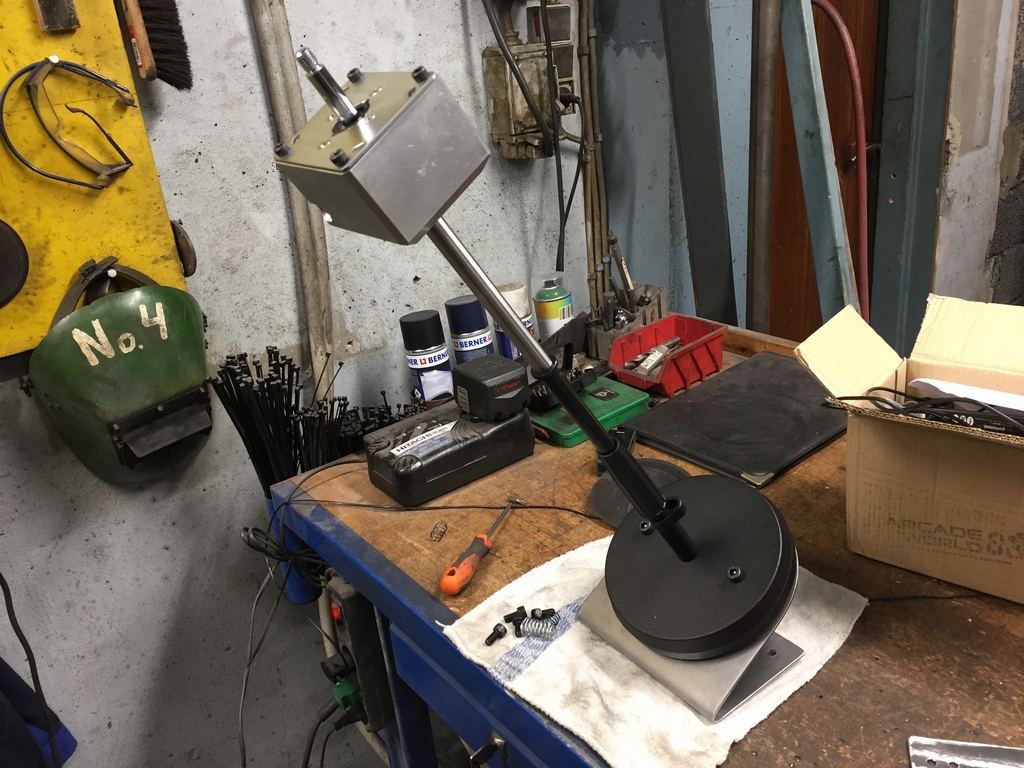
Next up was the chin operated joystick that (right analog stick). A big chunk of aluminum was used for making the box for the chin joystick. This part could probably be made using a 3D printer, but whenever it’s possible to use heavy machinery, heavy machinery will always be the primary choice 🙂


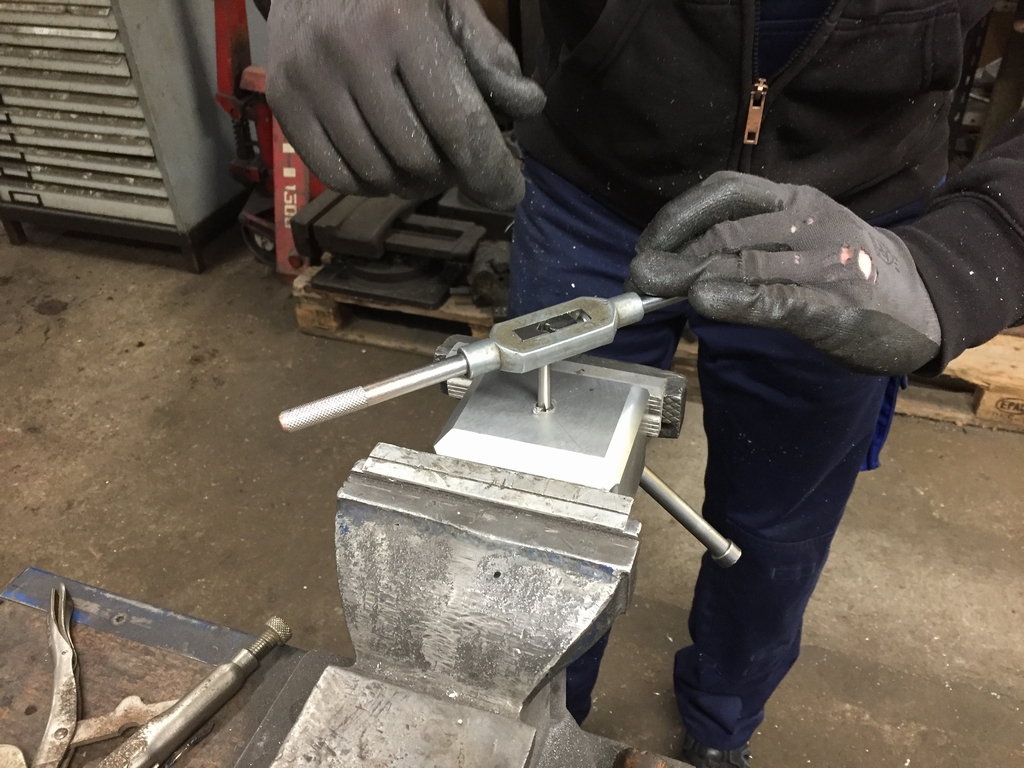
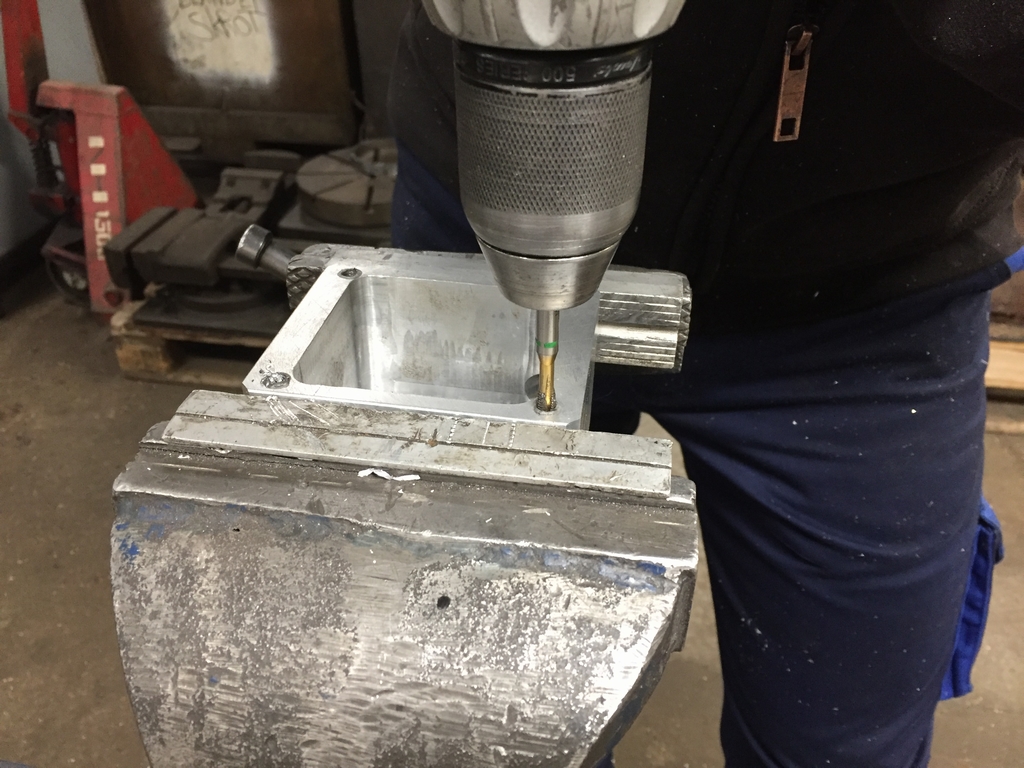
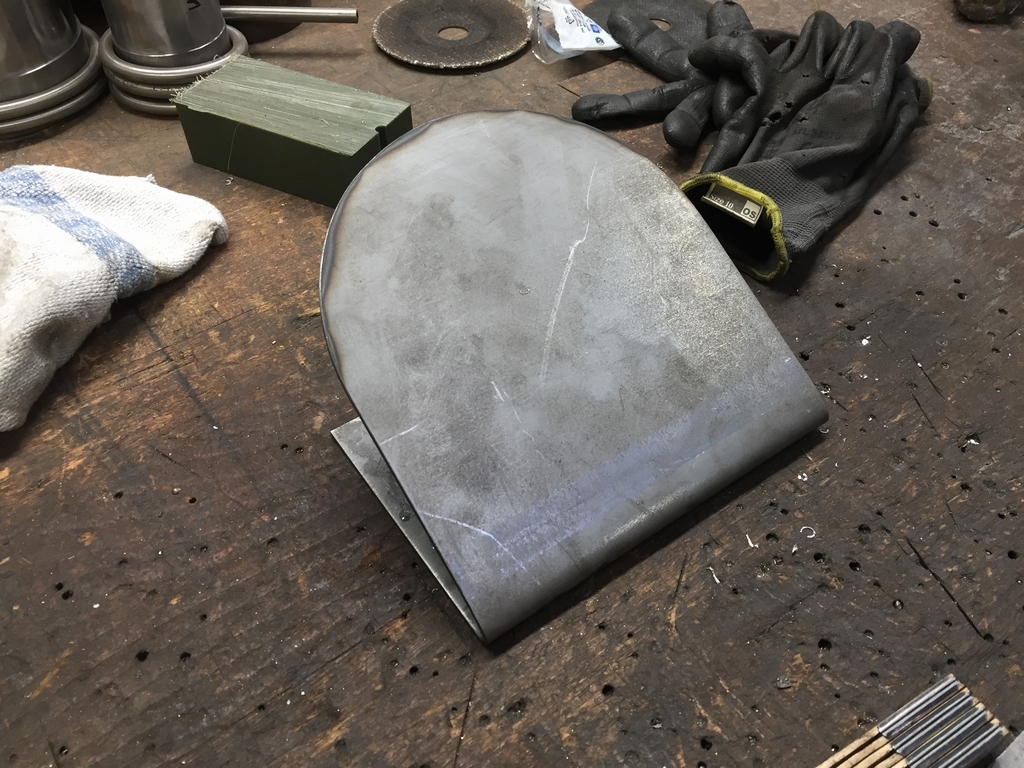
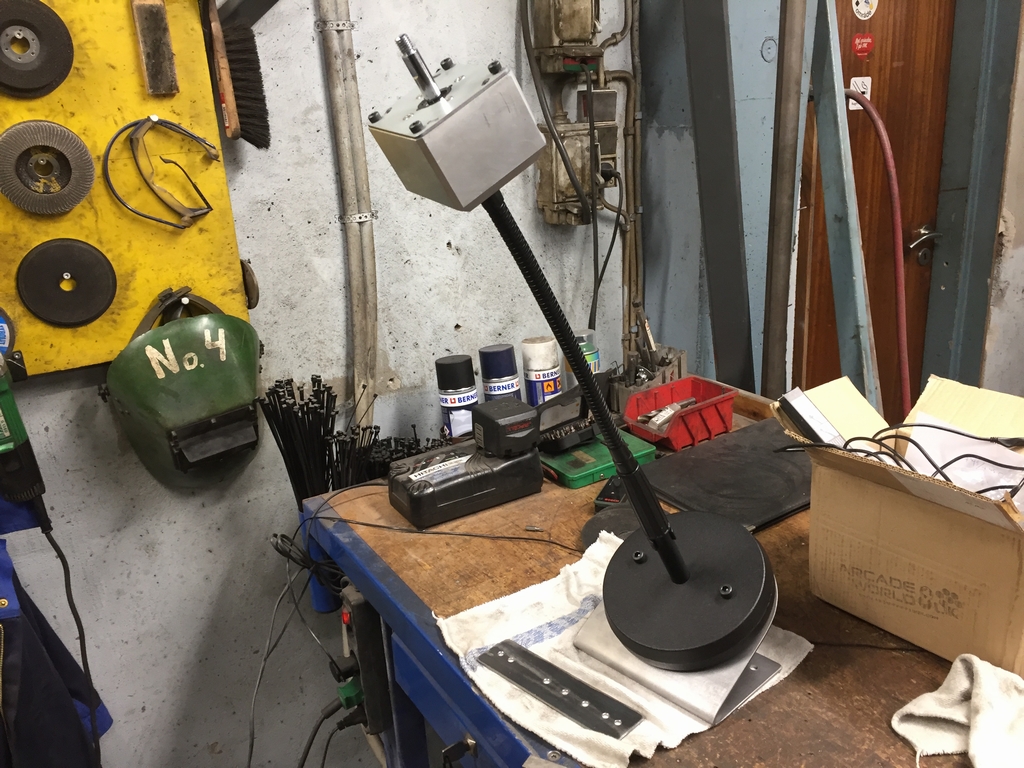
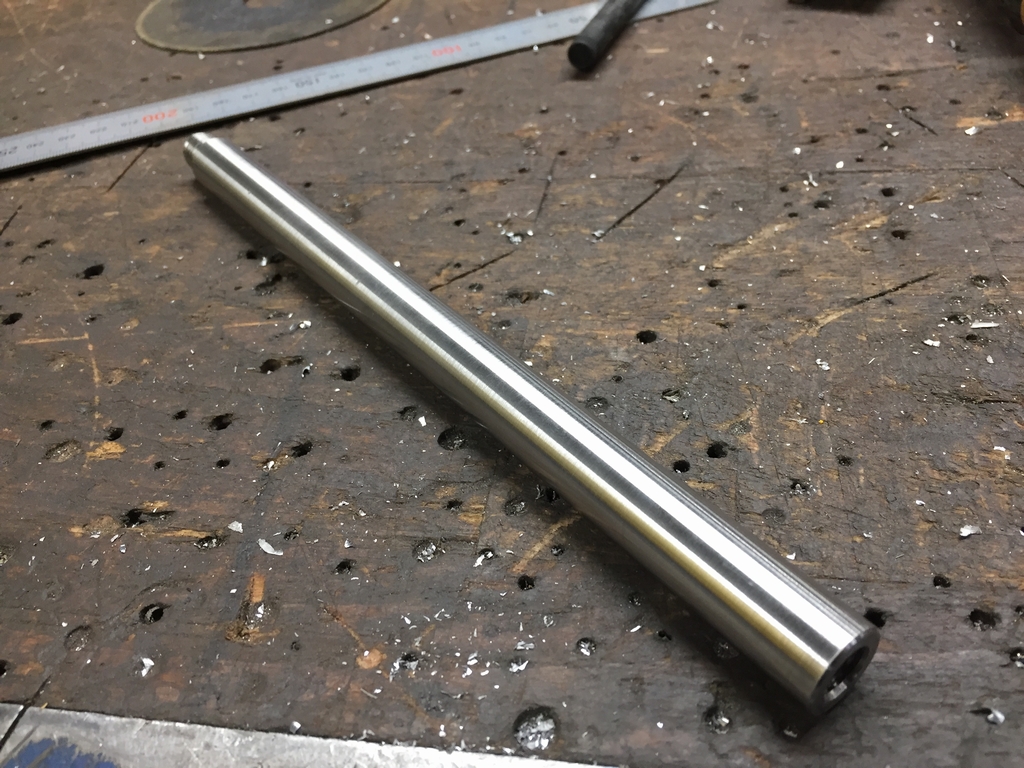
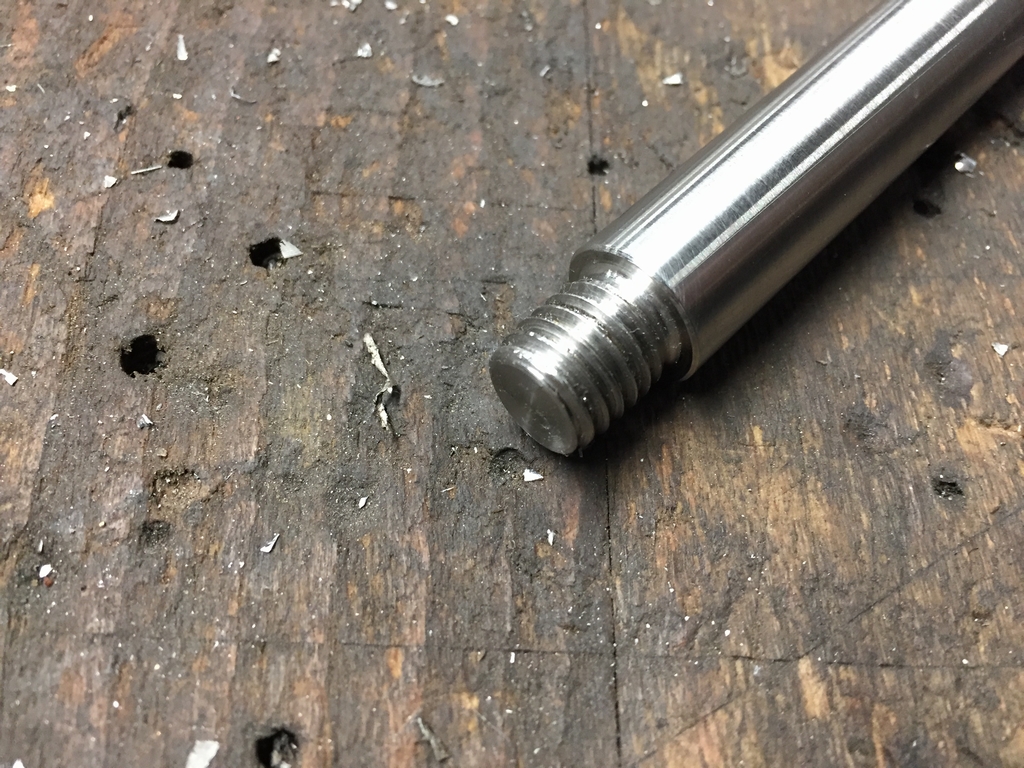
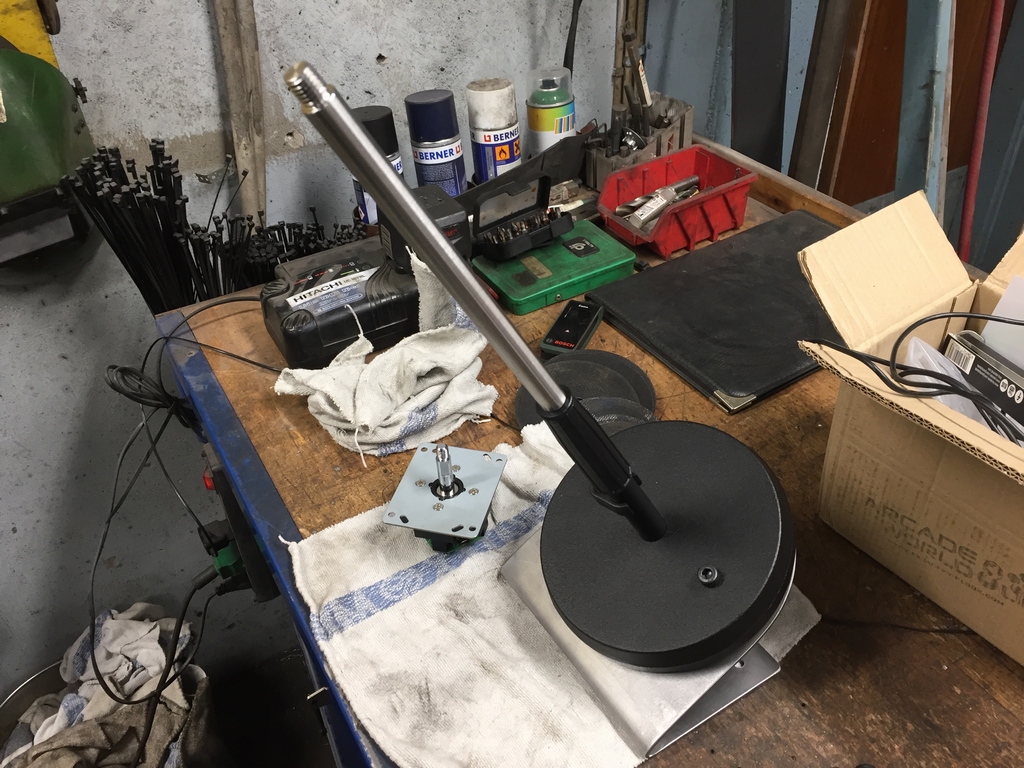
The base of the chin operated joystick was made using an iron plate that was cut, bent, drilled, cut into shape and tested with the microphone stand that would eventually hold the aluminum box with the Ultrastik 360. The initial plan was to use a goose neck for easy adjustment. Unfortunately, the joystick box was way too heavy so a few stainless steel rods were made in different lenghts for the final adjustments with Thomas. It later turned out that one of them fitted perfectly 🙂 The chin joystick ended up being really sturdy, indestructible, unbendable and quite heavy! This is what happens when a black smith helps making joystick stands…
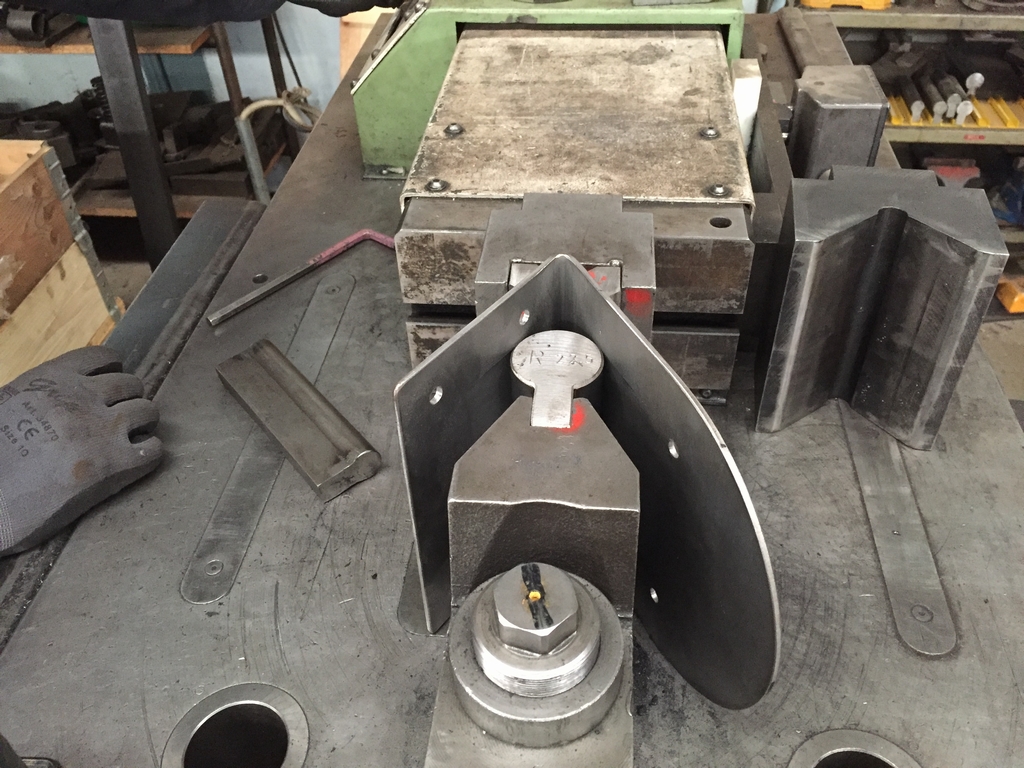
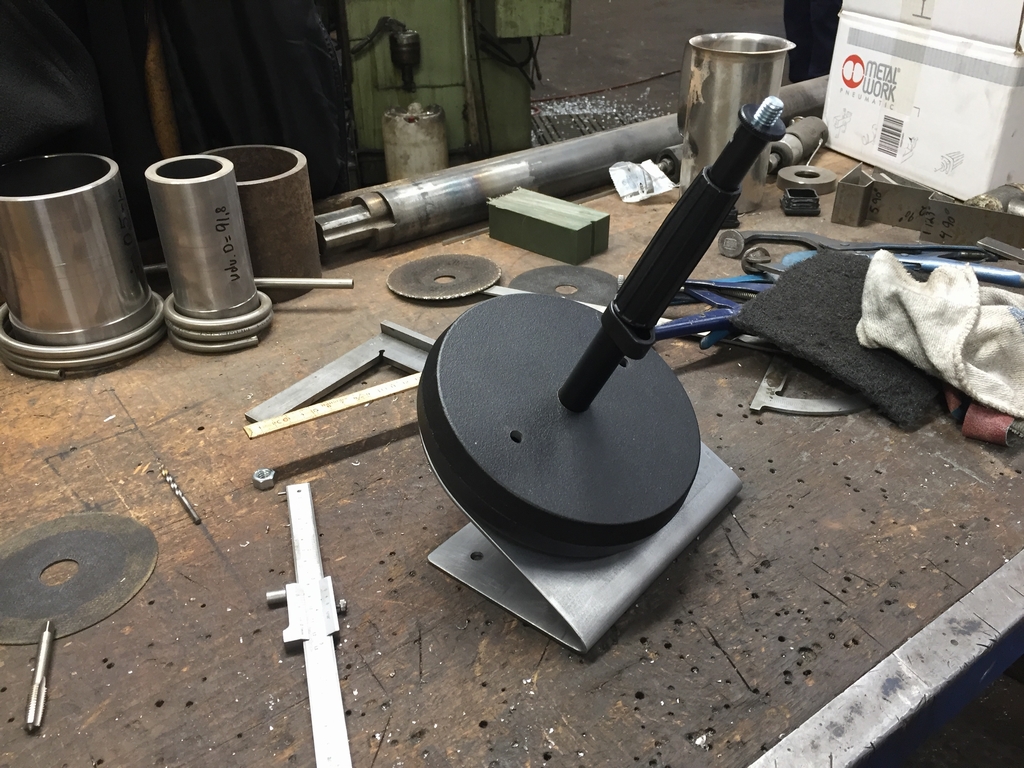
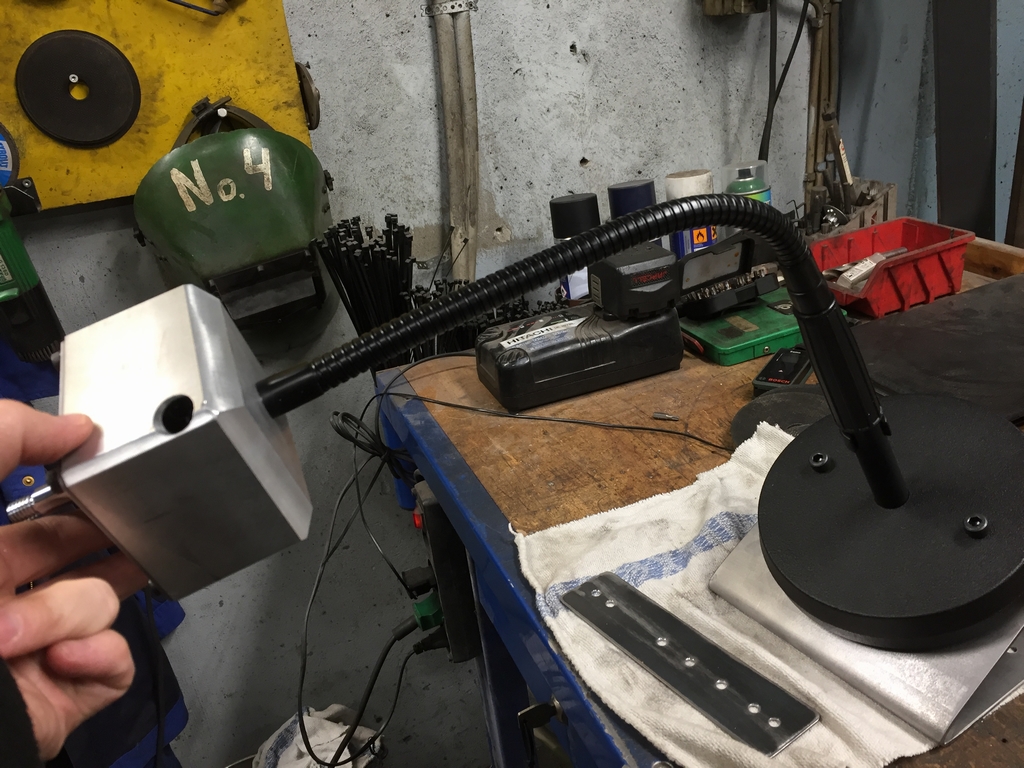
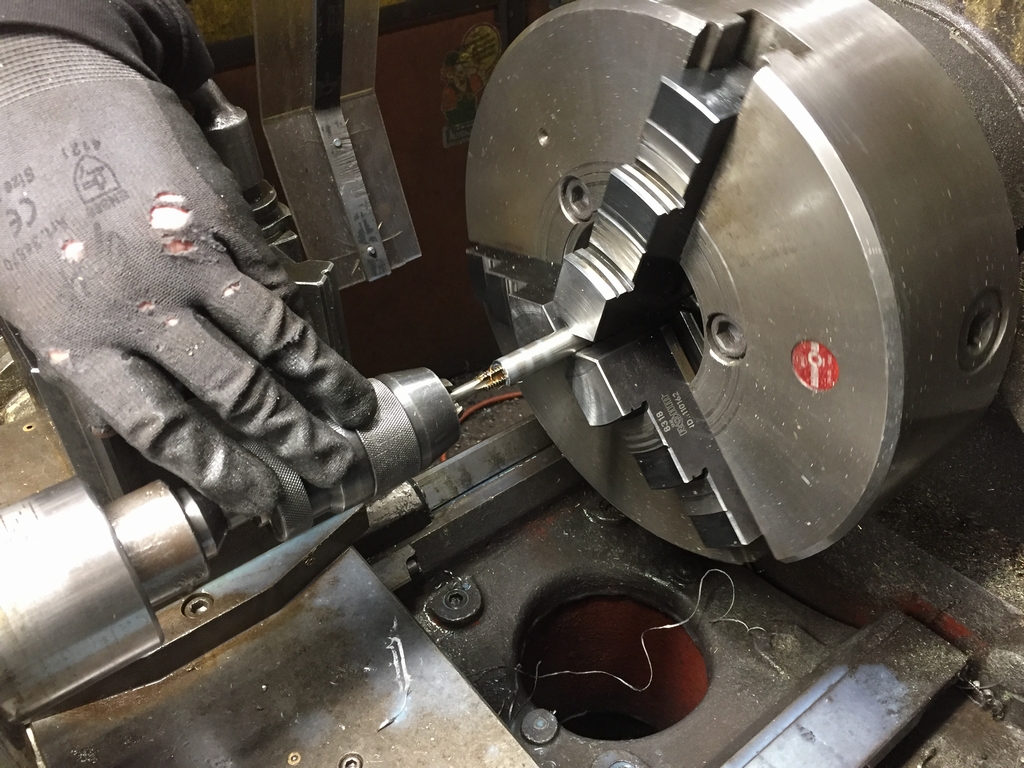
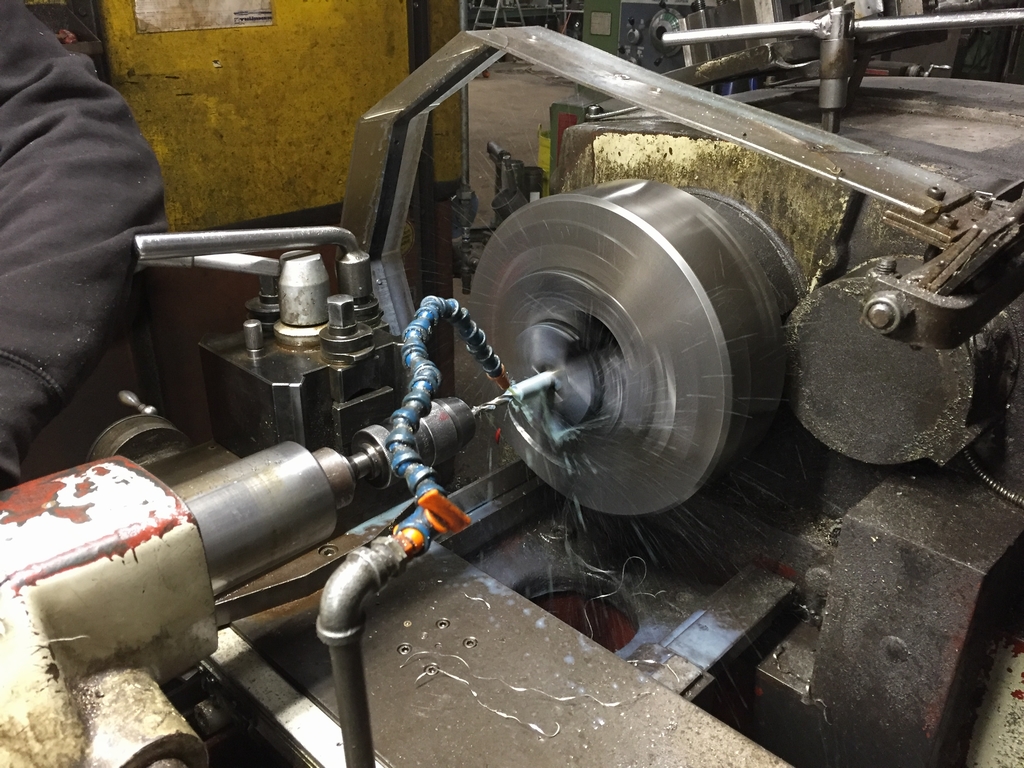
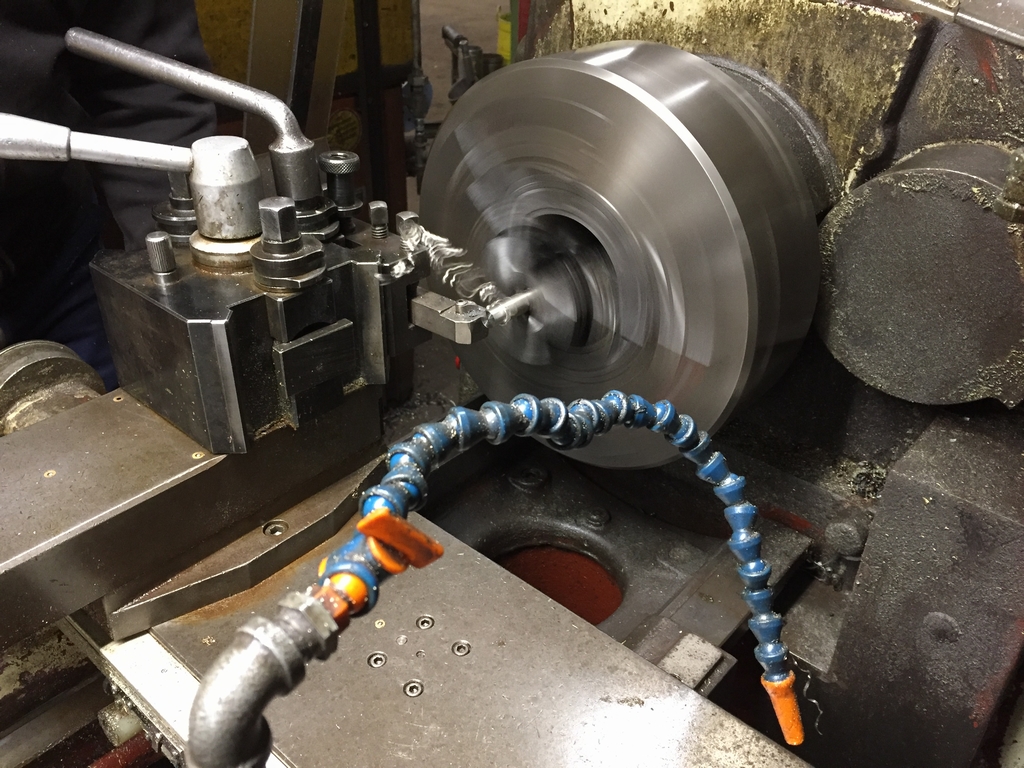
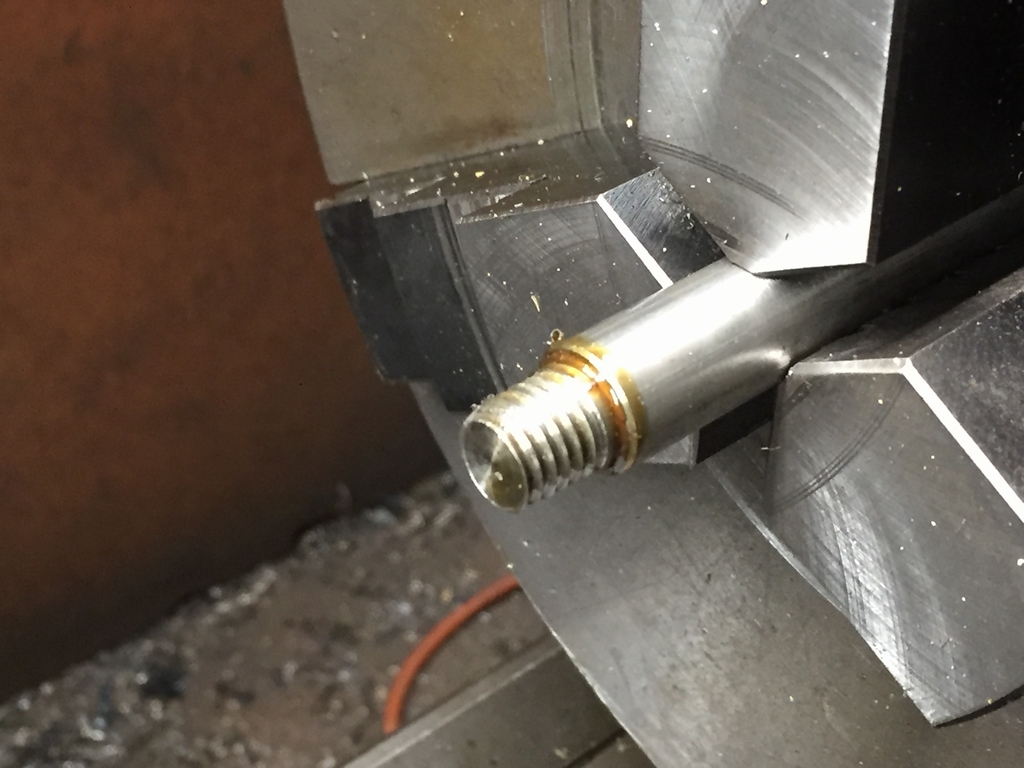
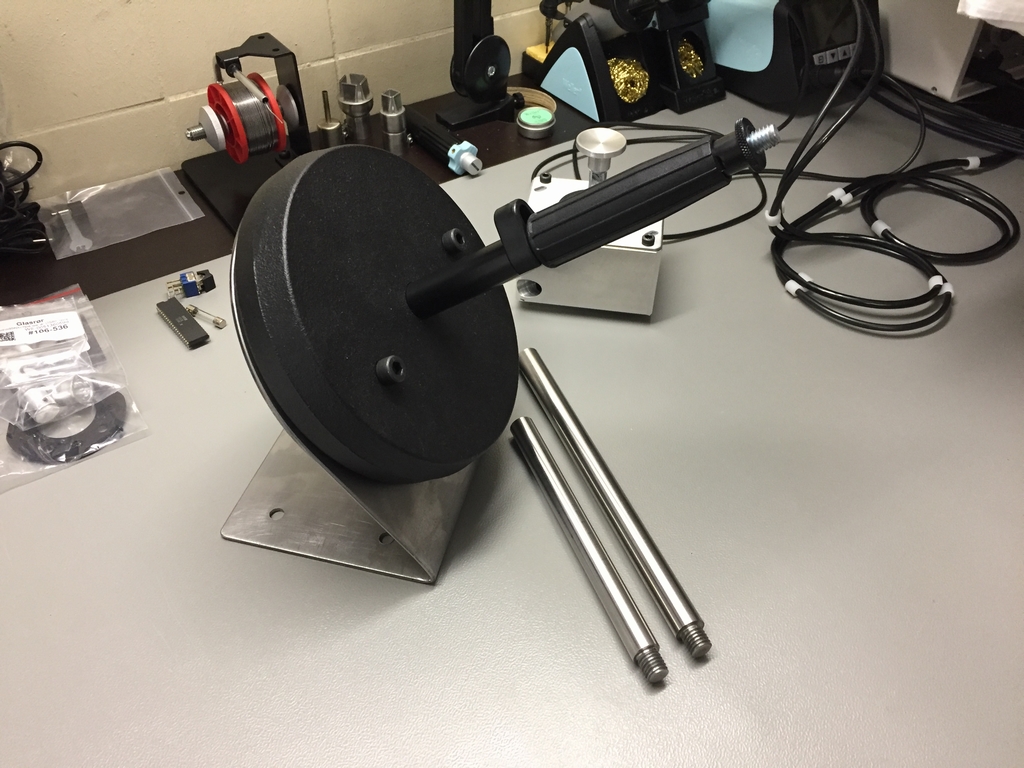
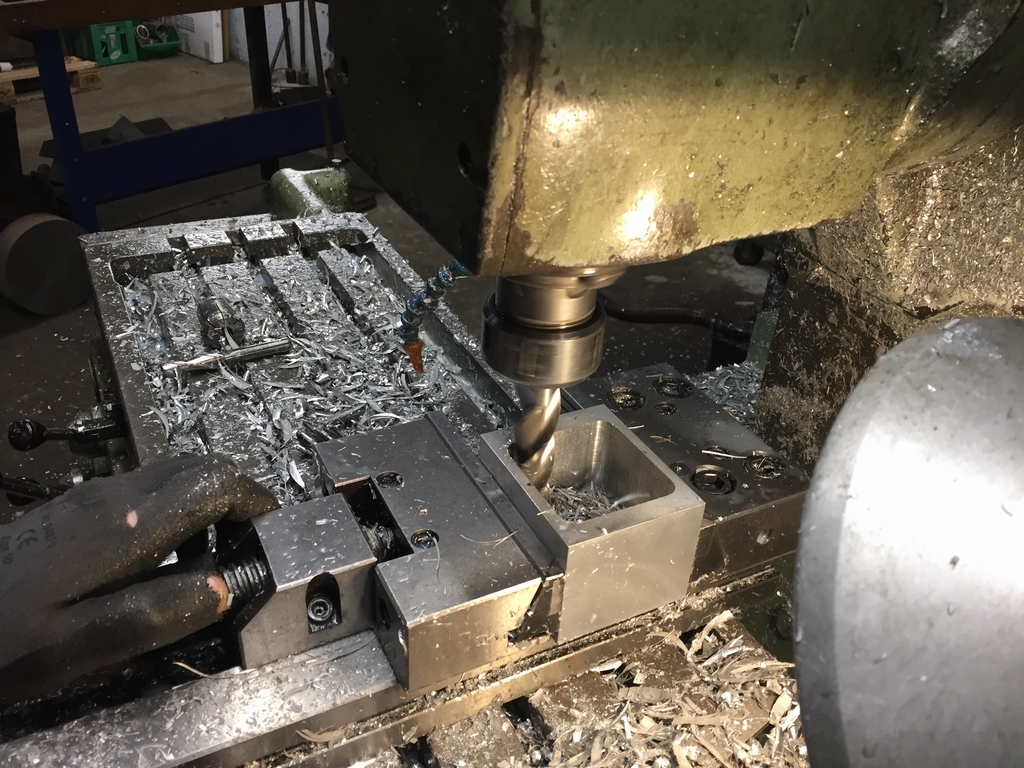
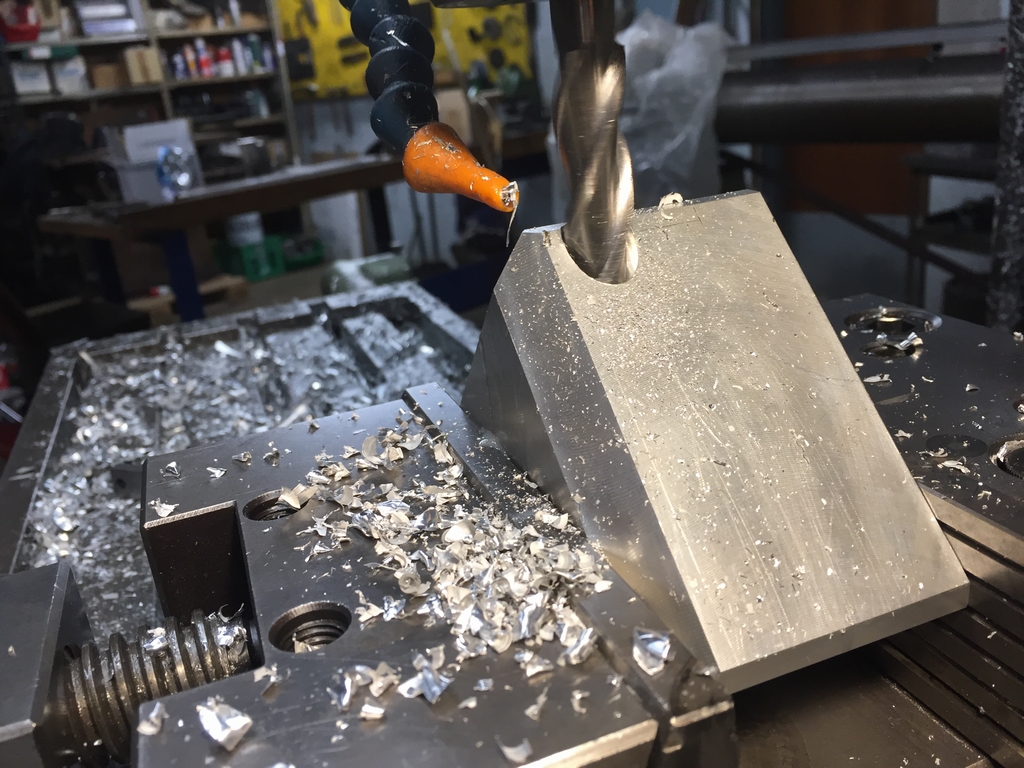
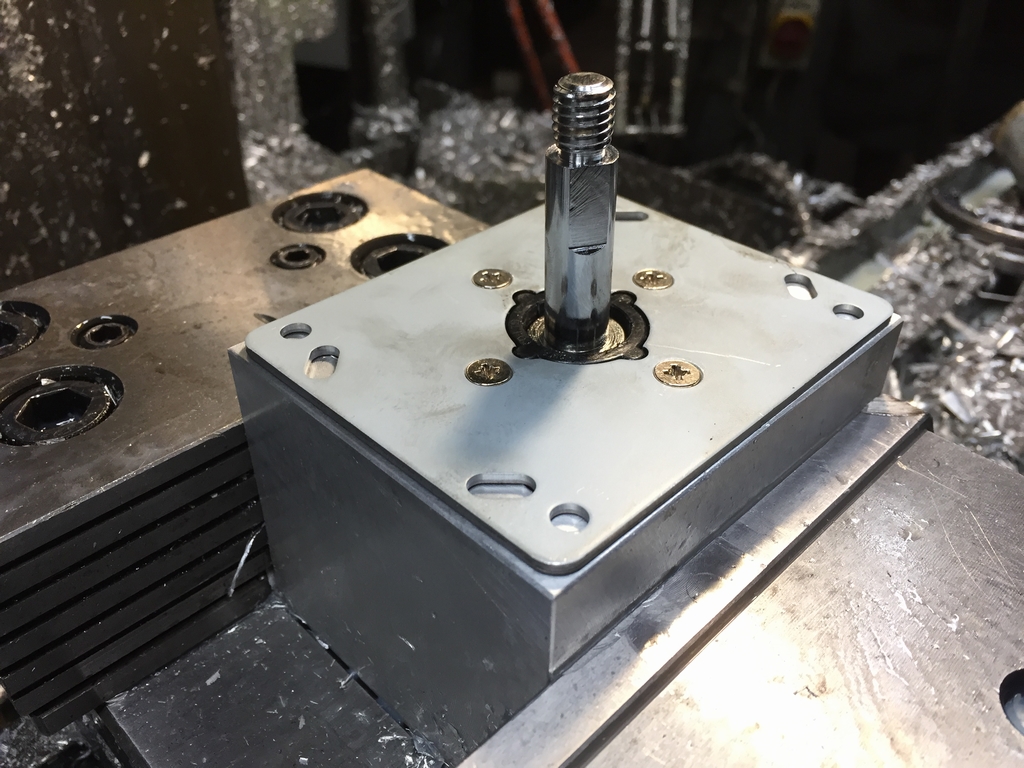
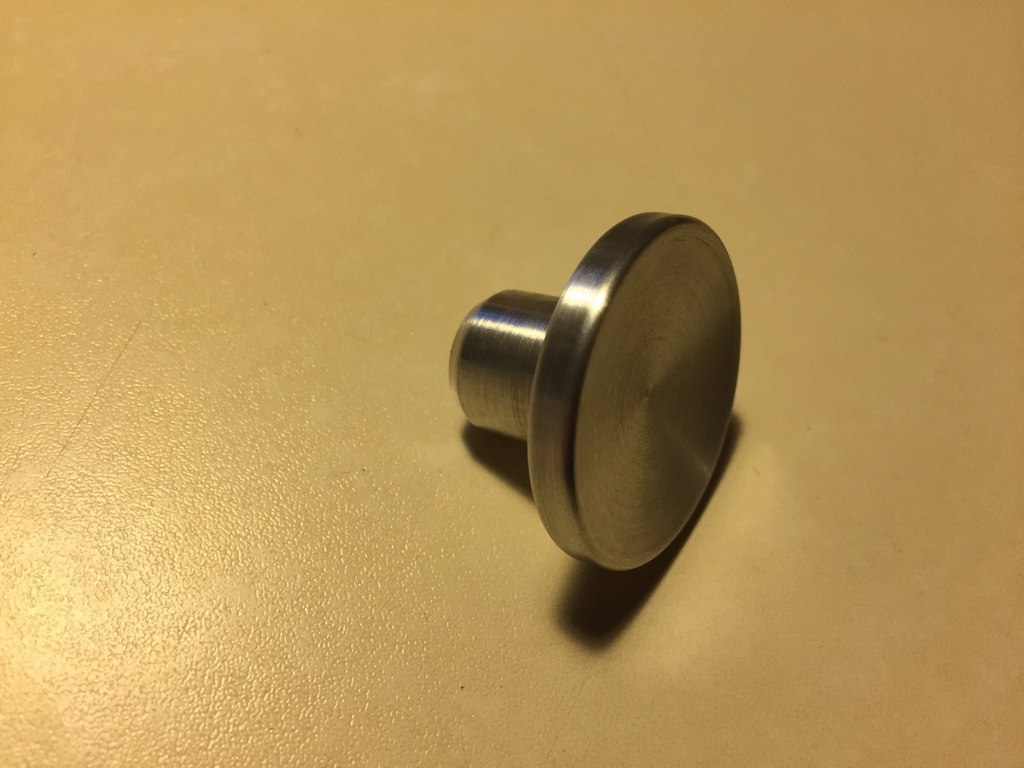
Last up was making the top part of the chin operated joystick. This was also made from aluminum and made using the same metal turning lathe as used for making the metal rods. An anti-skid furniture pad is used to make the chin joystick stay in place during gameplay.


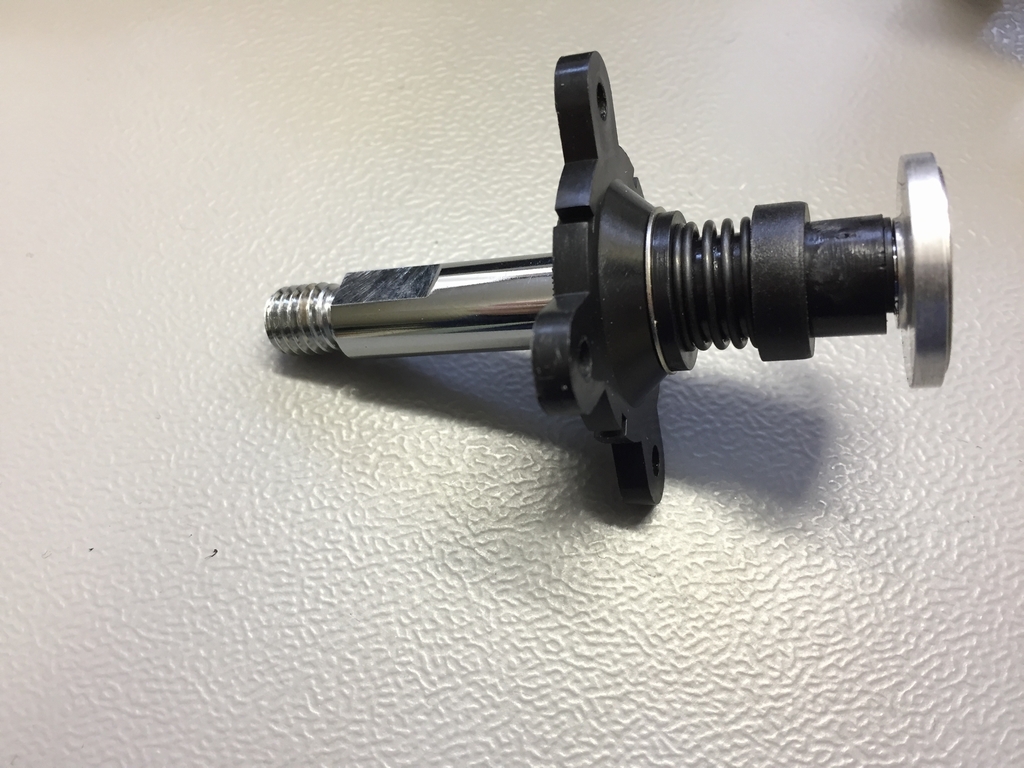
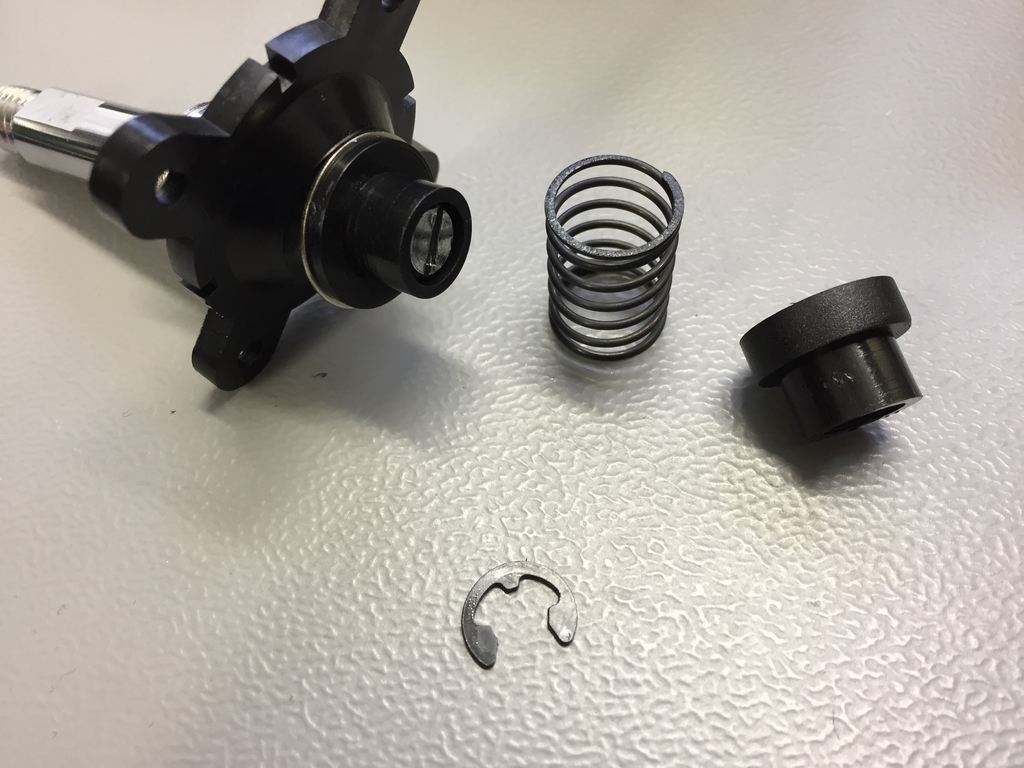
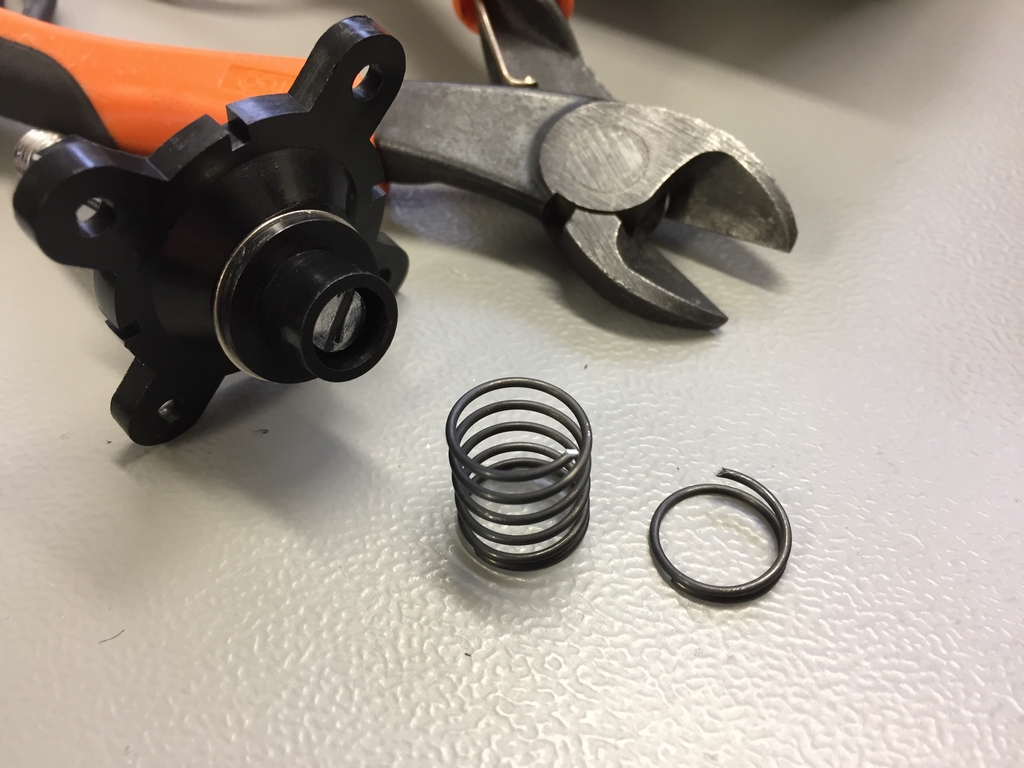
Final Adjustments
As the springs of the Ultrastik 360 joysticks are pretty hard (especially when using the chin), the stiffness was adjusted by downsizing the springs. Easy peasy!


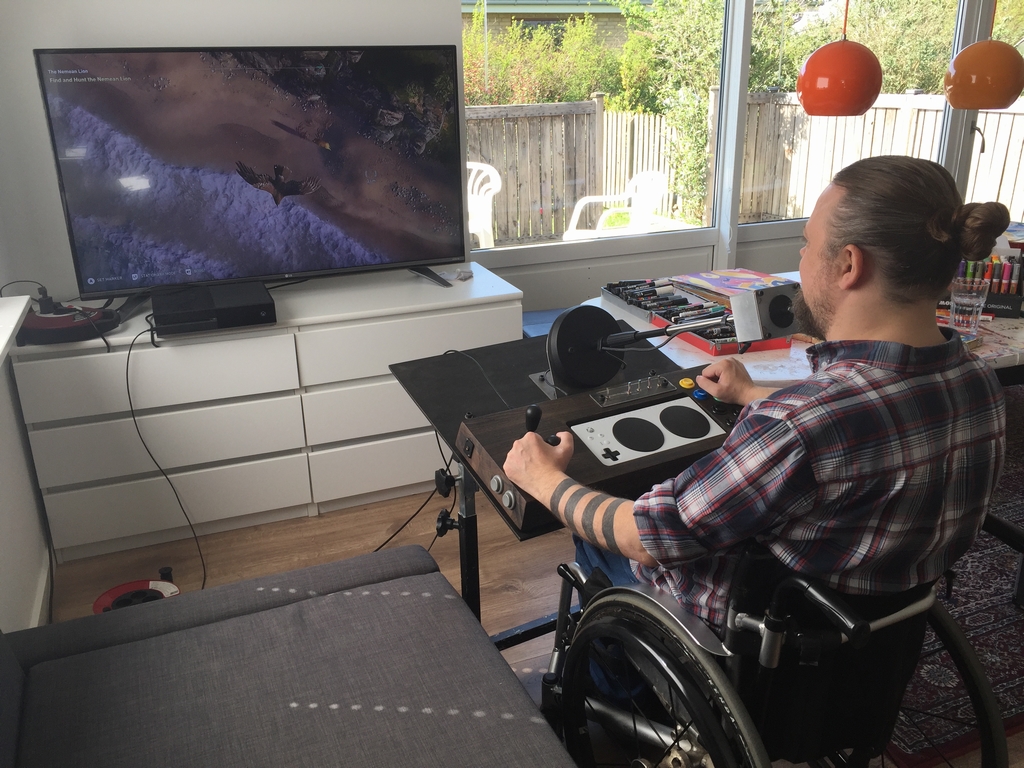
Real-time Game Play
Here is a little video showing the Adaptive Chin Check joystick in action. I also tried using the chin joystick and I really really stunk at it! I’m pretty sure I would get my rear end whupped if Thomas and I should ever play against each other…
Final Thoughts
Usually I report my own experience with a device or unit that I’m testing. However, this time I had to rely on the comments I got from Thomas. First of all, he really enjoys playing with the Adaptive Chin Check joystick and the controls are a lot more precise compared to his old setup – and sturdy thanks to the solid metal and wooden parts 🙂 However, he has discovered a few quirks with the XAC after a few weeks of testing. Specifically, there is an issue when customizing the buttons in the Xbox One software for different games. For example, when altering the big black A and B buttons on the XAC to e.g. LT and RT, the A and B buttons on the joystick (green and red arcade buttons) also changes to these buttons. It would have been nice to have full control of each individual button.
The analog input ports (X1, X2, LT, RT) of the XAC accept inputs which can be used for e.g. the throttle in racing games or the speed of movement. However, the analog inputs of the XAC needs about 200 kΩ to get full throw (0-100% activation). The problem is that the only analog arcade buttons commercially available use 10kΩ potentiometers (link) and therefore cannot be used. They simply cannot load the ports enough to achieve full range. I’ve asked Microsoft why they have made this choice (link) but they never really answered my question. It would have been nice if they have made the value adjustable to accommodate a wider range of analog inputs (i.e. adjustning the sensitivity of the ports). Until someone releases 200kΩ analog arcade push buttons at a reasonable price, all inputs are digital.
Beside from the above, the general functionaly of the XAC is outstanding. The customization of buttons is key when playing games as a tetraplegic to optimize the gaming experience. This is made really easy by Microsoft and works really well. The only thing that he really misses is the Push ON/Push OFF functionality of his old joystick. It’s not ‘impossible’ to use the toggle switches I have installed, but during gameplay, it would be a lot easier to simply hit a single button instead of having to look down and finding the specific toggle switch to flip. I’m currently working on a solution using an Arduino Pro Mini and an analog 4066 switch. According to Thomas, this would be the very last part to realize his dream of a perfect joystick…. Hopefully, I will be able to find a solution to reach that goal 🙂
Microsoft has made a true gaming gem with their Xbox Adaptive Controller. Compared to other gaming devices made for console gamers with physical disabilities, the XAC is reasonable priced and gives a heap of oppertunities when it comes to customization. It was extremely easy to add parts and focus could therefore be on how to create the best gaming experience as possible. Well done Microsoft – well done!!
© breadbox64.com 2019
I really love this set up! I have a personalized set up using the XAC myself and am looking at other options for joysticks because the ones I use have been discontinued. Are the UltraStik joysticks similar to a regular thumbstick in their movement or are they more arcade like?
Incredible custom controller! Great job!
Hi Randall, thanks for your comment. I would say the UltraStik joysticks are more like arcade joysticks than regular thumbsticks. However, the engage distance and the throw distance are quite short. In my experience, this makes it really good for chin operation. My friend Thomas’ old chin operated joystick had to be moved quite far to reach outer positions (large throw distance). So he really enjoys using the UltraStik. As a side note, we did some adjustment to the spring inside the joystick to reduce the tension. This reduced his neck fatigue quite a bit. He says he can play for hours without cramping up 🙂