

The Electronics
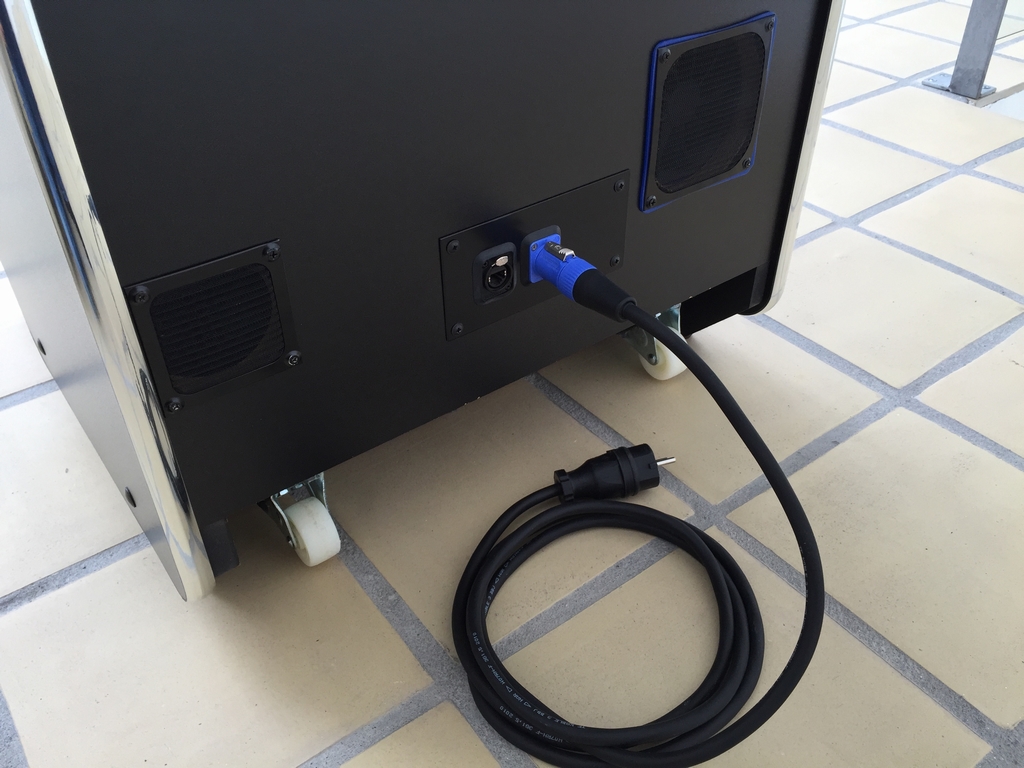
Blue Neutrik plugs are used for powering the system (Neutrik Powercon NAC3MPA & NAC3FCA). A Neutrik RJ45 ethernet connector (Neutrik NE8FDP-B) is placed next to the power inlet and is used for connecting the machine to the internet.
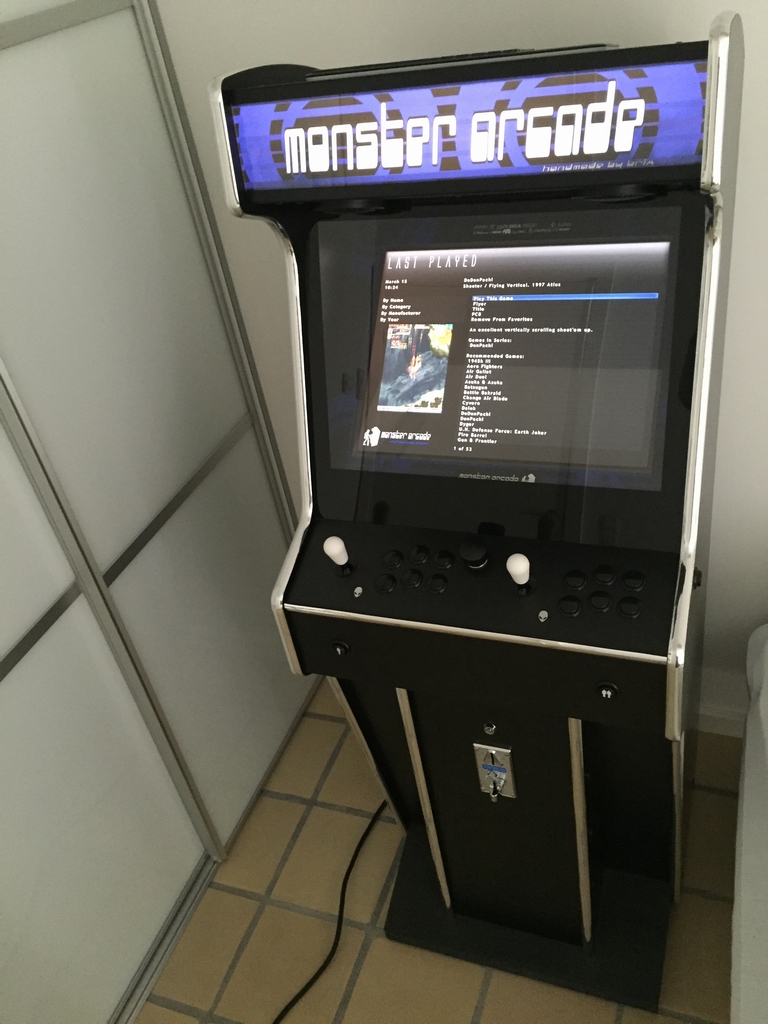
I used an old 22 inch LCD computer monitor (4:3 aspect ratio) and mounted it using a VESA 100 monitor mount. The cables running down the side are for a PC start button placed on top of the cabinet, speaker cables, power cables to the marquee light and a sensor bar for a light gun.

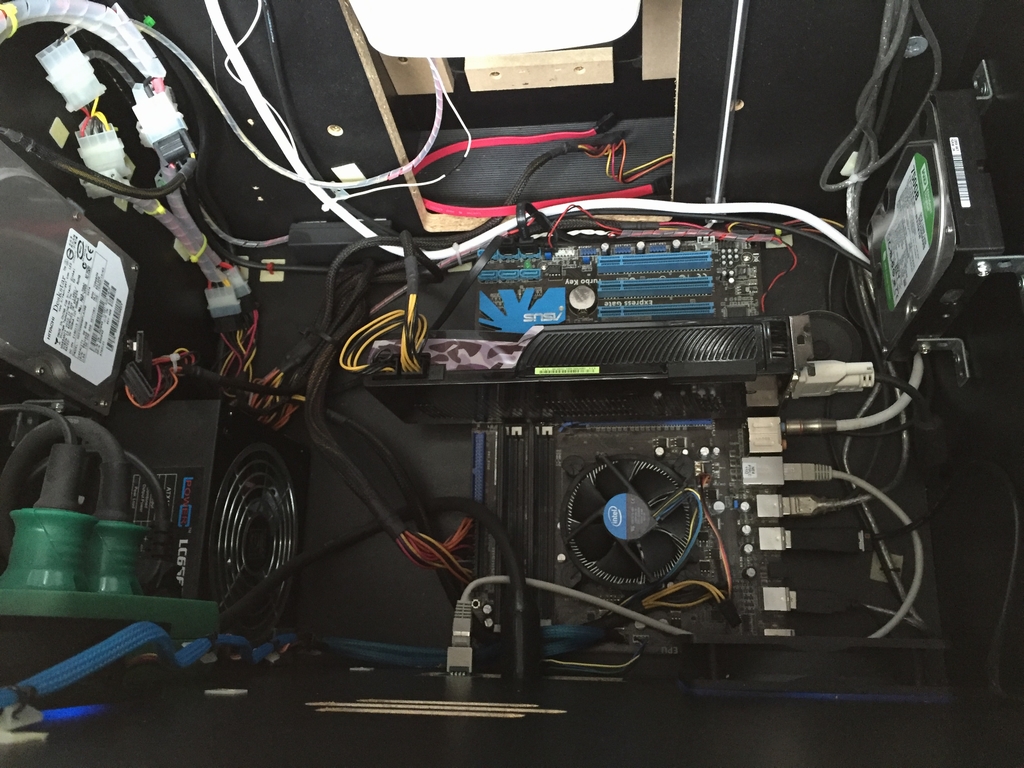
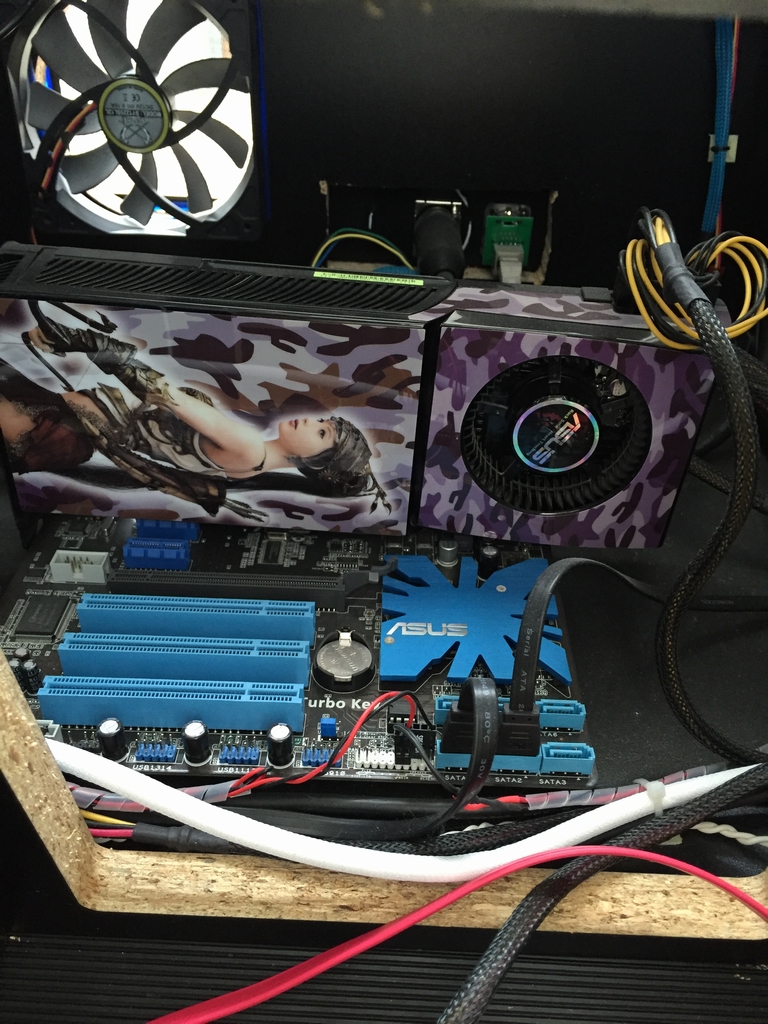
The PC motherboard is placed on plastic feet on the bottom plate of the cabinet. Graphic is controlled by a Nvidia graphics card. This card may be a little overkill for MAME games, but it really comes into play when running pinball emulations. The system has two hard drives. One is running Windows 7, while the other is used for back-ups. They are attached to the cabinet sides using small metal brackets.
The thich black cable, coming from the back of Neutrik power connector, feeds the green power strip. One cable powers the LCD monitor. The middle cable goes to the PC power supply unit which had its power cable moved to the side of the metal casing. This was done in order for the power supply to be pushed up against the cabinet sides to allow airflow out of the cabinet. The third cable goes to the 12V power supply for the stereo amplifier.

Several high quality 120mm fans were used for sucking in fresh cold air and blowing out the hot air. Special attention was given to the level of fan noise (<12dB) to keep the system running cool and silent.
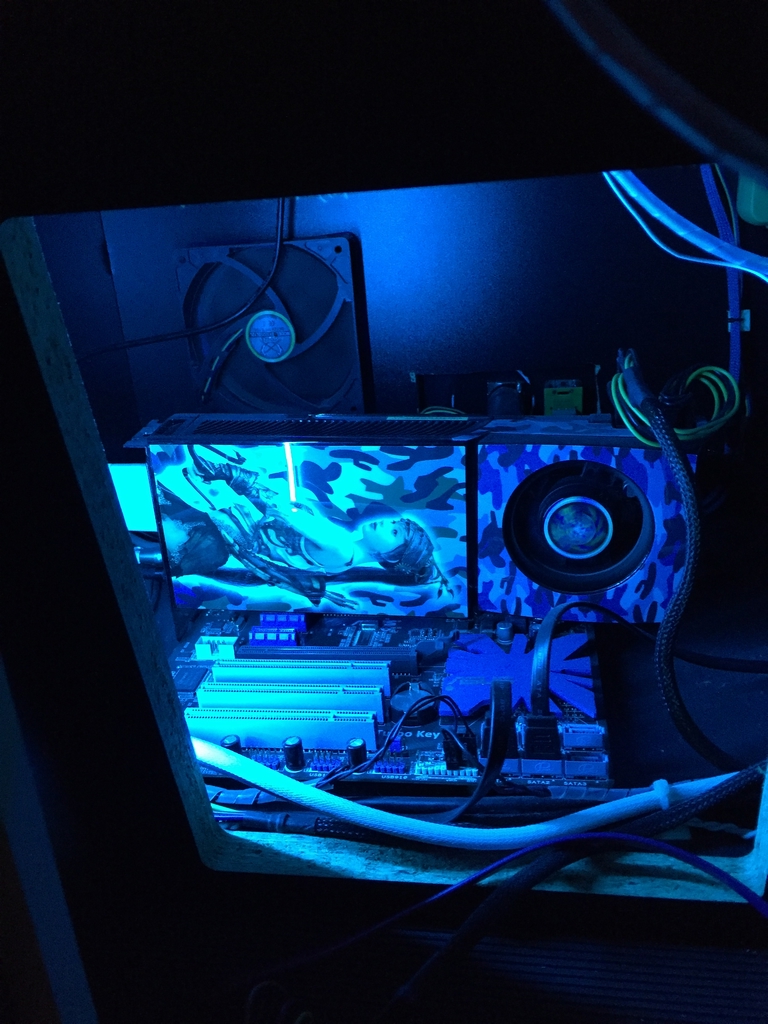
Blue cold catode lights are non-negotiable in any gaming system!
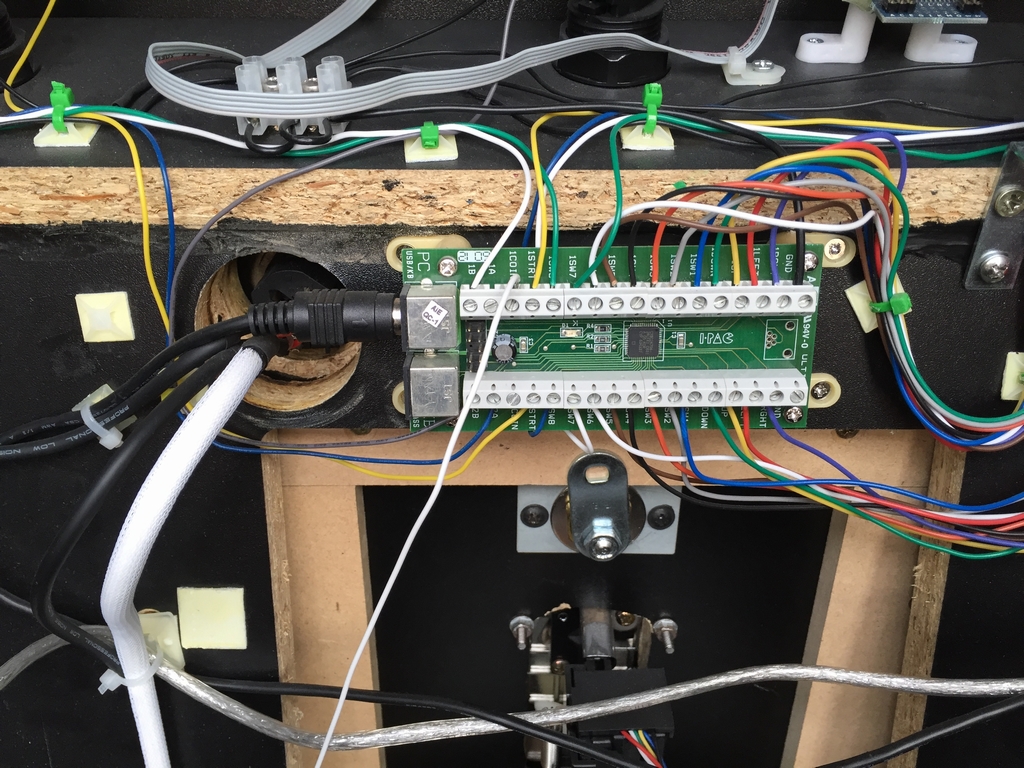
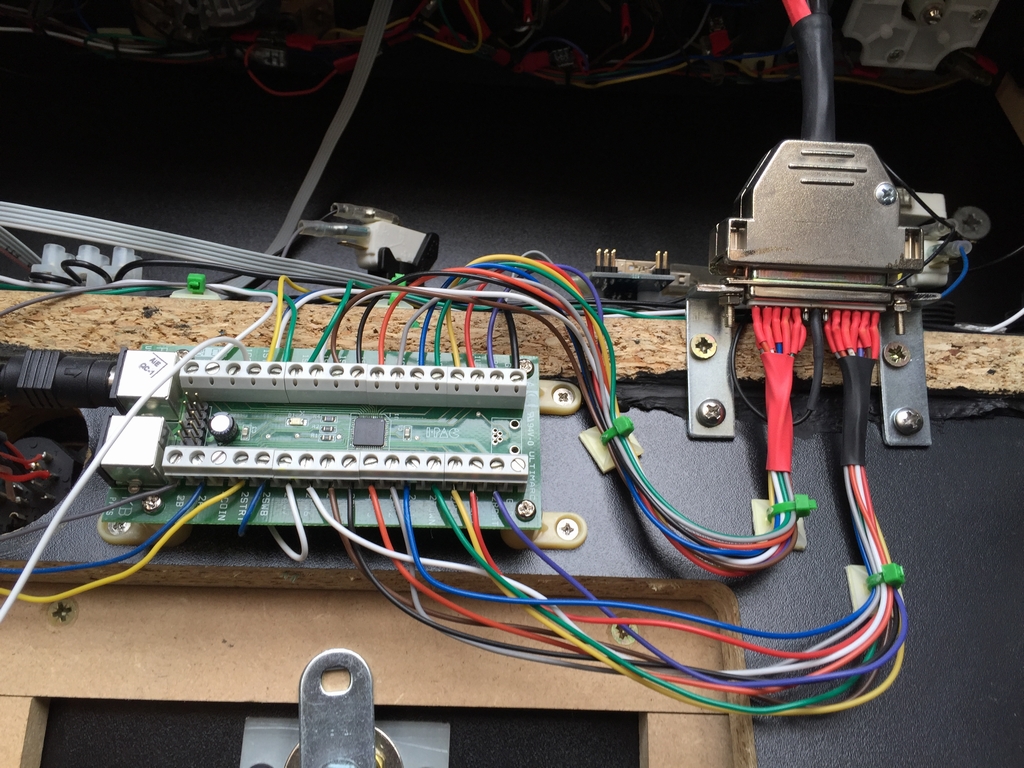
An iPac 2 USB device was used to connect all the buttons and joysticks to the internal computer system. It looks a little messy, but each screw terminal has its special function written on it to ease the assembly. A small piece of software can be used to program each input.
The female part of the D-sub 25 pin connector with the male connector attached from the control panel.
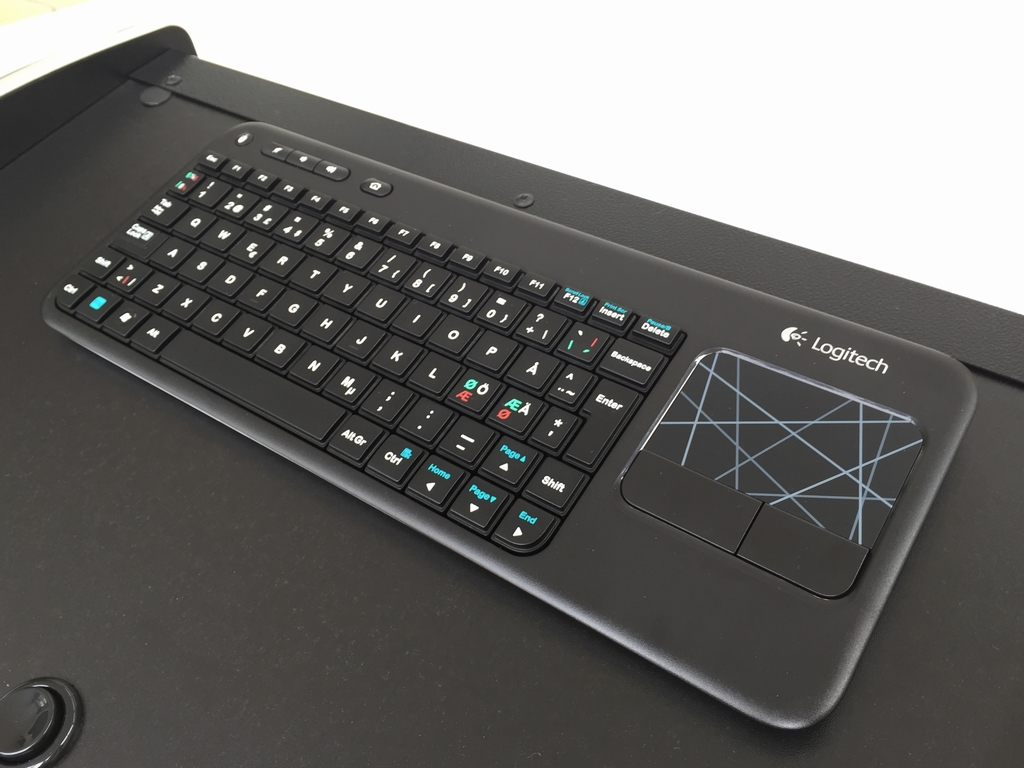
A wireless USB keyboard (Logitech KT-400) with a track pad is placed on top of the cabinet. I don’t like the looks of MAME machines with the keyboard drawers underneath the control panel. The black Happ standard button, at the bottom left of the image, is attached directly to pins on the PC motherboard and serves as a system start button.
The Coin Mech
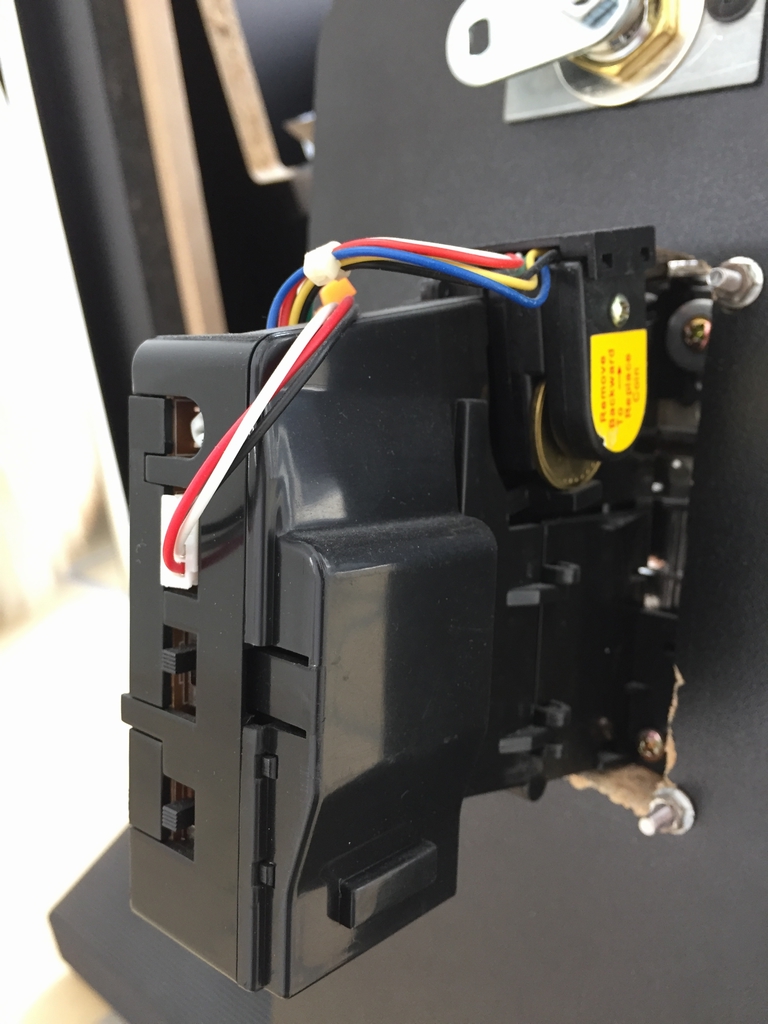
A comparable coin mech was inserted to the front panel of the cabinet. The coin that the mech should accept, is placed inside the device. This way, each inserted coin will be “compared” to the one inserted in order to identify a match. If the coins match, then a credit is added. If there is a difference, then the mech will reject that coin.
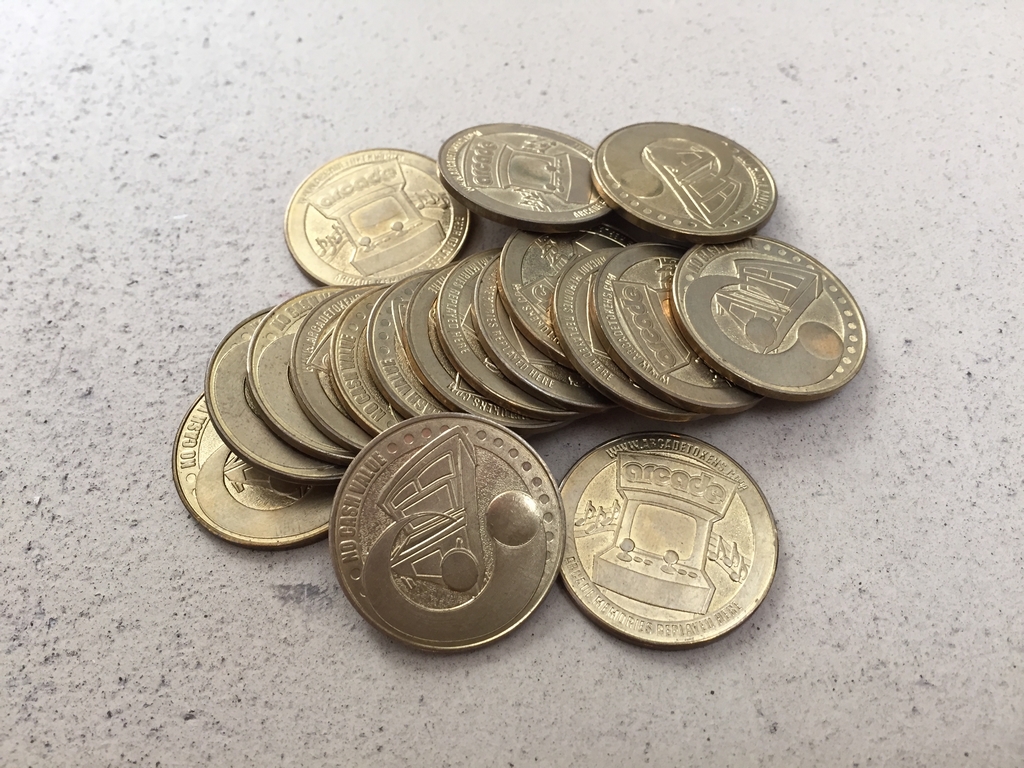
I got a pile of arcade tokens online which gives the whole arcade experience a little extra..
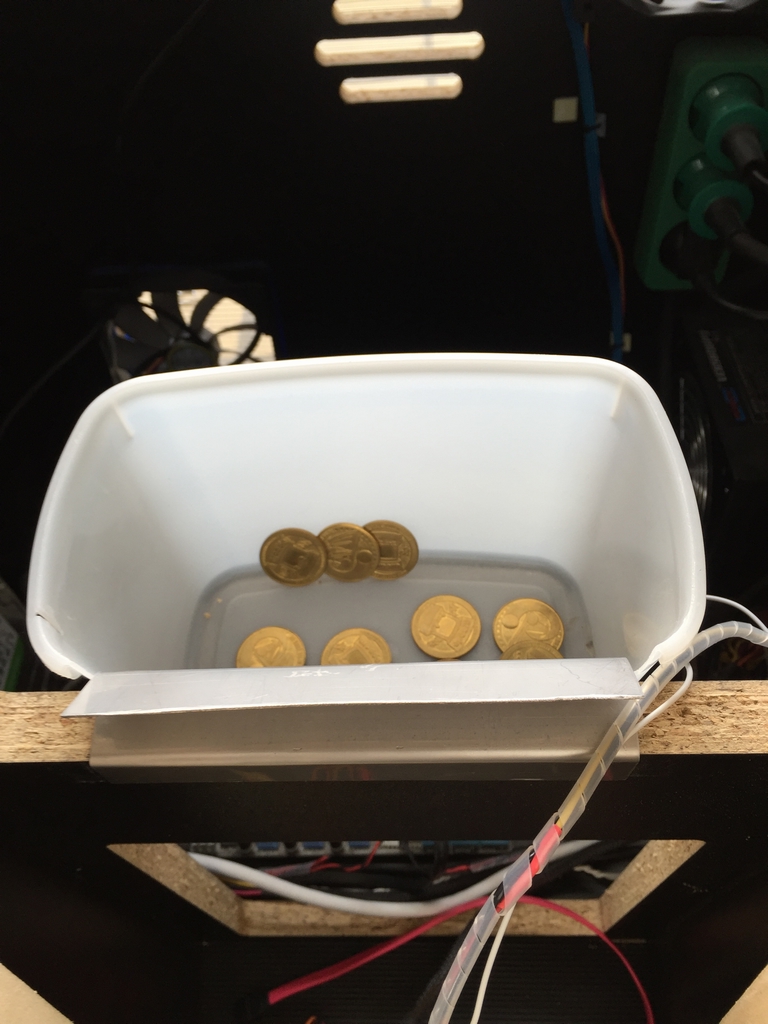
A box for collecting the inserted coins with a small metal bracket to ensure the tokens doesn’t go flying around the cabinet – don’t want them small metal parts hitting the motherboard, will we?
Gaming Peripherals
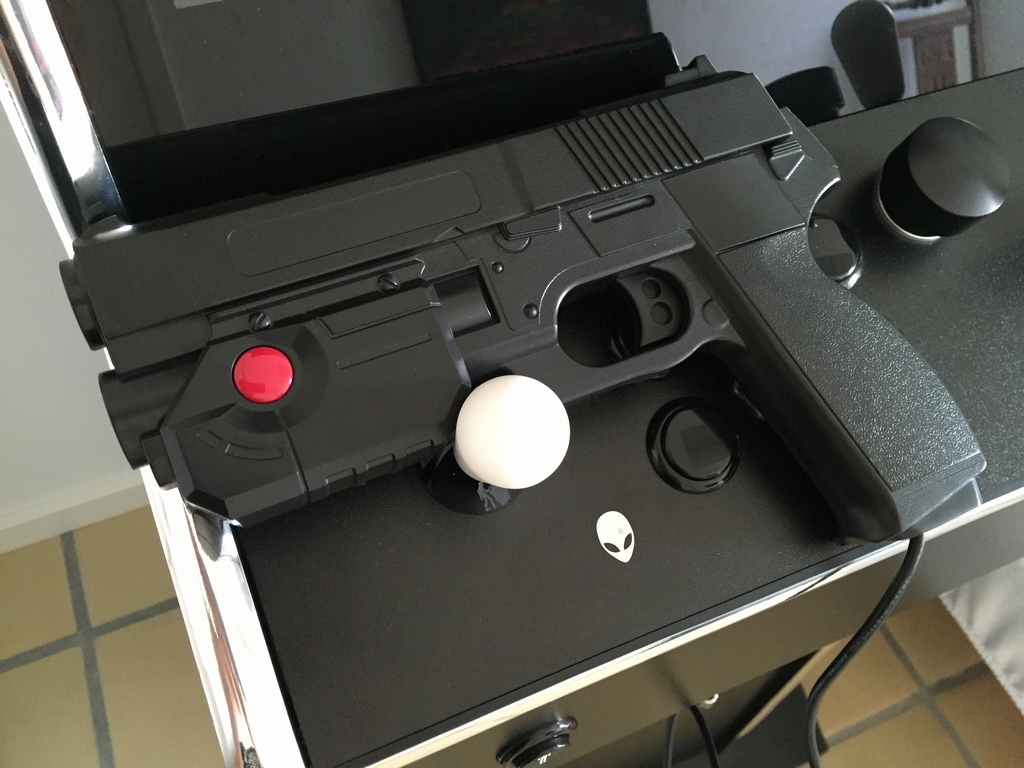
I have an Ultimarc AimTrak light gun that I use for shooting games like Area 51. The light gun can be plugged into the arcade machine using one of the two USB port at the front of the cabinet.
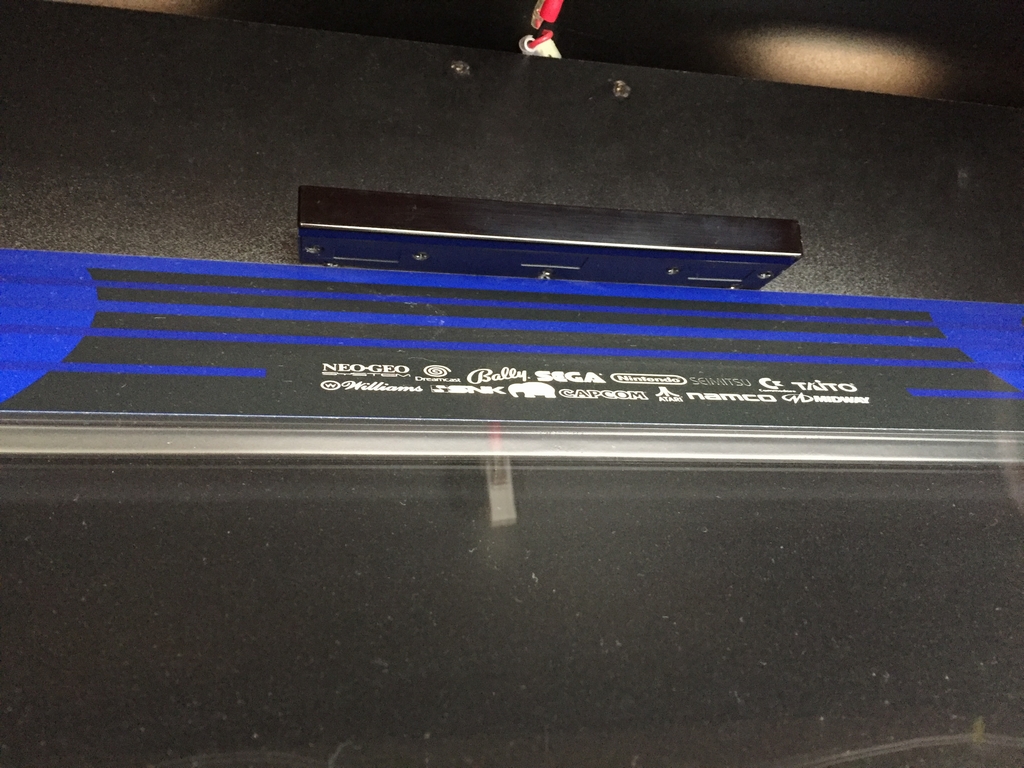
The LED bar is the sensor for the light gun. It is mounted on top of monitor using some adhesive pads and plugged into an USB port of the PC. The top part of the blue bezel can be seen below the sensor bar.
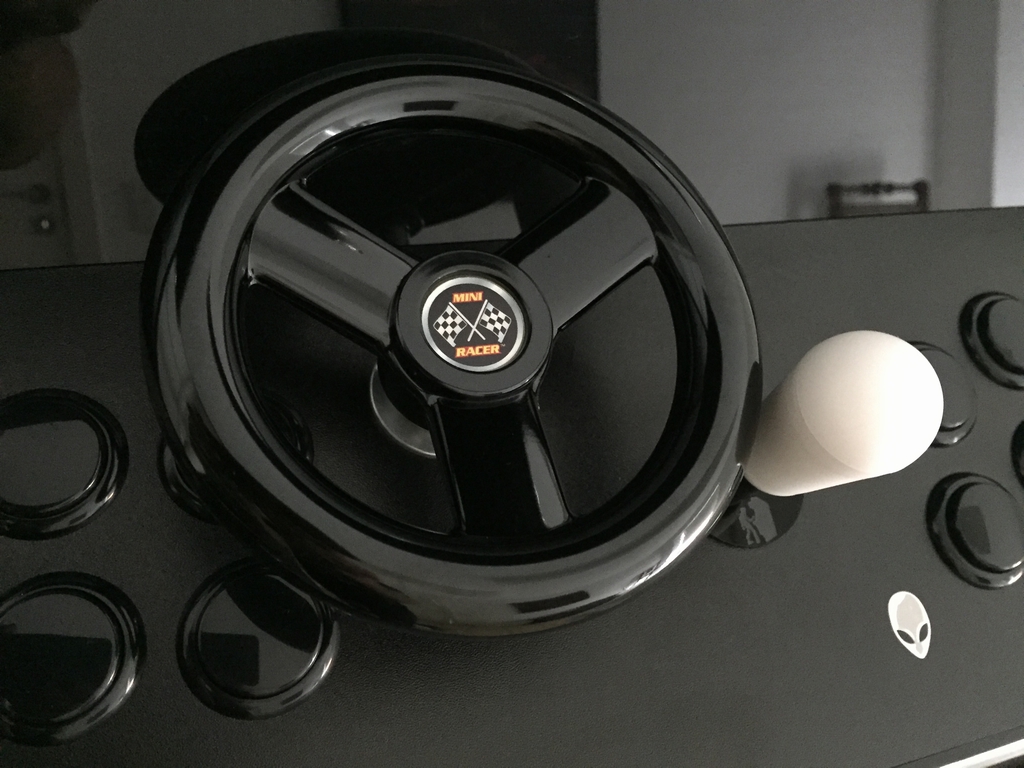
I got a metal steering wheel for race games like (Out Run). The racing wheel mounts to the Ultimarc SpinTrak Spinner after removal of the spinner knob.
The Arcade Machine in Action
I use the GameEx frontend (link). Besides the MAME emulator, the system also has game emulators for consoles games made for the Atari 2600, Atari 5200, Atari 7800, ColecoVision, Nintendo Entertainment System, Super Nintendo Entertainment System, Sega Genesis, Sega MasterSystem and Sega Mega Drive system. Over time, emulators for playing pinball and the Commodore 64 also made it into the system.
This is a short video to get an idea of how the system works in action. My apologies for the grainy quality!
© breadbox64.com 2016
Kudos, this is a very clean build 🙂 Do you know which monitor you used in the cabinet?
Inspired by your post, I am now in the process of ordering the same kit and build my own Arcade Station.
Thanks! It’s an old 22 inch Samsung SyncMaster LCD (4:3 format) that I’ve had since before everything went widescreen… ? The resolution is 1600×1200 and the refresh rate is ridiculous – 25 ms if I remember correctly. The color was grey/silver so I painted the front black with some glossy spray paint.
It’s a cool flat pack kit and it takes a few hours before it is standing and the real work with the electronic’s start. Good luck with the build.
Thanks for the Answer. I guess it is the Samsung Syncmaster 214T. It has 8ms and 21.3″. I have an old NEC 2190Uxp with the same specs. I think there are no bigger 4:3 LCD Monitors than that. I placed my order for the flat pack now 🙂
That may be it! Good luck with the build!
Really cool build. I have a similar kit which I’m setting up. Just wondering: how did you mount your screen in the cabinet? Maybe you can share some pictures? The kit I have has nothing to mount a monitor 🙁 so I need an idea what would work.
All the best, Sebastian
EDIT: Just saw the second page with one picture of your screen setup ? Still would be great if you have some additionally ones. Thx, Sebastian
Hi Sebastian and thanks 🙂 There was no monitor mount in the kit I got from Arcadeworlduk.com either. I guess they want people to have the choice of installing either an old CRT monitor or an LCD. I assume that you want to install an LCD monitor? If so, I used a piece of melamine faced particle board that was cut in size and mounted some metal brackets on the sides as seen here (link). The board was approximately 25 cm (10 inches) wide. I then used a cheap ‘VESA 100’ TV mount and attached it to the particle board using some bolts and nuts (link). The second half of the VESA bracket was fastened to the backside of the monitor. I then used some clamps and some small pieces of wood to hold the particle board and monitor in place to make sure everything was looking as desired (link). Hereafter, I simply fastened the metal brackets with some screws to the sides of the cabinet and that was pretty much about it.
Good luck with your project 🙂
He he…so we have more or less the same kit. I also ordered it from arcadeworlduk.com. Thank you for the detailed instruction. I guess I will try that. I will put an old 19″ 4:3 LCD Monitor in.
Overall your blog post is an awesome instruction for a lot of the assembling question I’ve had so far. Also it gave me some new ideas on how to tweak it. Thx 🙂
It’s a very cool kit and everything fits perfectly. Glad you liked the blog post. You may also be interested in another arcade cabinet build that I did. You can find it here (link).
Thx for the hints. Again, a great post 🙂
Thanks. 🙂 Just searching the web for inspirations concerning Arcade/Mame and hit your page. The stearing wheel is now on my list… 😉