

I recently posted images of a tabletop arcade machine that I’ve build – the Monster Arcade Junior (link). This post contains the full size version of the machine, the Monster Arcade Senior. The arcade is an upright version and its primary use is for playing original arcade games using the Multiple Arcade Machine Emulator (link) also known as MAME (I know that true arcade game aficionados loathe MAME, but it sure makes it a lot easier to swap among games…).
The Monster Aracde Sr. arcade machine was made during a time period of about 4 months and an excess of 200+ hours were spent on the build. I wanted the cabinet to have a clean look on the outside. I therefore opted for a professionally manufactured wooden cabinet made from black melamine faced particleboards. The software should be run from a standard computer to make everything run as smooth as possible.
Even though building an arcade machine is never a straight forward job, I have subdivided it into the following sections:
The Arcade Cabinet Build
The Marquee
The Control Panel
The Sound System
The Electronics
The Coin Mech
Gaming Peripherals
The Arcade Machine in Action
The Arcade Cabinet Build
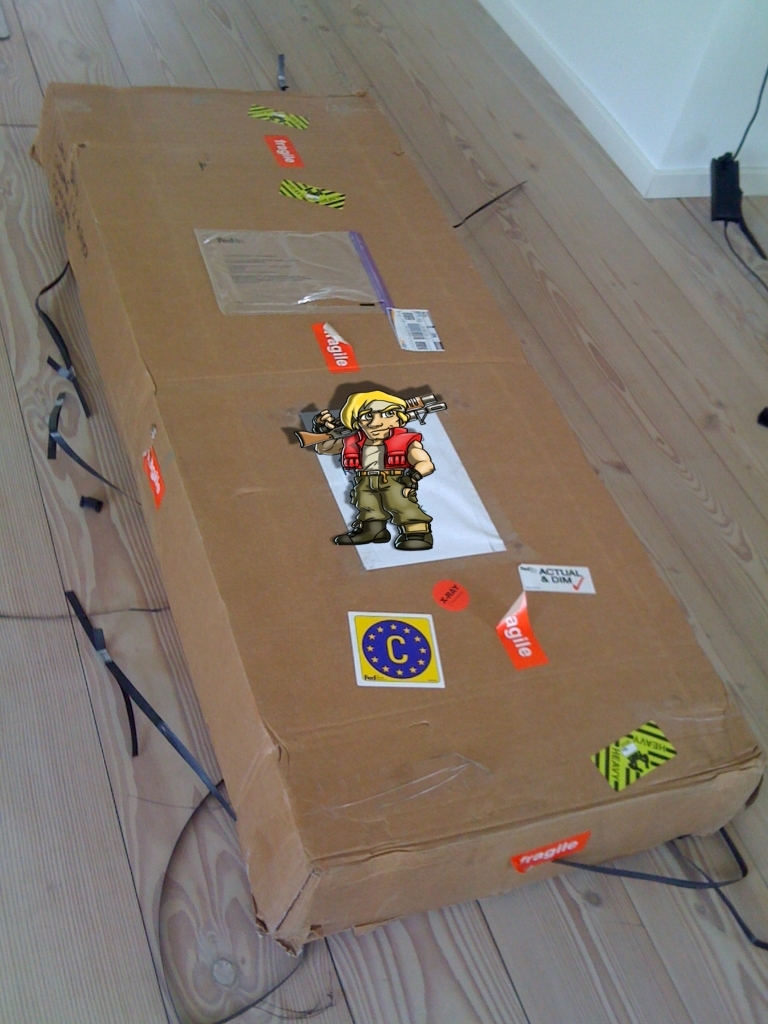
The cabinet was ordered from Arcadeworld.co.uk (link) as a so-called ‘Flat pack upright arcade cabinet kit’. It came complete with chrome T-molding installed, a pre-drilled (2 player layout) control panel, a lock/key set and a set of wheels for the base. Assembly instructions and fixings were also included in the box. The shipping ended up costing me about the same as the kit itself as it weigthed approximately 60 kg (132 pounds).
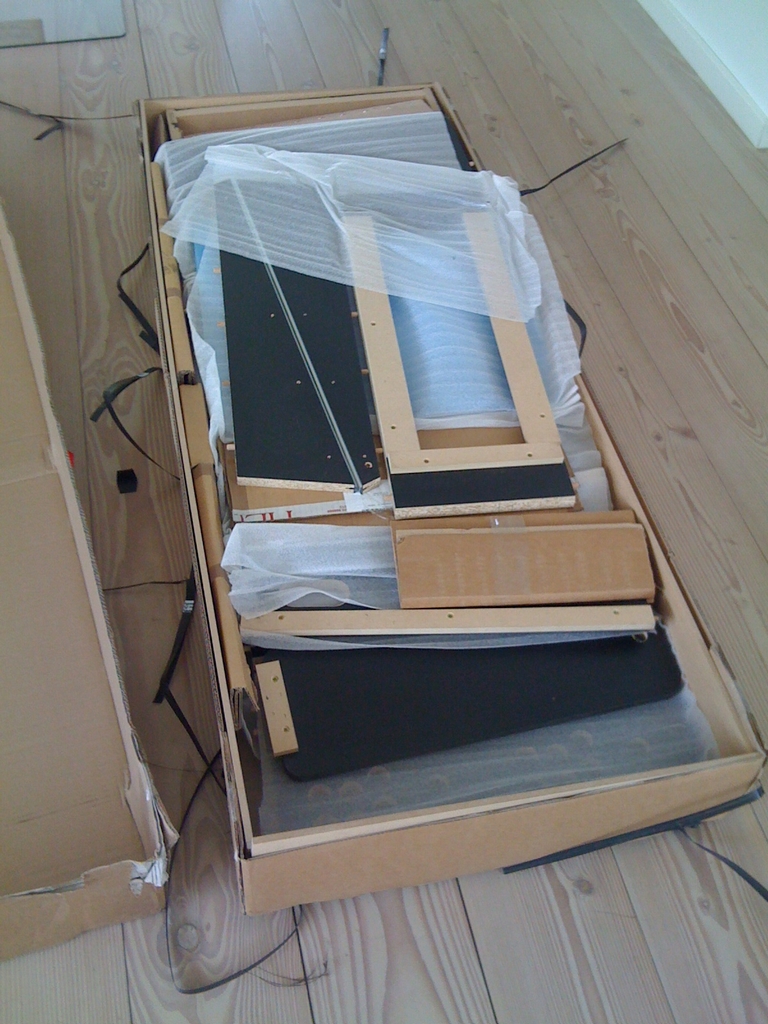
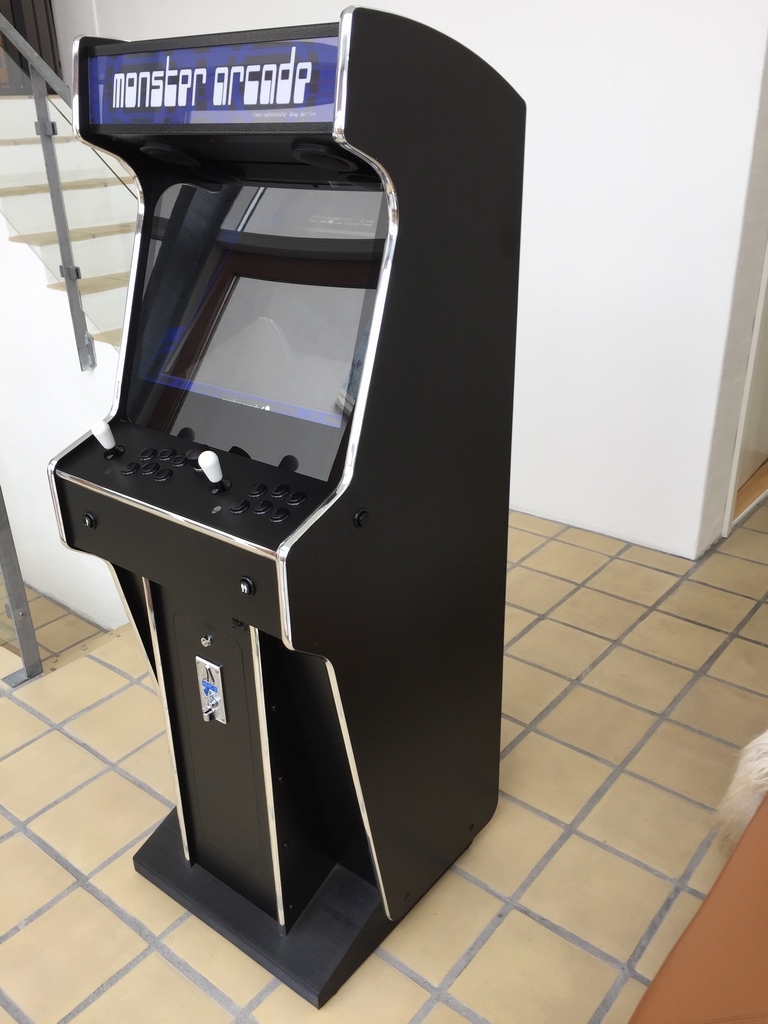
The instructions were pretty easy to follow and the cabinet was asembled within an hour or so.

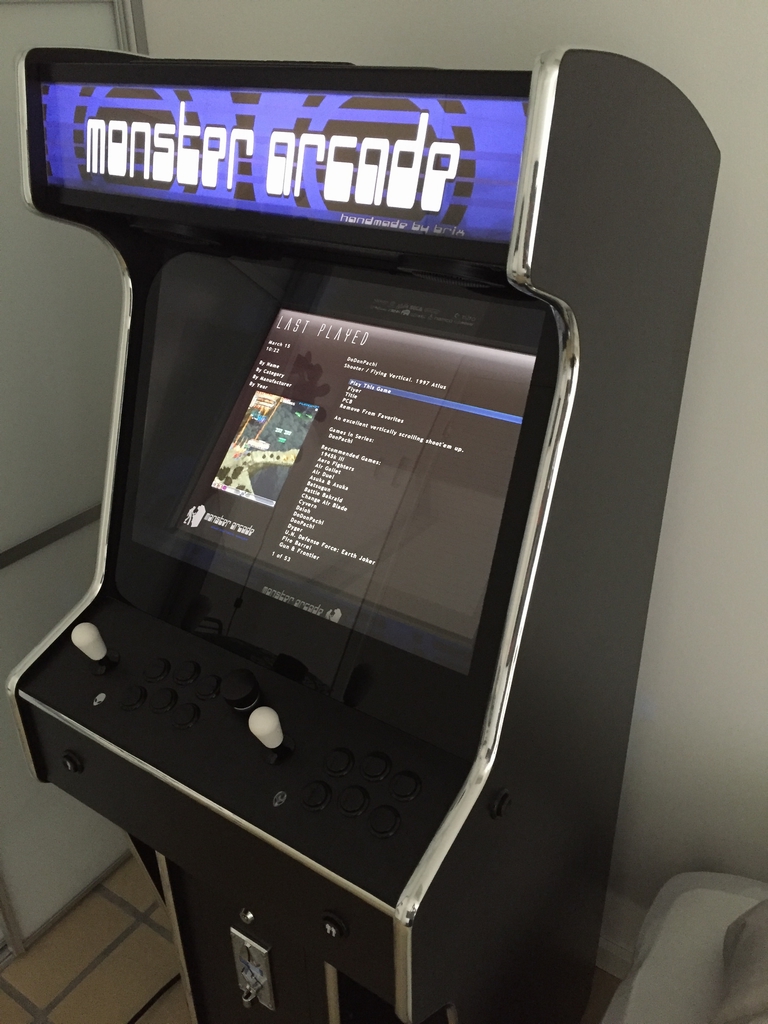
Fast forwarding in time and the machine ended up looking like this. I think it has the clean look I wanted without too much eye catching arcade graphics. The kit also came with a plexi set for covering the monitor area. I painted the plexi black on the backside to cover up the electronics surrounding the LCD monitor. Happ Standard buttons were placed on the cabinet’s sides for pinball emulation.

The backside of the cabinet with fans for cooling, a power chord for the internal PC and wheels for easy maneuverability.

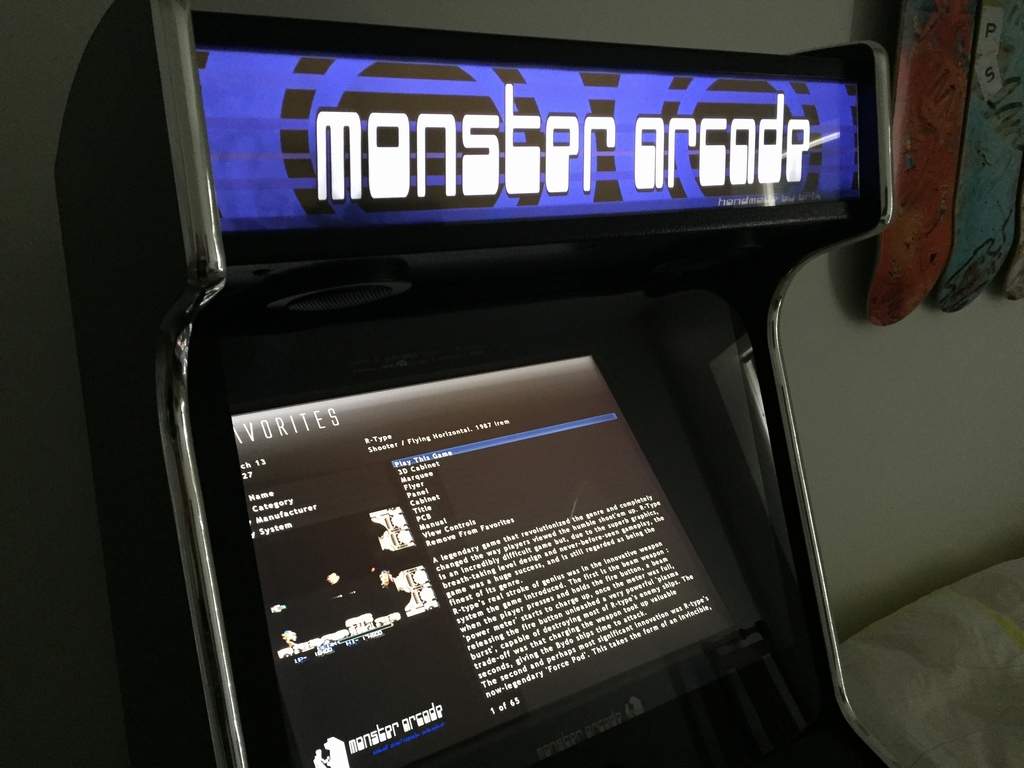
The Marquee
The dimmed light from the marquee is what makes it a true arcade machine! To light up the marquee, I used Nova Matrix Linx™ LED lights from GroovyGameGear (link). The LED’s are daisy chained together and powered directly from a Molex-style power plug which is simply tapped into the 12 V supply from the PC power supply.

The cabinet kit came with two black metal brackets and two pieces of plexiglass acryllic sheets. A light transparrent piece of paper, with my own artwork, was placed between the transparent sheets and the metal brackets were screwed in to hold everything in place.


This is the graphics that was used for the marquee with a size of 540x120mm (21.25×4.71 in) using 2041×454 pixels.

Let there be light…
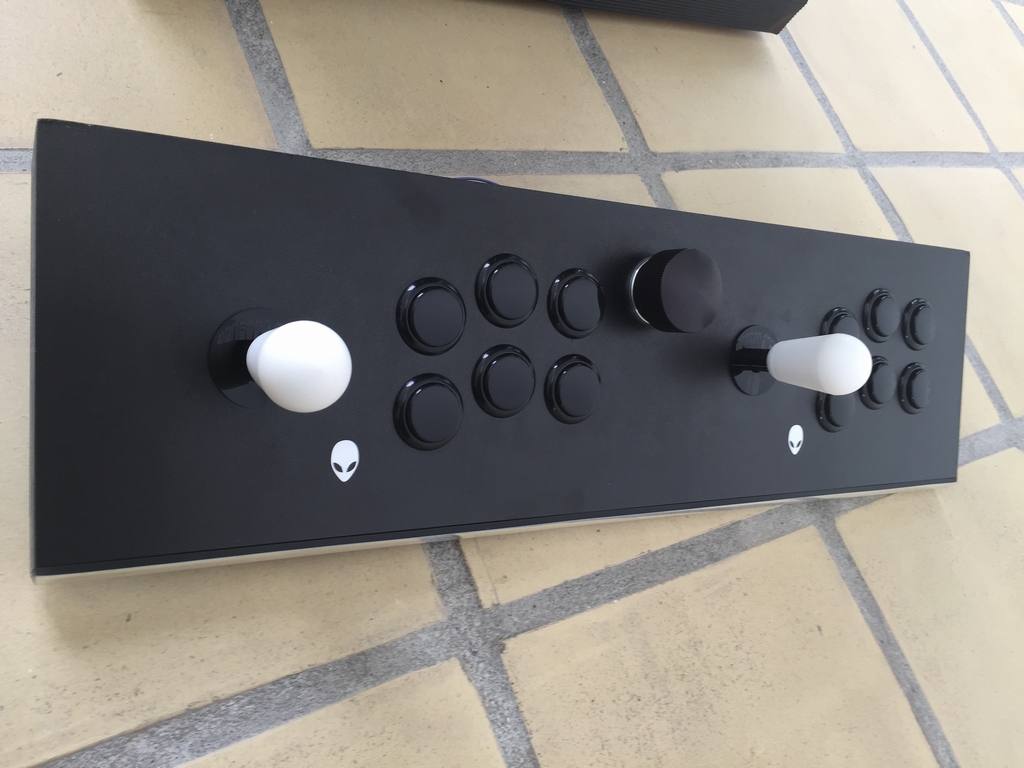
The Control Panel
This is one of the most important parts of the arcade system as the hardware used (buttons and joysticks) has a direct influence on the gaming experience. I went through a couple of iterations before settling on my current setup. It all comes down to personal taste and the type of games being played. I like to play vertical shooters and platform games. To optimze my gaming experience I therefore have completely different setups for Player 1 and Player 2, eventhough the joysticks and buttons look alike.
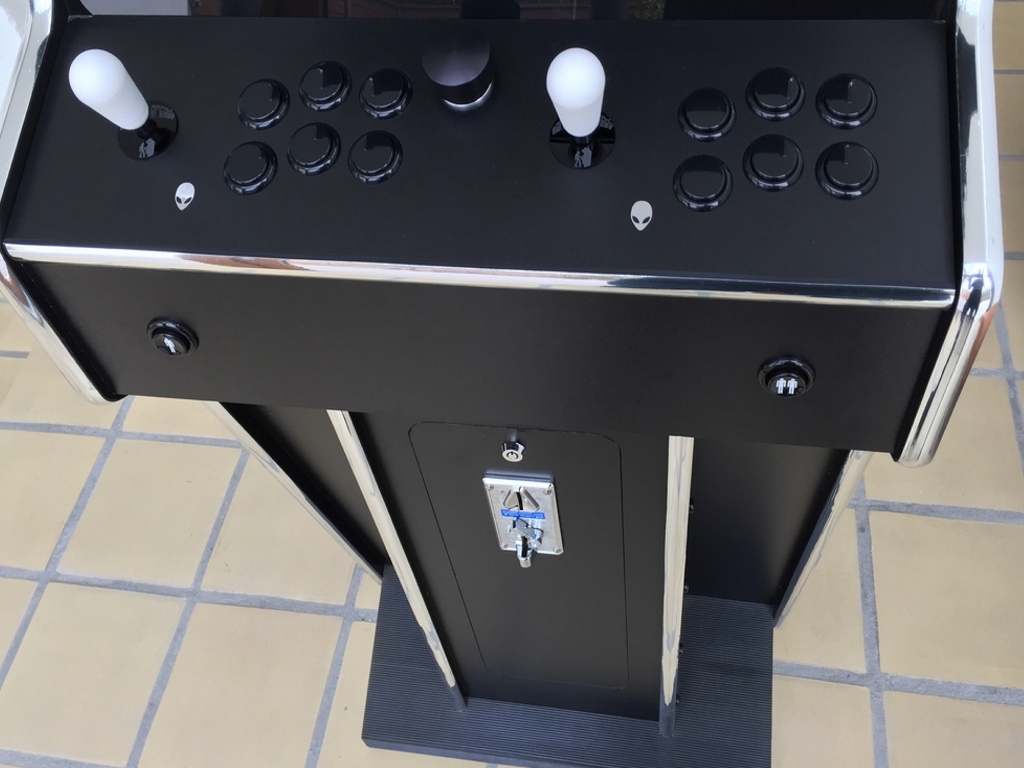
The vertical shooters setup consists of a Seimitsu LS-56 joystick and Sanwa OBSF-30 buttons. The Seimitsu joystick features a medium engage distance which is related to how far the joystick has to be moved from a neutral position before engaging the micro switches. It also has a medium throw distance which is the distance it has to be moved before hitting the retstrictor plate. These characteristics makes the on-screen character move with the smallest movement of the joystick. The same holds true for the Sanwa buttons as they exhibit very short engage distances and barely have to be touched in order to be activated. I prefer this setup in vertical shooting games, as shooting enemies does not call for the same precision as jumping in a platform game does. The buttons just have to shoot as fast as possible.
The platformers (and fighting games) setup consists of a Sanwa JLF joystick and Seimitsu PS-14 GN buttons. The Sanwa joystick exhibit a far engage distance causing it to yield a very high level of directional control. A Sanwa GT-Y octogonal restrictor gate has been added to the base of the joystick to further improve the 8-way feeling of the joystrick. The Seimitsu buttons have a medium engage distance and medium tension which provides a very high level of control. You don’t unintentionally engage the micro switches using these buttons which is quite important went leaping platforms or hitting opponents in the face. Thus, for platformers and fighters, I prefer to have very precise directional control and buttons that are only activated when intended.
The top of the joystick is also a matter of personal taste. I prefer bat top handles to ball tops. The bat tops also add to the overall height of the stick as the wodden control panel reduces the overall height compared to its metal counterpart. An Ultimarc SpinTrak spinner (link) with a large black aluminum knob is placed between the two player setups for playing games like Arkanoid.
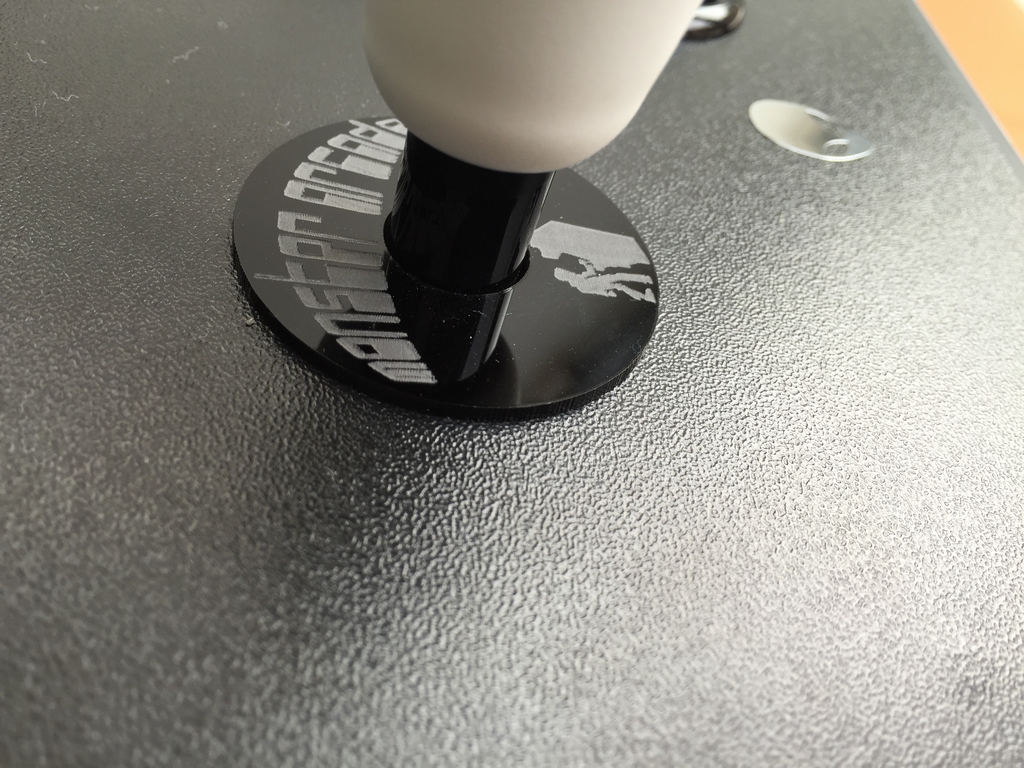
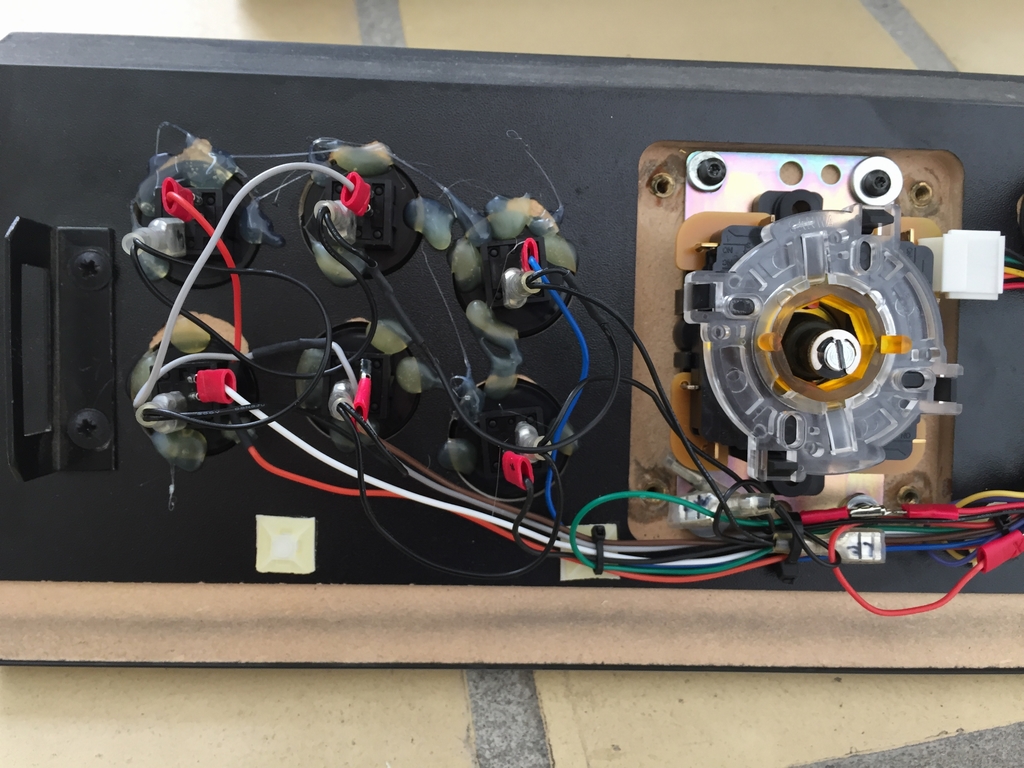
Custom dust washers have been made for the joysticks with the Monster Arcade text and logo.
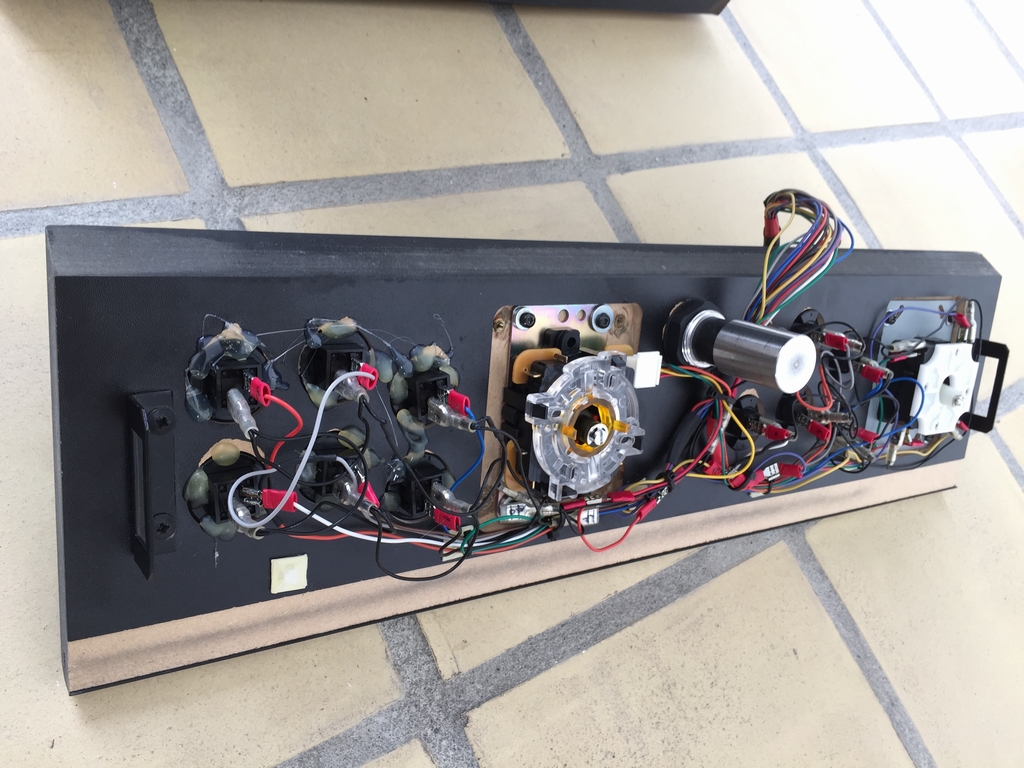
The inside of the control panel with all the cables.
The Player 1 Seimitsu LS-56 joystick and the black Sanwa OBSF-30 buttons.
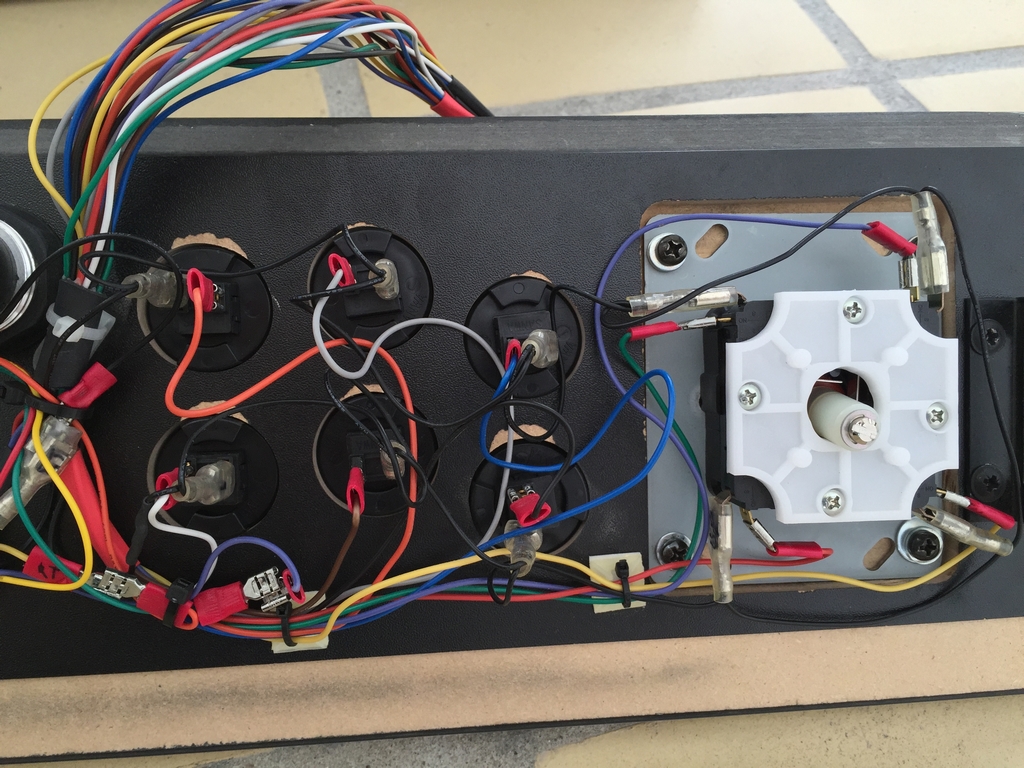
The Player 2 Sanwa JLF joystick with the orange octogonal restrictor gate and the black Seimitsu PS-14 GN buttons. The buttons are snap-in’s made for thin metal control panels, so they were fastened using some hot glue.
An Ultimarc SpinTrak spinner is placed between the two player setups. It can be used for spinner/paddle games. To ease maintenance of the control panel, all cables were compiled and soldered into a male parallel cable connector (D-Sub 25 pin).
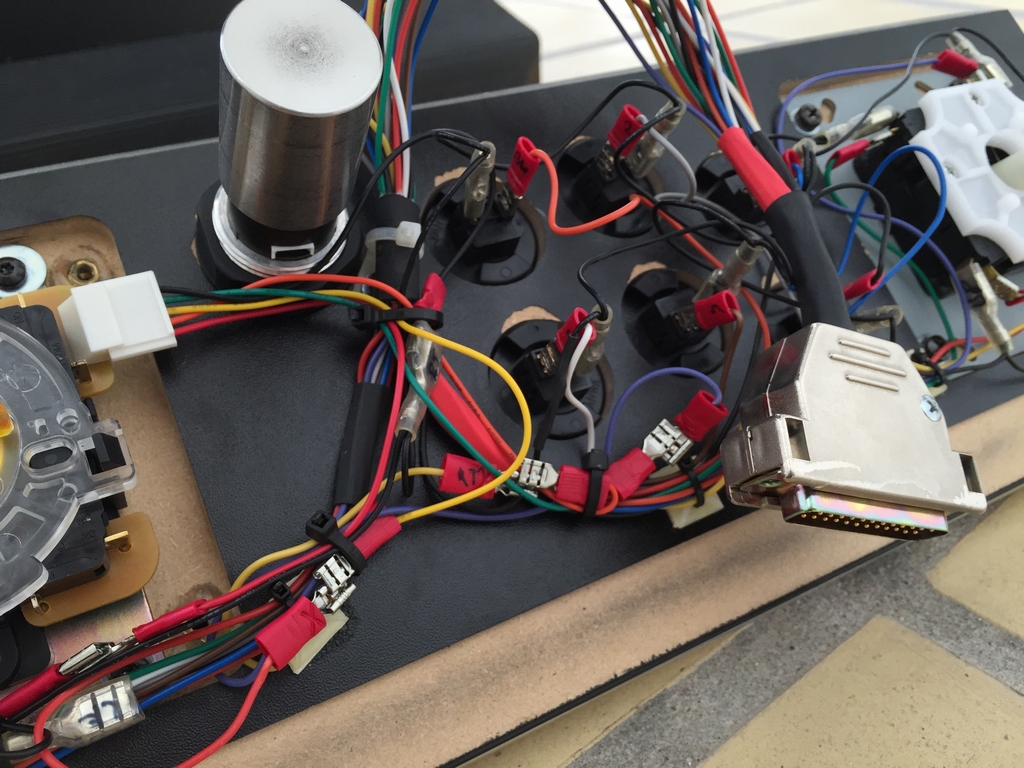
The female part of the D-Sub 25 pin connector is fastened to the inside of the cabinet. The little PCB in the middle of the picture is connected to the spinner and to the PC using an USB cable. One of the metal latches, for holding the control panel in place, can be seen at the top of the picture.

Controlling MAME is done using five black Happ standard buttons located underneath the control panel box. The buttons are used to control the sound volume (UP/DOWN), adjusting MAME games during gameplay (TAB/ENTER) and to exit the current game and return to the frontend for games selection (ESCAPE). Two Neutrik USB plugs (Neutrik NA USB-W-B) are placed on each side of the cabinet to accomodate light guns or gamepads. The purpose of the Neutrik plug, located diagonally from the coin mech, is described in further details below.

The Sound System
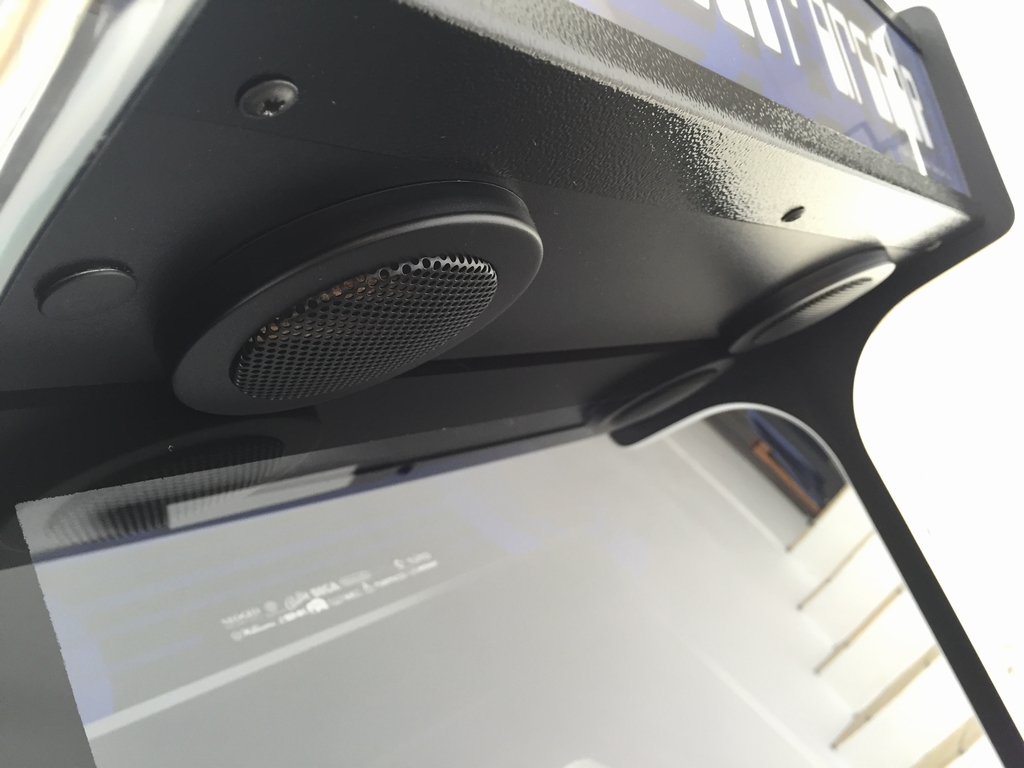
Two loudspeakers are placed behind the marquee next to the LED lights. Holes for the sound to travel through the bottom of the marquee box were already cut from the factory. All I did was screw the loudspeakers down and mount black metal grilles on the outside.
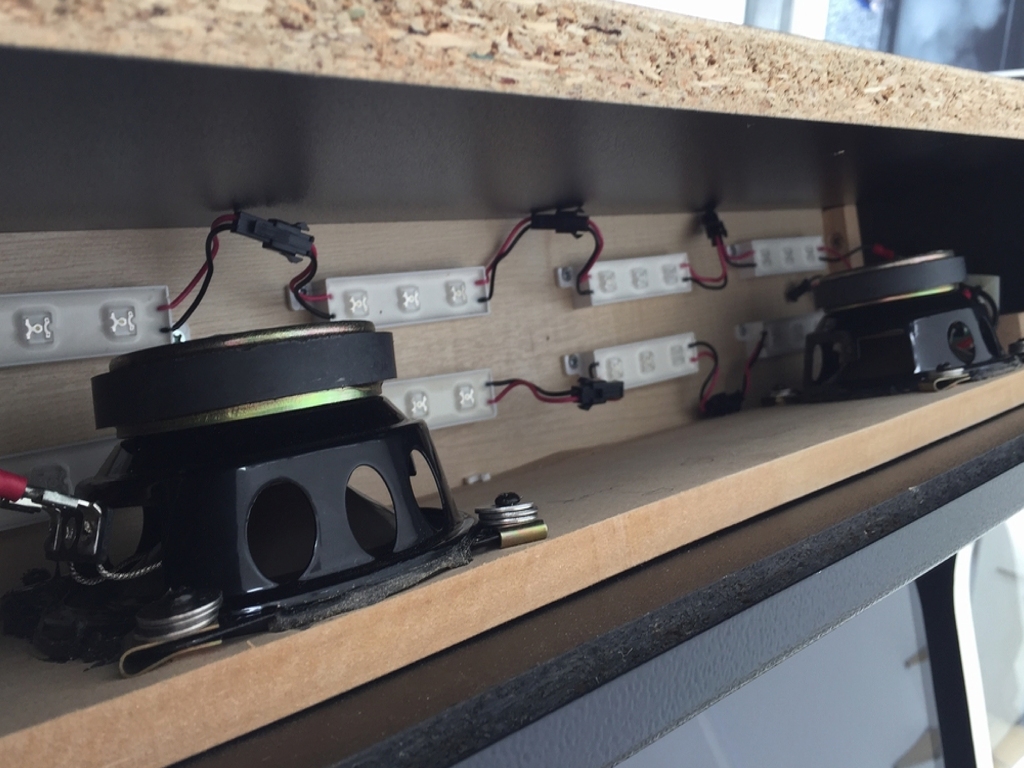
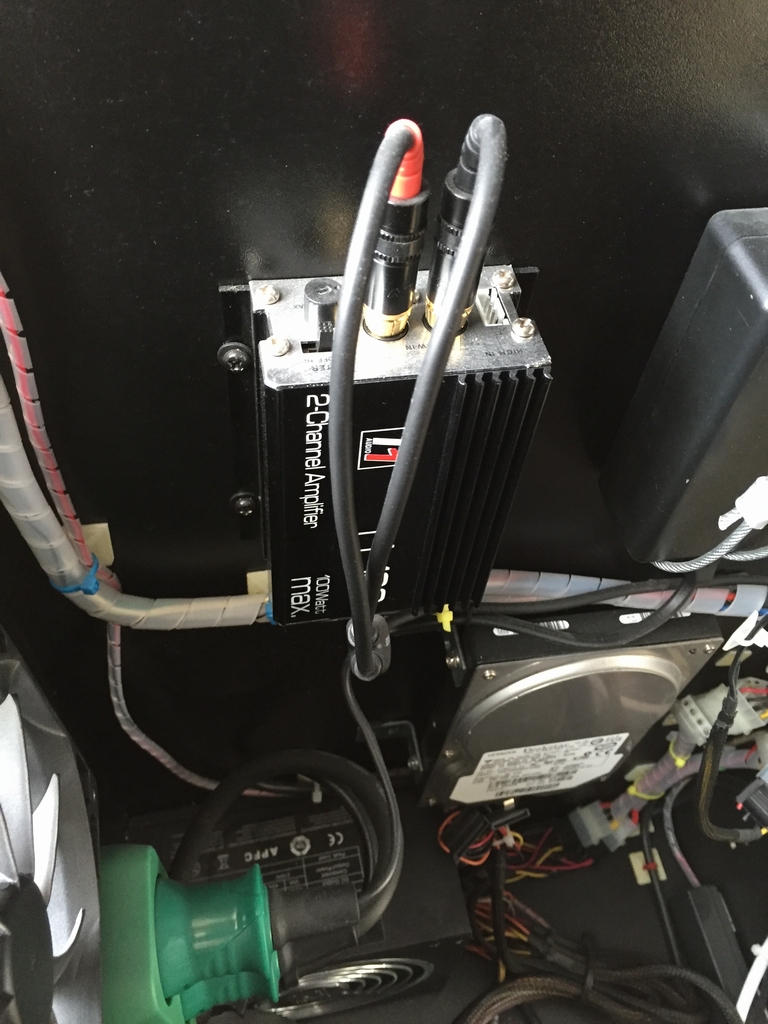
A 50W stereo amplifier, running on 12V, were used to power the sound system. The 12V line from PC power supply generated interference to the sound signal, so a dedicated 12V power supply was added to drive the stereo amplifier (black box to the right of the amplifier).
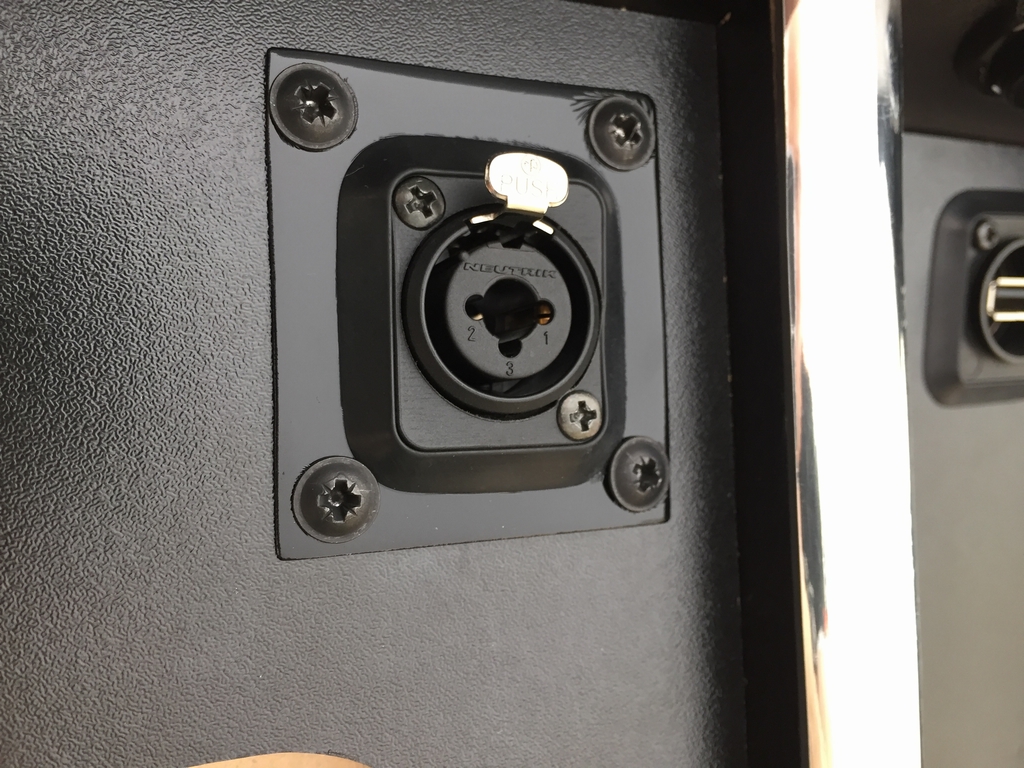
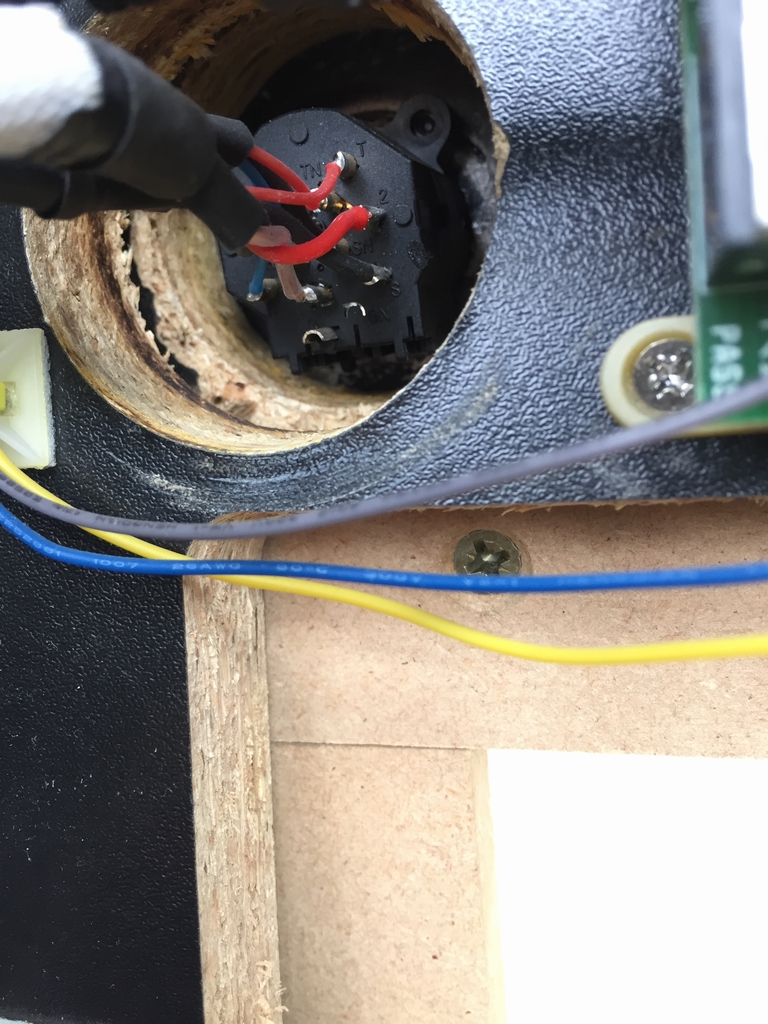
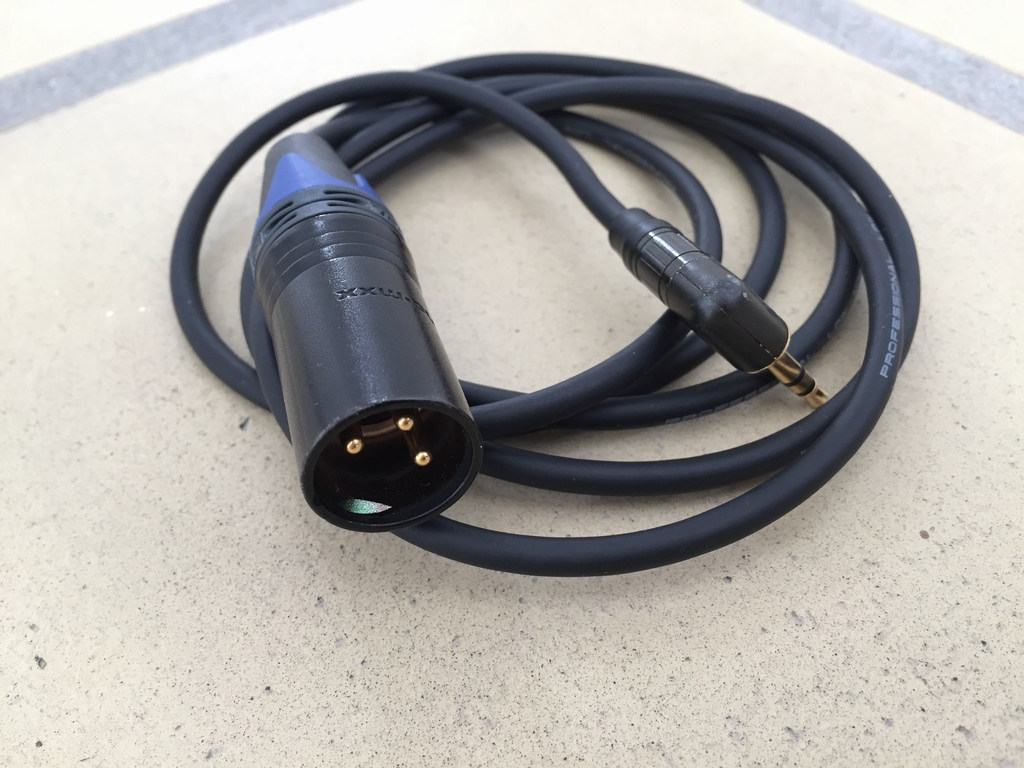
A special female plug with a 6.35 mm (¼ inch) phone jack and XLR conection (Neutrik NCJ9FI-S) was mounted above the coin mech on the front panel af the cabinet. When nothing is inserted into the plug, the game sounds are played through the loudspeakers. To keep the music levels down during late night gaming sessions, a pair of headphones can be connected using a standard phone jack. This causes the sound to be passed through the headphones and the loudspeakers are muted. Finally, if the sound of the 80’s gets to you (and they will eventually!), a special cable with an XLR plug can be inserted into the connector. This cuts the game sounds and if the other end is connected to an external sound device (e.g. a Smartphone), music from the device can be played through the loudspeakers.
The backside of the plug with all the cables soldered to the solder cups.
This is the special cable (XLR and mini jack plugs) for attaching an external sound source. The XLR connector goes into the Netrik plug while the mini jack goes to the music device.
Kudos, this is a very clean build 🙂 Do you know which monitor you used in the cabinet?
Inspired by your post, I am now in the process of ordering the same kit and build my own Arcade Station.
Thanks! It’s an old 22 inch Samsung SyncMaster LCD (4:3 format) that I’ve had since before everything went widescreen… ? The resolution is 1600×1200 and the refresh rate is ridiculous – 25 ms if I remember correctly. The color was grey/silver so I painted the front black with some glossy spray paint.
It’s a cool flat pack kit and it takes a few hours before it is standing and the real work with the electronic’s start. Good luck with the build.
Thanks for the Answer. I guess it is the Samsung Syncmaster 214T. It has 8ms and 21.3″. I have an old NEC 2190Uxp with the same specs. I think there are no bigger 4:3 LCD Monitors than that. I placed my order for the flat pack now 🙂
That may be it! Good luck with the build!
Really cool build. I have a similar kit which I’m setting up. Just wondering: how did you mount your screen in the cabinet? Maybe you can share some pictures? The kit I have has nothing to mount a monitor 🙁 so I need an idea what would work.
All the best, Sebastian
EDIT: Just saw the second page with one picture of your screen setup ? Still would be great if you have some additionally ones. Thx, Sebastian
Hi Sebastian and thanks 🙂 There was no monitor mount in the kit I got from Arcadeworlduk.com either. I guess they want people to have the choice of installing either an old CRT monitor or an LCD. I assume that you want to install an LCD monitor? If so, I used a piece of melamine faced particle board that was cut in size and mounted some metal brackets on the sides as seen here (link). The board was approximately 25 cm (10 inches) wide. I then used a cheap ‘VESA 100’ TV mount and attached it to the particle board using some bolts and nuts (link). The second half of the VESA bracket was fastened to the backside of the monitor. I then used some clamps and some small pieces of wood to hold the particle board and monitor in place to make sure everything was looking as desired (link). Hereafter, I simply fastened the metal brackets with some screws to the sides of the cabinet and that was pretty much about it.
Good luck with your project 🙂
He he…so we have more or less the same kit. I also ordered it from arcadeworlduk.com. Thank you for the detailed instruction. I guess I will try that. I will put an old 19″ 4:3 LCD Monitor in.
Overall your blog post is an awesome instruction for a lot of the assembling question I’ve had so far. Also it gave me some new ideas on how to tweak it. Thx 🙂
It’s a very cool kit and everything fits perfectly. Glad you liked the blog post. You may also be interested in another arcade cabinet build that I did. You can find it here (link).
Thx for the hints. Again, a great post 🙂
Thanks. 🙂 Just searching the web for inspirations concerning Arcade/Mame and hit your page. The stearing wheel is now on my list… 😉