
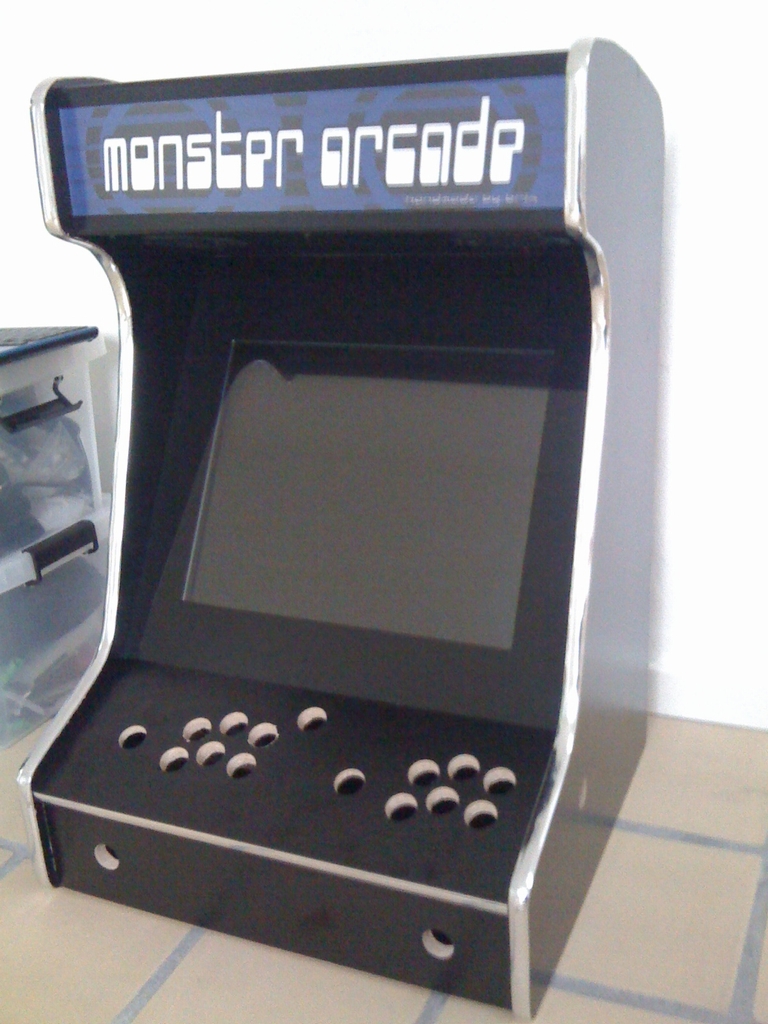
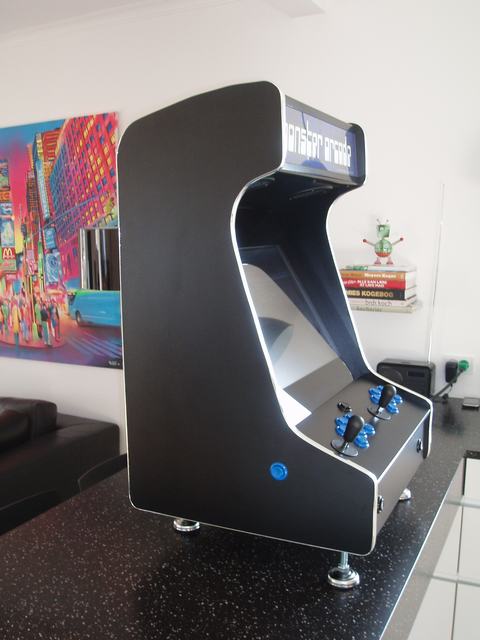
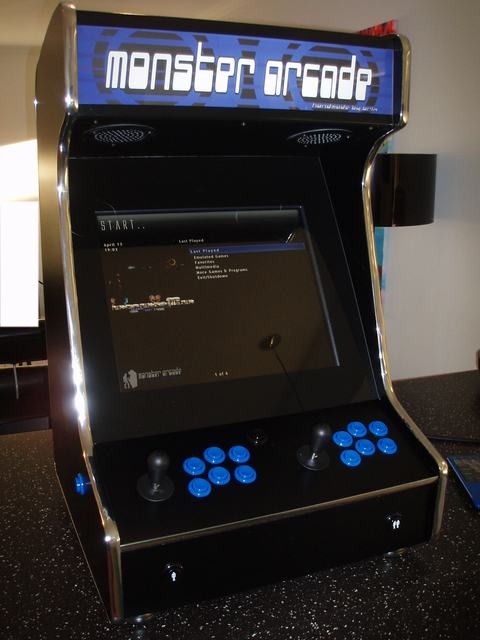
I finally found the time to complete my old school tabletop arcade machine project which has been waiting for me in a corner of the basement for quite some time. It started out as a MAME (Multiple Arcade Machine Emulator) based arcade machine but ended up containing a bunch of emulators for playing retro console games made for the Atari 2600, Atari 5200, Atari 7800, ColecoVision, NES, SNES, Sega Genesis, Sega MasterSystem and Sega Mega Drive systems. The reduced size of the cabinet makes it easy to stow away when it is not in use. Call it an arcade machine with a high WAF (Wife Acceptance Factor) if you will!
The tabletop arcade machine cabinet is made from a black 16 mm (0.63 in) melamine faced particleboard so I did not have to paint it or anything. I used a router to make the slot for the chrome T-mold to give it the right arcade retro look. It is a 2 player model with 6 button for each player. I also drilled holes for buttons on the sides of the cabinet for pinball emulators like Visual Pinball. This is how the cabinet looked before any of the electronics were installed.
A black Happ Standard arcade button is placed on top of the cabinet for turning the internal computer on. I put in a back door with a lock to gain access to the electronics.
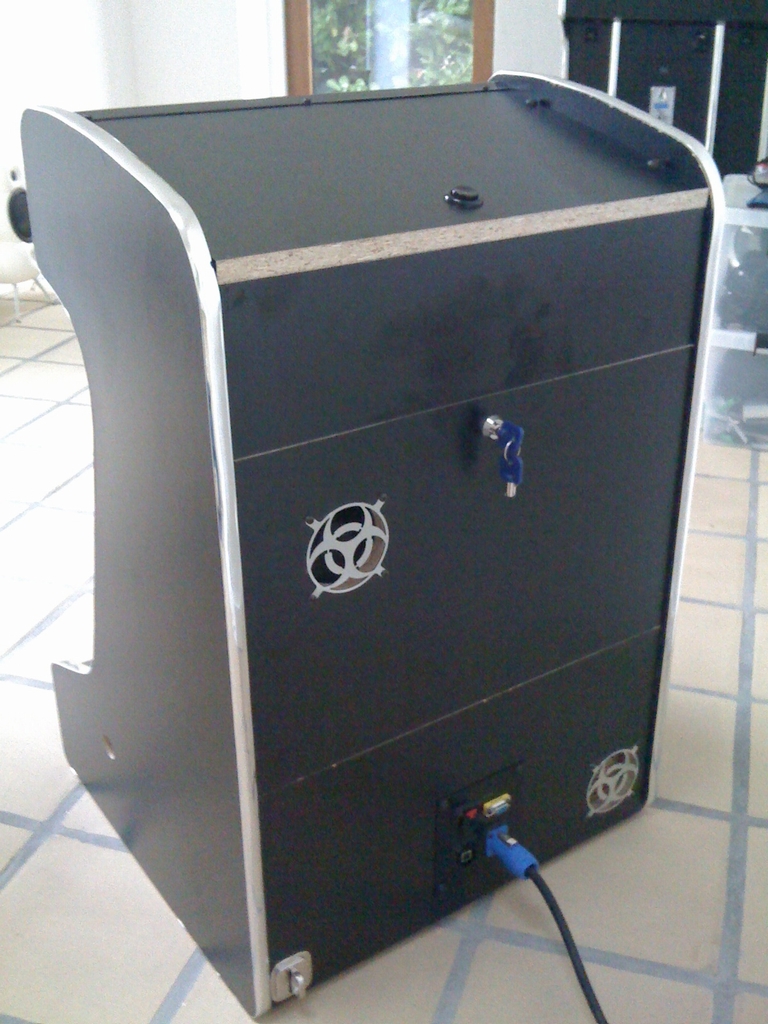
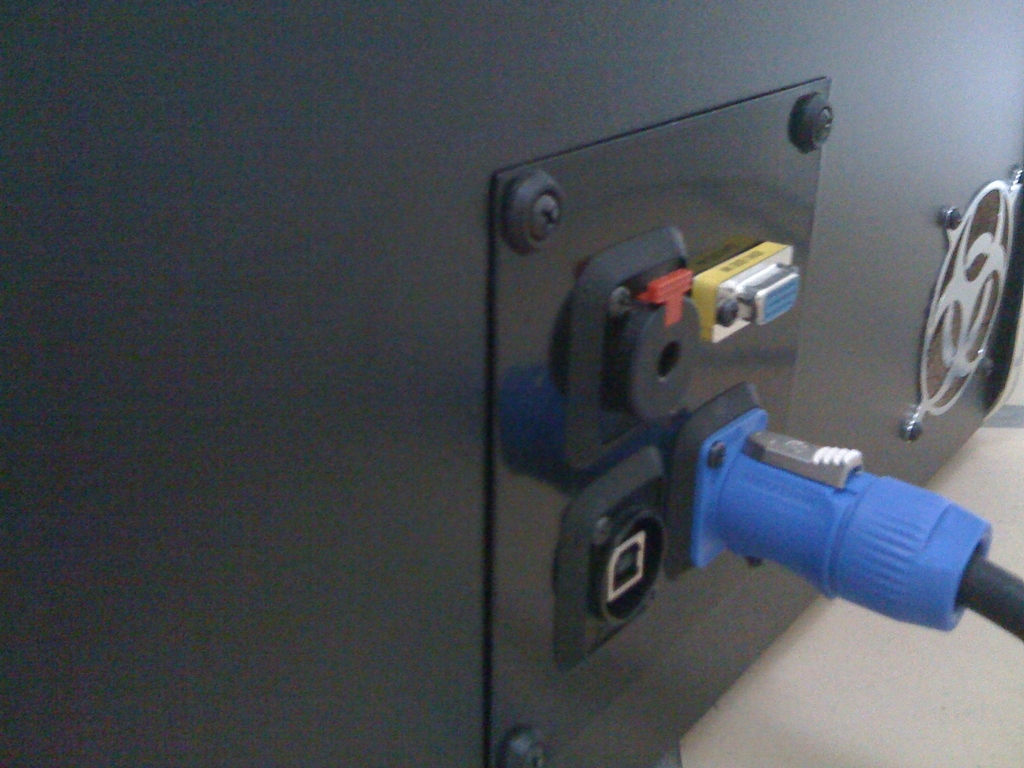
A metal plate has all the plugs that are needed to connect the internal PC to the outside. The plate has a Phone jack (Neutrik NJ 3FP6C BAG) for playing music using an external source (like from a mobile phone), an USB plug (Neutrik NA USB-W-B) for a light gun/joypad, a female VGA plug to ‘clone’ the arcade monitor to a projector/flat screen TV so buddies can watch the live gaming action from the couch and finally a power plug and power cable (Neutrik Powercon NAC3MPA & NAC3FCA) for powering the system.
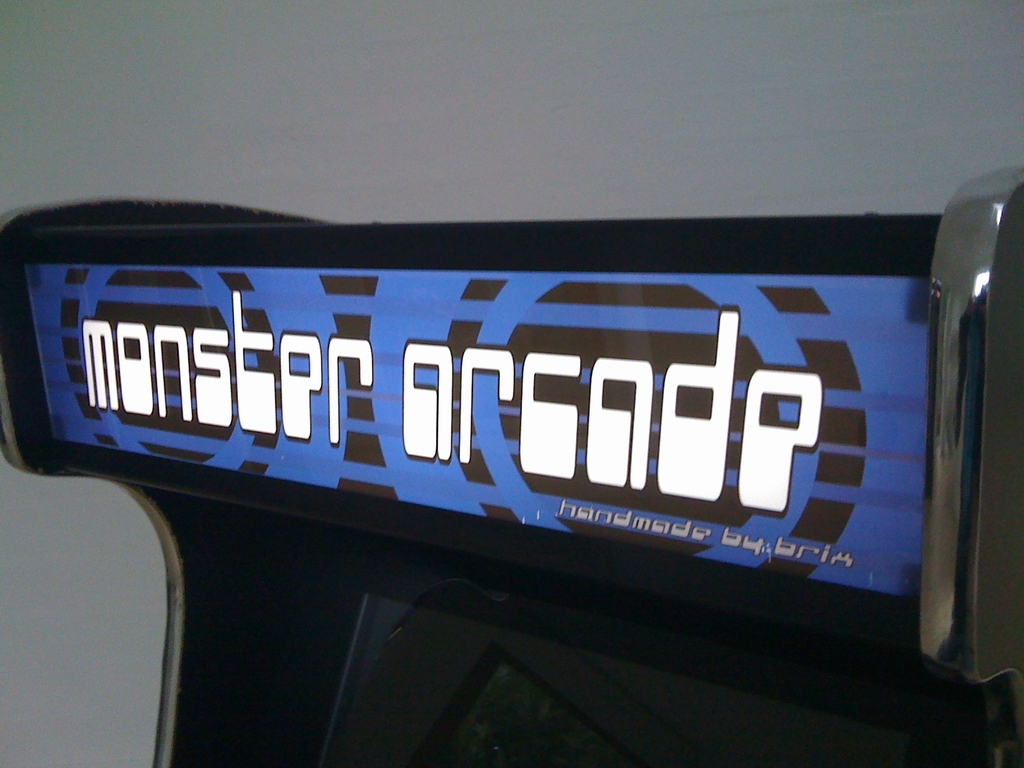
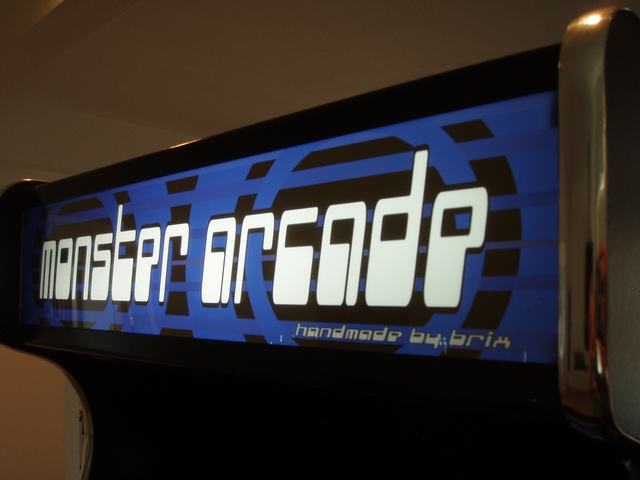
The marquee consists of two pieces of plexiglass acryllic sheets, a light transparrent piece of paper with my logo printed on and two metal brackets to hold everything in place. I used two cold cathode lights that I got from an online case modding store to eluminate the inside of the marquee. The power for the cathode lights is taken directly from the 550W ATX PSU that is powering the entire system. The size of the marquee is 540x120mm (21.25×4.71 in) using 2041×454 pixels.

Cutting the melamine faced particleboard caused small platics chips to break off at the edges. This was especially evident on the curved edges as I had to use a jigsaw for the cutting. The problem can be seen right next to the chrome T-mold.
It could be fixed by simply painting the wood by a permanent black marker. It is hardly seen as shown in this picture.
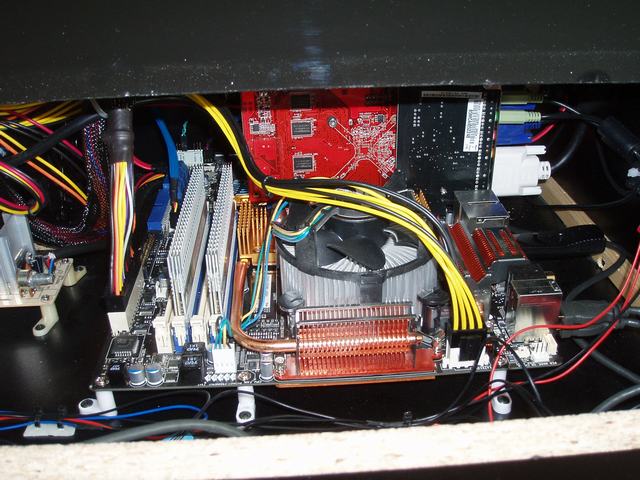
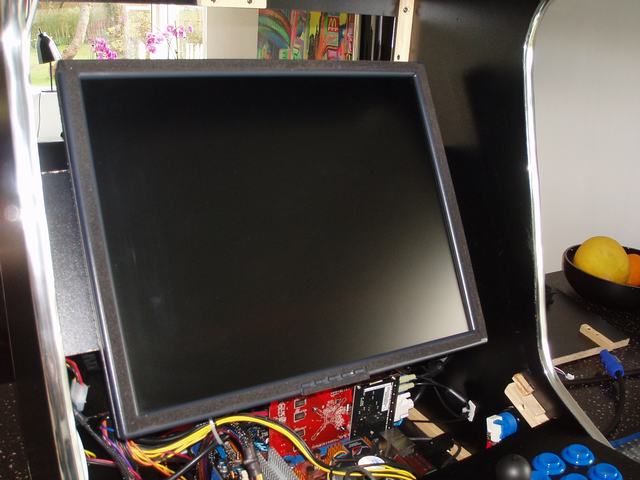
The installed PC consists of 4GB 1600MHz Cosair RAM, an Intel Core2 Quad (Q6600) 2.4GHz CPU, an ASUS Striker II Extreme Motherboard, an ASUS Radeon 4500 GPU, a Windows 7 32bit and a 19 inch ViewSonic LCD screen. It’s really the pinball emulator that needs the computing power and not the retro gaming emulators.
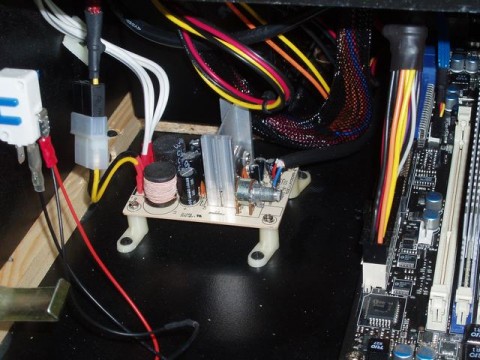
The sound is produced by a small 2x5W arcade stereo amplifier (running on 12V) and two small 5W arcade loudspeakers. The toal cost of the sound system is about 8 $ and it sure does sound alot like the 1980’s!
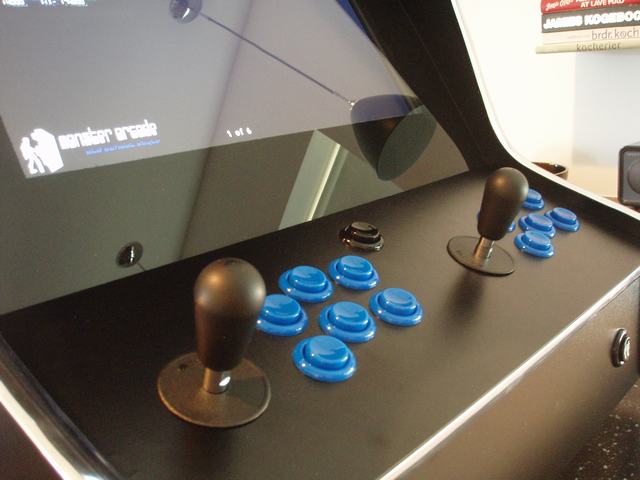
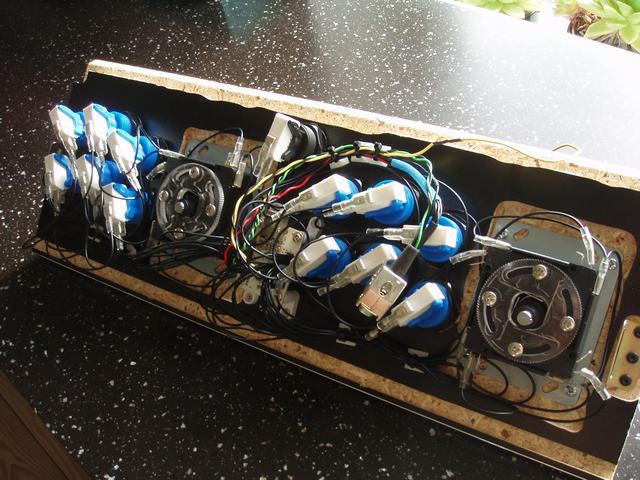
Sanwa bat top joysticks (JLW-UM-8) and Happ standard buttons with Cherry microswitches (each player has 6 blue buttons) make up the controllers of the machine. Two blue Happ standard buttons are placed on the sides of the cabinet (for playing pinball) and a black coin-up button is placed in the middle of the control panel. The LCD monitor is placed behind a plexiglass acryllic sheet that I painted black on the backside. This way no light can pass from the inside of the cabinet and distract me when playing.

The backside of the control panel is a cable mess – but it works! A cheap 2 player encoder is mounted in the middle of the control panel under the cables. It’s har to see, but it’s there!
Four white buttons are placed at the bottom of the cabinet and are for controlling the volume (up/down) and for adjusting the emulators (TAB/ENTER). A black Happ standard button is used to ESCAPE a current game and return to the frontend for games selection.

To ensure sufficient cooling of the electronics, two 120mm (4.7 in) fans are placed on the backsid of the cabinet.


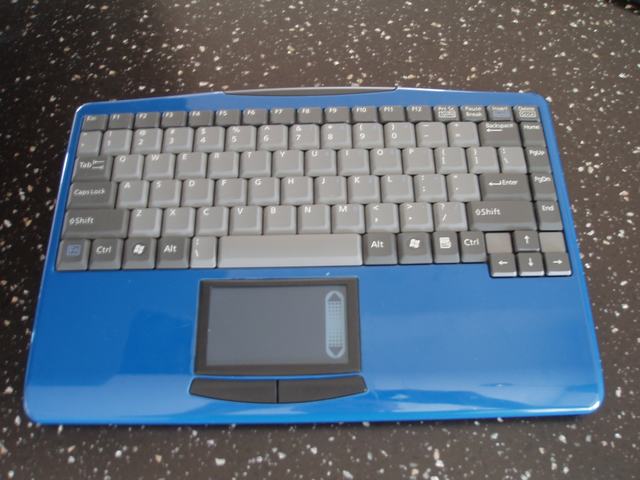
I had a spare wireless USB keyboard with a touchpad that I customized to the arcade machine. I took everything apart and painted it blue so it would look a little better when placed on top of the machine. I just don’t like the homebuilt MAME arcade machines with a keyboard/mouse drawer placed underneath the control panel…
The arcade machine has the GameEx frontend installed with all the emulators. The software is designed to be used with the arcade controls so there is no need for a keyboard/mouse when playing on the system. Everything can be controlled using the joysticks and buttons.
I also mounted some heavy duty feet underneath the cabinet in order to adjust the height of the machine. This way it is possible to play standing up at a dinner table. This is pretty nice whenever two people are playing or when the system is placed in an uneven surface. The feet has an adjustable range of 6 cm (2.36 in). The entire machine is 53 cm (20.9 in) wide, 50 cm (19.7 in) deep and 83-89 cm (32.7-35 in) high. Just testing the system with a quick game of R-Type…

All there is left is to plug it in, push the start button and forget about kids, garden, wife, work or any other real life issues….
I apologize for the generally poor image quality of this post. The images have been collected over an extended period of time (2 years+) using a variety of cameras with questionable qualities…
© breadbox64.com 2016